How to Build a New WordPress Site while the Old Site is Live
Bulletproof Backups for Your WordPress Website
Fortify your business continuity with foolproof WordPress backups. No data loss, no downtime — just secure, seamless operation.
Are you looking to build a new WordPress site while the old site is live? Perhaps you think it’s time to give your site a makeover, or maybe you’re in the process of rebranding your business and want your website to reflect that.
Whatever your reason may be for building a new WordPress site, you can’t afford to take your current site offline. Your website traffic, SEO rankings, and in turn, your revenue will suffer.
So, what is the solution? Fortunately, you can create a new WordPress site with the existing domain live. Then, after you’ve developed your new site, you can make it live on the same URL as your current site. To visitors, it’ll seem as if nothing happened.
TL;DR: If you wish to redesign your WordPress website, it’s possible to build a new version of it while keeping your old one live and open to visitors. While there are quite a few ways to build a new WordPress website, probably the easiest and fastest way is to use the staging feature of BlogVault. You can create a staging site from your old site in a few clicks using it, and if you wish to push the changes afterward to your live site, you can do so using the click of a button.
Before you can start laying the bricks, you need to acquire the bricks in the first place. Here’s a list of the stuff you need before you can start building:
- FTP/SFTP access to your web server. You can download and install FileZilla to access your web server via FTP.
How to build a new WordPress site while the old site is live (4 ways)
There are quite a few ways you can go about building a new WordPress site while the old site is live. For this article, I’ll cover the following four methods:
- Build a new WordPress site in a subdirectory of your old site
- Build a new WordPress site in a subdomain of your old site
- Build a new WordPress site locally while the old site is live
- Build a new WordPress site using a staging site
Let’s look at each one in detail.
Build a new WordPress site in a subdirectory while the old site is live
You can either do this via your web hosting provider or yourself via FTP. Most web hosts will allow you to easily install WordPress in a subdirectory, just like you would’ve done for your root directory when you first signed up with them. However, web hosts often add their own code and plugins to WordPress when you use their installer. That’s why I recommend doing it manually as it’ll give you a clean installation. Let’s look at the steps in detail.
Step 1. Create a subdirectory under the root directory
Before you can build a new WordPress site in a subdirectory, you need to have a subdirectory in the first place. So, in this step, we’re going to create a subdirectory where we’ll be installing WordPress. You’re going to need an FTP client for this step. I’ll be using the popular FileZilla client to demonstrate the procedure.
- Connect to your website via FTP on FileZilla.

- Once connected, enter the root directory of your website. This is usually the public_html directory but doesn’t have to be.
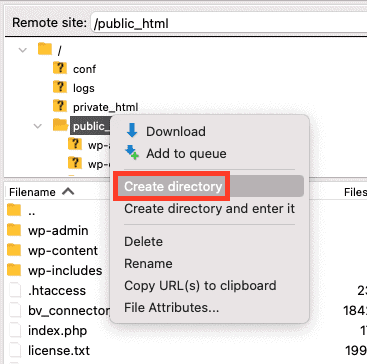
- Right-click on your root directory and pick ‘Create directory’ from the menu to create a subdirectory. Give your subdirectory a suitable name and hit OK.
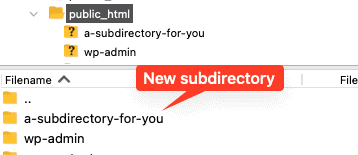
You should now see the subdirectory you created under the root directory.
Step 2. Download and extract the WordPress package from the official website
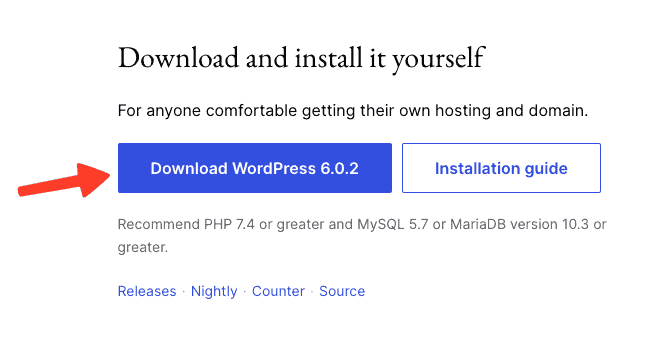
- First, we need the core WordPress files and folders. Go to https://wordpress.org/download/ and download the WordPress software as an archive. We always recommend using the latest version of WordPress for security reasons, but you should check the PHP version on your web server first for compatibility. <image>
- Extract the archive. The files will be extracted to a folder named ‘WordPress.’
Step 3. Create a new database for your subdirectory
Every WordPress site needs a database to store post content, user settings, and so on. In this step, we’ll be creating a new database for the website we’ll be building in the subdirectory. You should be able to create a new database from the ‘Databases’ section of your web hosting dashboard. To illustrate this process, I’ll use Bluehost. The steps should largely be the same for any other web host out there.
- Go to Advanced > Databases from the left-hand navigation menu.
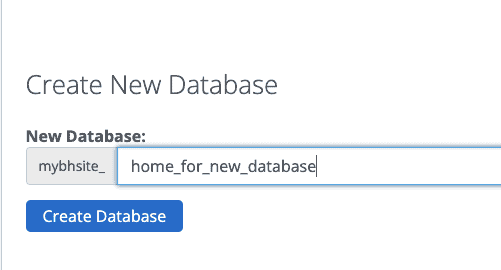
- Under the section ‘Create New Database,’ provide a name for your new database, then click on Create Database. In my example, I’ve named the database ‘mybhsite_home_for_new_database.’
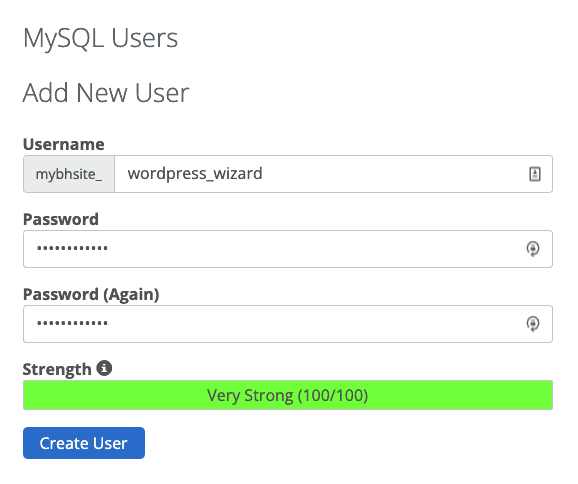
- Now, we’re going to add a new database user for our account. Scroll down to ‘Add New User’ under ‘MySQL Users.’ Choose a username and a strong password for this user, then click on Create User to finish creating.
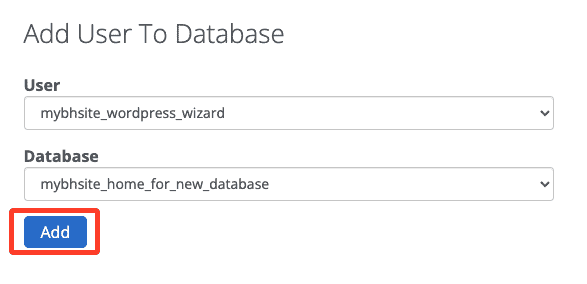
- Now, add this user to the database you created as shown in the image below.

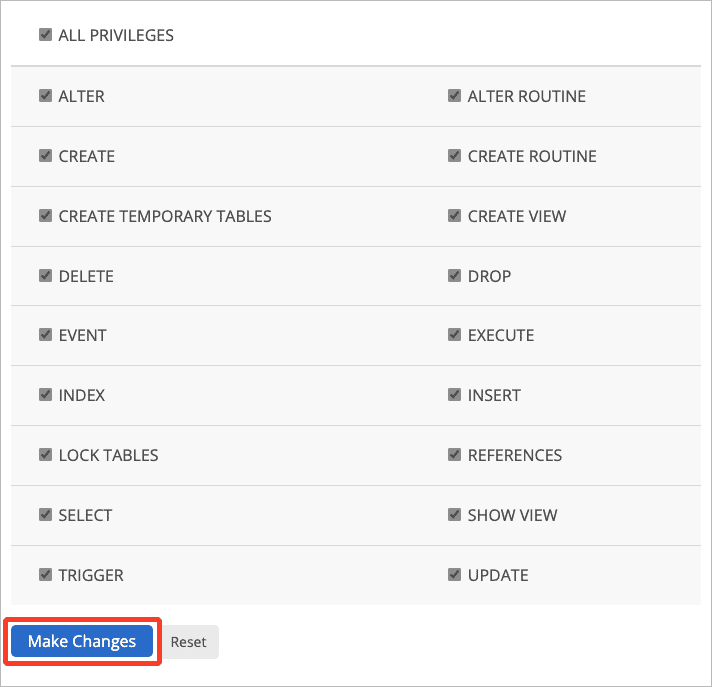
- On the next page, assign all privileges to this new user and then click on Make Changes. Make a note of the database details and credentials you’ve just created. You will need them when installing WordPress to connect the site to the right database.
That’s it! You now have a new, blank database for your new website.
Step 4. Upload the WordPress files to your subdirectory
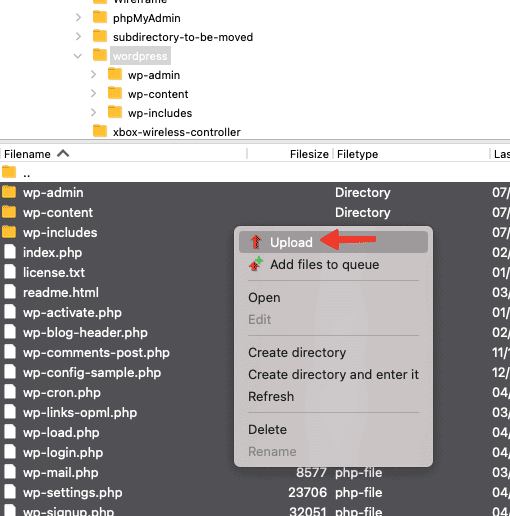
- Navigate to the ‘wordpress’ directory, which you obtained in Step 2, in the Local site area of FileZilla and enter it.
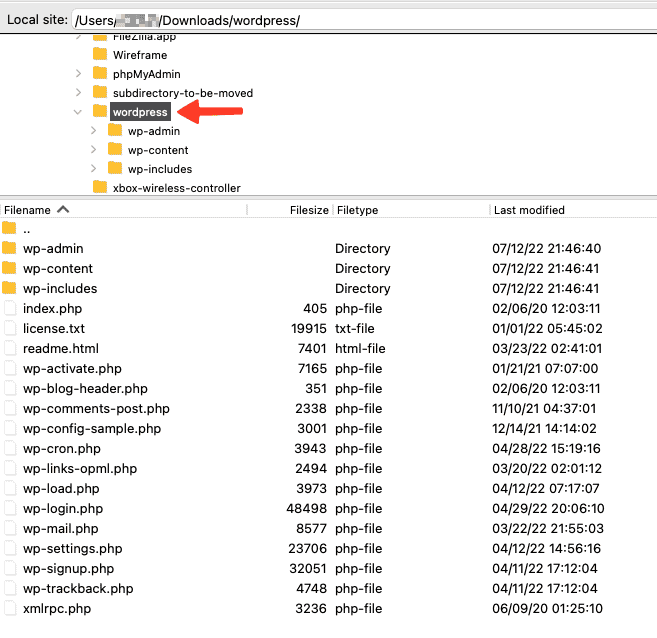
- Select all files inside this directory and upload them to the newly created subdirectory on your live site.

Step 5. Run the WordPress installation script on your subdirectory
Now that we have everything we need for our website to function properly, all that remains is to install WordPress itself.
- Visit your subdirectory. Its URL should look like http://yourwebsite.com/name-of-your-subdirectory. The WordPress installation script will start.
- Choose a language to continue with the installation and click Continue.

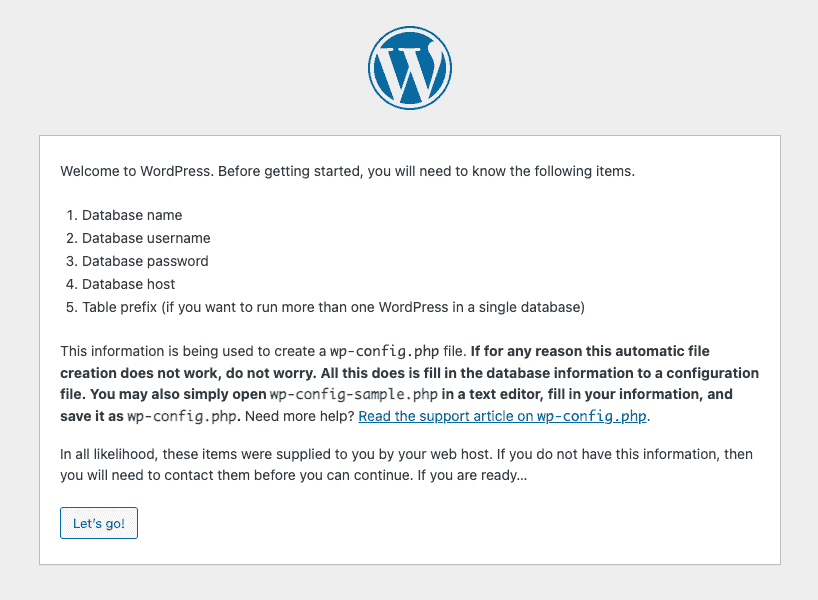
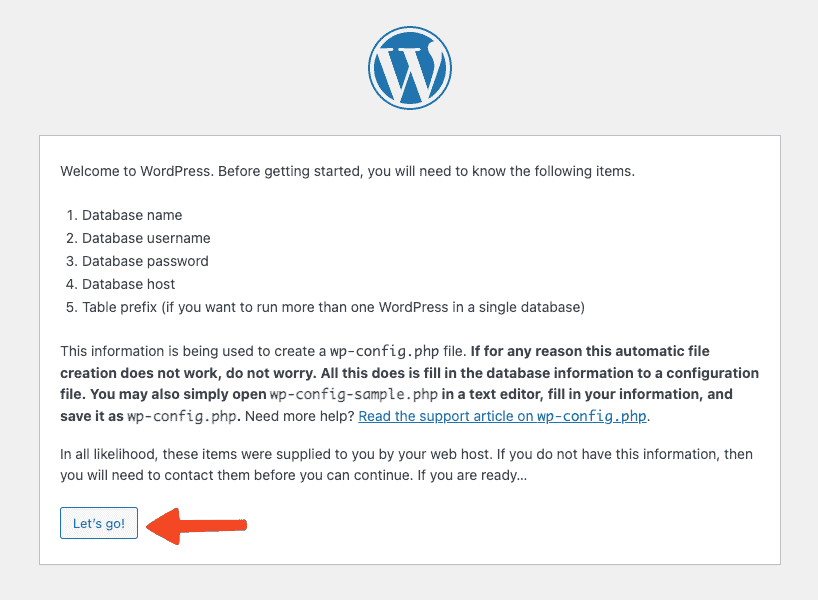
- On the next page, WordPress will inform you of the database information that you need. Click “Let’s go!” to continue.
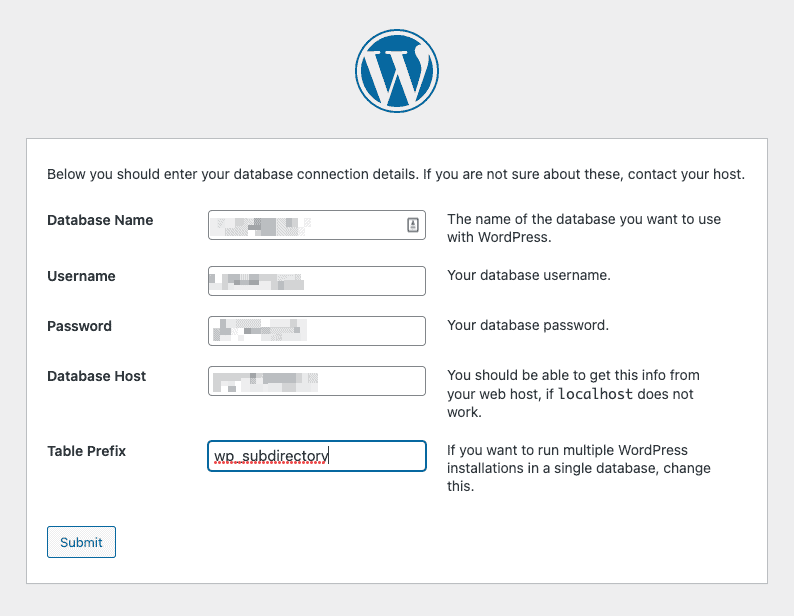
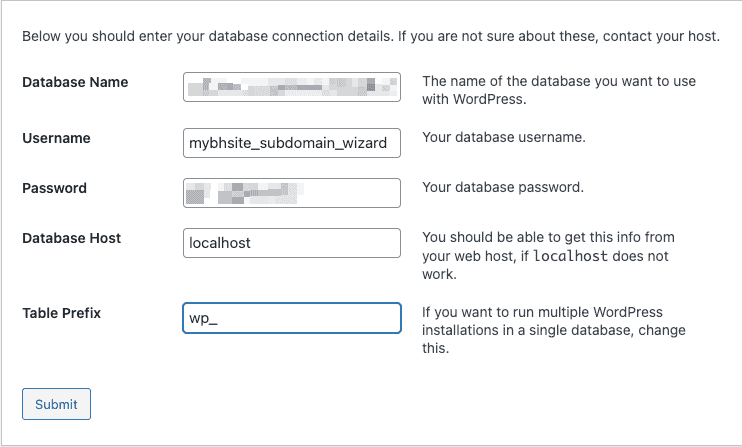
- Next, enter the details of the database you made in Step 3 and click on “Submit” to continue.
- On the next page, you should see the message that “WordPress can now communicate with your database.” Click Run the installation to continue.
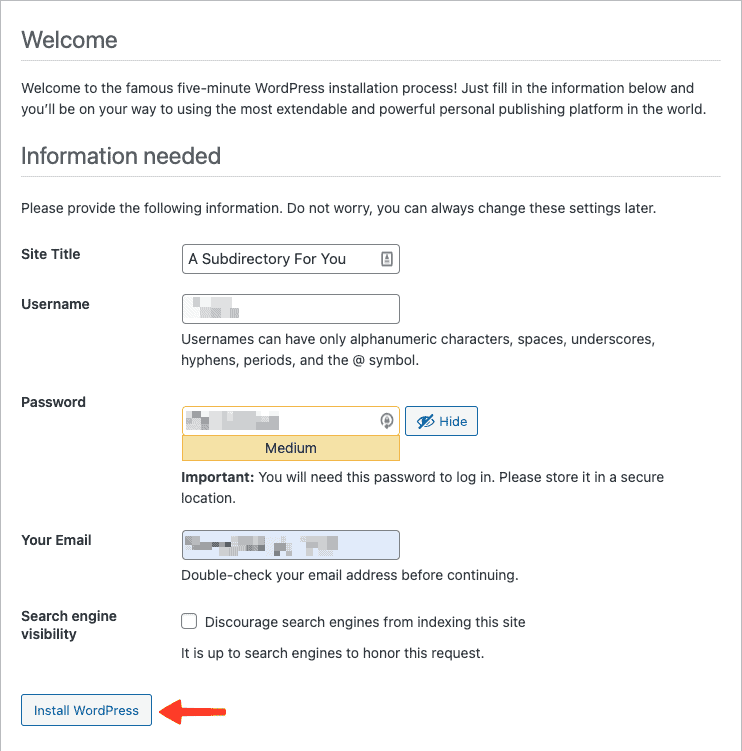
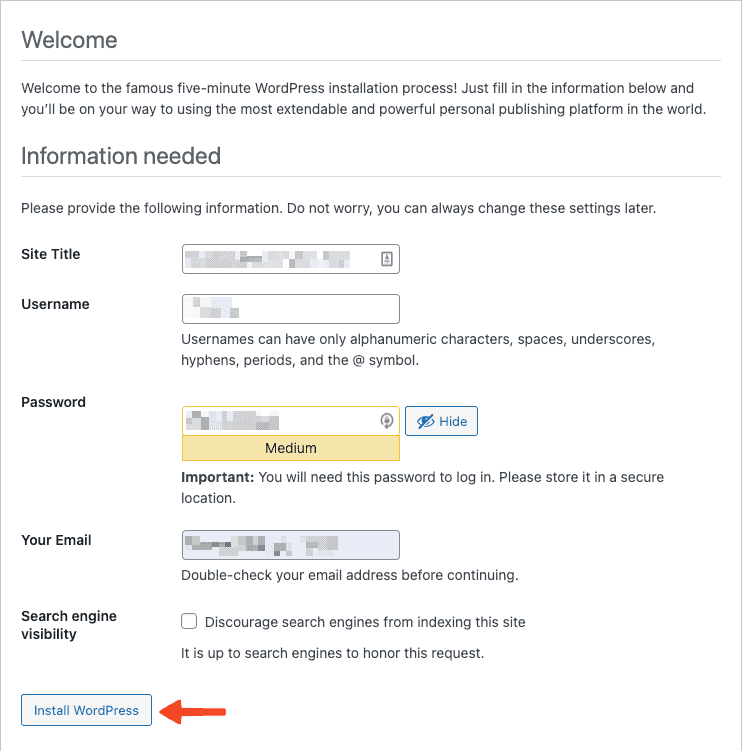
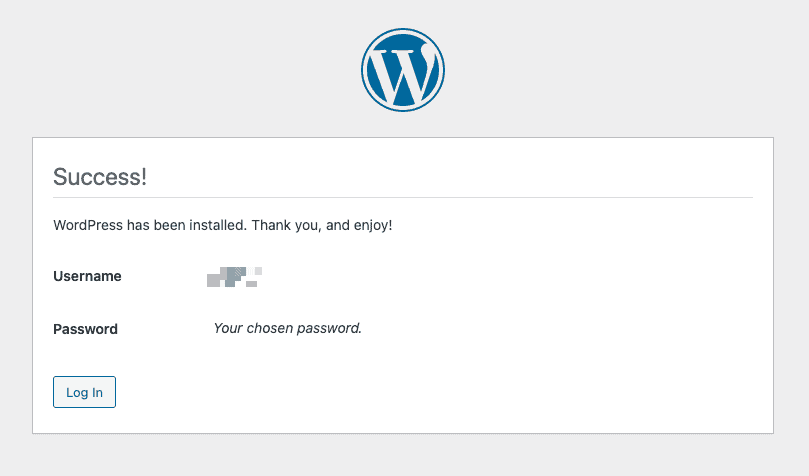
- On the next page, enter the required information and click on Install WordPress to continue. Make sure to prevent search engines from indexing this site till you finish development.
That’s it! You’ve built a new WordPress site in a subdirectory. You can now design and develop this site just like you would for any other site.

If you wish to make your new site live, you’ll have to move it to the root directory. Check out our guide on how to move a WordPress site to root.
Build a new WordPress site in a subdomain while the existing domain is live
A subdirectory is part of your site. If you want to keep things separate, then you can build a new WordPress site in a subdomain instead. Let’s look at the steps in detail.
Unfortunately, the only way to create a subdomain for your website is via your web hosting provider. The exact steps could differ from host to host, but note that most web hosts give you the option to create a subdomain from the ‘Domains’ tab in your hosting account’s dashboard. For this section, I’ll use Bluehost to illustrate the process.
- From the Bluehost dashboard, go to Domains > Subdomains.
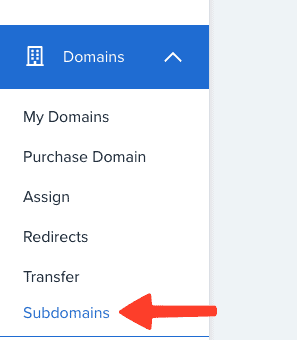
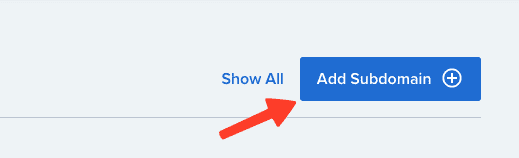
- Click on Add Subdomain on the top right.
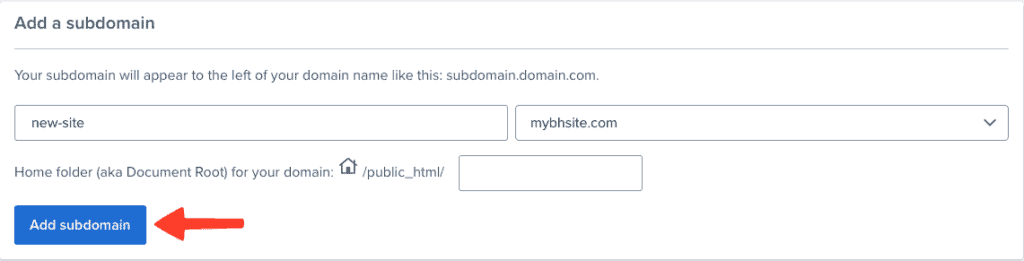
- Type a name for your subdomain and pick the root domain from the dropdown menu. Next, click on Add subdomain.
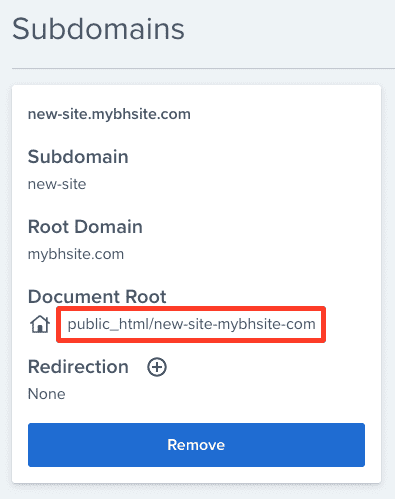
That’s it! Bluehost will now create the subdomain for you. After the creation is complete, you’ll see that Bluehost has created a new folder for the subdomain.
Now, we need to install WordPress in this subdomain. I’ll use FTP, and the FileZilla client, in particular, to illustrate how.
Step 1. Download and extract the WordPress package from the official website
- First, we need the core WordPress files and folders. Go to https://wordpress.org/download/ and download the WordPress software as an archive. We always recommend using the latest version of WordPress for security reasons, but you should check the PHP version on your web server first for compatibility.

- Extract the archive. The files will be extracted to a folder named ‘wordpress.’
Step 2. Create a new database for your subdomain
Every WordPress site needs a database to store post content, user settings, and so on. In this step, we’ll be creating a new database for the website we’ll be building in the subdomain. You should be able to create a new database from the ‘Databases’ section of your web hosting dashboard. To illustrate this process, I’ll use Bluehost. The steps should largely be the same for any other web host out there.
- Go to Advanced > Databases from the left-hand navigation menu.

- Under the section ‘Create New Database,’ provide a name for your new database, then click on Create Database. In my example, I’ve named the database ‘mybhsite_home_for_new_database.’
- Now, we’re going to add a new database user for our account. Scroll down to ‘Add New User’ under ‘MySQL Users.’ Choose a username and a strong password for this user, then click on Create User to finish creating.
- Now, add this user to the database you created as shown in the image below.
- On the next page, assign all privileges to this new user and then click on Make Changes. Make a note of the database details and credentials you’ve just created. You will need them when installing WordPress to connect the site to the right database.

That’s it! You now have a new, blank database for the new website you’re going to build on your subdomain.
Step 3. Upload the WordPress files to your subdomain
- Navigate to the ‘wordpress’ directory, which you obtained in Step 1, in the Local site area of FileZilla and enter it.

- Select all files inside this directory and upload them to the root folder belonging to your subdomain on your live site.
Step 4. Run the WordPress installation script on your subdomain
Now that we have everything we need for our website to function properly, all that remains is to install WordPress itself.
- Visit your subdomain. Its URL should something look like http://yoursubdomain.yourwebsite.com. The WordPress installation script will start.
- Choose a language to continue with the installation and click Continue.

- On the next page, WordPress will inform you of the database information that you need. Click “Let’s go!” to continue.
- Next, enter the details of the database you made in Step 2 and click on “Submit” to continue.
- On the next page, you should see a message that says, “WordPress can now communicate with your database.” Click Run the installation to continue.
- On the next page, enter the required information and click on Install WordPress to continue. Make sure to prevent search engines from indexing this site till you finish development.
After all that, you now have a functional WordPress website at your subdomain, ready to be developed as per your requirements.
If you wish to make your new site live, you’ll have to move the subdomain to the root directory. Check out our guide on how to move a WordPress site from subdomain to root.
Build a new WordPress site locally while the old site is live
If you don’t like the idea of having your new website residing on a web server somewhere while you develop it, then consider building it on your own computer. Let’s look at how you can do so. I’ll be covering Local by Flywheel, which is probably the best way to build WordPress sites locally.
Step 1. Install Local on your computer
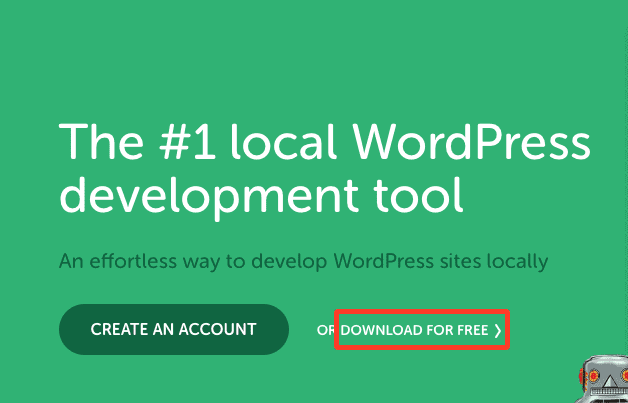
Head to https://localwp.com/ and click on ‘Download for Free.’
Next, choose your operating system and enter your details to sign up for a free account. After clicking ‘Submit,’ your download should start automatically.
Install Local by following the prompts for your OS. Once installed, launch it.
Step 2. Create a new local WordPress site
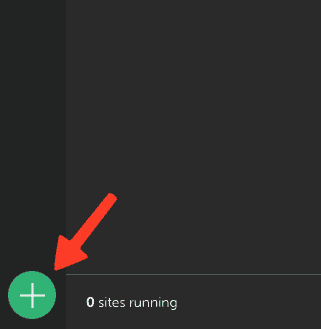
The Local dashboard will show you a list of your local sites by default. Since you have none right now, go ahead and click the plus sign at the bottom left to create a new WordPress website.
Next, click ‘Create a new site’ and then click on Continue to proceed.
Now, give your site an easily recognizable name. The advanced options allow you to choose a local domain for your site as well as its path. If you’re happy with the name, domain, and path, click on Continue to proceed.

On the next screen, Local will ask you to configure your environment by choosing the PHP and MySQL versions, and the web server. You can select Preferred if you’d like to go with the default settings or select Custom to pick your own. As you can see in the image below, I’ve opted for my own settings.
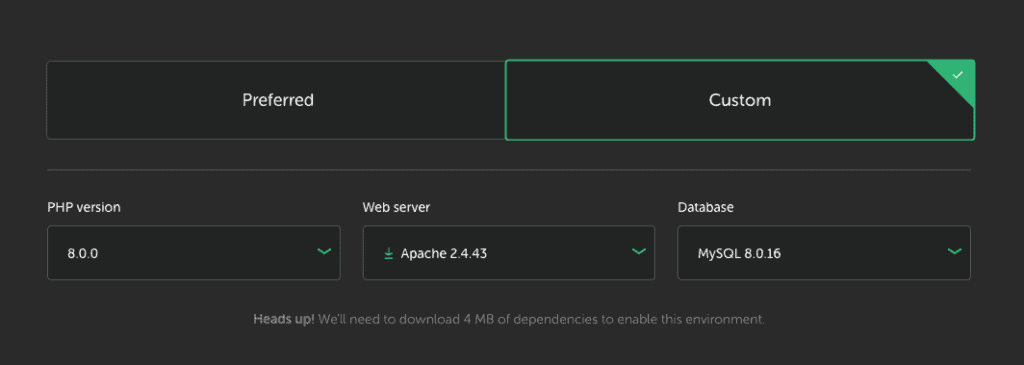
Click Continue to finish setting up the environment.
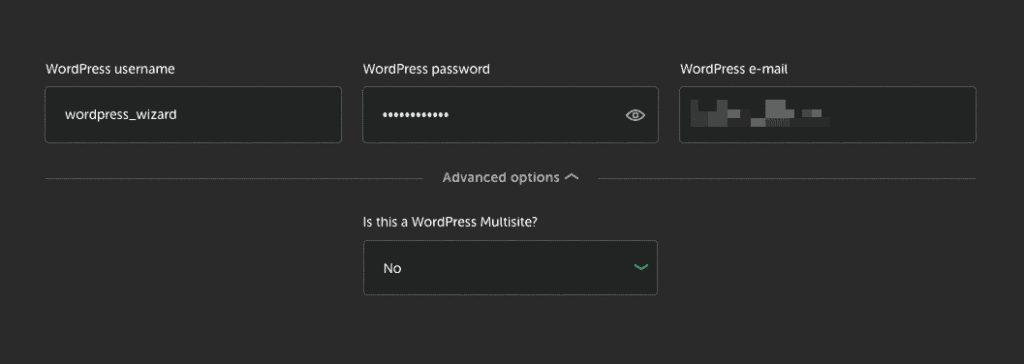
Now that you’ve set up the environment for your WordPress website, the time has come to set up WordPress itself. Choose a username, password, and email address for your local WordPress site. If you’re setting up a multisite, you can confirm the option under Advanced options. Click Add Site to finish setting up your local site.
Once Local completes setting up your site, you should see a screen like the one below:
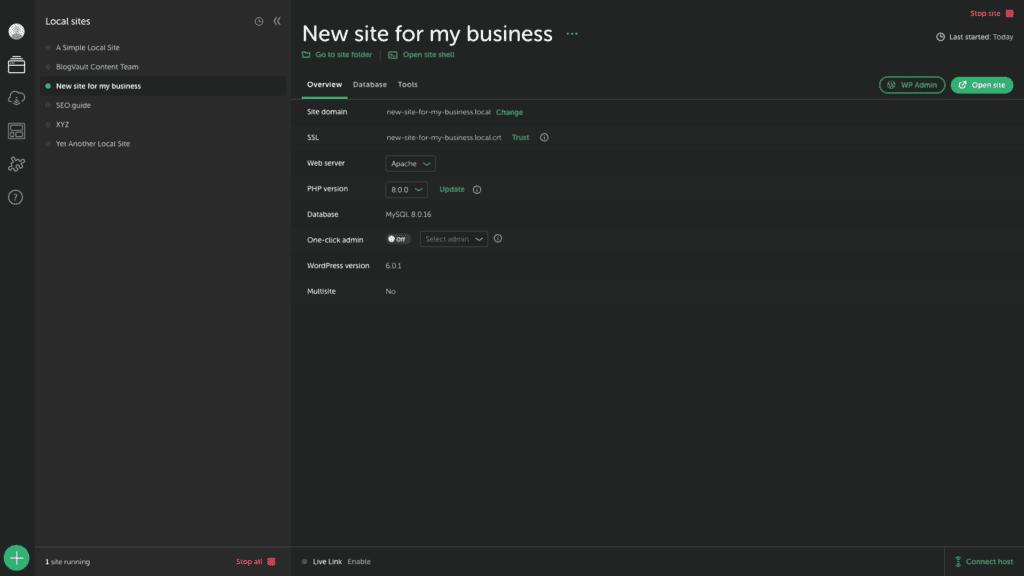
From here, you can open the WordPress admin panel to design and develop your site, tweak your settings, etc. You can also click on ‘Open Site’ to see a preview of what your site would look like on the Web.
How easy was that? Local basically handled everything for you, from installing WordPress to setting up the database, saving you a lot of time and effort. It’s one of its USPs. As a comparison, XAMPP, another popular tool for developing WordPress sites locally, doesn’t install WordPress or create a database for you automatically.
After having developed your site, if you wish to make it live, read our guide on how to move your WordPress site from localhost to a live server.
Build a new WordPress site using a staging site
Now, we come to the final method. If you don’t wish to start from scratch and would prefer to use your existing site as a sort of template using which you can create your masterpiece, then a staging site is the way to go. It’s a bit like having a finished art piece given to you to which you add a personal touch by making some changes rather than starting from a blank canvas.
The easiest, most effective way to create a WordPress staging site for your live site is to use BlogVault. You can quickly make a password-protected staging site using it. You don’t need to worry about creating a subdomain or performing a migration, and you don’t need to pay for additional hosting for the staging site since BlogVault will host it on its own, powerful cloud-based servers. Moreover, it’s very easy to use and comes with a clean, minimalist UI.
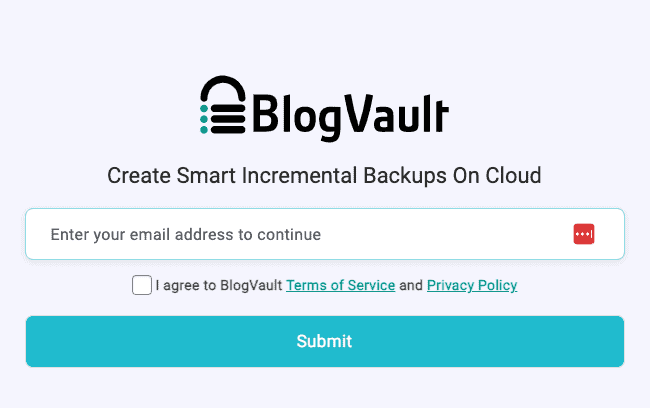
- Install and activate the BlogVault plugin on your live WordPress website. As soon as you activate it, you’ll be taken to a page where you’ll be asked to sign up for an account. Enter your email address, agree to the terms and privacy policy, and click Submit to continue.
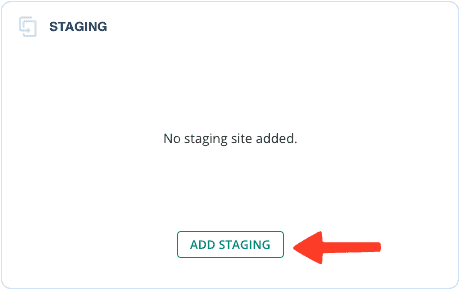
- As soon as you’ve signed up, BlogVault will start taking a backup of your site automatically. Once the backup is complete, go to the dashboard and, under the Staging section, click on Add Staging.
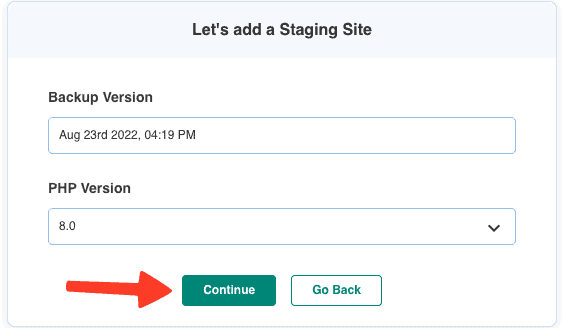
- On the next page, choose the version of your site that you want BlogVault to use to create a staging site as well as the PHP version. Click Continue to proceed.
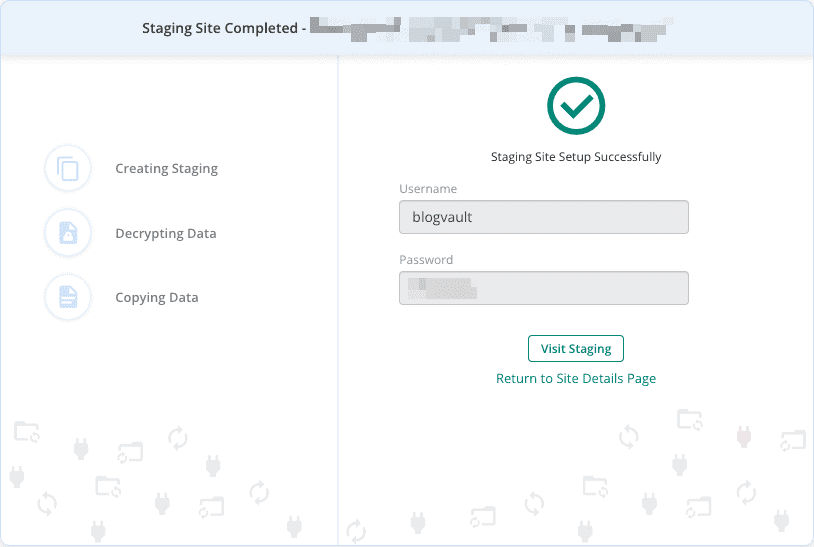
- BlogVault will now start the staging site setup process. On the next page, you can see the progress it has made. Once the process is complete, it will notify you and present you with a set of credentials for accessing the staging site. These credentials ensure that you, and only you, will be able to access the site. Click on Visit Staging to access the staging site and start building your new site.
To access the staging site’s dashboard, click on the wp-admin button in the Staging section on the BlogVault dashboard. Note that you have to enter the same WordPress login credentials that you use for your live site to access the staging site’s dashboard as well.
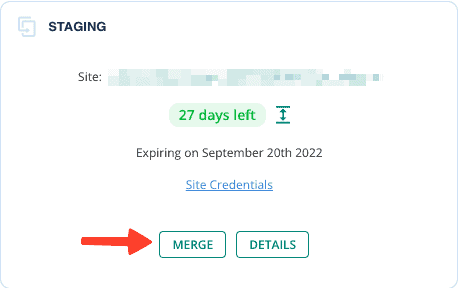
If you made some changes to your staging site and want to replicate them on your live site, you can do so by going to the BlogVault dashboard and clicking on Merge in the Staging section.
Conclusion
In this article, I’ve covered four ways you can build a new WordPress site while the old site is live. To summarize, these four methods were as follows:
- Use a subdirectory to build your new website;
- Use a subdomain to build your new website;
- Build your new website locally; or
- Create a staging site of your old site to build your new website.
You can’t go wrong with either of these methods, but if you’re looking for the easiest, fastest way, it’s best to create a staging site for your live site using BlogVault, designing and developing your new site in this staging environment, and then pushing the changes you’ve made to your live site, effectively replacing it.
FAQs
Q – How to build a new WordPress site in the background on an existing domain?
A – There are four main ways to do so:
- Use a subdirectory to build your new website;
- Use a subdomain to build your new website;
- Build your new website locally; or
- Create a staging site of your old site to build your new website.
Q – Can I build a WordPress site on my PC?
A – Yes, you absolutely can. The easiest, most effective way is to use Local, a free tool designed specifically for those who want to build WordPress sites locally.
Tags:
Share it:
You may also like

How to Limit Form Submissions with Droip in WordPress
Forms are an indispensable part of any website because of their versatility, letting you collect information for various purposes! However, people with ill intentions often attempt to exploit these forms…

How To Manage Multiple WordPress sites
Management tools help agencies become well-oiled machines. Each task is completed with the least amount of effort and highest rate of accuracy. For people managing multiple WordPress sites, the daily…

PHP 8.3 Support Added to Staging Feature
We’ve introduced PHP version 8.3 to our staging sites. Test out new features, code changes, and updates on the latest PHP version without affecting your live website. Update PHP confidently…
How do you update and backup your website?
Creating Backup and Updating website can be time consuming and error-prone. BlogVault will save you hours everyday while providing you complete peace of mind.

Updating Everything Manually?
But it’s too time consuming, complicated and stops you from achieving your full potential. You don’t want to put your business at risk with inefficient management.

Backup Your WordPress Site
Install the plugin on your website, let it sync and you’re done. Get automated, scheduled backups for your critical site data, and make sure your website never experiences downtime again.


