Setting up a WordPress site from scratch
Bulletproof Backups for Your WordPress Website
Fortify your business continuity with foolproof WordPress backups. No data loss, no downtime — just secure, seamless operation.
I love travel and I love to write! So the most logical thing for me was to have a travel blog. When I heard about WordPress, I wanted to use that for my travel blog. So I decided to build a WordPress site from scratch and then migrate my existing travel blog which is on blogspot. Sounds simple? Well, here is what I did, listed in a few simple steps!
Step 1: Getting a host and a domain
Why did I need a host and what exactly is a domain?
First and foremost I needed a host(server) for my website to reside on. Next I needed a domain or in simple terms, a name by which people could reference to my website. For eg, http://www.travelwelldocumented.com/, http://touristmeetstraveler.com/, http://slowstruck.com/ are some popular blog sites. There are many hosts available which provide a hosting service. In this case, I used an already existing domain on the host provided for me (hostgator) and created a subdomain by logging on to the cPanel interface of hostgator. cPanel is the dashboard that lets us manage our webhost account by providing various options through a GUI.
Step 2: Installing WordPress
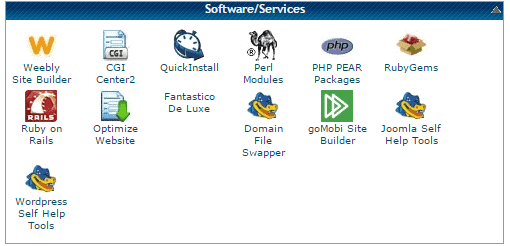
Most of the hosts support the option of auto installing WordPress with just one click. If not, WordPress can be installed manually as well. As you can guess, I chose the auto install option. The cPanel interface on hostgator has an option for QuickInstall under the Software/Services section.
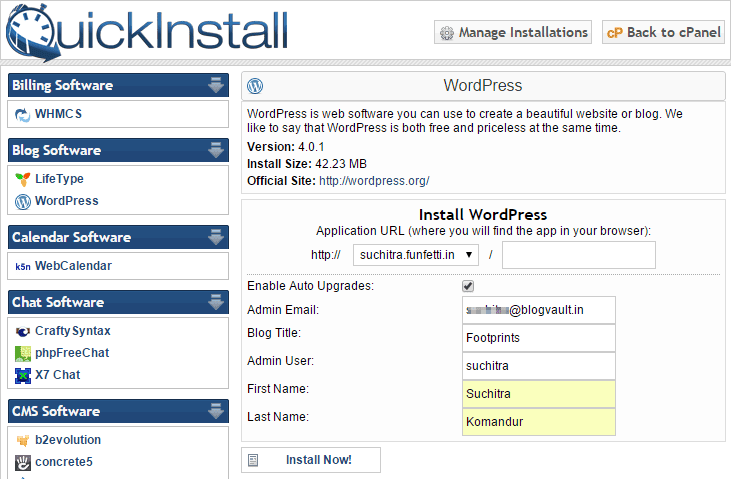
I clicked on QuickInstall, chose WordPress from the left menu and chose my website from the dropdown menu. I had to fill in some details like my email address, blog title, user name etc and click on “Install Now”.
Soon there was a mail with my login information as follows:
Congratulations!
Your installation is ready. You can access it now by going to http://suchitra.funfetti.in/ .
Admin Area: http://suchitra.funfetti.in/wp-admin
Username: suchitra
Password: ****************
Step 3: Setting up WordPress
The first step was to login to the admin area with the username and password provided in the email. This took me to the Dashboard, where there are various options on the left side which lets me customize the blog for my needs.
Step 4: Migrating my blog posts from the earlier location
This was a manual process and slightly tedious. Before I talk about migration, let me mention about adding new posts to my WordPress blog. I logged in to the admin area of the blog using the password provided in the email.

To add a post I clicked on “Posts-> Add New” which gave me the following interface to add posts.
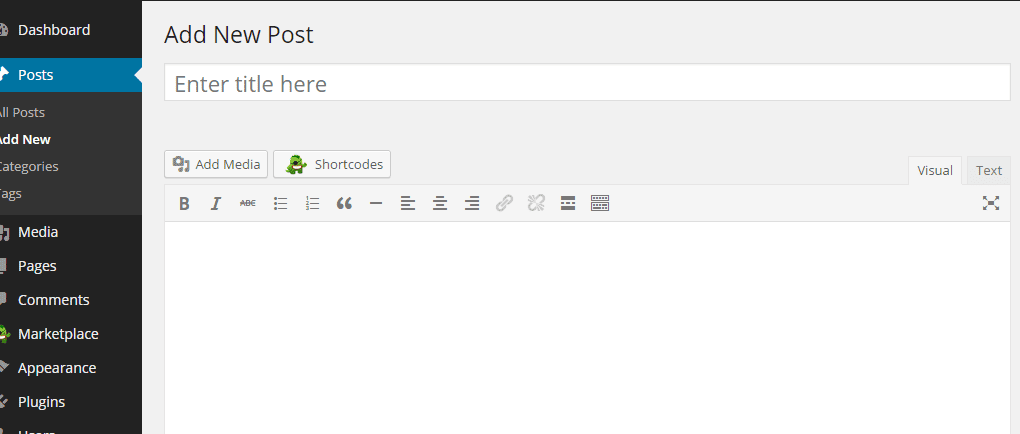
All I had to do was enter the post title and then the contents on to the Visual section of the text box. The text section contains the html version of the post and is needed mainly to edit the html. I could add pictures by clicking on the “Add Media” button above the text box and uploading pictures or simply drag and drop.
As I migrated the posts from another blog, I had to copy paste the text manually. Then I saved the images from the earlier blog and uploaded them here. Finally I did a manual review to check the sanity of the copy paste operation. Now I was ready to save the post and publish it. There are buttons on the right side to do both. The most logical thing to do would be to Save the contents periodically( or ensure that there is Auto Save ), see a Preview after the post completion, Edit if necessary and then Publish the post!
Step 5: Customize the look and feel by changing the theme
Now I was very curious to check out the various themes and plugins offered by WordPress. There are many paid themes and plugins and many free ones as well. Changing the theme is simple with just a few clicks! I clicked on Appearance->Themes and searched for travel related themes as my blog was a travel blog. I found several ones and chose a travel based theme to make my blog look more attractive.

I selected the theme “Travel Guide” and installed it. There is also a “Preview” button to have a look at the theme before installing it. After Installing, the “Activate” button sets the theme. Here is how it looks! Wow, my simple blog looks sophisticated already! I hope it attracts many readers.

Step 6: Install Plugins
1.Social Media Icons
The first plugin that I was mainly interested in was to include Social Media buttons on my website. With these buttons the reader could click and access my facebook profile, google plus or twitter account or send an email to me etc. I clicked on Plugins>Add New from the left tab to search for plugins.
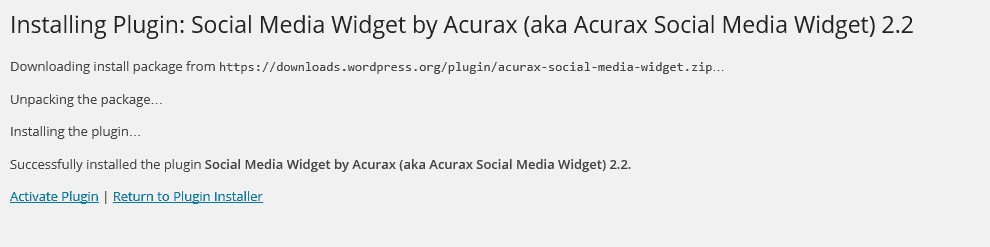
A search for “Social Media” gave me lots of available plugins and I chose to install “Social Media Widget by Acurax”. After installation, it is activated and a Widget appears on the left hand side.

The “Social Media Widget Settings” on the left panel helped me to customize this plugin.

After selecting the theme, I customized the icons that would appear on the blog along with their settings. As I currently wanted only the Facebook and Google Plus icons, I added the URL information only for them and clicked on “Save Changes”.

After customization, it was time to test the plugin and see if it works! I opened my blog and saw that the icons had appeared on the right side of the page. I clicked on them and was taken to my facebook and google plus profile pages respectively.
2.SEO by Yoast
Another plugin that I was really curious about was SEO or Search Engine Optimization. This would help me in ensuring that my website showed up in search engine results. Apart from this, the SEO plugin offers a host of features that can help my blog. I searched for SEO plugin and installed “SEO by Yoast”. Learn more about Best settings for yoast seo plugin
Step 7: Backup the blog using blogVault
My final step was to set up backup for my website using blogVault. This would help me restore my website in case I lose the blog due to crashes, hacks, human errors etc. Setting up backup with blogVault is fairly simple and I was done in no time.
This was just a quick start guide to have your own blog on WordPress and customizing it for your needs. WordPress lets you have a food blog, travel blog or just anything that your heart fancies ! For more detailed tutorials and other information on WordPress, visit their tutorials at http://codex.wordpress.org/
Tags:
Share it:
You may also like

How to Limit Form Submissions with Droip in WordPress
Forms are an indispensable part of any website because of their versatility, letting you collect information for various purposes! However, people with ill intentions often attempt to exploit these forms…

How To Manage Multiple WordPress sites
Management tools help agencies become well-oiled machines. Each task is completed with the least amount of effort and highest rate of accuracy. For people managing multiple WordPress sites, the daily…

PHP 8.3 Support Added to Staging Feature
We’ve introduced PHP version 8.3 to our staging sites. Test out new features, code changes, and updates on the latest PHP version without affecting your live website. Update PHP confidently…
How do you update and backup your website?
Creating Backup and Updating website can be time consuming and error-prone. BlogVault will save you hours everyday while providing you complete peace of mind.

Updating Everything Manually?
But it’s too time consuming, complicated and stops you from achieving your full potential. You don’t want to put your business at risk with inefficient management.

Backup Your WordPress Site
Install the plugin on your website, let it sync and you’re done. Get automated, scheduled backups for your critical site data, and make sure your website never experiences downtime again.


