Backup WordPress to Google Drive: The Ultimate Guide
Bulletproof Backups for Your WordPress Website
Fortify your business continuity with foolproof WordPress backups. No data loss, no downtime — just secure, seamless operation.
WordPress 101 is that backups are necessary. But, where you store your backups are equally important. If your web host takes a backup, it’s stored on your server. This still leaves your site vulnerable because everything is one hack away from being accessed by a hacker.
If you’d like to store a backup on your local computer or an external removable hard disk, you’ll need to manually backup your site, which in itself is risky. This is because it’s easy to take a bad backup that is rendered worthless when you really need it.
We recommend you store your site in a remote location. BlogVault stores your site backups on its own servers. Another option is to store on cloud storage. If that’s the route you’re looking to take, this article is all you need to know about how to take WordPress backup to Google Drive.
Google Drive is a temporary but inexpensive solution for external backups. It gives you 15GB of free storage for your entire account. But what does it mean to store your backups on your google drive? How do you do it? Is it safe? This article is everything you need to know about how to backup WordPress to Google Drive.
TL;DR: It’s essential for the safe keeping of your site to have multiple backups of your site. Google Drive can be a good secondary option if you use a backup plugin like BlogVault. BlogVault will create a backup that you can download, and store on your Google Drive in a few easy steps.
Backing up to Google Drive means you’re either sending a backup or manually uploading your backup to Google Drive. We’ll talk about all the methods to do so in this article.
Safely backup WordPress site to Google Drive with BlogVault
If safety, ease of use, and reliability are the things you’re looking for in a backup solution, BlogVault is what you need. You don’t really need to send a WordPress backup to google drive if you’re using BlogVault because it already securely stores your backup on its own servers without you having to worry about storage.
But, it does offer the option to download your backup to your local computer, which you can then upload to your Google Drive account. Here are the steps to do so:
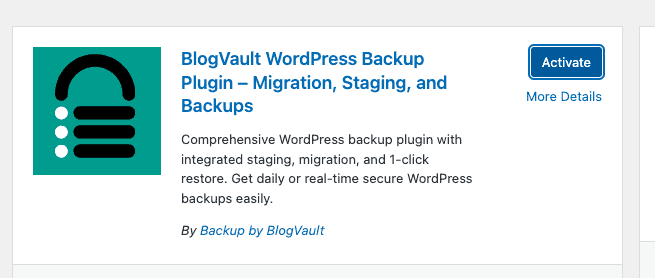
- Install and activate the plugin: Go to your wp-admin panel, hover over Plugins on the sidebar, and click Add New. Look for BlogVault in your plugin directory, and click Install and Activate. On the Installed Plugins page, scroll down till you see BlogVault. Click Settings.
- Create an account: Fill in your email address and click Submit. In the next page, click Continue. Click Back to Dashboard. This will take you to your BlogVault account dashboard. Creating an account also automatically backs up your whole site for the first time. Give it a few minutes.
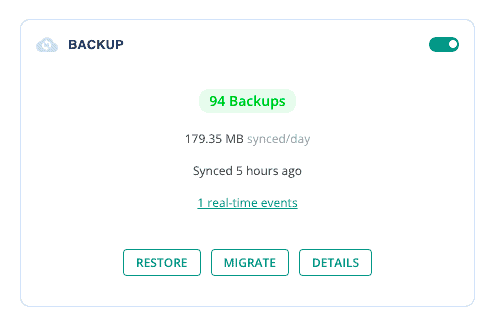
- Download the backup: On the BlogVault dashboard for your site, click Details in the Backup section. Click Download at the top. In the next page, the most recent backup, files and database will be automatically checked. Click Continue once you’ve decided what you’d like to download. This might take you a few minutes. But once the download is complete, a link is created to download the zip file.
- Upload it to Google Drive: Rename the file to have a meaningful name. Perhaps you could use the name of the site and the date it was created. You can now upload it to your Google Drive like you would any other file.
- Restore your backup: We don’t recommend manually backing up your site. Your site is safer when you use the Restore feature. But, if you’d like to restore the site using the backup now stored on Google Drive, we have steps that can walk you through
Let’s take a second to talk about why BlogVault really is your best bet:
- BlogVault automatically creates multiple backups of your site so you don’t have to.
- Restore your site without your WP-Admin dashboard. Even if your site crashes, the Restore feature is all you need.
- Backups are automated and scheduled so you don’t have to stress about it.
- Backups are taken in increments. Your site performance will never be affected.
- BlogVault has additional security and management features that can make sure that your site is safe and easy to manage.
WordPress backup to Google Drive using plugin
If you’d like to try other popular backup plugins, we’ve explored how to backup your WordPress site to Google Drive with three other plugins: UpdraftPlus, BackupBuddy, and BackWPup.
1. UpdraftPlus
The process of using UpdraftPlus to send a backup to your google drive includes installing and activating the plugin, and then granting the plugin access to create a folder and save WP backup to Google Drive.
Please note that UpdraftPlus doesn’t include WordPress core files and directories in their backups. This means that all their backups are partial ones, and if you need to restore using them, you would need to reinstall the correct versions of WordPress on your site server.
Here are the steps to do so:
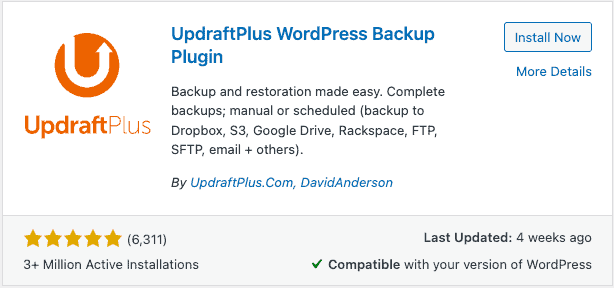
- Install and activate the plugin: Go to your wp-admin panel, hover over Plugins on the sidebar, and click Add New. Look for UpdraftPlus in your plugin directory and click Install and then Activate.
- Choose Google Drive: Hover over Plugin in the sidebar and click Installed Plugins. Next, scroll down till you find the UpdraftPlus plugin and click Settings. This will take you to the plugin’s dashboard. Head to the Settings tab that you say at the top. Scroll down till you see the list of remote storage options. Select Google Drive.
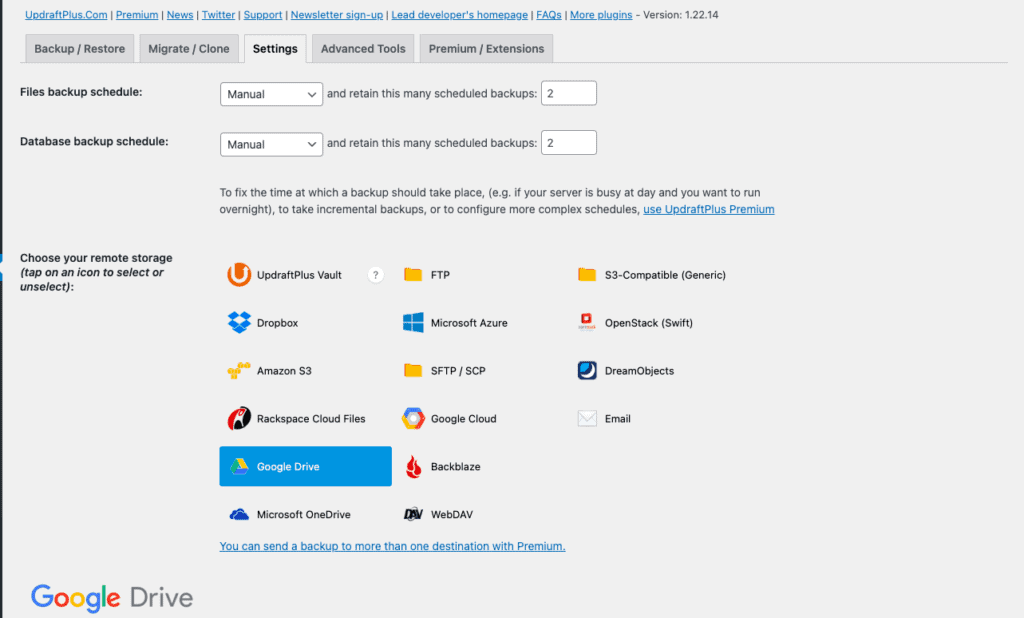
- Save Changes: Make sure you’ve opted to backup plugins, themes, and uploads. Then click Save Changes.
- Login to your Google Account: You’ll be redirected to a page where you’ll have to sign into your Google Account.
- Create a backup: You can now go back to your wp-admin and the UpdraftPlus dashboard. Click Backup Now. A popup box will appear. Make sure that you’ve opted in to backup your files and database, and to send the backup to remote storage. Click Backup Now. This will take you back to the dashboard. You’ll see a progress bar that shows how much has been backed up so far. The backup process might take a few minutes, depending on the size of your site and server resources available. You may also see a perceptible difference in performance.
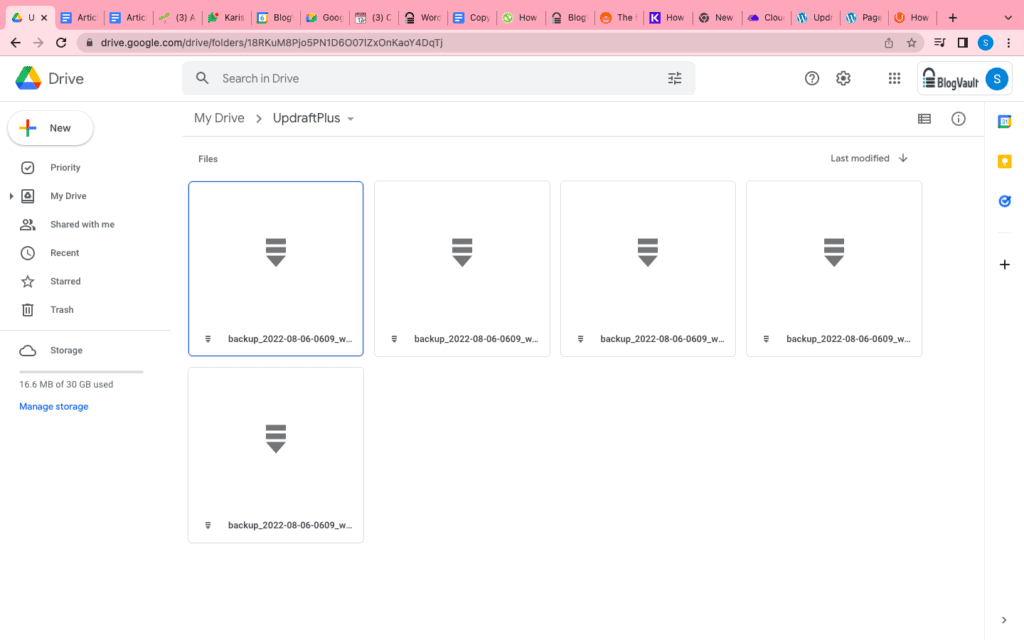
- Find the backup: Once it’s done, you can see the backup logs on the dashboard. You will also find a folder on your Google Drive called UpdraftPlus. You’ll notice that there is a backup file in the folder.
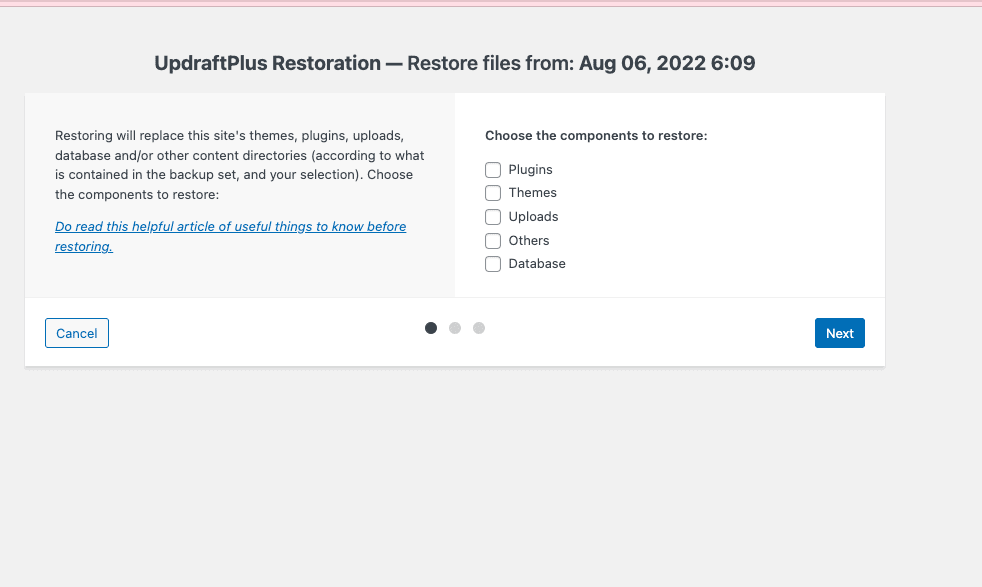
- Restore the backup: You can restore the backup using UpdraftPlus from wp-admin. Just click Restore against the latest backup. This will redirect you to a popup with a list of all the things that you’d like to restore. Select from the list and click Next. The next page will have a progress bar for all the files it’s retrieving. Click Next when it’s done. On the next page, click Restore and wait till a few minutes for the restore to complete.
2. BackupBuddy
This plugin needs to be bought from the iThemes site. You can install the plugin and send your WordPress backup to Google Drive using API keys. Here are the steps to do so:
- Install and activate the plugin: Once you buy the plugin, you can download the zip file. Next, head to your wp-admin, and hover over Plugins in the side panel. Click Add New and Upload Plugin. Click Choose File and select the right file. Click Install and Activate after that.
- Select Google Drive: In the sidebar, click BackupBuddy. In the Remote Destinations page, click the icon for Google Drive, and Open the Google API console in a new window. This will lead you to the Google API Console.
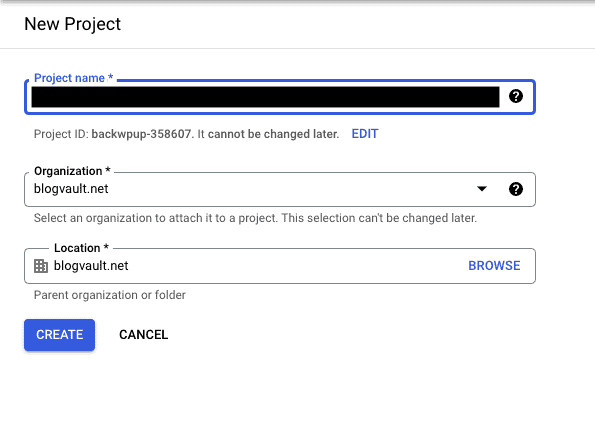
- Create a new Project: At the top, click the drop-down box My First Project. Click New Project and fill in the details of your project in the popup. Click Create. Make sure this is the project that is selected in the drop-down menu.
- Configure Consent Screen: In the sidebar, click OAuth consent screen. Click External in the type of users and Create. Add app details like name, support email, and developer email. Next, you can add scopes, which refers to the amount of access you’re allowing Google to have. Next, add other users that you’d like to add and go back to the Google API console dashboard.
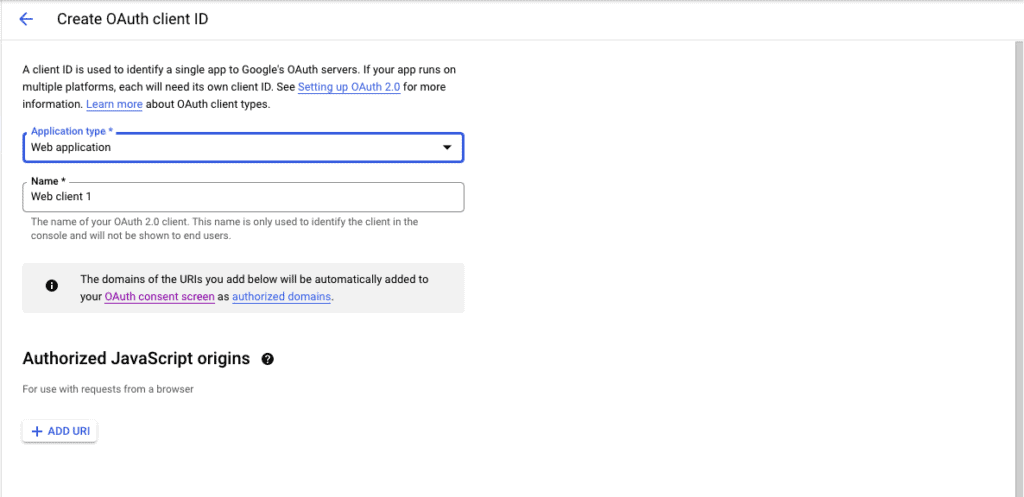
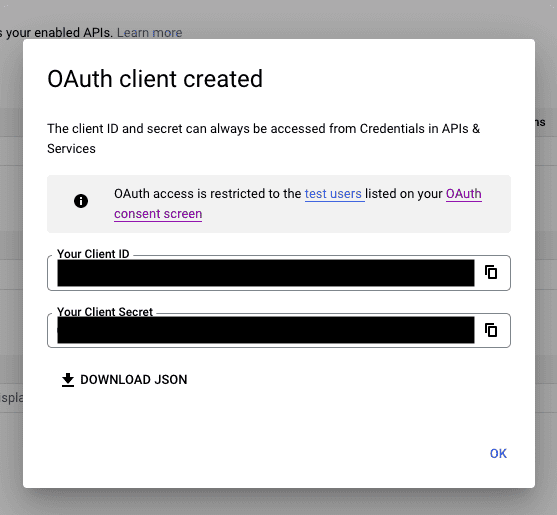
- Create Credentials: in the sidebar, click Credentials. Click Create Credentials and OAuthentication ID. Select Web Application as the type of application. Scroll down and click Create. A popup will appear with the API keys.
- Integrate with plugin: Copy the Client ID and Client Secret. Back on wp-admin, paste these in the appropriate fields. Click Continue.
- Authorize BackupBuddy to access your Google Drive: Click Click here and click Accept to authorize BackupBuddy access to your Google Drive. Click Accept on the next page.
- Paste the code: The next page will have a code that you need to copy. Make sure to copy the entire field. Back on your site’s admin dashboard, paste it in the Auth Code field. Click Continue. This will lead you to your Google Drive settings where you can pick the destination folder. Click Add Destination.
- Create a backup: You can create a new backup by clicking Backup in the sidebar. You should find the backup in your Drive after you’re done.
- Add Google Drive to Scheduled Backups: Hover over BackupBuddy in the sidebar and click Schedules. Edit or add a new schedule, and add Google Drive.
- Restore the backup: To restore, click BackupBuddy in the sidebar and click Restore Backup.Then, click restore beside the backup you’d like to restore. You can pick if you want a partial or full backup. The next page will show you a progress bar. Give it a few minutes and your backup will be restored.
3. BackWPup
If you’d like to use BackWPup to send your WordPress backup to Google Drive, you need the Pro version of the plugin. The process is similar to that of BackupBuddy, so you need to integrate the plugin to Google Console with API keys. Here are the steps to do so.
- Sign into Google Account: If you don’t already have a Google account, you’ll have to create one. Otherwise, sign into your Google account.
- Create a new project: Go to the Google developers console and click the drop down at the top that says My First Project. Click New Project and fill in the details of your project in the popup. Click Create. Make sure this is the project that is selected in the drop down menu.
- Configure Consent Screen: In the sidebar, click OAuth consent screen. Click External in the type of users and Create. Add your site details like name, support email and developer email. Add scopes and users in the next two pages and go back to Google API console dashboard.
- Create Credentials: From the sidebar, click Credentials. Click Create Credentials and OAuthentication ID. Select Web Application as the type of application.
- Copy and paste the Redirect URL: Switch to the WordPress admin dashboard, click on BackWPup, and then on Settings. Next, click API keys and go to the Google API keys section. Copy the Redirect URI and paste it in the Authorized URI field on your Google Console. Scroll down and click Create. A popup will appear with the API keys.
- Copy the Client ID and Client Secret: Next, copy the entire text in the Client ID and Client Secret fields, and paste them in their respective fields back on the WordPress dashboard. Click Save.

- Install and activate the plugin: Once you buy the pro version of the plugin, you can download the zip file. Next, head to your wp-admin, and hover over Plugins in the side panel. Click Add New and Upload Plugin. Click Choose File and select the right file. Click Install and Activate after that.
- Create a job: First hover over BackWPup in the WordPress Dashboard sidebar. Click Jobs and then Add New. You can name the job if you’d like. Scroll down and select Google Drive as the Job Destination. This should create a new tab in the plugin’s settings called To GDrive. Click this tab.
- Reauthenticate BackWPup on Google Drive: Click Reauthenticate and this will redirect you to a Google Drive page where you will have to authorise BackWpup to be able access Google Drive. You’ll be redirected back to the WordPress admin dashboard.
- Save New Google Drive Backup settings: If you go to the Settings tab, you can name the backup folder and set the total number of backups to be stored. The checkbox below File Deletion will push the old backups to trash instead of deleting them.
- Create backup: Once the job has been fully set up, go back to General and click Run Now at the top.
- Restore a backup: If you’ve created a backup with the Pro version of the plugin also, you can restore it by clicking the Restore tab and selecting the right backup. Check out this article for more information.
Manually backup WordPress to Google Drive
We can’t tell you enough why you should not manually backup your site. It is time-consuming, it is risky, and it is incredibly frustrating for the following reasons:
- You have to download your files and export your database separately; both of which can be time-consuming processes for larger sites.
- It can slow down your site because it is a serious load on your server.
- It is dependent on you having a great connection to your server. Server disconnections can lead to a partial download of your file, which will invariably lead to a corrupted backup that can crash your site.
- Small mistakes in your backup can cause your site to crash.
We recommend using BlogVault for its ease, reliability, and efficiency. But, if you’d like to backup your site manually, we have an article on how you can manually backup your files and your database. We recommend using an FTP client for your files and phpMyAdmin for your database.
Once you’ve backed up your site, zip the folder containing both your files and database and upload the zip folder to Google Drive.
If you’d like to restore this backup, check out this article on manually restoring the WordPress site.
Why Google Drive is a secondary storage solution
While the biggest benefit of using Google Drive is the cost because you don’t have to spend any money for 15GB of storage, here are 4 reasons that we think Google Drive should remain a secondary solution only:
- Storage: Ideally, you should always have more than one full backup of your WordPress site, especially if you are making regular changes and updates to your site. Therefore, if you’re backing up your site frequently, this can take up a lot of storage on your Google Drive. This is especially true for large sites. At some point, you are going to run out of space. BlogVault is the only WordPress backup plugin that has unlimited storage for full site backups.
- Manual backups and restores: If you’re using a plugin the backup itself may not be too much trouble. If you’re using a Google Drive backup to restore your site though, the manual restore process is exhausting, time-consuming, prone to failures, and risky. BlogVault restores are 100% reliable and work every single time. No more corrupted restores that irretrievably crash the site.
- Real-time backups: If you own a WooCommerce site, you need real-time backups that can keep up with the way the daily changes on your site. If your backups are being stored on Google drive, this means that you’re very quickly going to run out of space. Google Drive as a backup storage solution wasn’t meant for sites like that.
With BlogVault’s real-time backup feature, changes to your site are backed up every 5 minutes. In the event of a site failure, your site can be restored to the most current version without a hassle.
- Security: If you are storing zipped backups to Google Drive, this can pose a threat to your site. If a hacker was able to access your backup, they would be able to see your database login credentials easily. BlogVault encrypts all backups before storing them to provide an extra layer of security to your site.
- Failsafe: We recommend having multiple copies of backups that are each stored in different places. BlogVault does that for you. It automatically saves multiple backups on various servers so that you don’t have to worry about it.
Final thoughts
Google Drive makes for an inexpensive secondary backup solution for a few backups of a small site. But it is definitely not a permanent or scalable solution for something as critical as site backups.
It is far better to use a backup plugin like BlogVault, because it automatically creates multiple backups, and stores them in several locations for safety. And so if your site ever crashes, you can restore it with absolute ease.
FAQs
Can I backup my WordPress site to Google Drive?
Yes, you can backup WordPress to google drive. We recommend you install a backup plugin like BlogVault to create a full site backup that you can download and then store on Google Drive. It’s a much safer option than manually backing up a site and storing the backup on Google Drive.
How do I backup my entire WordPress site?
The best way to backup your entire site is with a backup plugin like BlogVault. Install and activate the plugin, create an account, and let BlogVault automatically create a backup of your site. BlogVault takes automated daily backups so you don’t have to worry about it.
Why should you take WordPress backup to Google Drive?
Having multiple copies of your WordPress site means that even if one backup is lost, you have other ones to fall back on.
How often should you backup your site?
The ultimate safety net for your site is to create a backup after every change—big or small. If you make frequent changes, daily backups are the way to go. BlogVault has automated daily backups, and on-demand backups, and has a real-time backup feature, so your site is always insured against the worst.
Tags:
Share it:
You may also like

How to Limit Form Submissions with Droip in WordPress
Forms are an indispensable part of any website because of their versatility, letting you collect information for various purposes! However, people with ill intentions often attempt to exploit these forms…

How To Manage Multiple WordPress sites
Management tools help agencies become well-oiled machines. Each task is completed with the least amount of effort and highest rate of accuracy. For people managing multiple WordPress sites, the daily…

PHP 8.3 Support Added to Staging Feature
We’ve introduced PHP version 8.3 to our staging sites. Test out new features, code changes, and updates on the latest PHP version without affecting your live website. Update PHP confidently…
How do you update and backup your website?
Creating Backup and Updating website can be time consuming and error-prone. BlogVault will save you hours everyday while providing you complete peace of mind.

Updating Everything Manually?
But it’s too time consuming, complicated and stops you from achieving your full potential. You don’t want to put your business at risk with inefficient management.

Backup Your WordPress Site
Install the plugin on your website, let it sync and you’re done. Get automated, scheduled backups for your critical site data, and make sure your website never experiences downtime again.


