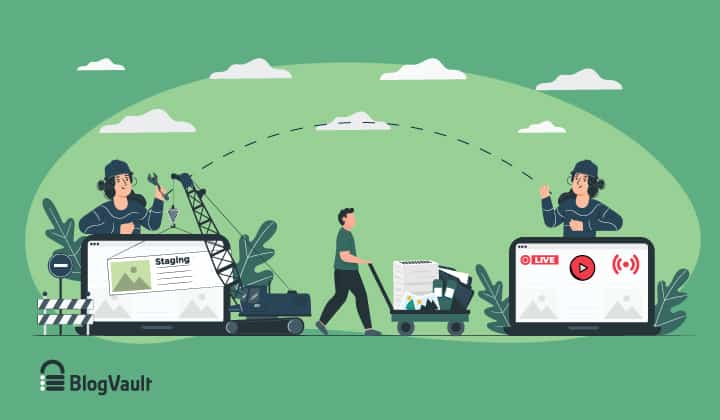
How to Push Changes from WordPress Staging To Live Site
Bulletproof Backups for Your WordPress Website
Fortify your business continuity with foolproof WordPress backups. No data loss, no downtime — just secure, seamless operation.
A staging site provides a sandbox-like environment for you to make changes to your site without the risk of breaking anything. It acts like a safety net for your experimentation in that even if you were to break or crash your staging site, your live site remains unaffected. migrating WordPress staging to live site can be tricky.
In this article, I’ll illustrate the process of moving a WordPress site from staging to live regardless of where you’ve built the staging site.
TL;DR: Using a staging site is a great way to make non-trivial changes to your website without risk. Once you’re happy with everything you’ve done with your staging site, you can push WordPress staging to live site with Migrate Guru. It’s easy to use, free of charge, and works with any web host out there.
What to do before moving a WordPress site from staging to live
Before you move WordPress from staging to production, there are a few things you need to do to make sure the process goes as smoothly as possible:
- Set up a live site with web hosting and a domain name.
- Make sure the staging site you use is a clone of the latest version of your live site. That means it should have the exact same content and settings as your live site.
Let’s say you have a WooCommerce store, and you’re using a staging site to develop and test a new design. That process could take weeks, if not months, and your store is receiving orders and new customers all the while.
Therefore, before migrating WordPress staging to live — which would effectively replace it — you would need to download the database and merge it with your staging site first. And then migrate to the live site. This way, you will retain your important data.
- Enable maintenance mode on your live site. It helps prevent any other users from making changes to the live site, which is very helpful when you’re pushing changes to the live site.
- Take a backup of your live site. This includes both your WordPress files and your database. Should anything go wrong during the process, you don’t need to worry. You’ll be able to restore a fully functional version of your site.
How to push changes from WordPress staging to live
There are three main ways of migrating WordPress staging to production, namely using a plugin, using your web hosting provider, or doing it manually. In this article, I’ll cover all three approaches in detail, starting with the simplest and easiest of them all: using a plugin.
Note that this article doesn’t deal with creating a staging site. It assumes that you already have a staging site that you’ve worked on and you’re now ready to push changes from staging to live.
What we’re going to essentially do is migrate/move our staging site to the location of the live site so that the live site has all the changes we made. Let’s get started.
Move WordPress staging to live Using a plugin
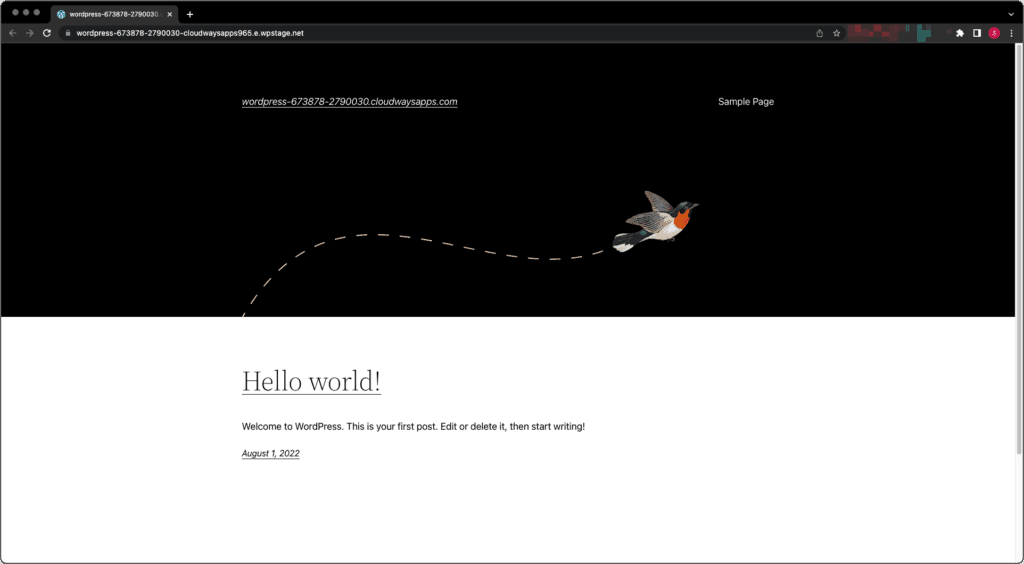
Using a plugin is the easiest way to move changes from WordPress staging to live. For this example, I’ll be using Migrate Guru, a versatile, free plugin that just works. It requires minimal effort and setup from you. The plugin handles everything itself automatically. Here’s what the staging site looks like now:
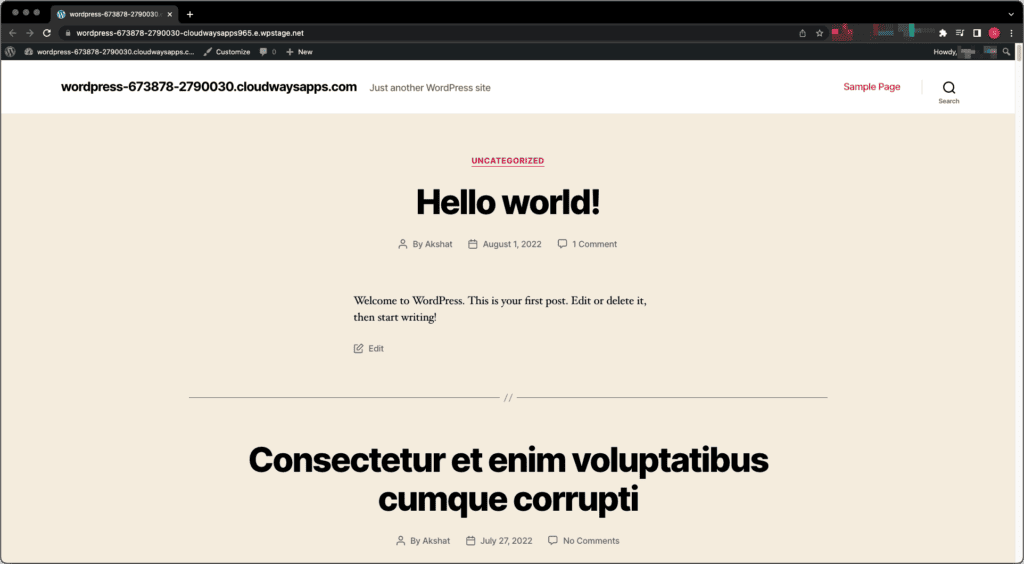
After making a few changes like changing the theme and adding a few fake blog posts, the staging site now looks like this:
When we migrate this staging site, it will show up at the URL of our live site.
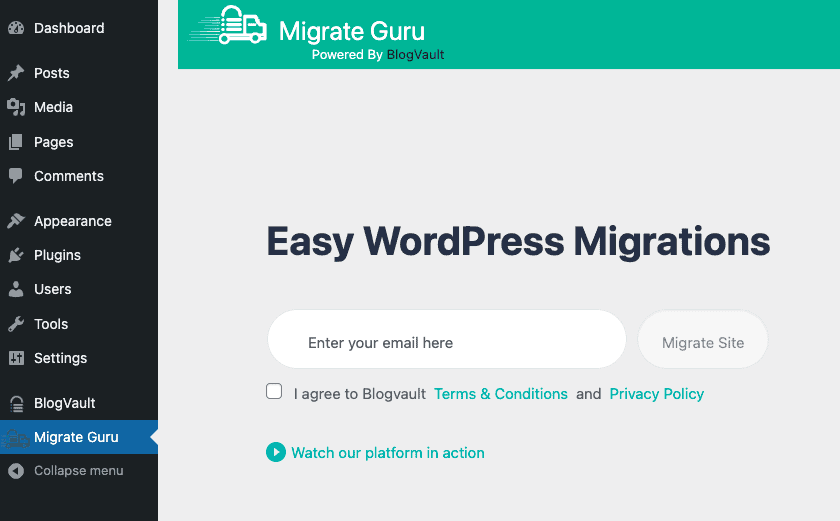
- Install and activate Migrate Guru on your staging site.
- You’ll be taken to the Migrate Guru tab on the WordPress dashboard. Enter your email address and click on Migrate Site to continue.
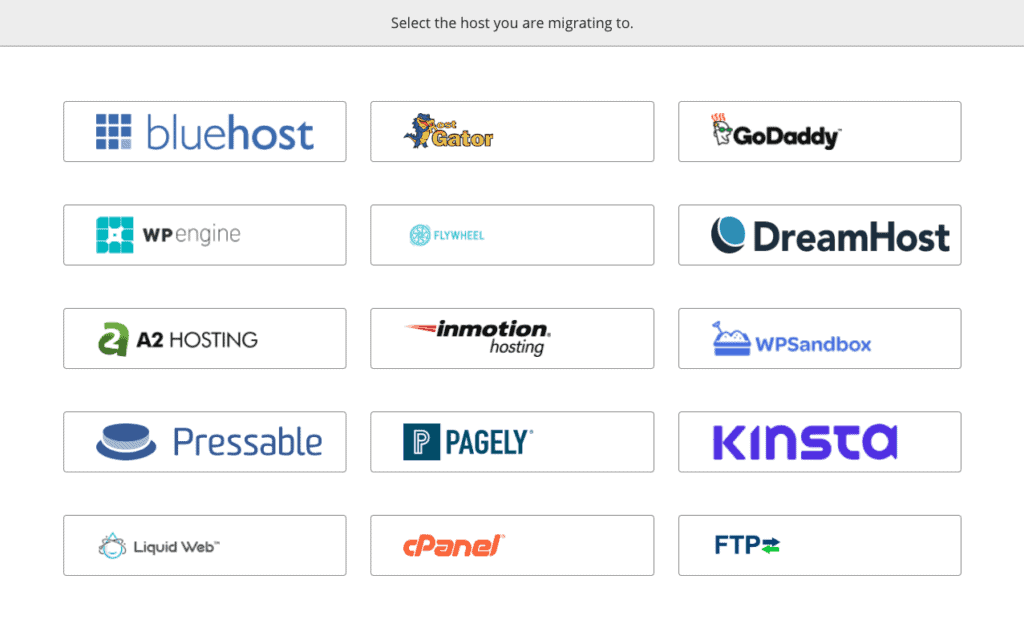
- On the next screen, choose your web host or the FTP option. FTP will work with any web hosting provider out there.
- Next, enter the required information correctly.

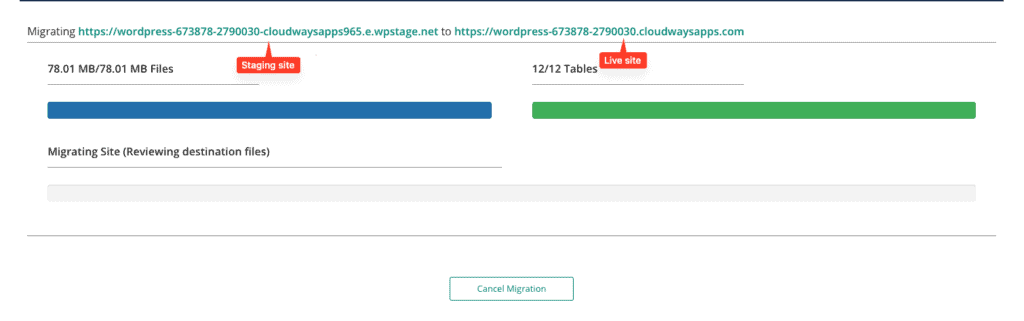
- Migrate Guru will then start the migration process. You’ll see the source and destination sites along with the progress made in migrating to the live site on the next page.
Once the migration is complete, you should see a page saying your migration has been completed successfully like the following:
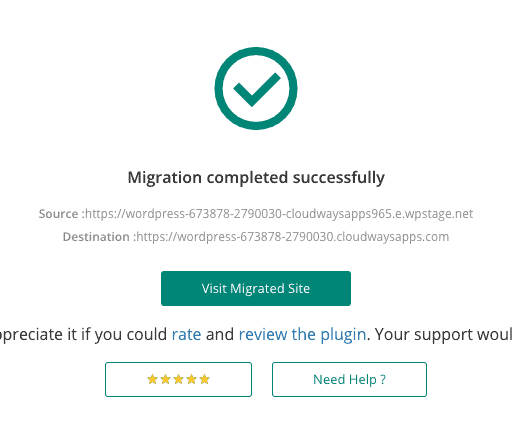
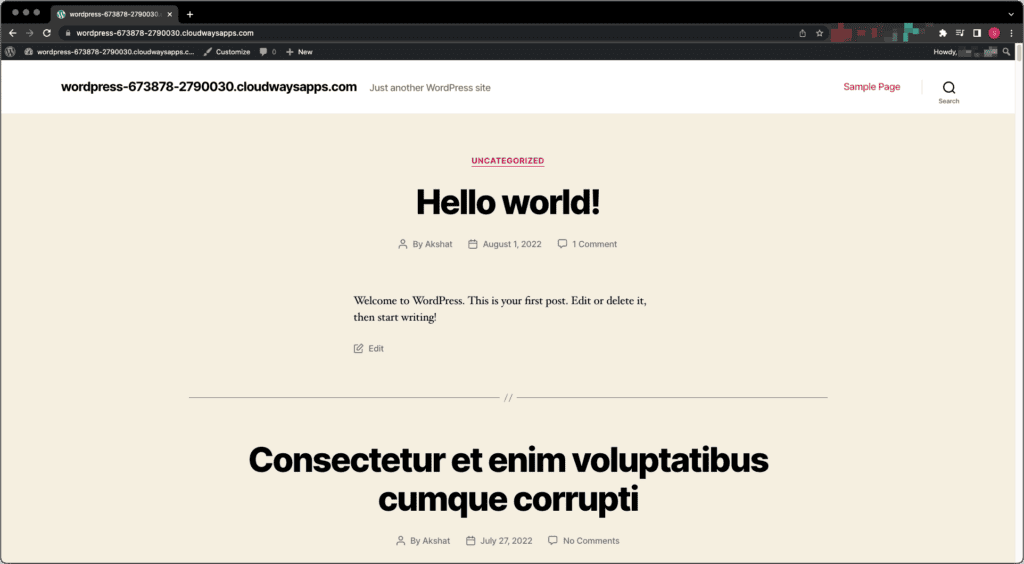
Click on Visit Migrated Site and you’ll see that the staging site is now live.
Go from WordPress staging to live using a web host
For this section, I’ll be covering the following popular web hosts:
- Bluehost
- WP Engine
- Kinsta
- Flywheel
Bluehost
- Log into your Bluehost account. Go to My Sites from the navigation menu, then click on Add site > Migrate Existing Site.
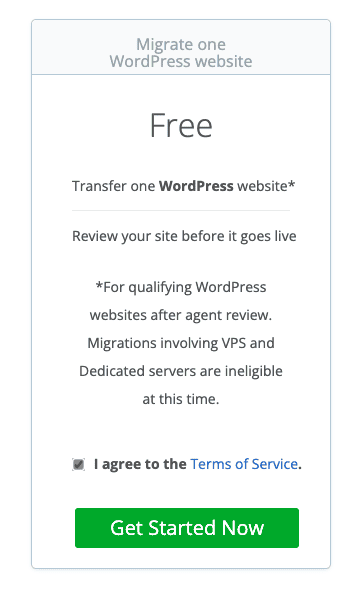
- On the next page, agree to the Terms of Service and click on Get Started Now.
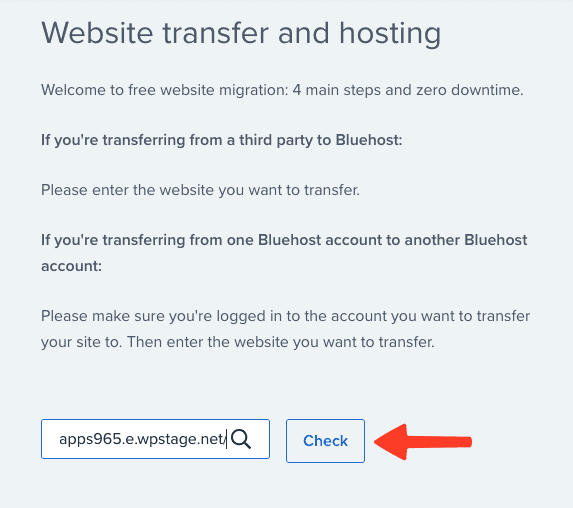
- Next, enter the URL of your staging site and click on Check so that Bluehost can check for compatibility.
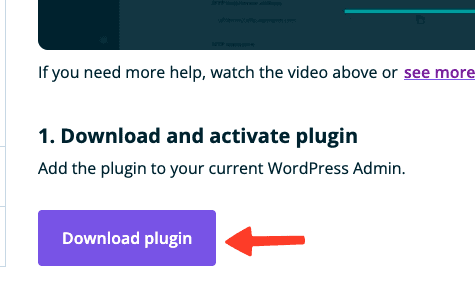
- Install the Bluehost Site Migrator plugin on your staging site and activate it.
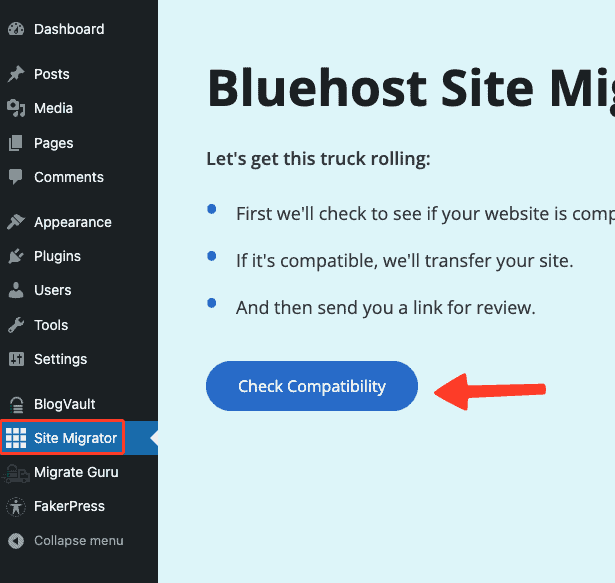
- After it’s activated, click on Site Migrator from the menu, then click on Check Compatibility.
- Once it confirms that the migration tool is compatible, click on Start Transfer to begin.
- The plugin will start the migration process.
And you’re done. You’ve successfully merged the changes you made to your staging site with your live site on Bluehost.
WP Engine
- Log into your WP Engine dashboard, then click on the live site you wish to push changes to.
- Next, under the Production sidebar, click on Site migration. You’ll see a page where WP Engine will provide you with three options for migration. Under Automated migration, you’ll see a link to download the WP Engine Automated Migration plugin. Download it.
- Now, go to the admin panel of your staging site and install and activate the plugin you just downloaded. You’ll be asked to log in to your WP Engine account. After logging in, you’ll be taken to the migration form.
- Go back to your WP Engine dashboard and click on Generate Password to generate the FTP credentials you’ll be using to migrate your site.
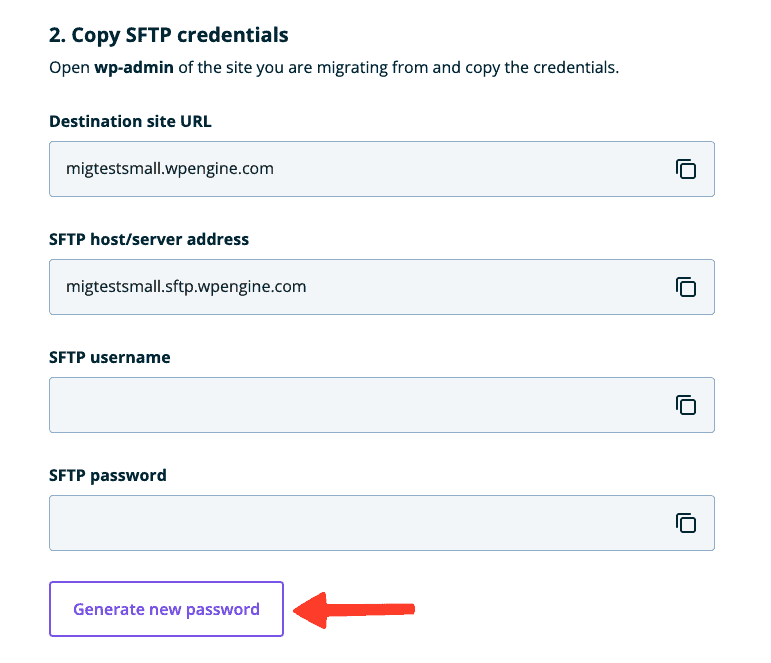
- Copy the FTP credentials and paste them as is on the migration form. The Destination Site URL is the URL of your live site.
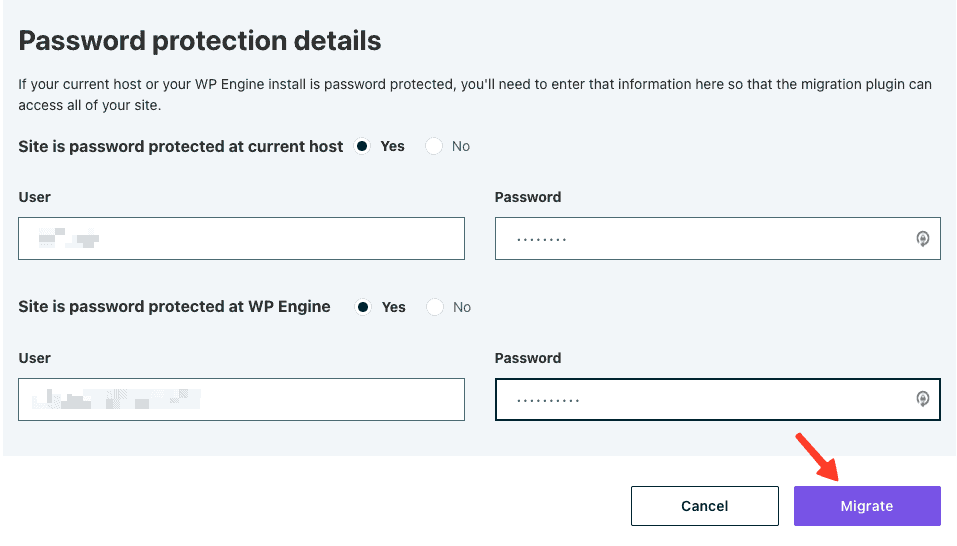
- If your staging and/or live sites are password-protected, enter the login credentials and click on Migrate.

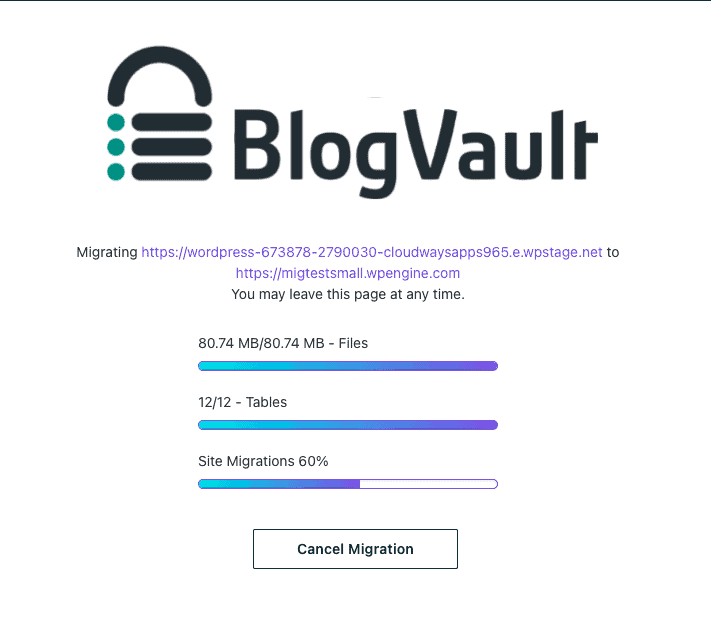
- The WP Engine Automated Migration plugin is powered by BlogVault. It will validate your details on the next page and then start the migration process. On successful validation, you should see a screen like the following:
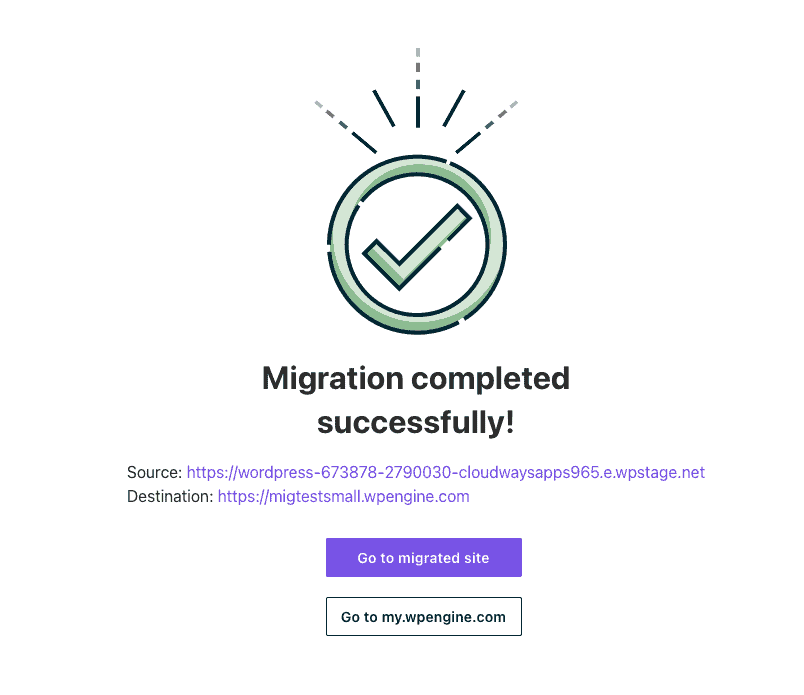
- If the migration is successful, you’ll see a message describing so. Click on Go to migrated site and you should see that your live site now has all the changes you made to your staging site.
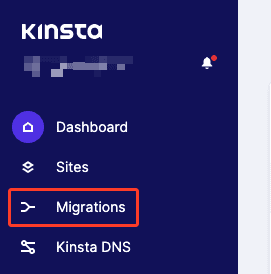
Kinsta
Back up your staging site before pushing changes to your live site on Kinsta. You’ll need the backed-up files and folders soon.
- Log in to your Kinsta dashboard, then click on Migrations from the left-hand navigation menu.
- Next, click on Request Basic migration.
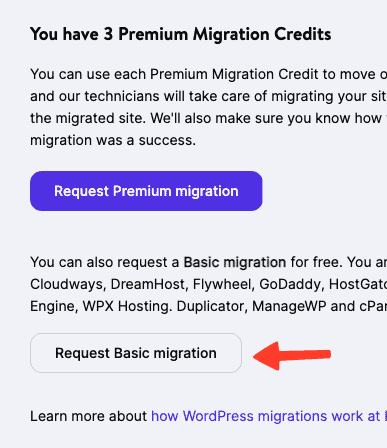
- On the next page, select Migrate from backup.
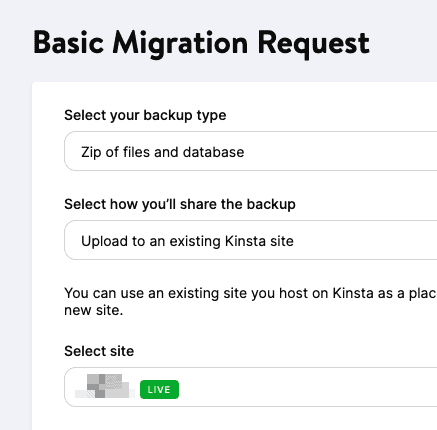
- On the next page, choose ‘Zip of files and database’ as your backup type and ‘Upload to an existing Kinsta site’ as your sharing method. Choose the Kinsta site you’ll migrate to.
- Enter the required information on the next page. In the ‘Domain name of site to transfer’ field, enter the domain name of your staging site.
- On the next screen, pick a name for your site and a data center location. Click Next.
- Review the details and click on Finish to start the migration process. Kinsta will start moving your staging site to your live site, and hence, your live site will have all the latest updates.
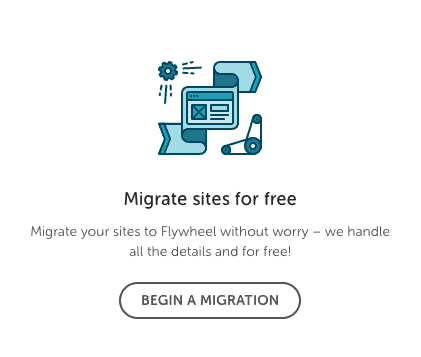
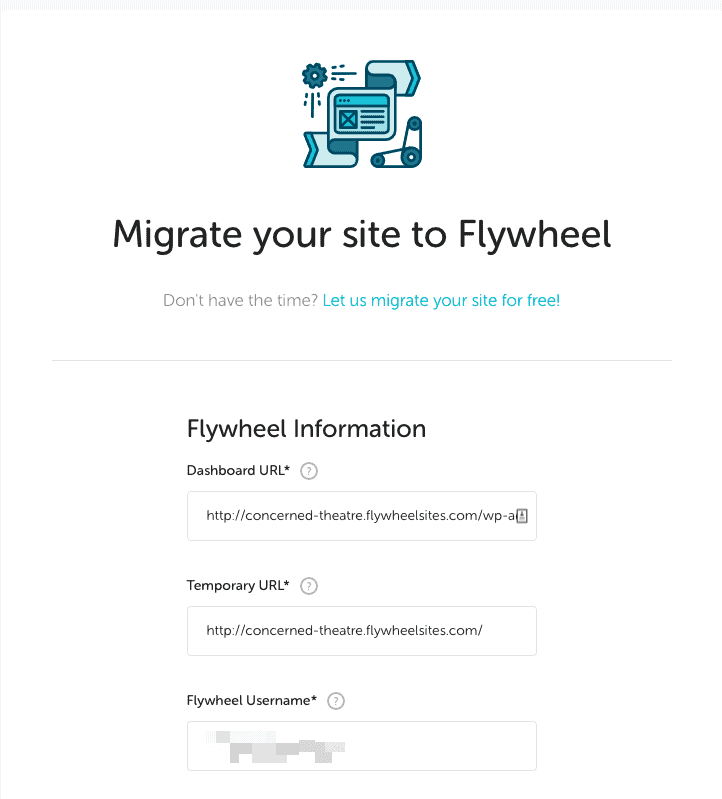
Flywheel
- Log into your Flywheel web hosting account, then click on Begin A Migration at the bottom.
- Click on I Got This on the next page.
- Flywheel will ask you to download the Flywheel Migrations plugin on the site you want to migrate. Go ahead and install the plugin on your staging site. Activate it.
- You’ll be taken to the Flywheel tab on the WordPress dashboard. Enter the email address associated with your Flywheel account and click on Get Started to continue.
- On the next page, enter the details as requested by Flywheel. After you’re done, click on Migrate. Flywheel’s migration feature is powered by BlogVault, a powerful WordPress backup plugin.
- After successfully validating your details, Flywheel will begin the migration. Once the migration is complete, you should see a screen similar to the following:
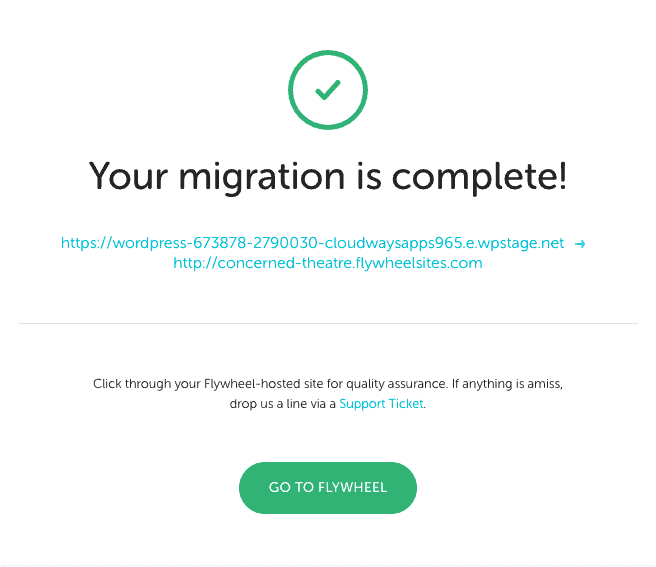
That’s it! You’ve now successfully pushed changes from your staging site to your live site.
Manually Migrate changes from WordPress staging to live
I highly recommend that you only do this as a last resort. There is always a possibility of something going wrong when you try to upload changes from your WordPress staging site to your live site manually. Having said that, it is useful to know the steps. Let’s get started.
You’ll need the FTP credentials of both your staging and live sites. If you don’t know how to obtain the FTP credentials for your website, check out our article on working with FTP. I’ll be using the popular FileZilla FTP client for this example.
- Connect to your staging site via FTP. On FileZilla, you’ll see a directory listing of your staging site in the right-hand Remote site area.
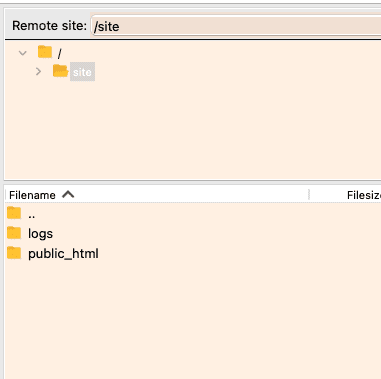
- Download all the files and subfolders inside the root directory of your staging site to somewhere on your hard disk. We’ll need this in a bit.
- Now, connect to your live or production site via FTP.
- Upload all the files and folders you downloaded in step 2 to the root directory of your live site.
And that’s it! You’ve now moved your staging site to your live site manually.
What to do after migrating a WordPress site from staging to live
Here are some important things you need to do:
- Test your live site. Make sure it has all the changes you made when you were experimenting with your staging site.
- Perform a search-and-replace operation on your database to change all the URLs on your site, so that links work correctly. I’ve explained how to do this as well as the reasoning behind it here.
- Enable SSL or reinstall SSL if you had set it up already.
- Disable maintenance mode if you had enabled it before migrating your site.
- Clear all caches.
Why using a migration plugin is the best way to push changes
Using a plugin like Migrate Guru is the best way to push changes from a locally hosted staging site or one hosted on a development server to your live site. The process is simple, easy, and fast, and there is little to no effort required from you. Such plugins have been refined over the years and are battle-tested, meaning it’s highly unlikely that something could go wrong. As I mentioned earlier in the article, I highly recommend Migrate Guru since it’s effective, free, and just works.
Now that your site is live if you need to make changes, use BlogVault’s staging site feature instead. You can create a staging site in minutes from a backup, and merging changes doesn’t need a full-scale migration. It is the best way to test updates or work on a redesign safely.
Conclusion
Creating a staging site is a great way to make non-trivial changes to your website without risk and do so without disrupting the experience of your visitors. When it comes time to push WordPress changes from staging to live, you can do so using three main tools.
Using a plugin is the easiest and safest way to migrate WordPress staging to live. Our recommendation is the excellent Migrate Guru plugin. As an alternative, you can use your existing web hosting provider to achieve the same objective. Lastly, you can do it manually, via FTP. This method is riskier than the other two, and we only recommend going this route as a last resort.
Also if you are building a new site without affecting the live site, check out our guide on how to build a new WordPress site while the old site is live.
FAQs
Q – How can I push changes from my staging site to my live site?
A – You can push changes from your staging site to your live site via three main methods: using a plugin, using your web hosting provider, or doing it manually.
Q – What’s a good plugin I can use for moving a WordPress site from staging to live
A – Migrate Guru. It’s easy to use, fast, and works with any web host out there. Why look anywhere else?
Tags:
Share it:
You may also like

How to Limit Form Submissions with Droip in WordPress
Forms are an indispensable part of any website because of their versatility, letting you collect information for various purposes! However, people with ill intentions often attempt to exploit these forms…

How To Manage Multiple WordPress sites
Management tools help agencies become well-oiled machines. Each task is completed with the least amount of effort and highest rate of accuracy. For people managing multiple WordPress sites, the daily…

PHP 8.3 Support Added to Staging Feature
We’ve introduced PHP version 8.3 to our staging sites. Test out new features, code changes, and updates on the latest PHP version without affecting your live website. Update PHP confidently…
How do you update and backup your website?
Creating Backup and Updating website can be time consuming and error-prone. BlogVault will save you hours everyday while providing you complete peace of mind.

Updating Everything Manually?
But it’s too time consuming, complicated and stops you from achieving your full potential. You don’t want to put your business at risk with inefficient management.

Backup Your WordPress Site
Install the plugin on your website, let it sync and you’re done. Get automated, scheduled backups for your critical site data, and make sure your website never experiences downtime again.


