
You log in one morning and your site is down. Maybe an update broke something. Maybe a file was deleted by accident. Maybe your site was hacked overnight. Whatever caused it, the first thing on your mind is how to restore WordPress from backup and get your site working again.
That is why regular backups matter. When you have a recent copy of your site, you are not stuck trying to fix everything from scratch. You have a clear way to recover your content, settings, and files.
A reliable WordPress backup plugin makes that process much easier. With the right backup in place, you can restore your WordPress website quickly, recover lost content, and get your site back online with far less stress.
Restore WordPress from backup when your site breaks, gets hacked, or important content goes missing.
A reliable backup tool like BlogVault helps you recover faster and avoid extra downtime, stress, and lost work.
How to restore WordPress from backup
Here are the most effective ways to restore WordPress from backup and get your site back online quickly:
A) Using a plugin (Recommended)
If you use a backup plugin, restoring your site is usually the fastest and simplest option. With BlogVault, you can restore a full backup or choose specific files and database tables, depending on what you need to recover. Here’s how to go about it:
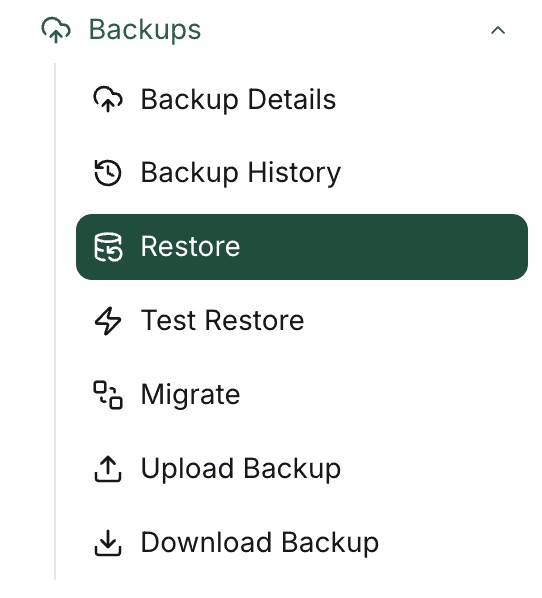
Access your backups on BlogVault: Log in to the BlogVault site, open your site’s dashboard, and go to the Backups section on the left. Click the Restore option in the Backups section to open the restore settings.
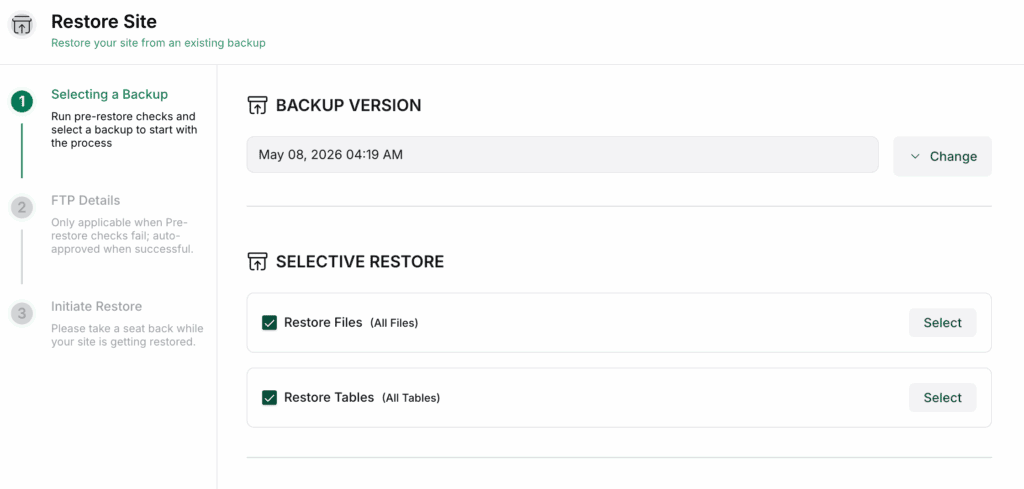
Start the restore process: Choose the backup version you want to restore. You can also select specific files and database tables if you only want to restore certain parts of your site. Once you have made your selection, click Continue.
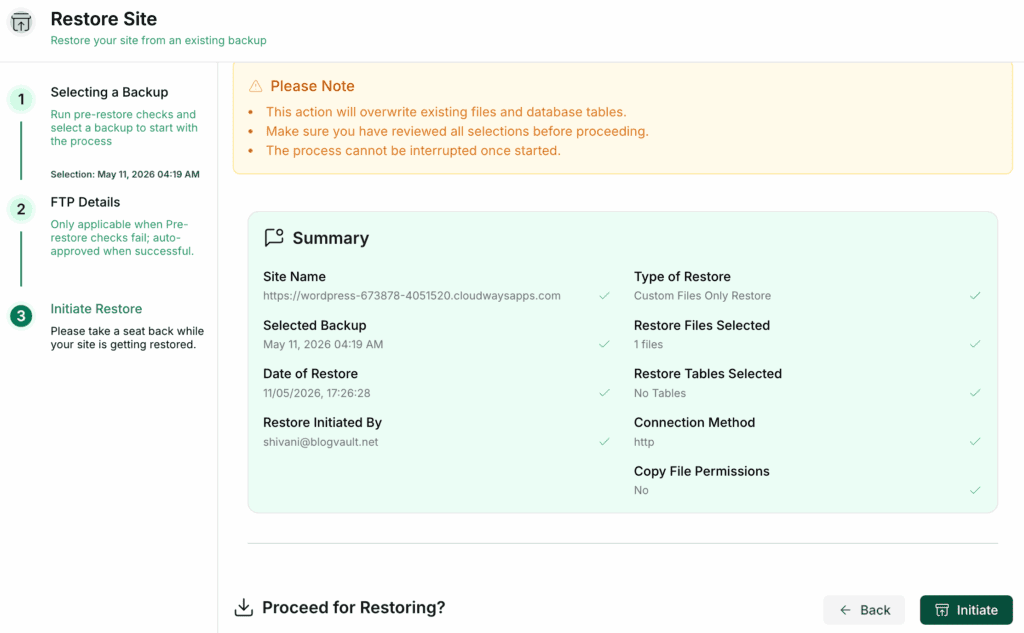
Validate and initiate the restore: BlogVault will ask you to review and validate the restore details. Once confirmed, click Initiate to begin the restore process.
Once the restore is complete, check your site to make sure everything is working as expected.
Why we recommend BlogVault backups
- Reliable restores: Restoring large WordPress sites can be tricky, especially with manual backups or basic hosting tools. A dedicated solution like BlogVault makes the process more dependable and reduces the chances of restore failures.
- Partial restores: Even if you have a full backup, you may not always want to roll back the entire site. With BlogVault, you can restore specific parts of your site, like a single page, post, or plugin, without affecting everything else.
- Test restores: Restoring an older backup can feel risky, especially if you are not sure how the site will look afterward. BlogVault lets you test a backup on a staging site first, so you can check everything before restoring it to your live site.
B) Using your web host
If you have host backups, this is often one of the easiest ways to restore WordPress from backup. Many hosting providers include a built-in restore option, which can save time when your site is down and you need to get it back quickly.
The exact steps will vary by host, but the process is usually similar. Here is how it works in Cloudways:

Go to Backup and Restore: Sign in to your Cloudways account and select the website you want to restore from the server panel. In the left-hand menu, open the Backup and Restore section. This is where Cloudways stores the available backup points for your site.

Choose a backup version: Pick the backup you want to restore. If you know when the issue started, choose a version from before that point. Then click Restore Application Now.

Confirm the restore type: If Cloudways gives you restore options, such as a full or partial restore (web files or database), choose the one that fits your situation and click Proceed.
Once the restore is finished, take a few minutes to check your site. Open your homepage, a few key pages, the admin dashboard, and any important forms or checkout pages to make sure everything is working properly.
C) Manually
If you have a manually downloaded backup, you can restore your WordPress site yourself. This approach gives you more control, but it also takes more time and comes with more risk if you are not comfortable working with site files and databases. Before you begin, make sure you have a complete backup of both your WordPress files and database.
1. With cPanel access
If your host gives you cPanel access, you can restore your backup through the Backup Wizard.

Open the restore option: Log in to cPanel and open your hosting account, go to cPanel, and find Backup Wizard under the Files section. Inside Backup Wizard, click Restore.

Upload your site files: To restore your WordPress files, select Home Directory, choose the ZIP file that contains your site files, and click Upload.

Upload your database backup: To restore your database, select MySQL Databases, choose your database backup file, and click Upload.
Once both uploads are complete, your site should be restored to the backup version you selected.
2. Without cPanel access
If you do not have cPanel, you can still restore WordPress manually by uploading your site files with FTP and importing your database with phpMyAdmin.
Restore your site files with FTP
In this example, we are using Cyberduck, but the steps are similar in other FTP clients.

Connect to your server: Open Cyberduck, click Open Connection, and enter the FTP or SFTP credentials provided by your host.

Upload your backup files: Once connected, open your WordPress root directory on the server. Upload the backup files from your computer to this location.

Replace existing files if prompted: If the client asks whether you want to overwrite existing files, confirm the replacement so the backup files can take their place.
Restoring the files brings back your WordPress installation, themes, plugins, and uploads. To restore your posts, pages, settings, and other content, you also need to import the database.
ii) Restore your database with phpMyAdmin

Open phpMyAdmin: Log in to phpMyAdmin through your host or control panel and select the correct database for your WordPress site. Go to the Import tab. Click Import from the top menu.

Choose your database file: Click Choose File and upload the database backup from your computer. In most cases, this file will be in SQL format.


Shivani enjoys crafting guides that make every aspect of using WordPress simple and easy to follow. When she's not glued to her laptop, you can find her buried in a good book or occasionally, painting.