How to Easily Backup WordPress Manually (Step-by-Step Guide)
Bulletproof Backups for Your WordPress Website
Fortify your business continuity with foolproof WordPress backups. No data loss, no downtime — just secure, seamless operation.
Every website owner’s biggest fear is having a site hacked or crash. You’ve put in all the work and you don’t want to lose it. That’s where backups come in. You’re essentially clicking Command+S on your site. If something goes wrong, you just need to restore the last saved version. If you’re looking to get your hands dirty or find a way to backup your site without plugin, this article will show you exactly how to backup WordPress site manually.
TLDR: WordPress manual backup is a risky process that requires backing up your files and database separately. We highly (highly) recommend backing up your WordPress site with BlogVault – a backup plugin that promises ease and 100% results.
How to backup WordPress site manually?
WordPress comprises two parts: files and database. Files contain code that runs your site. The database contains mostly content like posts and comments. To manually backup WordPress site completely, without a plugin, you need to backup both your files and database individually. They’re accessed, backed up and restored differently. This article will guide you through the different methods and steps to accomplish them.
How to manually backup WordPress site files?
There are a few things to note before you get started to backup WordPress manually:
- There will be fluctuations in your site because a manual backup takes up a lot of server resources. This will affect speed and performance.
- We recommend connecting to offsite storage like Google Drive or Dropbox. Let’s say you store your backup on your server, if your server is affected, your backups will be of no use. While offsite backups can be expensive, it’s the safest way to go.
Now that that’s out of the way, let’s start with your site’s files. There are many ways to backup your WordPress site manually:
We’ve listed all three methods below in detail, starting from the easiest.
A. Manually backup WordPress files with cPanel
Manually backing up your WordPress site files with cPanel might be the easiest way because all you need to do is connect to your host dashboard and download the files. However, not all web hosts have cPanel, so you may have to use an alternative method in those cases. For our tutorial, we use a site hosted on Bluehost.
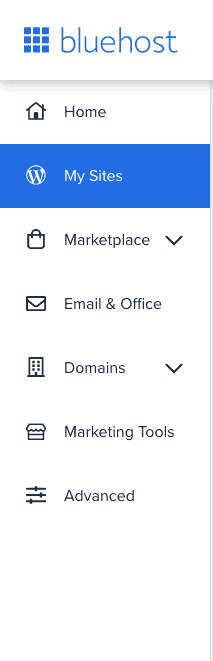
- Access your cPanel: You can access the cPanel on your host’s dashboard. On Bluehost, once you’ve signed in, go to Advanced Settings.
- Some web hosts like Cloudways don’t have a cPanel and you’ll need to look up how to access your files. Some web hosts offer a browser-based SSH shell. Dreamhost, for example, has a browser-based file manager. Most hosts will give you the ability to see your site’s files on the server. You could even try Adminer, a database management tool that’s written in php, to access your files. But in case you’re unable to, you can also use an FTP client.
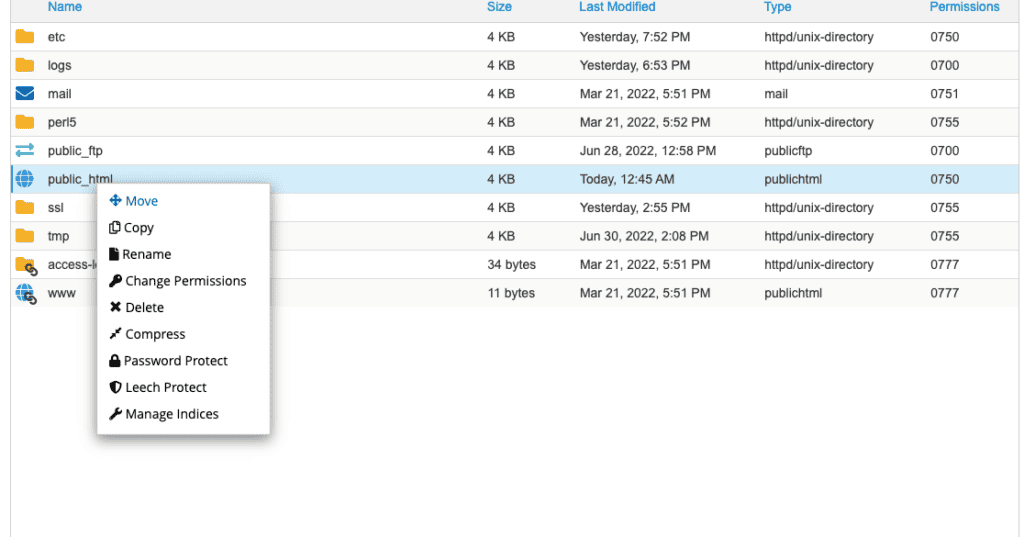
- Compress files: Open File Manager and right click on public_html. Click Compress and select Zip Archive.
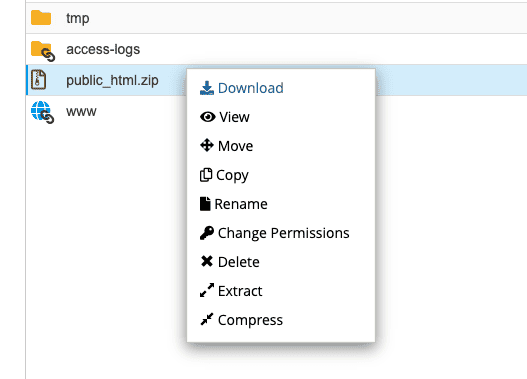
- Download Files: Once the files have been compressed, download the zip file. This might take a few minutes depending on the size of the website.
B. Backup WordPress files manually with FTP
If you’ve got no option but to use FTP to backup WordPress manually, this section will walk you through it. For this process, you’ll need to connect to your server using an FTP client and download the files:
- Find application credentials: You’re looking for a server IP or hostname, username, and password. Occasionally, you may also need the port number. Generally, you will find them on your host’s dashboard for your site. In our example, our site is on Cloudways. You can find the details in the Access Details section under Application Credentials. If you haven’t created those credentials, you can create a username and password. Copy the IP, username, and password after that.
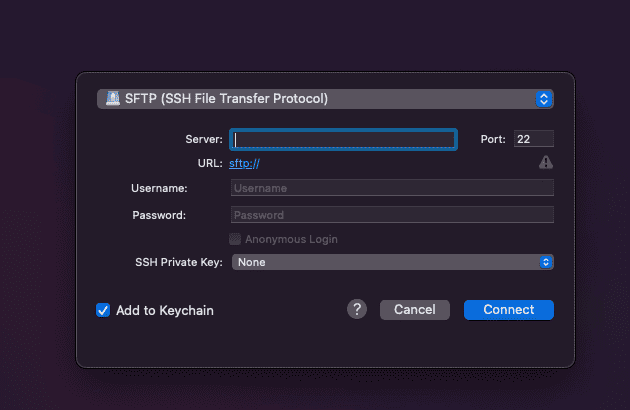
- Install a FTP client: There are many to choose from like FileZilla and Cyberduck. In this case we’ll be using Cyberduck.
- Connect to server: Click Open Connection. Select the correct protocol from the dropdown menu. In our case, this was SFTP. Then, paste the credentials you have copied. Click Connect.
- Backup files: You can see your files in the root directory, which in our case is the public_html folder. Download the files you want to backup. The larger the site, the longer the backup will take.
Recommended read: backup WordPress theme using FTP
C. Backup WordPress website files manually with SSH
This was a really long process and we highly recommend against using it. But, if you’d like to try it out, you’ll need access to your terminal, username, password and server IP.
- Install WP-CLI: When we tested the SSH method of backing up a site, we realised that we don’t have php and needed to install command-line tools for our machine, to install a package manager called Homebrew, to then install php, to finally be able to install WP-CLI.
- Create a folder: For the sake of ease and organisation, we recommend creating a folder on your device that you can store both exports in. It keeps your entire backup in one place and makes restoring easier. We’d recommend copying the path to this folder. On a Macbook Air, select the folder, click View and Show Path Bar. This should reveal the path at the bottom. Open the folder, right click on the path and select the option to copy the folder as a path. We recommend pasting this in an accessible place for future use
- Download the files to local folder: Open your terminal, and execute the following command:
scp -r username@serveraddress:rootfolder localfolderMake sure to enter the entire path in the case of both root and local folder. After this step, you will be prompted to type in your password. This will download your entire root folder to your local folder.
<image from migrate article>
How to backup WordPress database manually?
Now that you’ve backed up your files, let’s get started with the database backup manually. There are two ways to go about doing this: either
A. Manually backing up your site database with phpMyAdmin
If you’re using the phpMyAdmin method, you can access it using cPanel. If your web host doesn’t provide cPanel, they may use another database management tool like Adminer. Either way, the steps are mostly similar. You need to export the entire database into an SQL file. In our tutorial, we’re demonstrating how to do it using phpMyAdmin via cPanel.
- Access your phpMyAdmin: This can also be accessed by your site’s web host, in the database section. Much like cPanel, not every web host has a phpMyAdmin. Cloudways, for example, has its own database manager that you can access on your Access Details section.
- Locate the right database: Click the Database tab. Select the database you need to export.
Note: To find out which database to export, look for the database name in the wp_config.php file.
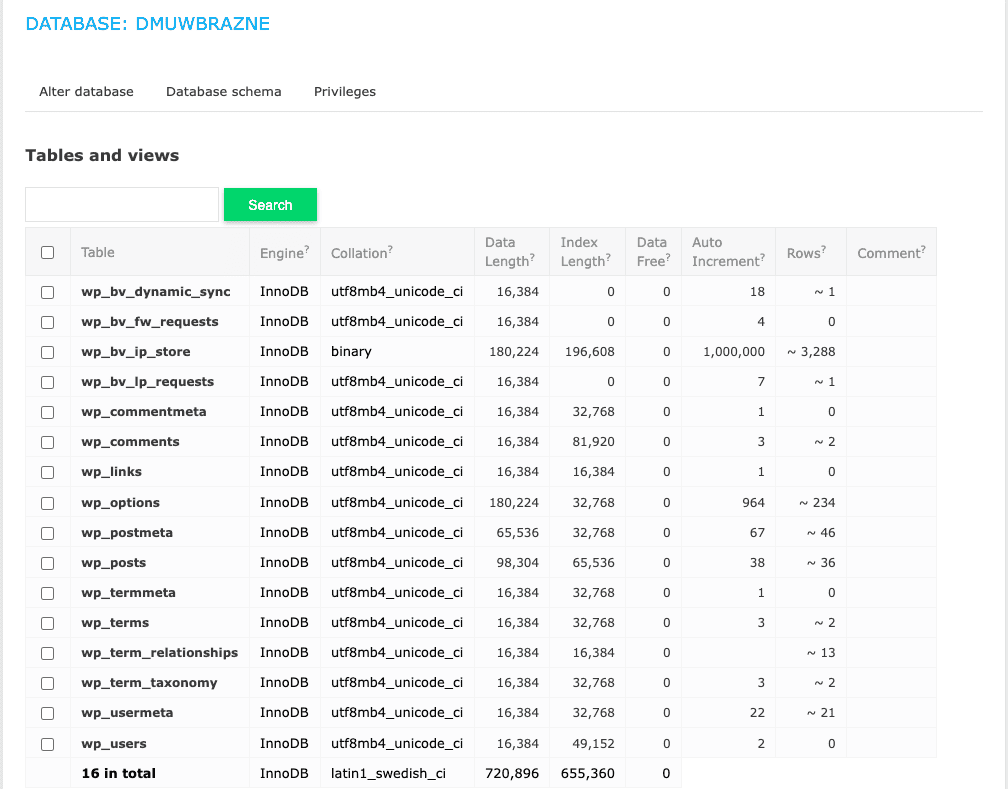
- Export the files: Select all the files and click Export.

B. Manually backup your site database with SSH
As with using SSH to backup your site files, you can use SSH to export the database to an SQL folder as well. You will need to have WP-CLI installed to do this.
- Navigate to the wp-config.php file: This is most likely in your site’s root directory. Execute the following command and replace filename with an appropriate name for your database export:
wp db export filename.sql- Download the file to your local machine: Exit the server and download the database file using the following command:This will save your file to your local machine.
scp username@serveraddress:rootfolder/filename.sql localfolderCongratulations. You’ve now successfully backed up your WordPress site. Make sure to save the file and database backups together. If you need to restore the WordPress backup, you will need both from the same time of backup, otherwise, you are risking a critical error on your site
How to manually restore your site from a backup?
You’ve backed up your site and now need to restore it. We have an article that discusses the ways to restore your site but let’s talk about the methods a little bit.
Restoring your site files manually
- With cPanel: There is a limit on the size of the file that you can upload and in those cases, we recommend going with the FTP. But, if it’s less than 500MB, we have a guide on using cPanel to restore your files that you will find helpful.
With FTP: This process requires connecting to your server, deleting the existing files and replacing the files. We have a step by step guide to restore your WordPress files with FTP that will walk you through the steps. - With SSH: Make sure to zip the folder containing the files before you start. This will make the restore faster. Then execute the following command:
scp -r zipfile.zip username@serveraddress:rootfolderRestoring your site database manually
- With phpMyAdmin: You have to delete or drop all the files and replace them with the backup. Here’s an easy guide to restoring your database with phpMyAdmin.
- With SSH: This process requires uploading your database to your server and then installing it. To upload the database, execute the following command.
scp filename.sql username@serveraddress:rootfolderNext, log into your server, navigate to the root directory and execute the following command:
mysql -u username -p databasename < filename.sql
Why don’t we recommend manual backups?
If you’ve gotten through the process of manually backing up and restoring your site, we commend you. But, you’ve probably also realized this isn’t feasible to do on a regular basis. Let’s dive into the reasons why:
- Slows down your website: Manual backups use server resources to copy files and database contents. If you have a large site with lots of content or a high-traffic site with lots of visitors, this can perceptibly slow your site down.
- Time-consuming: The whole process is banking on great internet, your device’s ability to handle it, and the connection to your host’s server. This can prove to be quite unreliable and cumbersome. Plus, if you are using FTP, it takes exponentially longer to transfer files back and forth.
A corollary: we can agree that scheduling backups is necessary, especially if your site sees regular changes. However, we guarantee that whatever initial reformatory zeal exists in the beginning of manual backups will slowly dissipate as the enormity of the task sets in. With the best intentions, we have seen plenty of people give up on backups because it takes up so much of their time, which could really be put to better use elsewhere. - Server disconnections: If you lose connection to your server, you may not have full download of your site. This means that your site has backed up incorrectly. While this is annoying, the real issue is if you try to restore your site manually. Server disconnections during a file transfer can result in incomplete or corrupt files, which will invariably lead to a crashed site. Spot-fixing also doesn’t work, and you will have to start again from scratch. (See point about time-consuming process above.)
- Partial backups are useless, full site backups take up a lot of space: If you’ve only partially backed up your site, when the time comes and you need to restore your site, most of the time, it won’t restore. That is why every BlogVault backup is a full backup. However, if you try storing multiple full copies of your site, you will rapidly run out of storage space. It is quite the dilemma.
- Downtime: Small mistakes in your backup process could crash your site. At that point, restoring may also prove to be exponentially more difficult, if you don’t have a full backup already.
Recommended Read: How to backup WordPress site without any issues.
The best alternative to WordPress manual backup
Over the course of this article, you’ve learnt that backups are necessary but manual backups are risky. The solution is BlogVault – the best WordPress backup plugin. There might be a tiny bit of bias, but we’ve got the goods to back up our claim. Here are a few reasons why we think you’d love BlogVault:
- Automated backup: You can schedule a time for your site to be regularly backed up. This leaves you without the hassle of doing it yourself.
- Real-time backups: Backups every 5 minutes mean your site is also backed up to the latest change. This is especially critical for WooCommerce sites, where order and product details change every minute.
- No need for storage: You don’t have to store it on your local device. BlogVault takes care of it by storing your backups on Amazon S3 servers.
- 24/7 support: No matter what problems you run into, we’ve got a team that can help you solve them…any time, any day.
- Incremental sync: During the daily site sync, BlogVault saves every change made to your site since the last sync. This means that the performance of your site is never affected. Your site isn’t slowed down because of a backup, but it is completely safe.
- Test your restore with a staging site: With BlogVault, you can easily create a staging site where you can test your restore and merge it back with your site when you’re ready. It’s incredibly easy and efficient, and is the recommended way to make any major change to your site.
- 100% restores: Always backs up your entire site and restores without a flaw. Every single time.
If you’d like to try it out, we have a tutorial on how to install and backup your site with BlogVault given below.
Final Thoughts:
Manually backing up your site is time intensive and incredibly risky because it requires backing up your files and database separately. We strongly advise you against it and to instead use a WordPress backup plugin. We suggest BlogVault because backups can be automated, regularly scheduled and taken without any loss in data or downtime.
FAQs
- How often should you back up your WordPress site?
This can vary depending on how often you’re updating or making changes to your site. If you make weekly changes, a weekly backup is okay. For high traffic ecommerce sites, we recommend real-time backups, which save changes to your site every 5 minutes. This way, the loss in data is minimal, if anything goes wrong.
- What are the most user-friendly backup plugins?
BlogVault, UpdraftPlus, and All in One WP are some of the most popular plugins for WordPress backups. We have an article that lists the best backup plugins and why we love them.
- How long does it take to backup and restore your WordPress site?
This can vary depending on the size of the site and the method of backup. If you use a plugin like BlogVault, it’s backed up incrementally and in real time. But downloading your entire site to your device can be much slower and requires a lot of human intervention.
Tags:
Share it:
You may also like

How to Limit Form Submissions with Droip in WordPress
Forms are an indispensable part of any website because of their versatility, letting you collect information for various purposes! However, people with ill intentions often attempt to exploit these forms…

How To Manage Multiple WordPress sites
Management tools help agencies become well-oiled machines. Each task is completed with the least amount of effort and highest rate of accuracy. For people managing multiple WordPress sites, the daily…

PHP 8.3 Support Added to Staging Feature
We’ve introduced PHP version 8.3 to our staging sites. Test out new features, code changes, and updates on the latest PHP version without affecting your live website. Update PHP confidently…
How do you update and backup your website?
Creating Backup and Updating website can be time consuming and error-prone. BlogVault will save you hours everyday while providing you complete peace of mind.

Updating Everything Manually?
But it’s too time consuming, complicated and stops you from achieving your full potential. You don’t want to put your business at risk with inefficient management.

Backup Your WordPress Site
Install the plugin on your website, let it sync and you’re done. Get automated, scheduled backups for your critical site data, and make sure your website never experiences downtime again.


