Your WordPress Multisite localhost setup keeps hitting unexpected technical hurdles. You face multiple WordPress errors, network configuration fails, or you’re hit with the white screen of death.
Nothing works like the tutorials promised.
This guide delivers two direct, error-free methods to install a fully operational local Multisite network, enabling safe development and efficient management of multiple sites.
Set up WordPress Multisite locally using Local by Flywheel for automation or manually with XAMPP/MAMP for flexibility. Gain a safe environment to develop and test multiple sites efficiently.
Install WordPress multisite on localhost
Let’s get your WordPress Multisite network running locally. I’ll show you both approaches so you can pick the one that matches your current setup.
A) WordPress multisite localhost setup using Local by Flywheel
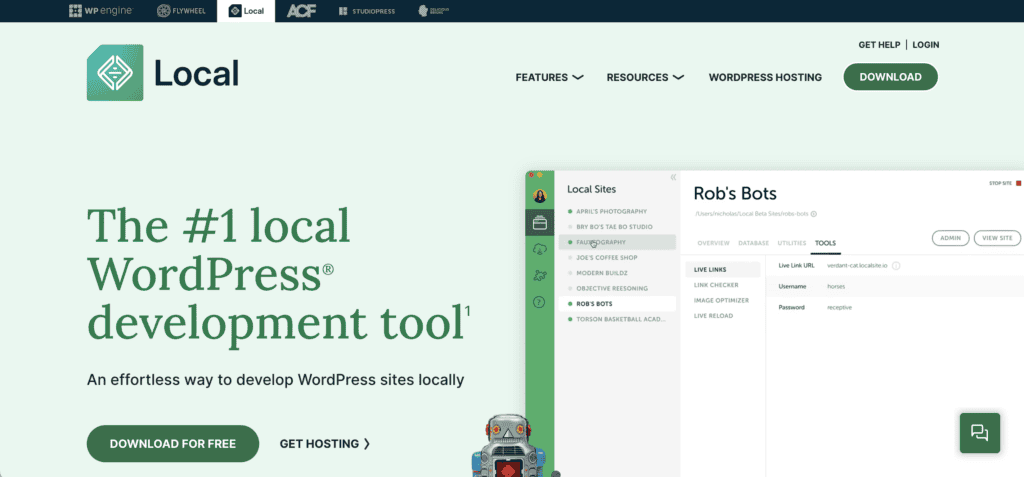
Local by Flywheel makes this almost too easy. The app handles most of the technical complexity, but you still need to follow the right sequence.
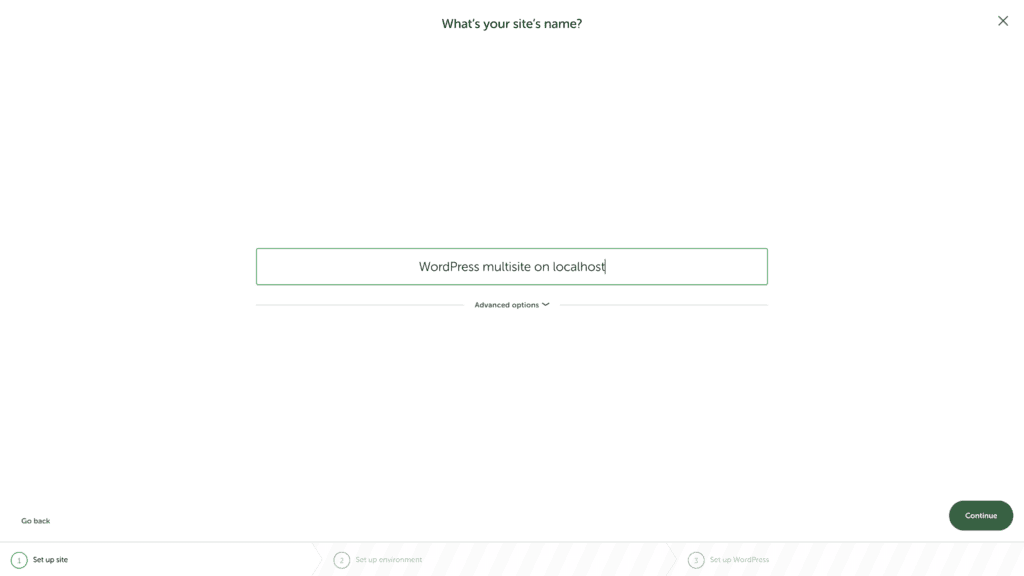
Click the plus (+) symbol in the app’s bottom left corner. Select Create a new site and enter a name for your site, and click Continue. This name becomes your local domain, so choose something memorable.
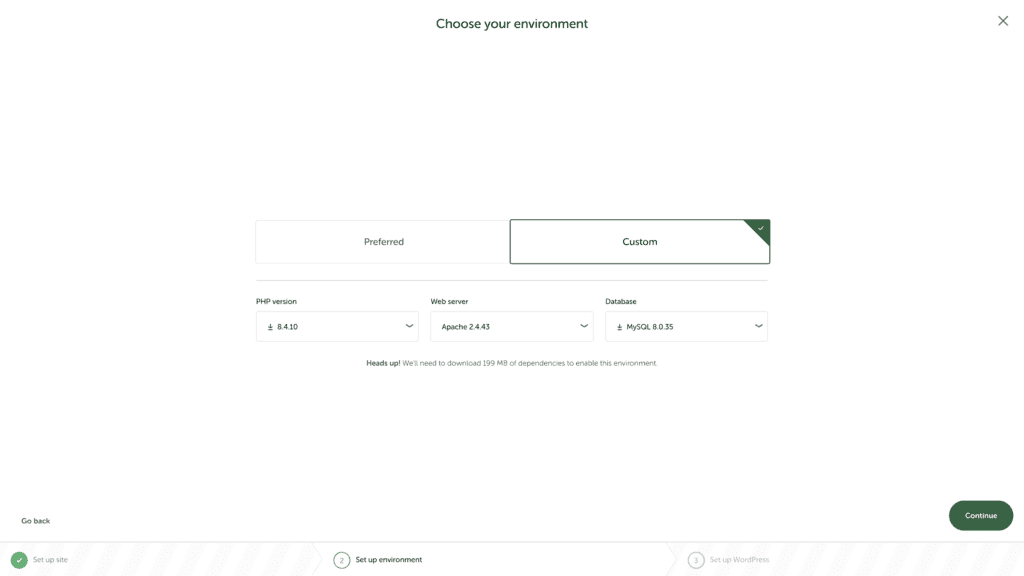
Select your preferred environment type and click Continue. The Preferred option works fine for most developers. You can change this if needed.
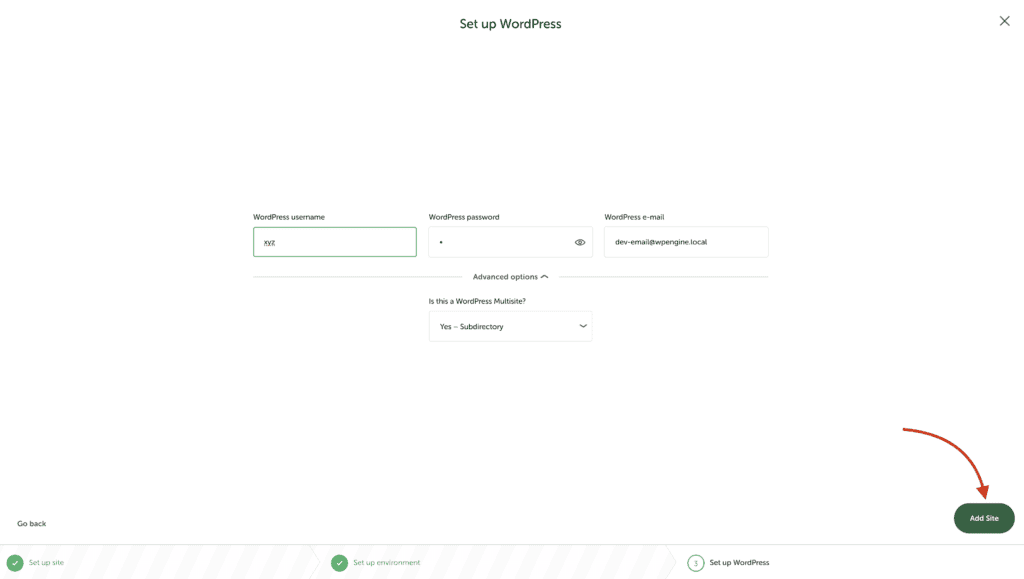
Fill in your admin username, password, and email address. Here’s the key step most people miss: expand Advanced Options and find the Is this WordPress Multisite? Dropdown.

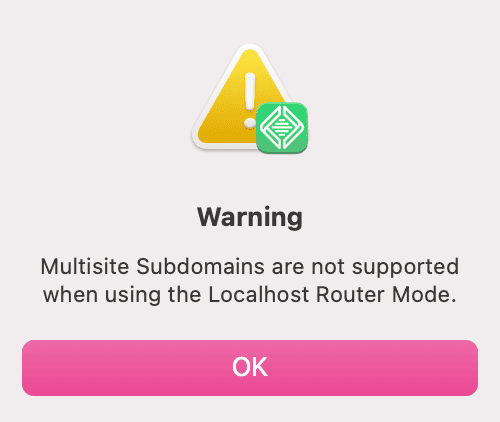
Select Subdirectory installation. This is your only option because Local’s localhost router mode doesn’t support Multisite subdomains. Don’t worry, subdirectories work perfectly for development.
Click Add Site to complete the creation process. Local will build your Multisite network automatically. When it finishes, you’ll have a fully functional WordPress Multisite installation ready to go.
That’s it. Local handles all the wp-config.php modifications, .htaccess rules, and database configurations automatically. You can start creating new sites immediately through the WordPress admin.
B) Manual WordPress multisite localhost setup
If you’re running XAMPP, MAMP, or prefer hands-on control, this method gives you complete flexibility. The process is the same as a normal multisite setup, just with local server considerations.
Prerequisites: What you need before you start
- You need a computer (Windows, macOS, or Linux),
- A local server environment like XAMPP, MAMP, or WAMP,
- A basic text editor like Notepad++ or VS Code to edit configuration files.
Install XAMPP, MAMP, or another local server environment. Create a new standard WordPress site through your local server tool. Make sure WordPress runs normally before proceeding.
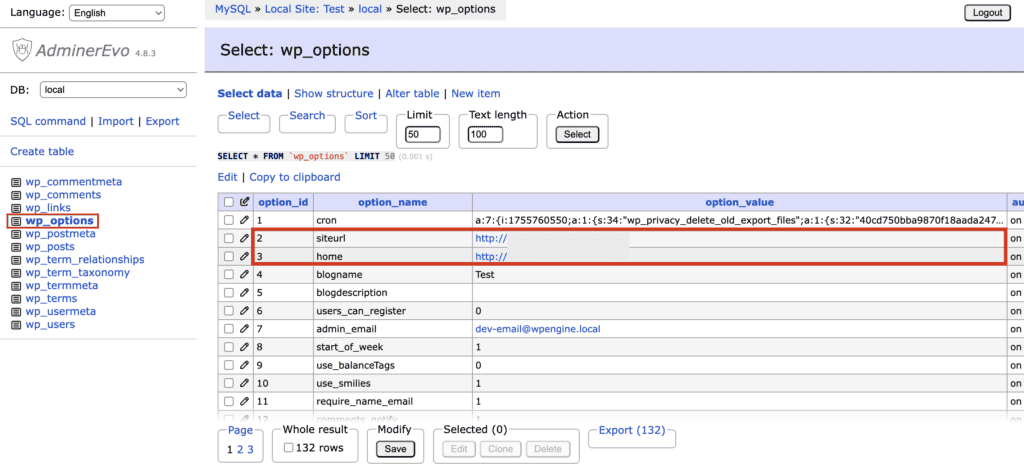
Access your database using phpMyAdmin or Adminer. Find the wp_options table (your table prefix may vary). Update both siteurl and home values to your local address, like http://yoursite.local.
Open the wp-config.php file in a text editor. Add this line before the “That’s all, stop editing!” comment:
define('WP_ALLOW_MULTISITE', true);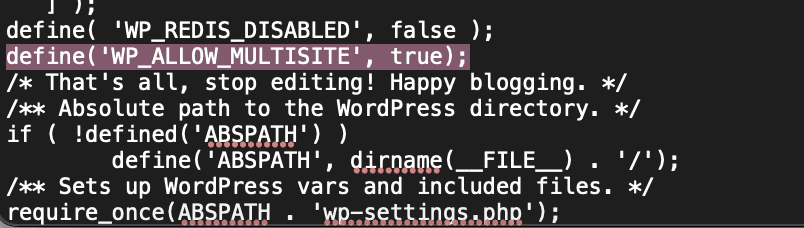
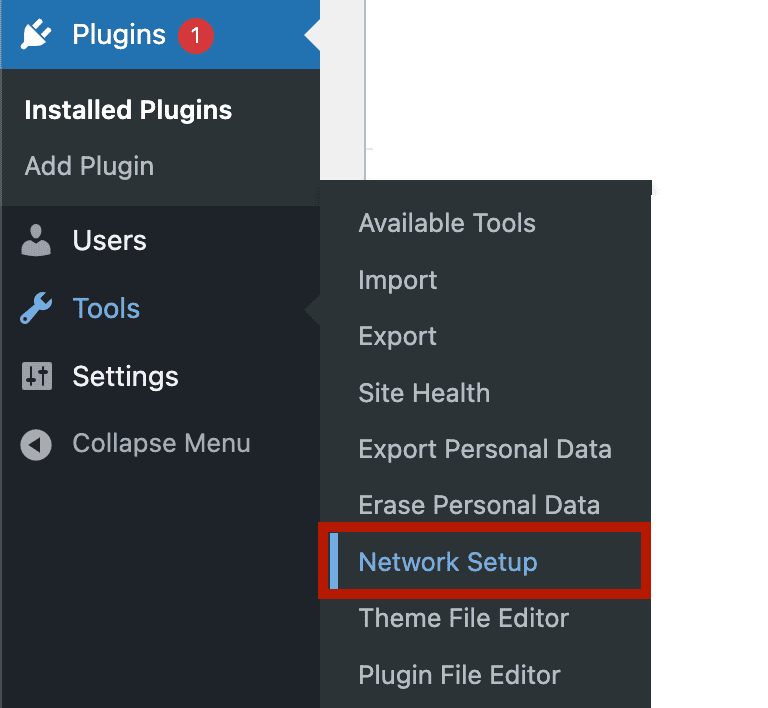
Save changes and refresh your WordPress admin dashboard. Go to Tools > Network Setup in your admin menu. You’ll see options to configure your network structure.
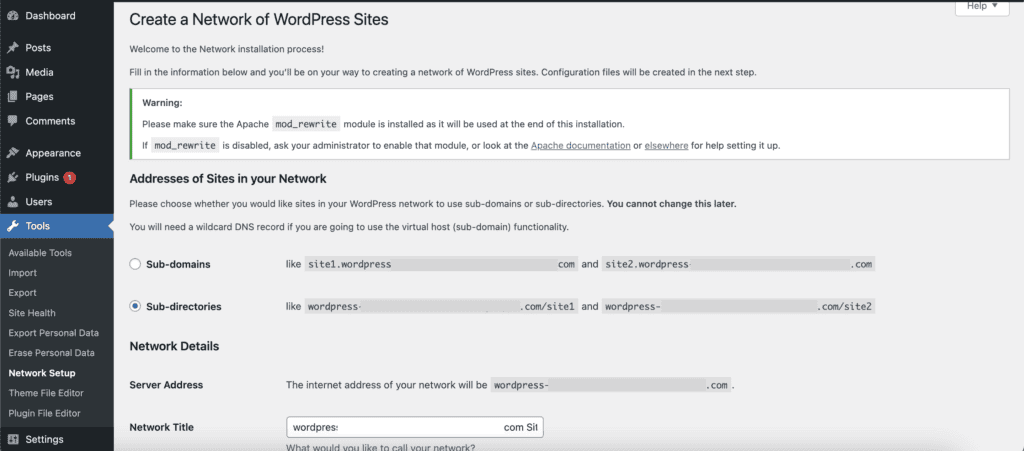
Choose your preferred site structure: subdomains or subdirectories. For local development, subdirectories are simpler.
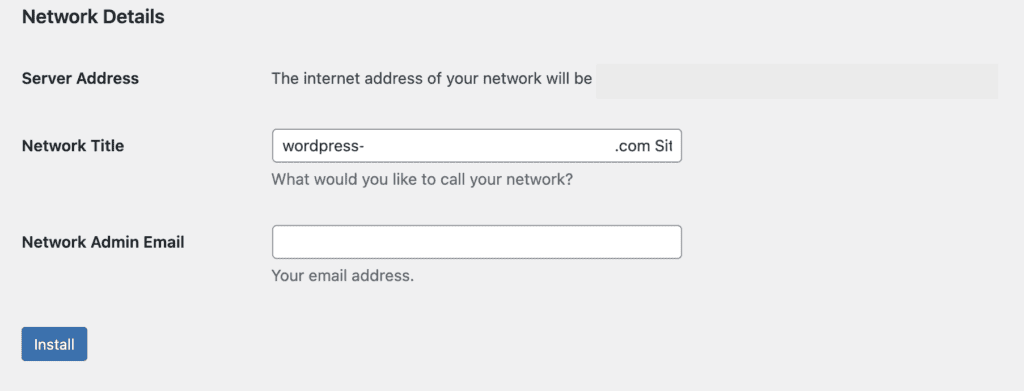
Click Install to generate configuration code. WordPress will display two blocks of code you need to copy.
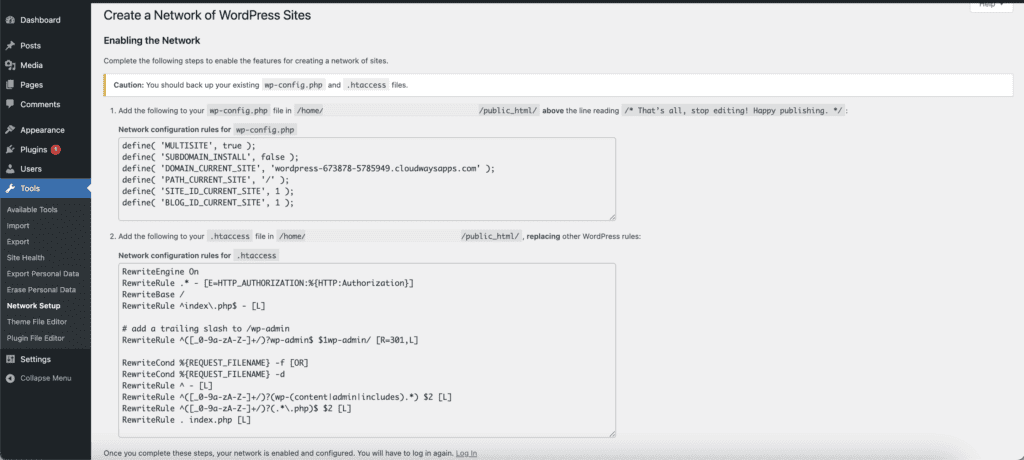
Copy the provided code into your wp-config.php and .htaccess files. Be precise here. The wp-config.php code goes before the “That’s all, stop editing!” comment. The .htaccess code replaces your current rewrite rules.
Log out and back into your WordPress dashboard. Verify installation by checking for the My Sites menu in the admin toolbar. If you see it, your Multisite network is ready.

Benefits of using multisite on localhost

You can break things safely. Test plugins, try different configurations, and experiment with code without worrying about crashing a live website. If something goes wrong, just restart your local server.
Learning becomes easier. WordPress Multisite has complicated settings for user management and site administration. Your localhost setup lets you click through everything and learn without pressure.
Development happens faster. Pages load instantly on your computer. No waiting for slow servers or dealing with internet connection problems. You can work anywhere, even without WiFi.
Testing gets thorough. Check how themes look across multiple sites quickly. Test if plugins work together properly. Find problems before clients do.
Troubleshooting common multisite issues on localhost
Even with the right setup, you’ll probably hit some bumps. Here are the most common problems and their quick fixes.
Permission denied when uploading media means your wp-content/uploads folder has the wrong permissions. Set it to 755 or 644, depending on your system. On Windows, right-click the folder and give everyone full control.
Network setup option missing from Tools menu? Check if define(‘WP_ALLOW_MULTISITE’, true); is actually in your wp-config.php file. It needs to go above the database settings, not below them.
Styles or scripts not loading on sub-sites happens when themes use absolute paths instead of relative ones. Check your theme’s functions.php file and make sure it uses get_stylesheet_directory_uri() instead of hardcoded paths.
Can’t log in after network installation? Clear your browser cookies or try a different browser. Sometimes the authentication cookies get confused during the setup process.
404 errors on subdirectory sites usually mean permalinks are broken. Go to Settings > Permalinks in your main site and just click “Save Changes.” This refreshes the rewrite rules.
Most of these problems happen because localhost environments don’t behave exactly like live servers. The good news? Once you fix them once, they stay fixed for future projects.
Parting thoughts
Your localhost WordPress Multisite setup is now your secret weapon for risk-free development and testing. The skills you’ve built here translate directly to managing live Multisite networks with confidence instead of anxiety.
When problems arise (and they will), you’ll know exactly how to fix them because you’ve seen every error message and troubleshooting scenario in your safe local environment.
FAQs
What is the purpose of WordPress multisite?
WordPress Multisite allows you to manage multiple websites from a single WordPress installation. This is ideal for businesses or developers who need to handle numerous sites efficiently. It streamlines updates and management tasks across all sites.
Who uses WordPress multisite?
WordPress Multisite is used by educational institutions, businesses with multiple branches, and bloggers managing several sites. It’s beneficial for anyone needing centralized control over multiple websites with varied content.
How many sites can WordPress multisite handle?
There is no strict limit to the number of sites a WordPress Multisite can handle, but performance can vary. The capability depends on server resources and configuration, allowing potentially thousands of sites.
Which software is needed to run WordPress?
To run WordPress, you need a web server (like Apache or Nginx), PHP, and a database system like MySQL or MariaDB. On localhost, you’ll often use software packages like XAMPP or MAMP that include all these components.
How do I access WordPress admin on localhost?
To access the WordPress admin on localhost, navigate to http://localhost/your-site-directory/wp-admin. This URL will take you to the login page, where you can enter your credentials to access the dashboard.

Shivani enjoys crafting guides that make every aspect of using WordPress simple and easy to follow. When she's not glued to her laptop, you can find her buried in a good book or occasionally, painting.