How to Migrate WordPress Site to New Host or Server (Step-by-Step Guide)
Bulletproof Backups for Your WordPress Website
Fortify your business continuity with foolproof WordPress backups. No data loss, no downtime — just secure, seamless operation.
There are many reasons to migrate a WordPress site to a new host or server. Admins experience web host issues like slow load times, poor service, or escalating costs. Alternatively, your site is growing, and you want to upgrade to a faster or better web host.
Whatever the reason, moving a WordPress site to a new host is not a decision taken lightly. That’s because, to transfer a WordPress site to a new host, a new domain, or even from localhost to a live site is always a fraught exercise. You want to keep your data intact during the WordPress migration and ensure that your site has no downtime whatsoever. It is especially important for WooCommerce sites that need to retain order, user, and product data during migration.
In this article, we will show you how to migrate a WordPress site to another host or server quickly, safely, and with zero downtime, for free.
TL;DR Migrate your site with zero downtime using Migrate Guru, a free WordPress migration plugin that works flawlessly each time. Migrate Guru powers the migration feature of all major web hosts, and works seamlessly with over 5000 others.
What is WordPress migration?
WordPress migration is the process of moving a WordPress site from one place to another. This move can mean a variety of changes:
- Moving to a different web host
- Migrating a site from a development environment to a live one
- From localhost to a live server
- Launching a new site design, when you’ve been building a new site while the old one is still live
- Changing the domain name
- Rebranding your website
- Moving from a subdomain to a TLD or vice versa
- Making URL changes for SEO reasons, like merging separate country-specific domains into one site
- Moving a subsite out of a multisite network, or vice versa
- Moving from managed hosting to shared or self-hosting
- Creating a staging site to test changes before making changes to the live site
As you can see, there isn’t a single definition for WordPress migration, and these are some of the cases where WordPress sites need to be migrated. They are not mutually exclusive either. You can move your WordPress site to a new host and want to change over to a new domain as well.
Successful WordPress migration is to have a fully functional site at the end of the process. That means, the site should load, all the links should work, and all the media should display correctly, with zero downtime.
The best way to migrate a WordPress site is to be thoroughly prepared. In the next few sections, we have broken down the migration process into actionable steps. We recommend reading through everything once, and then planning your site migration out accordingly.
Pre-migration checklist
The first step when exporting a WordPress site to a new host or server is to pre-prepare. There are a bunch of things you will need to migrate a WordPress site properly, and you want to have those readily available when you need them.
- Make a note of the FTP or SFTP credentials of the existing and destination servers
The credentials should include the server IP address, username, password, and a port number. The port number is not always needed, but it is handy to have in case there are server configuration settings that require it. These credentials are usually available on the web host dashboard. If you need more help, check out our article on how to find your FTP credentials.
- Install WordPress on your destination host
Most web hosts will have the option to do this automatically. If you are moving to a dedicated server, you may have to install it yourself, which you can do via WP-CLI.
- Figure out which folder contains your website
Also known as the root directory, it is generally the public_html or public directory at the very top of your WordPress site structure.
This step is especially important if you are using a web host or migrating your WordPress site manually.
- Disable any caching, firewall, or redirect plugins
These types of plugins can cause migrations to fail, so it is better to disable them before the migration process. You can always reenable them later, once the WordPress migration is complete.
- Check PHP versions of both WordPress installations
Both source and destination WordPress installations should have the same PHP version. If they don’t match, you may see a HTTP 500 error.
- Lock out all users from your site
This step is to ensure that no changes are made to your site during migration. If you are migrating a live site which has many users, you can use a maintenance mode plugin, like WP Maintenance Mode, to set this up easily.
- Log into your domain registrar and have the DNS panel handy
You will need this info to change IP address or nameservers to point to the new server. Note: if your domain is registered with your soon-to-be-old host, look for the settings in your hosting dashboard. You may need to opt for a different package with the host, or consider porting your domain to another registrar altogether.
For a comprehensive list of things to do before and after a migration, check out our essential migration checklist.
We cannot sufficiently stress the importance of taking a full site backup. If you are using our recommended migration plugin, Migrate Guru, then it will backup your site automatically. However, in case you are migrating your WordPress site manually, please do take a backup.
Migrate a WordPress site for free with a plugin
Migrate Guru is a WordPress plugin built for the express purpose of migrating a site safely from one host to another. It supports over 10,000 web hosts out of the box, and actually powers the migration features of many of the top ones.
Built by the BlogVault team, Migrate Guru migrates sites securely and is completely free to use. Migrate Guru will migrate your WordPress site seamlessly, regardless of whether it is a WooCommerce store, a multimedia-heavy blog, or a multisite network with many subsites. It will work every single time without fail.
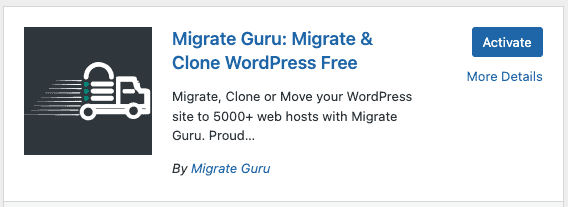
1. First, install and activate Migrate Guru from the plugins section of your website.
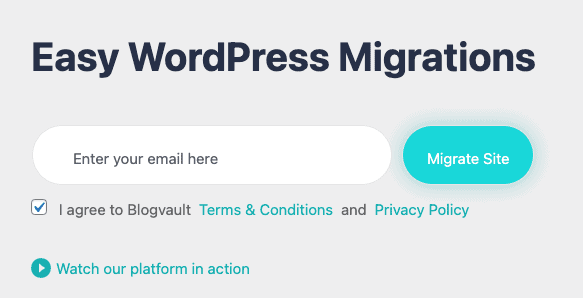
2. Next, enter your email address to create an account, and click on Migrate Site.
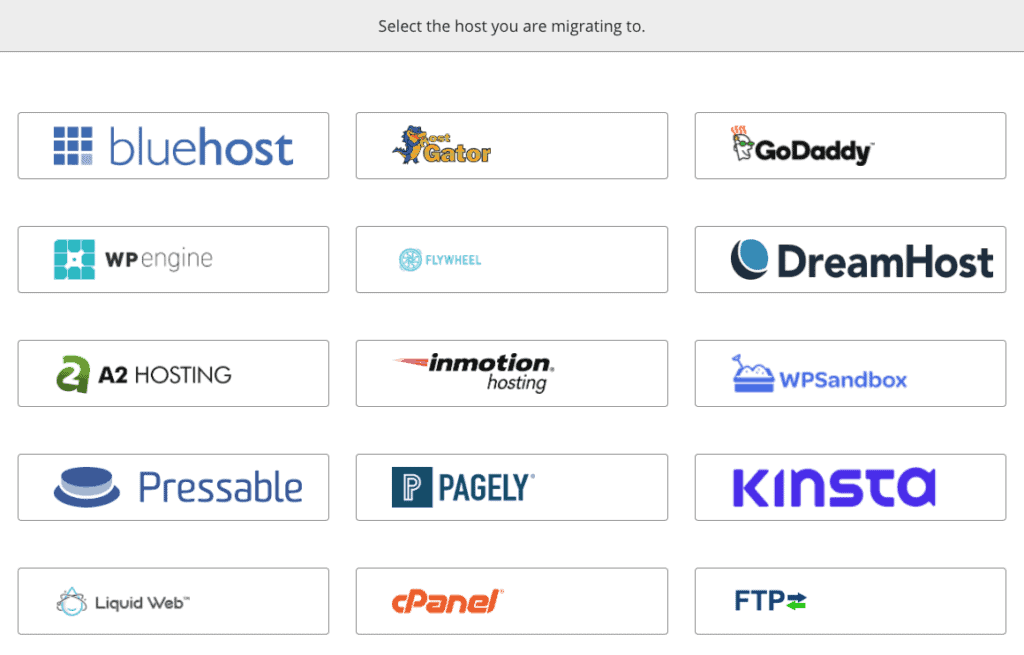
3. From the dashboard, select your destination host. If you can’t find an icon for your web host, choose either cPanel or FTP to continue.
4. Enter all the relevant details, and click Migrate to commence. Make sure to check the additional customisation options in case those are applicable to your site.
And that’s it!
Once the migration is complete, you’ll get an email saying it is. Once your site has migrated, skip over to the post-migration checklist below to tie up all loose ends.
Why we recommend Migrate Guru
There are a fair few WordPress migration plugins out there, so why do we recommend Migrate Guru? Of course, we built the plugin, so we know it works really well. However, there are a host of other reasons as well:
- Easy to use, even for beginners and people with no development experience
- Powered by BlogVault, so Migrate Guru backs up your site during migration, so it is 100% safe
- No downtime before, during, or after migration
- Host-agnostic, and actually powers the migration capabilities of all major WordPress web hosts like WP Engine, DreamHost, Bluehost, SiteGround, among others
- Works with large sites just as easily as small sites, and no timeouts during transfers
- Complete websites, so there are no broken links, unavailable media, or missing content
- Handles even non-WordPress content
- Supports WooCommerce and multisite migration out of the box
- It is 100% free
There are many ways to migrate a WordPress site, which we are covering in extensive detail below. However we can assure you that the only method that is guaranteed to work every time is to use a dedicated WordPress migration plugin. There are many WordPress migration plugins you can choose from. However, after extensive testing, we have discovered many of them are hit-and-miss except for Migrate Guru.
Apart from dedicated migration plugins, you can also try out backup plugins. Most WordPress backup plugins of any value will have a migration option. BlogVault does too, and we highly recommend trying out its great backups, staging, and updates features as well.
Transfer a WordPress site with a web host
Major WordPress web hosts will have free WordPress migration services. If you cannot find the service on your dashboard, write into their support for more information. In fact, BlogVault has built migration plugins for most web hosts.
In this section, we will take you through the process to transfer the WordPress site to a new host or server. If you would prefer to skip this section, you can just install Migrate Guru, as it works with all of the hosts below.
WP Engine
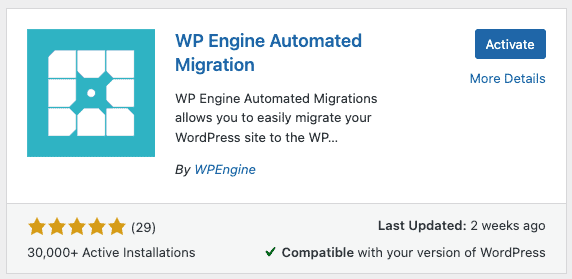
1. To migrate your WordPress site to WP Engine, you will need to install the WP Engine Automated Migration plugin and activate it.
2. Next, enter your email address.

3. The plugin will check your site for migration readiness. Click on Migrate to proceed.
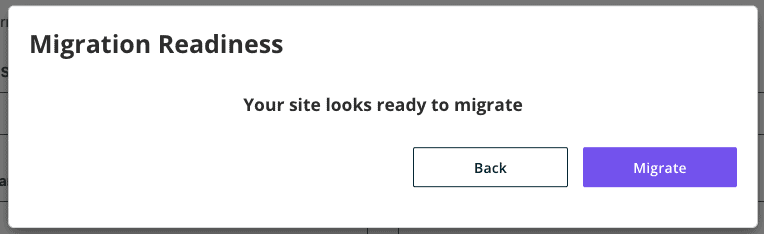
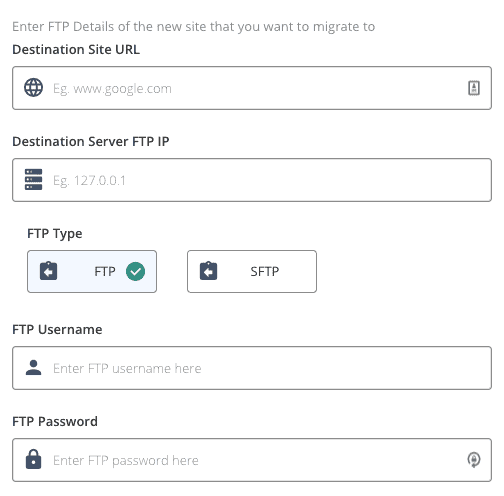
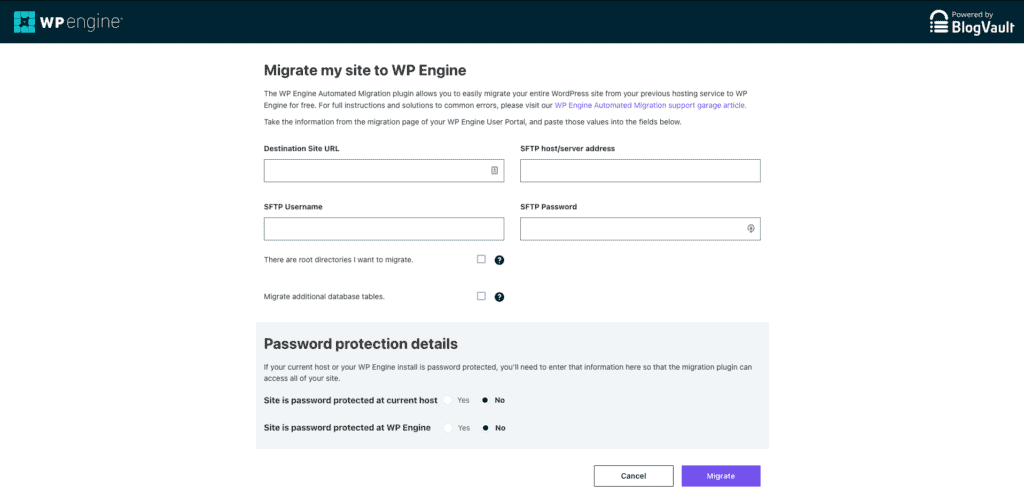
4. Enter FTP or SFTP details, and select the options that are relevant to your site, and click on Migrate to proceed.
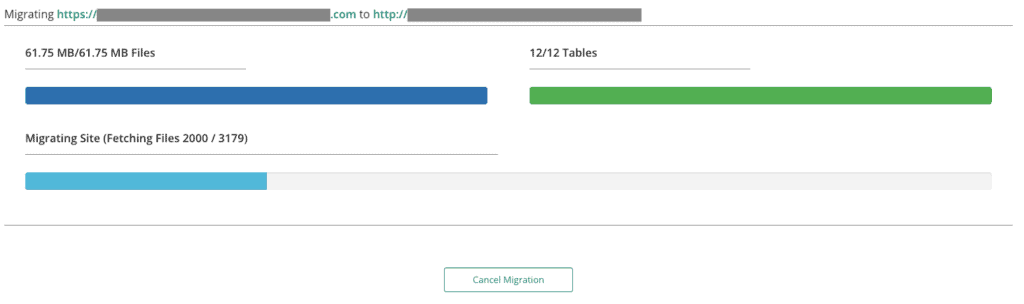
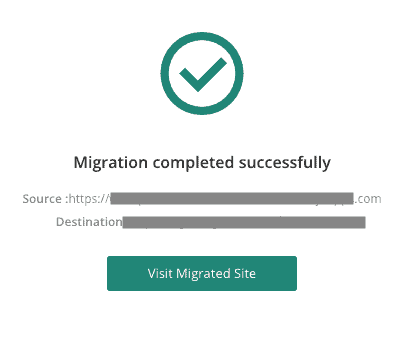
Once the process is complete, your site will be migrated to WP Engine.
Bluehost
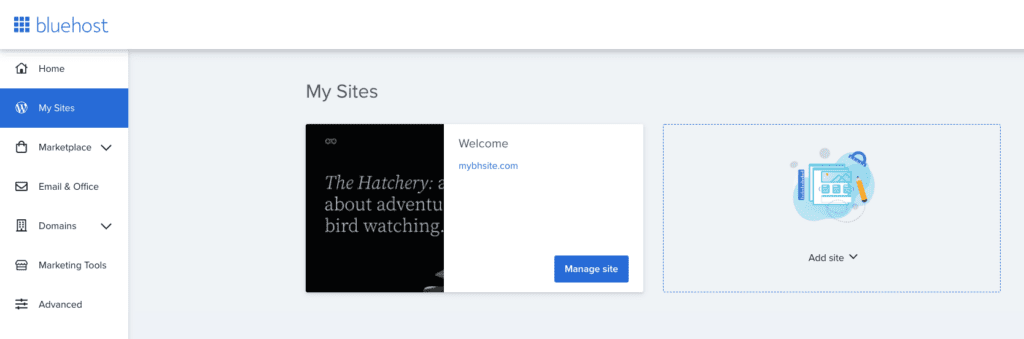
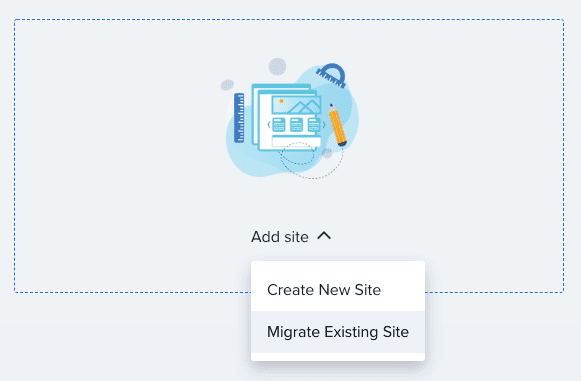
1. To transfer a WordPress site to Bluehost, create a Bluehost account and log in. Navigate to My Sites from the navigation menu, and click on Add site.
2. Next, click on Migrate Existing Site.
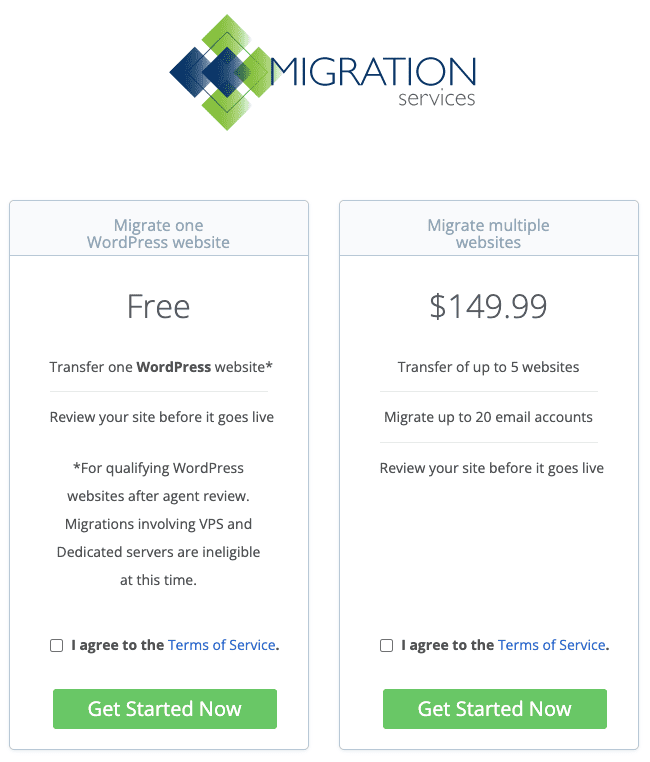
3. You will be taken to Bluehost’s Migration services panel. Agree to the terms of services, and click on Get Started Now to proceed.
4. Enter the URL of your WordPress site, and click on Check. This step performs a compatibility check to ensure that the migration process goes smoothly.
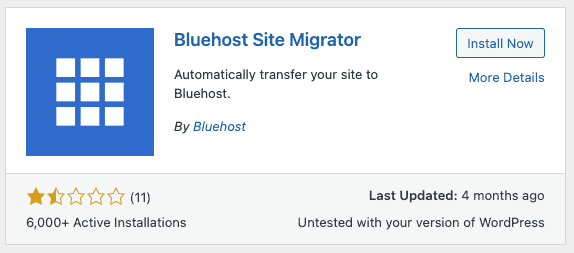
5. Next, you will need to install the Bluehost Site Migrator plugin on your site, and activate it.
6. The plugin will check for compatibility again, before starting migration.
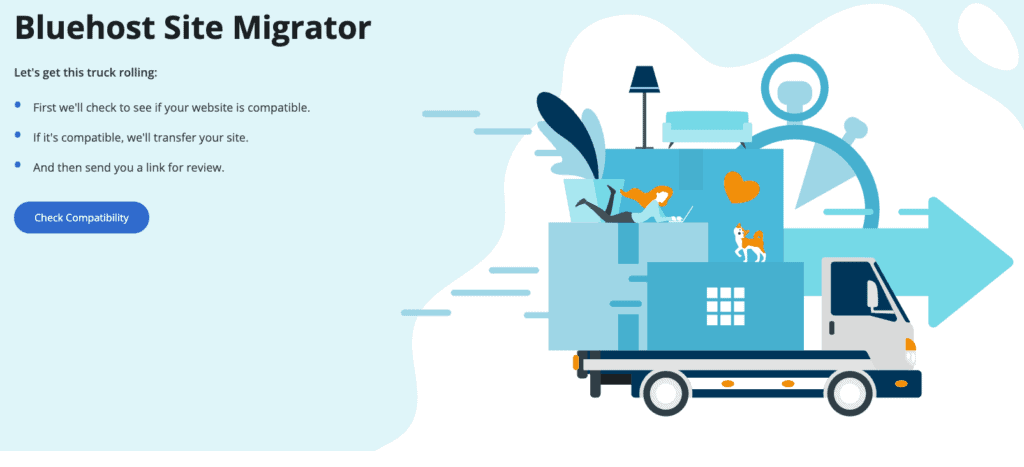
7. Click on Start Transfer to begin.
The plugin will commence the transfer process. Once it is done, you can proceed to the post-migration checklist.
Note: As indicated on Bluehost’s site, you cannot use this service to transfer a domain name to Bluehost. That is an entirely separate process.
DreamHost
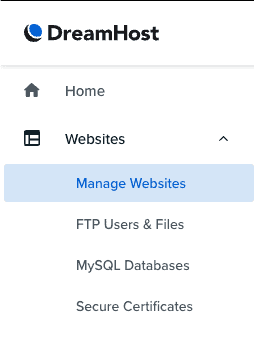
1. To migrate a WordPress site to DreamHost, log into your DreamHost account, and navigate to Websites > Manage Websites.
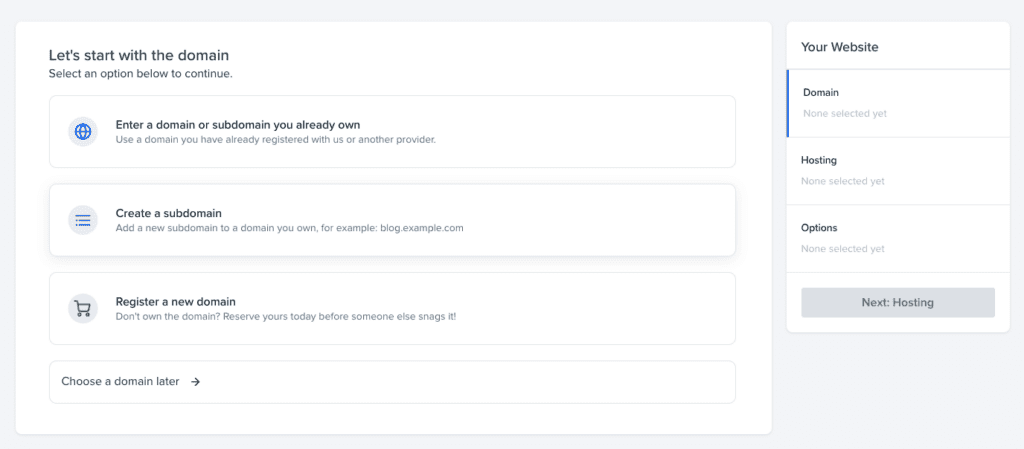
2. Click on + Add Website to proceed.

3. Start setting up your website. First, you need to select a domain, or leave that for a later step. If you choose to leave it for later, you can enter a temporary name in the next screen.
4. Next, you need to choose hosting.
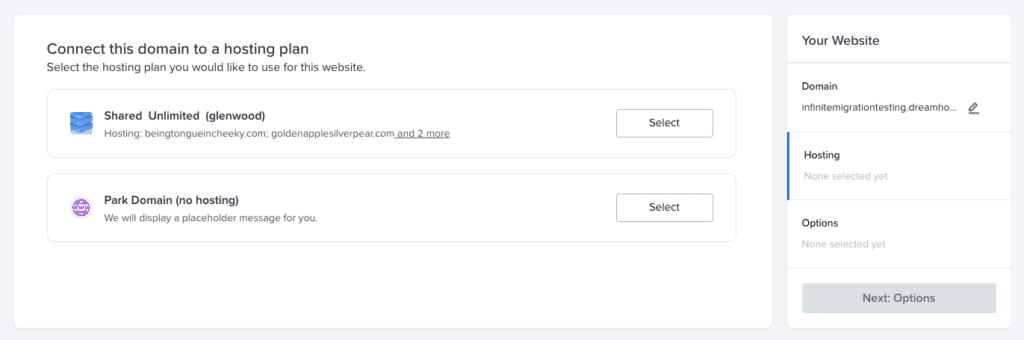
5. Finally, you will need to install WordPress. Once this step is complete, you have a blank WordPress site set up. Next, click on Set Up Website to proceed.

6. Once WordPress is installed, you’ll be taken back to the Manage Websites dashboard. There, locate the site you just created, and click on Manage.
7. Scroll down to the Migrating this site to DreamHost? section and click on Get Key. Copy the key.

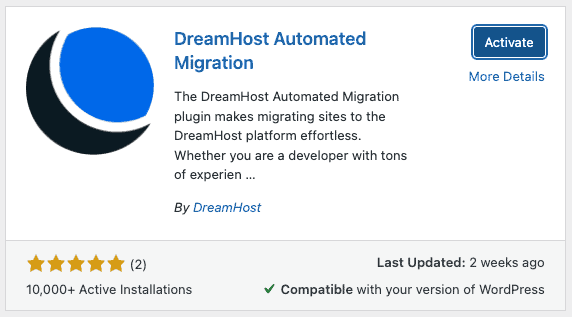
8. Next, you need to log back into your wp-admin. Install and activate the DreamHost Automated Migration plugin.
9. Enter your email address, and click on Migrate.
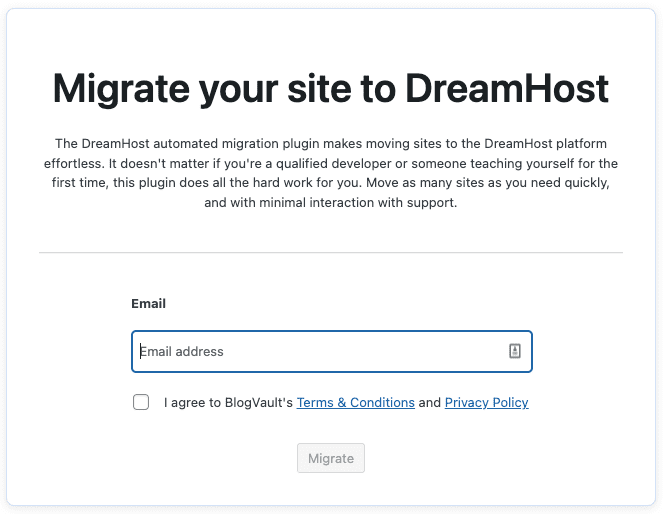
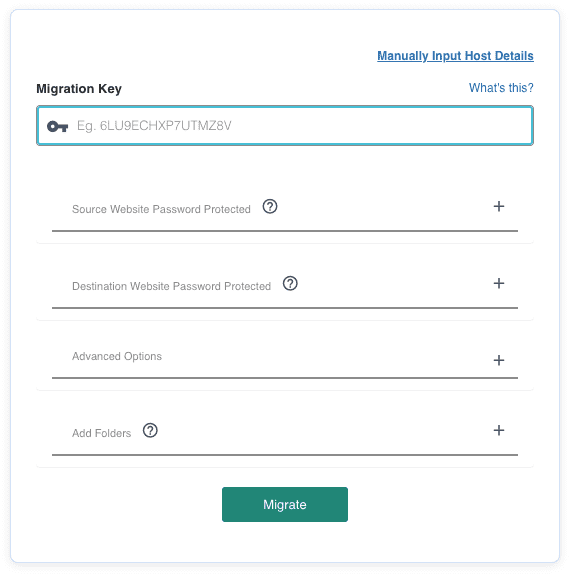
10. Enter the key from your DreamHost dashboard, and click on Migrate.
Kinsta
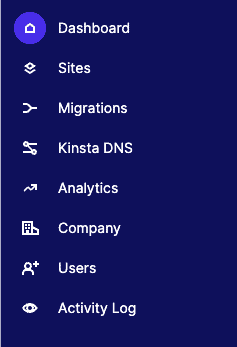
1. To move a WordPress site to Kinsta, create and log into a Kinsta account. From the navigation menu, select Migrations.
2. Depending on how much help you need, you can choose a premium migration or a basic one, which is free. Since our test site is currently hosted on an eligible web host, we chose Request Basic migration.
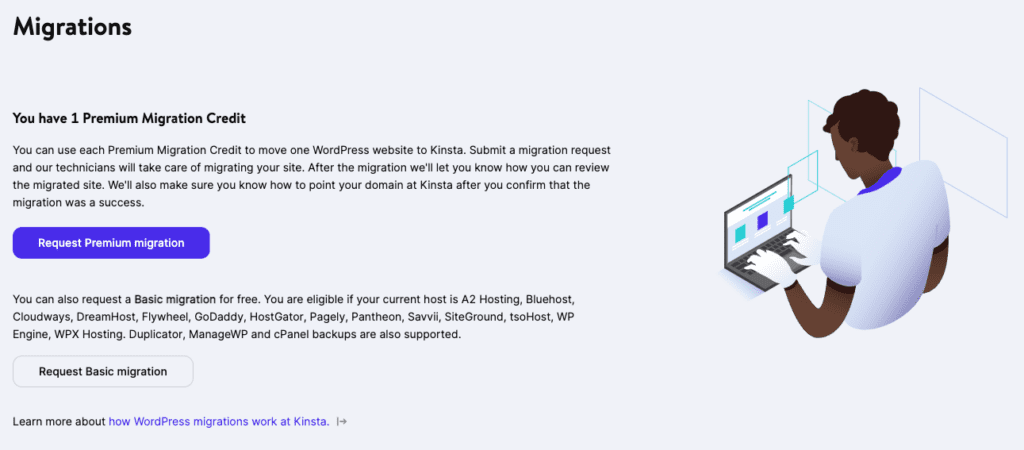
3. Read all the instructions, and follow onscreen instructions to reach the request form.
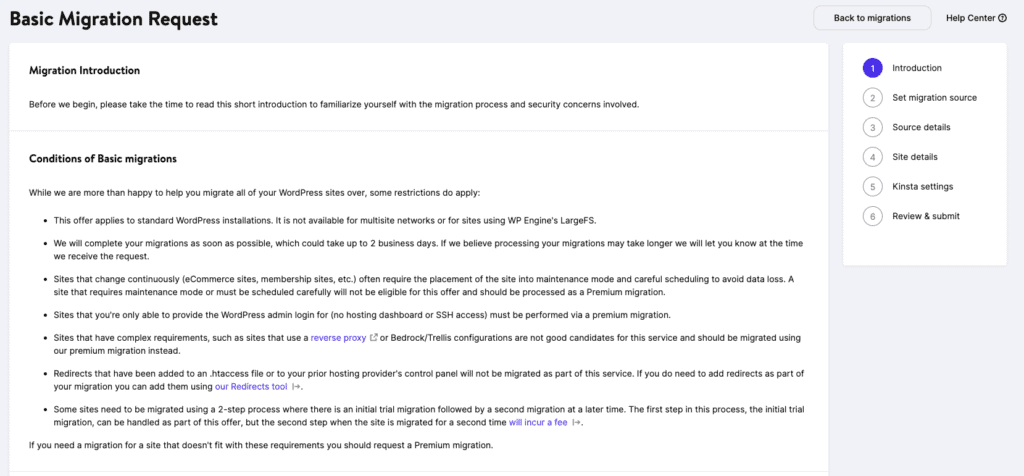
4. Click to Finish to complete the process.
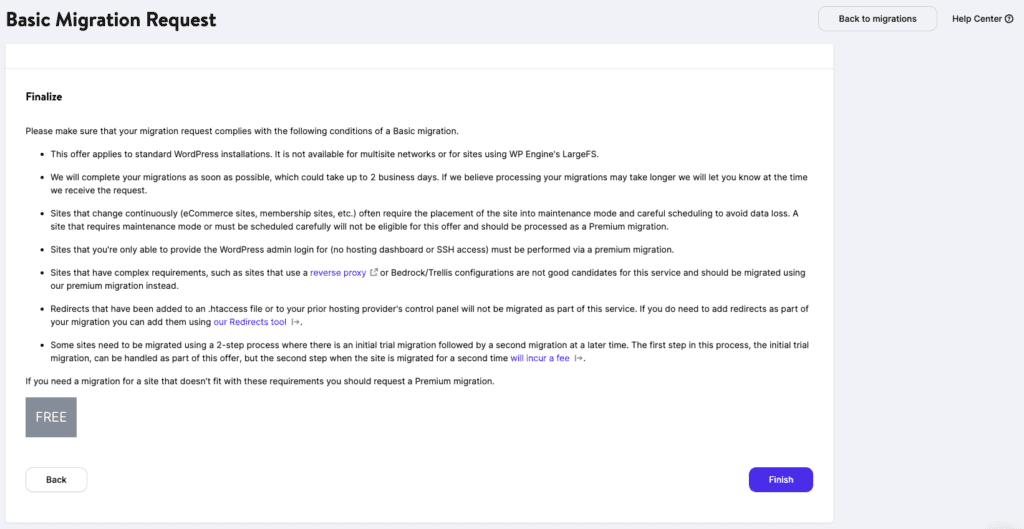
5. Kinsta migrations are done manually, hence the lengthy request form.
Flywheel
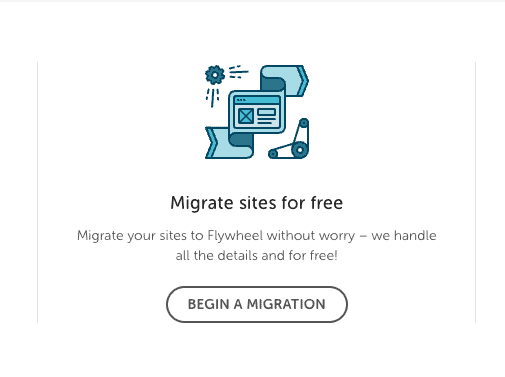
1. To migrate a WordPress website to Flywheel, log into your hosting account. Scroll down to the Migrate sites for free, and click on Begin a migration.
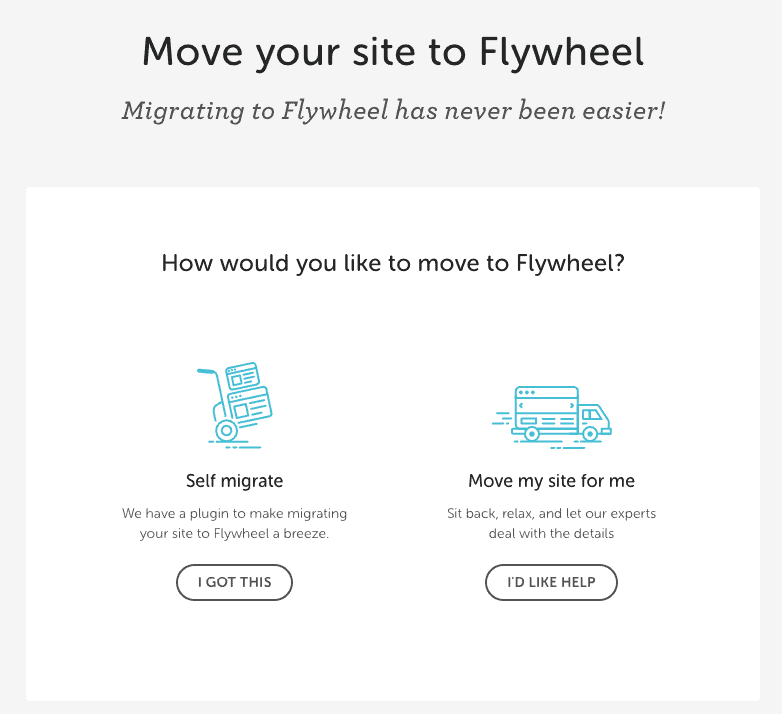
2. Click on I got this from the Self migrate section.
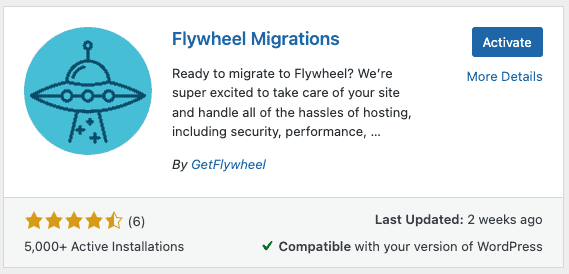
3. Follow the instructions, and Get the plugin. Install and activate Flywheel Migrations on your site.
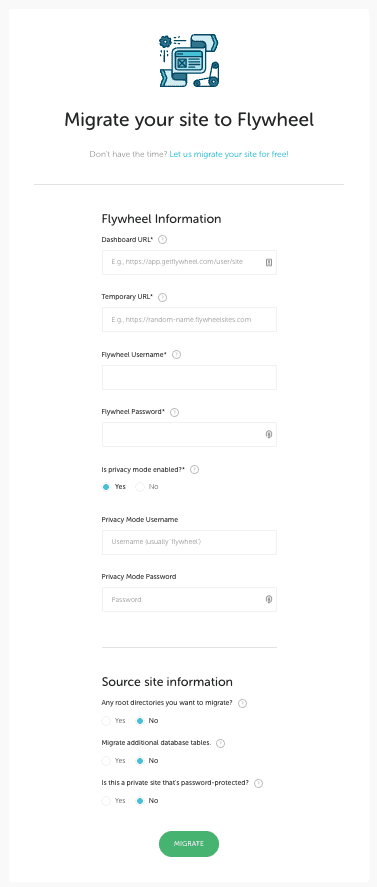
4. Enter your email address and click on Get Started.

5. Fill out your site details, and click on Migrate.
Most other web hosts will have similar processes for migrating sites. In a few cases above, you will have seen that BlogVault powers the migration plugin that web hosts use, so basically it is like using a different flavour of Migrate Guru.
Migrate a WordPress site manually
WordPress site migration is not for the faint of heart. After testing out a bunch of WordPress plugins that are supposed to work out of the box and make migration easier, we encountered enough errors to be entirely done with the process. Trust us when we say that manual WordPress migration is far, far worse.
If you absolutely must migrate a WordPress site to a new host or server manually, please take a backup of your site first. We lost count of the test sites that broke because of failed migrations. At least on our part, that was an intentional decision to feel the pain of a failed migration. Again, trust us when we say, it is just not worth it.
Final warning before we launch into the steps: manual migrations often fail for large sites. Connections time out, files don’t transfer correctly, and database tables get messed up. None of these are pleasant experiences, to say the least.
Anyway, without further caveats, here are the steps to move your WordPress site manually. We’ve broken up the manual migration process into sections for easier reference.
1. Move the site to a new server
Moving a WordPress site to a new server is the most difficult exercise, so we will start with that first. Take your time to follow through the steps carefully, because the smallest misstep can cause the whole process to collapse like a house of cards.
a. Download a copy of your website files and folders
The first step is to download a copy of your WordPress files and folders. You can do this via FTP or via File Manager on cPanel, if your host has it. Find the root directory of your site, which is often public_html and download the whole thing.

If you are using FTP, please note that this process will take a long time to complete. For our small test site of less than 100 MB, the download took over an hour to complete. This is partially because of a normal Internet connection, but also because FTP is a painfully slow process too.
b. Export a copy of the database
Next, get a copy of the site database. You can use phpMyAdmin to do this, or whichever tool your host has available. In our case, the host used Adminer to manage the database.
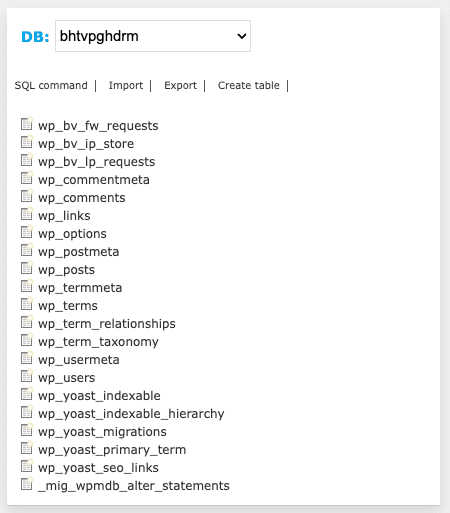
If you have more than one database, make sure to select the correct one. If you are unsure which database is the correct one, check the wp-config.php file for that information.
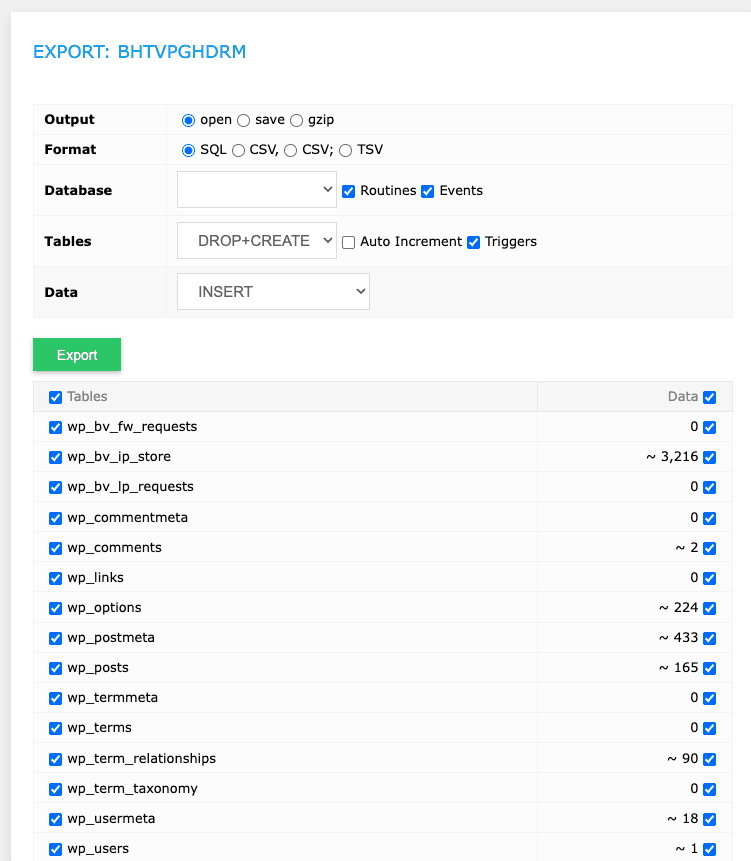
Stick to the SQL format, as it is most universally used by WordPress databases.
c. Upload files backup to the new server
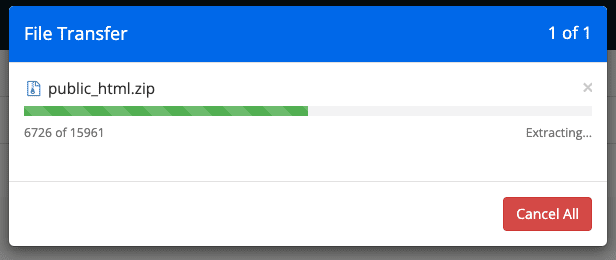
On the new host, upload the zip file containing website files to the server.
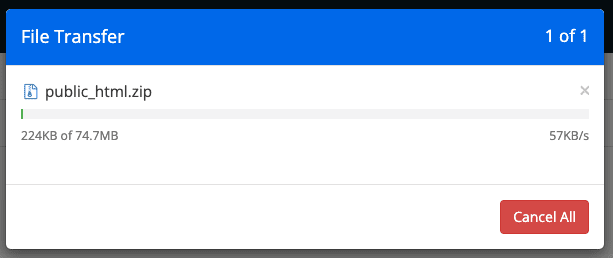
Extract the folder.
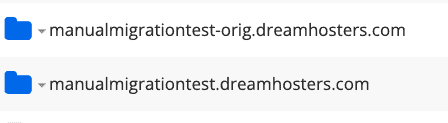
Since WordPress is already preinstalled, it needs to be overwritten. The simplest thing to do is rename the existing root directory to something else, and name the newly uploaded directory to the root name.
d. Create a new database for your site
Now that the WordPress files and folders are in place, the database is next up. You might have to create a new MySQL user to set up a database, if you are setting up the WordPress installation from scratch.
If you have WordPress pre-installed, then there will most likely be a database user already created. Either way, note down the user credentials.
Next, drop the pre-installed database tables, if any.
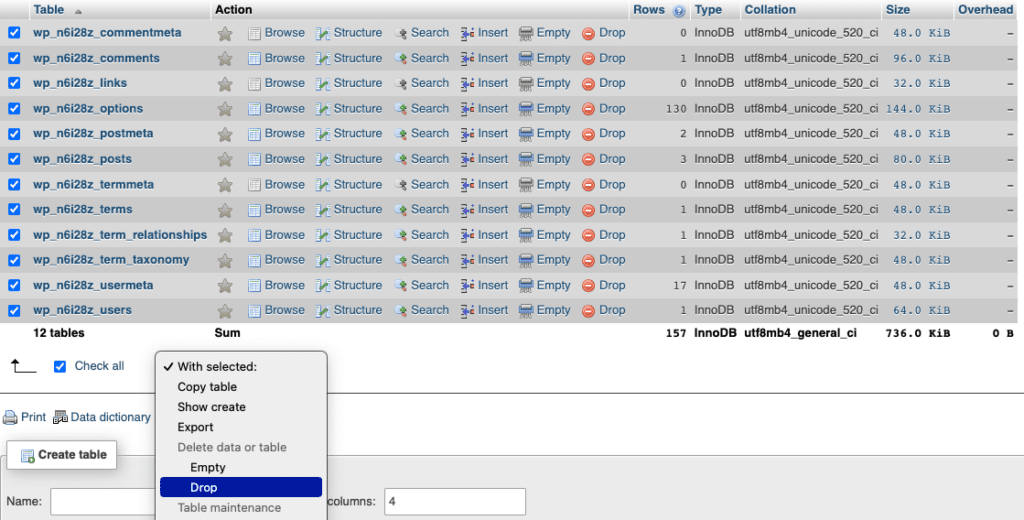
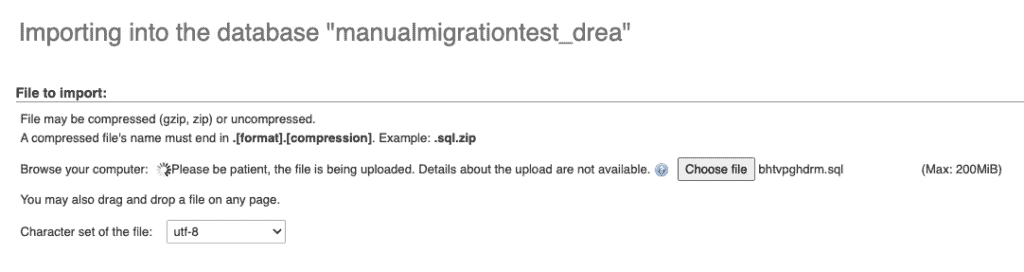
Finally, import the SQL file to the database.
2. Change the DNS records
Since your site has moved to another server, you now have to point your domain to that new server.
This step also applies if you are changing the domain name of your WordPress site. Sometimes a domain name is done at the same time as a host change; other times it isn’t. The most common occasion to change both is when making a site live, after building it elsewhere first.
In either case, the following steps are the same, regardless of whether you are changing just the domain or the server as well.
a. Get DNS details from your web hosting provider
You need the DNS records from your web host. DNS, or domain name servers, help map the domain name to the correct server. All web hosts will have DNS information readily available. Copy the information from the site server.
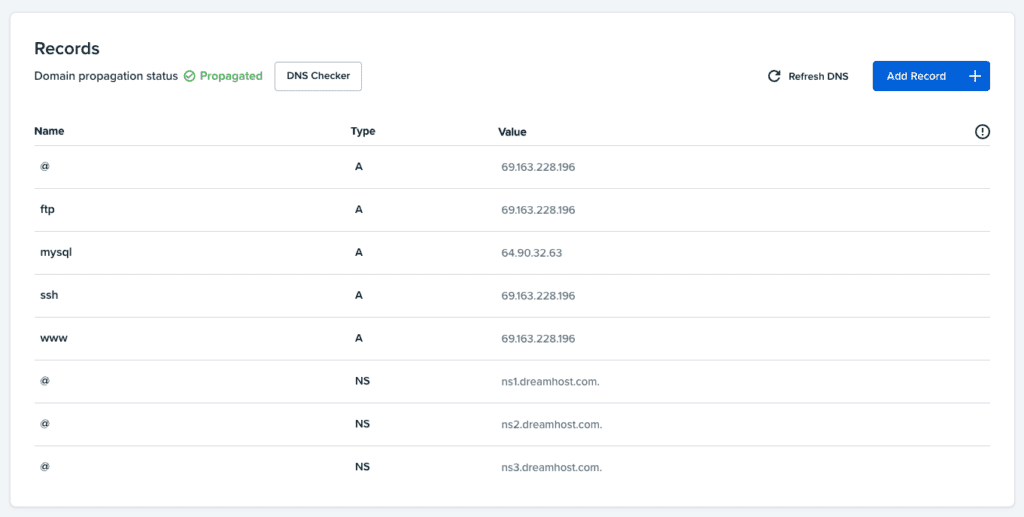
b. Update DNS details with domain registrar
A domain registrar is where you bought your domain name from. They also map your domain name to the server where your site is hosted through the use of DNS records.
You need to update the DNS records for your domain to point to your site server. Each registrar will have their own instructions to do this that will be available in their documentation. The update may take a few hours up to a day to reflect, so don’t be alarmed if typing in the URL doesn’t immediately load your site.

Note: Many web hosts offer free domains along with their hosting packages. If this is the case with you and you are migrating to a new host, you may have to check how this affects your domain. You can either look for standalone domain services with the old host, or alternatively transfer the domain to another registrar.
3. Configure the site and database
All the pieces are now in place, so we’ve got to connect them together.
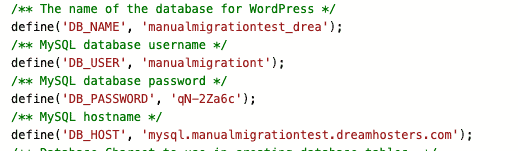
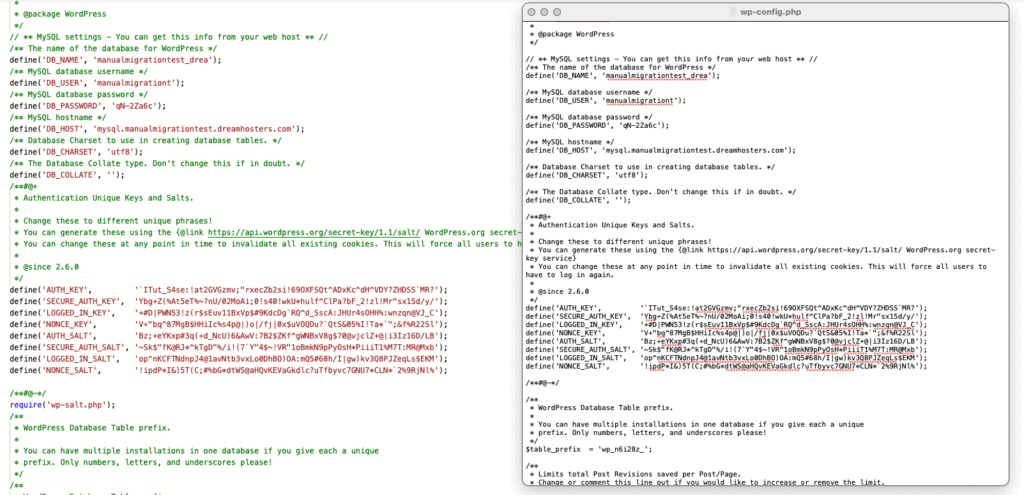
a. Configure database in the wp-config.php file
Change the following values to new ones: DB_NAME, DB_USER, DB_PASSWORD, and DB_HOST.
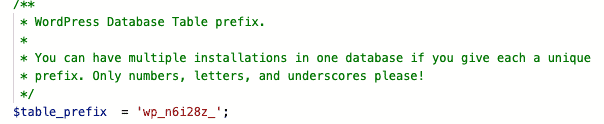
You may also need to change table_prefix if you’ve changed the table prefix previously from wp_ to something else.
If you are replacing a web host installation, you can use their wp-config.php as a template as well.
4. Configure your new domain
If you didn’t change the domain, you can skip this section.
a. Configure new domain in the database
To make sure the right domain points to the database, you need to change two values in the wp_options table: siteurl and home. It is simply a matter of right-clicking on each option value, and replacing the old URL with the new one.


b. Change links to reflect new ones
Once the database is configured and the new site is loading correctly, it is time to edit the links. This will also affect uploaded images, so be prepared to see broken images before you fix this.
Note: Skip this section if you are not changing the domain name.
Go into Settings on the left sidebar, and then into General.
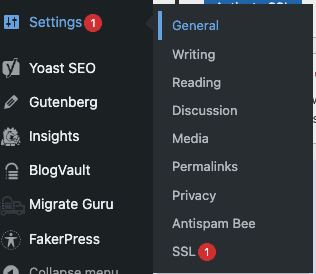
Change the values for WordPress Address (URL) and Site Address (URL) to point to your new domain.

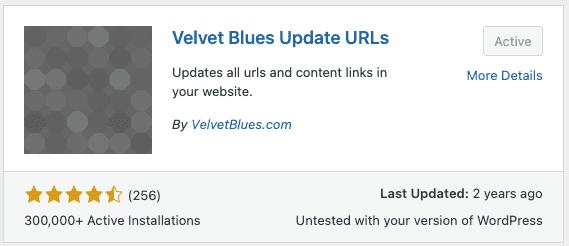
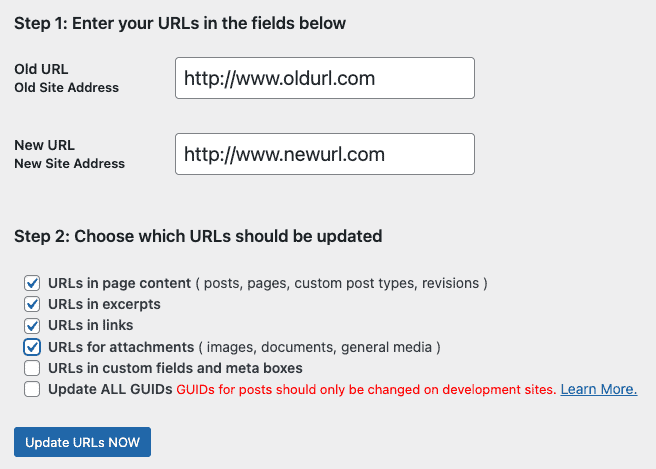
Alternatively, you can use a plugin to do this. We used the Velvet Blues Update URLs plugin.
Once installed, navigate to the Tools menu, and click on Update URLs.
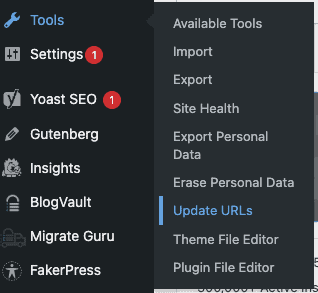
Enter the new URL in the Step 1 field, and check all the appropriate boxes in Step 2.
Click on Update URLs NOW to continue.
That’s it! This was a horrendous process, and we encountered a ton of errors while trialling this method. So if you were able to pull it off, you’ve earned yourself some hefty WordPress chops. Continue on to the post-migration checklist from here.
Move a WordPress site using SSH or WP-CLI
In the previous section, we covered how to migrate a WordPress site manually. However, that was via pleasant user interfaces, and it was still a painful process. In this section, we take the pain up a couple of notches, and show you how to migrate WordPress site manually via SSH.
1. Download a copy of your site
To use SSH to migrate your WordPress site, you will need to use the command line. You may need an SSH client to do this, or use one that comes with your machine. We are using Terminal with macOS for this article.
You will need 3 things to log into your server using SSH: server address, username, and password. Create a folder on your local machine, where you want to store the site copy.
On the terminal, type a command in the following format:
scp -r username@serveraddress:rootfolder localfolder
Both in the case of the ‘rootfolder’ and ‘localfolder’, make sure to enter the entire paths to both, including slashes. Once the command executes, you will be prompted to enter your password. Enter that, and execute again. This will copy your entire root directory to the local folder you have specified.
2. Download a copy of your site database
To download your WordPress database via SSH rather than using phpMyAdmin or a plugin, you need to install WP-CLI.
Note: When we tested this method, we realised that our machine didn’t have php installed, which is necessary to run WP-CLI commands. So we went through a rabbit hole to install command-line tools for our machine, to install a package manager called Homebrew, to then install php, to finally be able to install WP-CLI, and then finally export a copy of our site database. If any of this sounds disturbingly unfamiliar, we have linked helpful articles for each step.
Once you’ve completed all of these steps, it is finally time to download the database. Log into your server through SSH, and navigate to the folder that has the wp-config.php file, generally public_html. Then, execute the following command:
wp db export filename.sql
Replace ‘filename’ with an appropriate name for the database download file. The file will save to the same folder. Exit the server, and then download the database file to your local machine:
scp username@serveraddress:rootfolder/filename.sql localfolder
This will save the database backup to your local folder.
3. Upload files to the new server
Essentially, we will now be performing the reverse of step 1. But before moving your files backup to the new server, make sure to zip the folder on your location machine. It will make the transfer process easier and faster.
Execute the following command:
scp -r zipfile.zip username@serveraddress:rootfolder
In this case, the ‘username’, ‘serveraddress’, and ‘rootfolder’ values are for your destination server. Once you execute this command, you will be asked to input a password. After you’ve entered your password, your zipped file will start uploading to your destination server.
Next, you will need to unzip the file you’ve just uploaded. Log into the server, and navigate to the folder where the file is stored. Then execute the following command:
unzip zipfile.zip Once the file is unzipped, the contents will be stored in a folder of the same name. These files need to be in the root directory of your site, not in this subdirectory. So now you need to move them up. Go into the newly unzipped directory, and then run the following command:
mv * ../This will move all the contents of the current directory into the root directory, and takes care of the migration of your WordPress files.
4. Upload database to your new server
The next step is to migrate your database to your new server. The command is very similar to the one you used to upload the zip file:
scp filename.sql username@serveraddress:rootfolderThis has uploaded your database backup to your server. The next step is to install it. Log into your server, and navigate to the root directory. Execute the following command:
mysql -u username -p databasename < filename.sql
Username and database in this instance are the credentials for the freshly installed database on the new server. This command will replace the database with the contents of the SQL file specified.
5. Map your domain to your new site
Once the site is up and running on your new server, you now need to point your domain to it. The steps are the same as for the manual migration in the previous section.
- Get nameserver details from your new web host.
- Change the nameservers with your domain registrar.
- Wait for the changes to take effect, which can be up to 24 hours.
Extra things to consider for migrating WooCommerce sites
Migrating a WooCommerce site is very similar to migrating any other WordPress site, with the possible exception of a multisite. (We’ll talk about that in the next section.)
The important thing to remember with a WooCommerce site is that data tends to be dynamic on the site. That means, users, products, orders, and subscriptions can change on a minute-to-minute basis.
Therefore the best thing to do with a WooCommerce site is to put it into maintenance mode first. This is to stop any changes being made to the website at all. Then, use Migrate Guru to move the site to its new server.
We’ve put together a dedicated guide for WooCommerce migrations that you can read for more information.
Extra things to consider for migrating multisite
Multisite migration is even more complicated, especially when the domain name is changed, because the database has multiple references to the same server name, as well as folder locations.
There are a few additional steps to consider when editing the database manually:
- Edit the wp_blogs entries to change folder name correctly
- Wp_posts tables
- Wp_site
- Wp_options → home, siteurl, fileupload_url
If moving from subdomains to subfolders of vice versa, remember to adjust the .htaccess file and the value for SUBDOMAIN_INSTALL in your wp-config.php file accordingly.
Here is a complete guide on how to migrate WordPress multisite.
Note: Some hosts don’t automatically allow multisite installations off the bat. If you are planning to migrate a multisite, please do remember to check with the destination web host about restrictions they may have in place.
Post-migration checklist
Congratulations, your WordPress migration has worked and your site is in its new home! You’re now in the home stretch.
Apart from the fundamental reason you are migrating your site, like a change of host or change of domain, there are several things that can and will change on your site. It is always better to have a final check to make sure everything is working as it should.
- Disable maintenance mode
Once the site has migrated, you can now let users back into the site. Remove the maintenance mode, if was enabled during the pre-migration phase.
- Log into your new site
Use the same credentials as your old site. Check for errors on the dashboard. Plugin or theme conflicts, for example, will show up here. In some cases, like with Duplicator, this is a necessary step to remove installer files left over from the migration.
- Clear the cache
Clear all the caches: WordPress cache, browser cache, and any other plugin caches you may have. Caches store copies of your site for easy retrieval, and therefore may have copies of your old site. This is especially necessary if you changed the domain name of your site.
- Test all the major parts of your site
- Pages: homepage and other main pages, buttons, links, forms, etc.
- Links, especially if the domain name is new. Important link locations are menus and other places of interconnectivity between pages. Sometimes the paths are encoded in the database, and can break during migration. If this is the case, use a Search & Replace tool to fix the issue.
- Images
- Analytics code
- Affiliates and ads
- Check theme and plugin licenses
Sometimes licenses are tied to domain names. You may need to write to individual customer support services to get licenses transferred.
- Check your SSL certificate
You may have to reactivate SSL on your new site. Use the Really Simple SSL plugin to do this quickly and easily.
- Redirect old URLs to new URLs
There are ways to transfer SEO to your new site, so that your SEO effort is preserved. This is a delicate process, and cannot be rushed, so we’ve put together some pointers on how to set up redirects on your old site. You can also refer to this article on how to manage SEO during migrations effectively.
- Close the old hosting account
Once the site has migrated successfully, run the old and new simultaneously for a while to be absolutely sure everything has transferred correctly. Some errors or lapses can show up days or even weeks later, especially if you have migrated the site manually. That being said, at some point it is unnecessary, so you can cut that cord.
Once you are through with the post-migration checklist, you can now focus on running your new site. If you’ll notice, many of the things we have included in the checklist would have automatically been taken care of, if you used Migrate Guru. It really is that efficient and effective.
Troubleshooting WordPress migration issues
We genuinely hope you don’t need this section, but if you used the manual method, chances are, you ran into some of these WordPress migration issues.
During testing, we ran into the HTTP 500 ERROR for 48 hours till we figured out which tiny mistake caused it. It was frustrating, time-consuming, and because we had backups, we wiped out everything and started from scratch.
- HTTP 500 ERROR: This error can be caused by a wide variety of things and is entirely uncommunicative. This error is why we advise people to disable caching and firewall plugins, and to make sure that the php versions on the source and destination sites match. This article on how to troubleshoot the HTTP 500 ERROR is a great resource that saved our sanity.
- Error establishing database connection: This error is usually caused by incorrect credentials in the wp-config.php file. Check the values for DB_NAME, DB_USER, DB_PASSWORD, DB_HOST, and table_prefix. That last one tripped us up for a while before we realised that was an issue. It literally had 1 character that was incorrect.
- SEO issues post-migration: If you see your rankings fall, chances are you haven’t handled the redirects correctly. We linked to a great article in the post-migration checklist above, which should help you figure out where you’ve taken a wrong turn.
If none of the solutions above work—and there is a chance they may not—you can either reach out to your host’s support team or hire a developer. However, if we were at the tail end of a failed migration and our patience, we would wipe the server, reinstall WordPress, and use Migrate Guru.
Why we don’t recommend migrating a WordPress site manually
Manual WordPress migration to another host is nothing short of a nightmare. Apart from the time it takes to actually accomplish, there are so many factors that can upend the process. For this article, we tried manual migration several times, and each time there were so many things that went wrong. So much so that we restarted the process a fair few times before successfully getting through it.
Although we experienced many of the issues below firsthand, we didn’t experience all of them. Our unnerved takeaway is that even more things can go wrong, and we could have been stuck in a pit of frustration and despair for even longer. What an awful thought.
- During migration, the last thing you want is to have downtime. You need your site to be up and running as much as possible, and the best way to do that is to clone your site when moving to another web host or server.
- You need developers to migrate sites manually, or need to ask your hosts for help. It is an extra cost with the former, and a tedious process with the latter.
- Transferring from one host to another can have conflicts, like customised WordPress installs or different PHP versions.
- Data loss is a real issue. You can lose content or even your entire site during a migration. Especially if your site is large, there is danger of timeouts during transfers.
- SEO rankings can be affected if the migration isn’t done correctly.
- When changing core files or database settings, one typo will crash the whole site.
- Overall, migration is a time-consuming process that is prone to human error.
Best practices for WordPress migration
There are a few measures to take so that your site migration goes as smoothly as possible. We’ve listed some of these measures in the pre- and post-migration checklists above, however they still apply as best practices.
- Take a backup of your site before doing anything to it.
- Use a dedicated migration plugin like Migrate Guru, or the migration feature of a good backup plugin like BlogVault.
- Keep all your credentials handy; for both the source and destination servers, the wp-admin ones, and those of your domain registrar.
- Make sure to install the same versions of WordPress and PHP on the destination server as is on the host. If necessary update the source first, if you cannot configure the destination one.
- Deactivate all plugins and all but a single stock theme. This is especially important for caching and firewall plugins.
- Use a maintenance mode plugin to prevent users making changes to your site during migration
- Make sure to go through the entire post-migration checklist thoroughly. If you are changing your domain, you need to set up redirects correctly to keep your SEO equity intact.
For the most part, plugins make WordPress migration significantly easier. Following these best practices will save you a great deal of time and effort as well.
Reasons to migrate a site
No one undertakes site migration lightly. There is a very real danger of losing your site and all your hard work during a failed migration, and admins are understandably leery of the process. Additionally, most admin require developer assistance to move their site, which can be an expensive proposition for something that is not always guaranteed to work.
So why would anyone want to migrate their site at all?
The most common type of WordPress migration is moving to a different web host. And there are a ton of good reasons to change your web host.
- If your site is growing, it needs more server and network resources to handle this growth, which in turn leads to escalating costs.
- Some web hosts are better than others: better infrastructure, more responsive support, and even sometimes more competitive pricing generally.
- If your site experienced a malware attack, your web host may not have handled the situation well. Most web hosts will suspend your site and account, while others will delete your site outright, when malware is detected on your site.
Perhaps you want to change your domain name instead. Again, it appears to be a huge task, with design, content, and branding changes spread throughout the site. So why change your domain?
- Rebranding, where your company name has changed so the site has to follow suit.
- You’re changing the design of your site, so you need to move it from a development environment like localhost or a staging site to a live environment.
- Moving in or out of a subdirectory on your site to a top-level domain. An example is moving from blog.yourdomain.com to yourdomainforblog.com.
- Localisation or expansion for country-specific sites; moving a site from a .in or a .co.uk to a .com, or vice versa.
- Merging a mobile site into the desktop version after making the latter responsive. For instance, mobile sites could be on a subdomain, like m.facebook.com. However, the desktop site at facebook.com could be made responsive instead, and the address on all devices would then be facebook.com.
As you can see, there are several legitimate reasons to want a change. Your site is not a hostage of a bad web host or an unfortunate brand name. The good news is that successfully migrating your WordPress site is easy and seamless with Migrate Guru.
Structure of a WordPress site and how it impacts migration
Ordinarily, you can operate a WordPress site quite successfully without knowing anything about what goes on underneath the hood. However, during a migration, it is worth understanding how a WordPress site is structured.
WordPress site structure
There are 2 main parts to any WordPress site:
- Files and folders
- Database
The files and folders contain WordPress core files, which contain the code that operates your site. They also contain all plugin and theme files that are installed on your site. These can be active or inactive plugins and themes.
The WordPress database contains all the user-generated content of your site. Things like posts, pages, links, comments, metadata, and so on, are all stored in the database. Each time a page or post loads, a core file will retrieve the correct information from the database, and display it in response to a visitor request.
Relationship between site structure and migration
You may reasonably be wondering how site structure is relevant to WordPress migration. It is relevant because most articles about WordPress migration talk about setting up a new server with a fresh installation of WordPress, and then migrating the database and a few choice core files.
In our experience, this is a sure-fire method to ensure that your site doesn’t migrate correctly, and that you will end up spending hours troubleshooting why images won’t load or why menu links are broken. For instance, WooCommerce site databases in particular need to be moved en masse because of the way data is stored across tables.
Long story short, always move your entire site during a WordPress migration. Anything less is a bad idea. We have a comprehensive resource dedicated to WordPress file structure and the database that you can check out for more information.
Conclusion
WordPress migration is a big undertaking because so many things can go haywire for the smallest reasons. We definitely recommend against manually migrating a WordPress site for these reasons.
The best way to migrate a WordPress site to a new host or server is to use Migrate Guru, a free plugin that is custom-built to handle site migration seamlessly. Migrate Guru works with all web hosts out of the box.
FAQs
How do I migrate an existing WordPress site?
Migrate an existing WordPress site using a dedicated migration plugin like Migrate Guru. Migrate Guru works with all web hosts out of the box, and will migrate all kinds of WordPress sites without downtime.
What is the easiest and best way to migrate a WordPress site?
The easiest and best way to migrate a WordPress site is to use a dedicated WordPress migration plugin like Migrate Guru. Migrate Guru integrates with all major web hosts seamlessly. Use Migrate Guru to migrate a WordPress site with zero downtime and for absolutely free.
How do I move a WordPress site to a new host or server for free?
Install Migrate Guru on your WordPress site and you can transfer the WordPress site to a new host or server absolutely for free. Zero downtime works with all web hosts out of the box and can move the largest or the smallest sites effortlessly.
How do I migrate a WordPress site manually?
To migrate a WordPress site manually, you need to take the following steps:
- Download a copy of the site files and folders
- Export the WordPress database
- Install WordPress on the destination server
- Upload the site files and folders to the destination folder
- Drop the existing database on the destination server
- Import the old site database
- Check the wp-config.php file to make sure the connection to the database is set up correctly
- Check all aspects of the migrated site
- Set up redirects on the old site
Tags:
Share it:
You may also like

How to Limit Form Submissions with Droip in WordPress
Forms are an indispensable part of any website because of their versatility, letting you collect information for various purposes! However, people with ill intentions often attempt to exploit these forms…

How To Manage Multiple WordPress sites
Management tools help agencies become well-oiled machines. Each task is completed with the least amount of effort and highest rate of accuracy. For people managing multiple WordPress sites, the daily…

PHP 8.3 Support Added to Staging Feature
We’ve introduced PHP version 8.3 to our staging sites. Test out new features, code changes, and updates on the latest PHP version without affecting your live website. Update PHP confidently…
How do you update and backup your website?
Creating Backup and Updating website can be time consuming and error-prone. BlogVault will save you hours everyday while providing you complete peace of mind.

Updating Everything Manually?
But it’s too time consuming, complicated and stops you from achieving your full potential. You don’t want to put your business at risk with inefficient management.

Backup Your WordPress Site
Install the plugin on your website, let it sync and you’re done. Get automated, scheduled backups for your critical site data, and make sure your website never experiences downtime again.


