You want one WordPress dashboard for several sites. Then the setup asks you to edit wp-config.php, replace rewrite rules, choose between subdomains and subdirectories, and trust that the main site will still work when you log back in.
That is why WordPress Multisite setup feels riskier than the checklist suggests. The actual setup is short. The hidden work is deciding whether Multisite fits your sites, preparing a restore path, and checking the network after WordPress says it is installed.
Here is the quick version: to enable WordPress Multisite, back up the site, deactivate plugins, confirm permalinks work, add define(‘WP_ALLOW_MULTISITE’, true); to wp-config.php, then go to Tools > Network Setup. Choose subdomains or subdirectories, click Install, copy the WordPress-generated code into wp-config.php and .htaccess, log back in, and add your first site from Network Admin > Sites > Add New.
Do not treat those as casual clicks on a live site. Multisite gives you one control room for related sites, but it also means one bad update, one bad plugin decision, or one missing restore point can affect the whole network.
First, decide if Multisite is the right model
Multisite is best when the sites are related enough to share infrastructure. It works well for university departments, franchise locations, regional business sites, editorial properties, multilingual networks, and brand microsites managed by the same team.
It is not the right answer for every “I have many sites” problem.
The visible benefit of WordPress Multisite is simple: one WordPress installation can run many sites. The hidden tradeoff is that those sites share WordPress core, installed plugins, installed themes, user infrastructure, and server resources. Each subsite has its own content, settings, and media directory, but the network still behaves like one system in many of the places that matter.
Use this decision before you touch files:
| Use WordPress Multisite when… | Use separate WordPress installs when… |
|---|---|
| The sites belong to the same organization, brand, client, or governance model. | The sites belong to unrelated clients, businesses, or owners. |
| You want one place to manage WordPress core, plugins, themes, and users. | Each site needs its own hosting rules, release schedule, or technical stack. |
| Sites can share a trusted Super Admin team. | Each site owner needs full independent control. |
| The sites are likely to stay together long term. | A site may need to move away later without a complicated extraction. |
| Centralized updates and policies reduce work. | Isolation is more valuable than centralized management. |
The important word is related. If you are managing ten regional pages for one company, Multisite can reduce repeated work. If you are hosting ten unrelated client businesses, it is usually safer to manage multiple WordPress sites separately than to make one client’s issue harder to contain.
The rule of thumb is plain: choose Multisite when shared control is the point. Choose separate installs when isolation is the point.
Before you start: prepare the rollback path
The safest WordPress Multisite setup starts before the first code edit. If something breaks, you need a way back that does not depend on the WordPress dashboard still being available.
Use this checklist before enabling Multisite on an existing site:
| Requirement | Why it matters | How to check |
|---|---|---|
| Full site backup | Multisite setup changes configuration files and rewrite behavior. A mistake can lock you out or break URLs. | Back up your WordPress site files and database, then confirm you know how to restore them. |
| Copies of wp-config.php and .htaccess | These are the files you will edit during setup. | Download clean copies before changing anything. |
| File access outside WordPress | If the dashboard breaks, you still need to fix files. | Confirm hosting file manager, FTP/SFTP, or SSH access works. |
| Deactivated plugins | Plugins can interfere with setup or behave differently in a network. | Deactivate plugins temporarily before starting. |
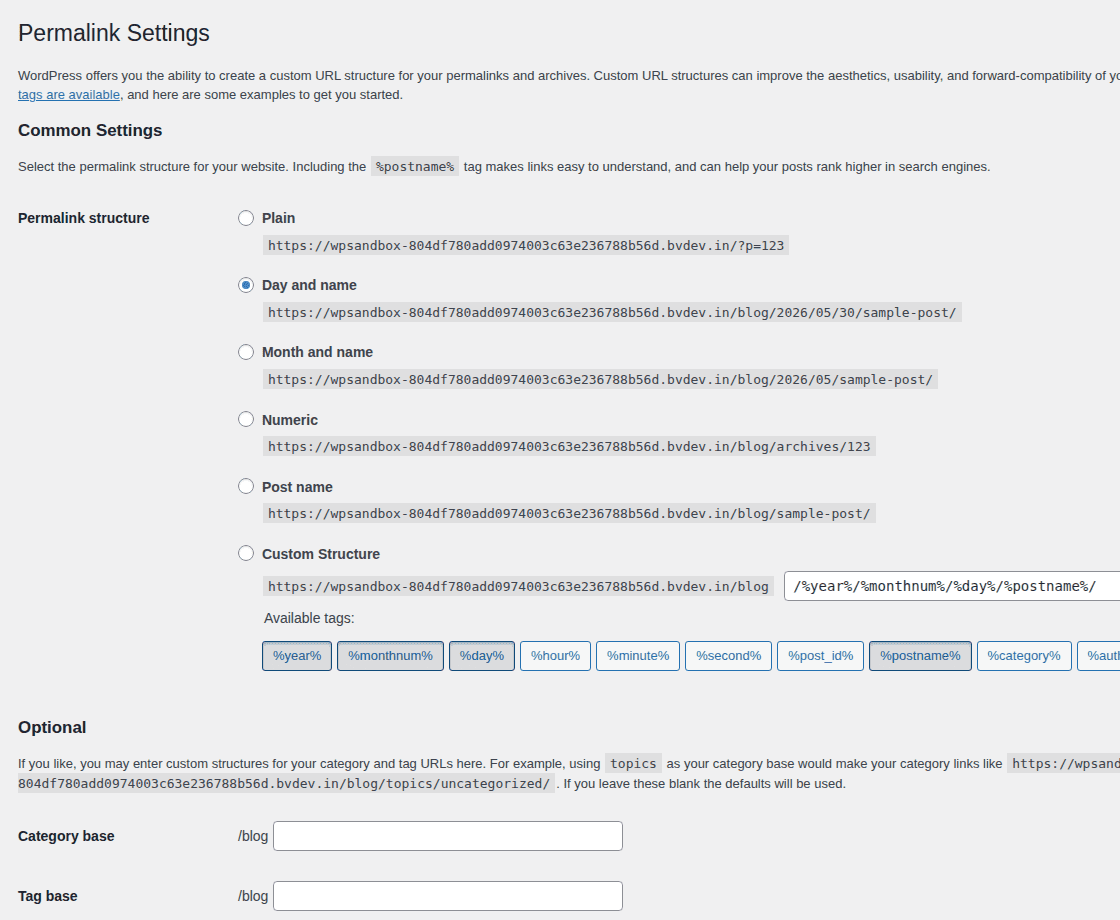
| Working permalinks | Multisite relies on rewrite rules. | Go to Settings > Permalinks, save the current structure, and test a normal post URL. If permalinks are already unreliable, fix WordPress permalinks not working before enabling Multisite. |
| Paused caching | Cache can show old redirects, old rewrite behavior, or stale login states. | Pause page cache, server cache, and CDN cache during setup if possible. |
| Host support | Apache, Nginx, and managed hosts do not all handle rewrite rules the same way. | Check your host’s Multisite instructions before editing server rules. |
| DNS and SSL access | Subdomain and mapped-domain networks need domain records and certificates. | Confirm you can manage DNS and SSL before choosing that structure. |
For an existing production site, do not skip the backup. BlogVault is useful here because this is not just about having a downloadable archive somewhere. You need a restore point you can use quickly if a config edit, plugin conflict, or rewrite mistake takes the site down.
Also save separate copies of wp-config.php and .htaccess. A full backup is the safety net. The individual file copies are the faster undo button.
If you are working on a staging site, keep the same habits. Staging is where you want to discover that your host handles Nginx rules differently, a plugin is not Multisite-friendly, or a subdomain certificate is missing.
Choose subdomains or subdirectories
You choose the network structure during setup, and it affects URLs, DNS, SSL, and future maintenance. This is not a cosmetic choice.
| Structure | Example | Good fit | Watch out for |
|---|---|---|---|
| Subdirectories | example.com/site-a | Shared-brand networks, departments, regional pages, simpler setups | Existing paths can conflict; sites feel less separate |
| Subdomains | site-a.example.com | Departments, regions, publications, or sites that need clearer identity | Needs DNS planning and SSL coverage |
| Mapped domains | site-a.com | Subsites that need their own public domains | Adds domain, SSL, and login/cookie complexity |
Subdirectories are usually simpler. They keep everything under one domain and avoid wildcard DNS. A company might use example.com/us, example.com/uk, and example.com/ca. A publication might use example.com/news and example.com/events.
Subdomains create more separation. A university might use science.example.edu, admissions.example.edu, and alumni.example.edu. A franchise might use chicago.example.com and austin.example.com.
For most non-technical site owners, subdirectories are the safer default. Choose subdomains only when the separation is worth the extra DNS and SSL work.
The catch is that subdomains demand more infrastructure discipline. WordPress can be configured correctly and the subsite can still fail if DNS is missing, DNS has not propagated, or SSL does not cover the new hostname.
Mapped domains are supported in modern WordPress Multisite without the old domain-mapping plugin workflow. They are useful when each subsite needs its own domain, but they add more moving parts. You now have to manage each domain, DNS record, SSL certificate, login behavior, and any later need to change a Multisite subsite domain cleanly.
Choose the structure your team can operate, not the one that looks neat in a planning doc.
How to enable WordPress Multisite on an existing site
An existing site already has content, users, plugins, URLs, redirects, traffic, and expectations. Treat the conversion like a controlled change, not a quick setting.
1. Finish the safety checklist
Create the full backup, download wp-config.php and .htaccess, confirm file access, deactivate plugins, pause caching, and test permalinks.
Do not continue if you cannot restore the site or edit files without WordPress admin. The setup is only low-risk when the rollback path is real.
2. Add the Multisite enable line to wp-config.php
Open your wp-config.php file and add this line above the comment that says to stop editing:
define('WP_ALLOW_MULTISITE', true);Save the file and refresh WordPress admin.
This line does not convert the site by itself. It only tells WordPress to show the Network Setup screen. If the site throws an error after this edit, restore your saved copy of wp-config.php and check the placement and syntax.
3. Open Network Setup
In WordPress admin, go to Tools > Network Setup.
If the option is missing, check three things first:
- The WP_ALLOW_MULTISITE line was saved in the correct file.
- You are logged in as an administrator on the main site.
- Plugins that alter admin menus or permissions are deactivated.
This is a good moment to slow down. If WordPress has not exposed the setup screen, do not start guessing at later steps.
4. Choose subdomains or subdirectories
Select the URL structure you decided on earlier.
If you are using subdomains, confirm DNS and SSL before proceeding. If you are using subdirectories on an older existing site, WordPress may warn or limit options because existing paths can collide with new subsite paths.
Do not force the structure if WordPress or your host is clearly telling you there is a conflict. Fix the architecture now. It is much harder after users, content, and links are already inside the network.
5. Enter the network title and admin email
Add the network title and Super Admin email address.
The Super Admin can manage network settings, sites, users, plugins, and themes. Keep this role limited to people who understand that one network-level change can affect every subsite.
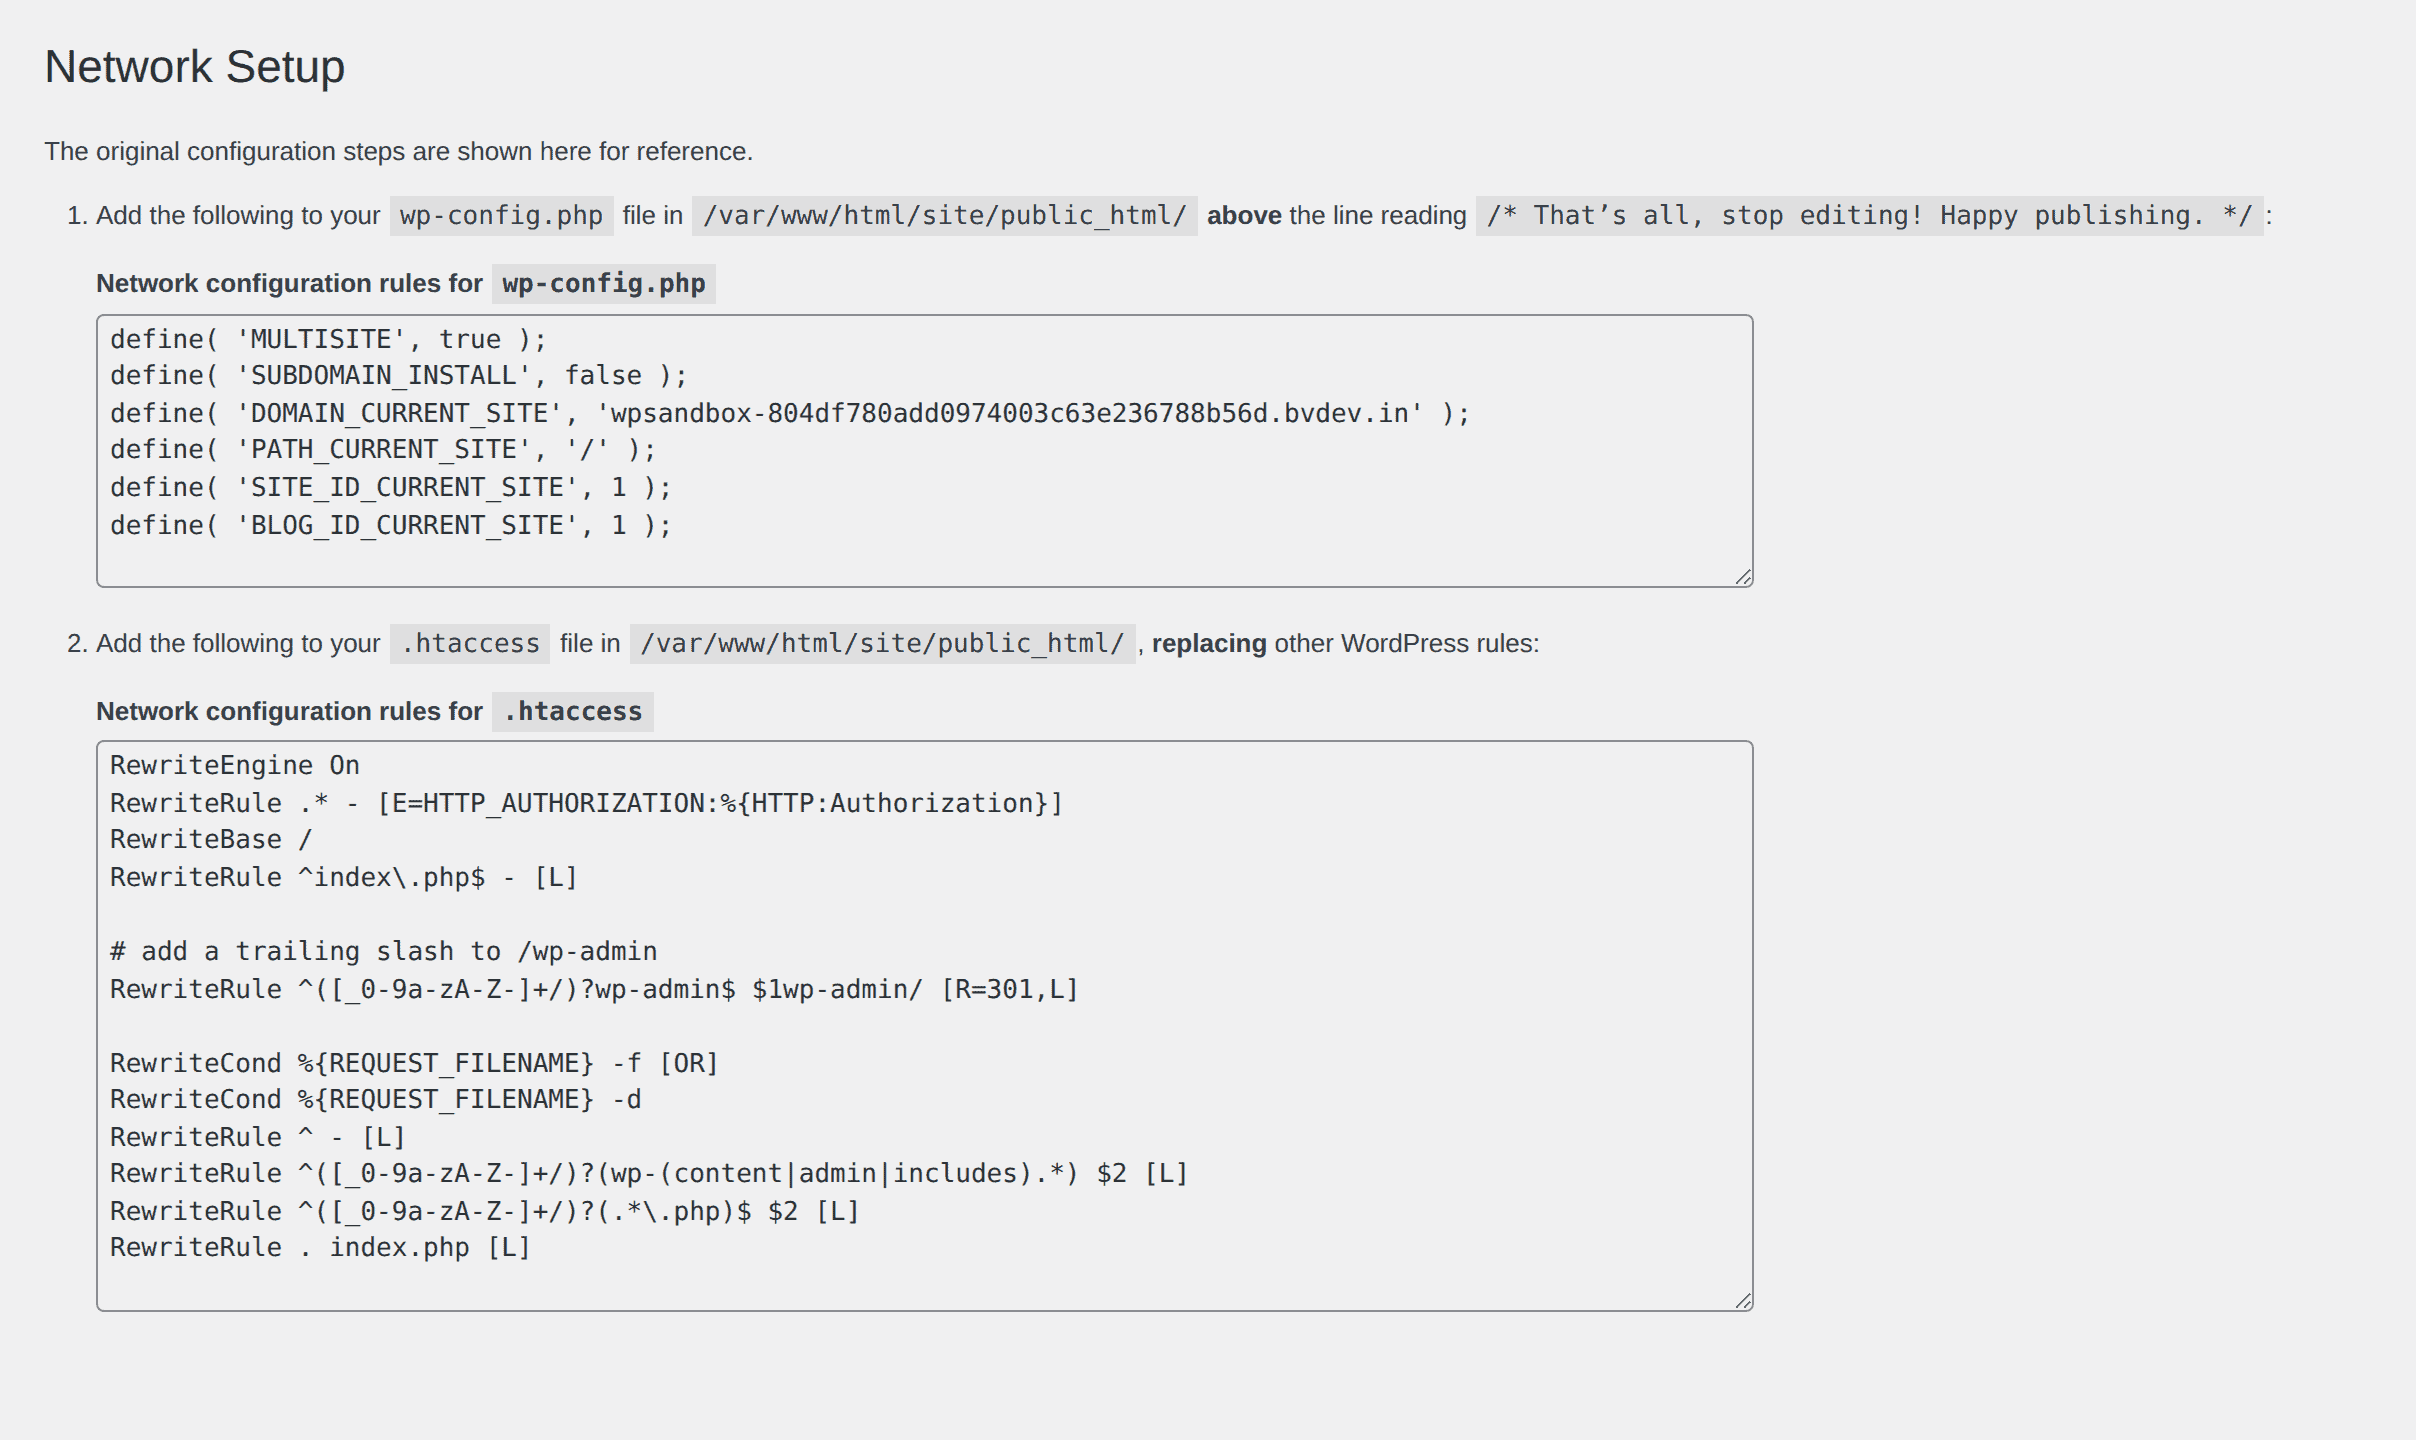
6. Click Install and copy only your generated code
WordPress will generate code for your specific network.
Use the code from your own Network Setup screen. Do not copy generic Multisite constants from a random tutorial and assume they fit your site. Domain, path, and server context matter.
7. Add the generated constants to wp-config.php
Copy the generated constants into wp-config.php where WordPress tells you to place them, usually above the stop-editing comment.
Save the file, but keep the original nearby until the network is fully verified.
8. Replace the WordPress rewrite block in .htaccess
On Apache-style setups, WordPress will also provide .htaccess rules. If you need a refresher, review how to edit your .htaccess file before replacing the existing WordPress rewrite block with the generated Multisite rules.
If your site uses Nginx or a managed WordPress host that does not rely on .htaccess, follow host-specific instructions instead. Do not try to translate rewrite rules from memory. This is how a clean setup becomes a site where the homepage works and every inner page fails.
9. Log back in and confirm Network Admin exists
WordPress will ask you to log in again after the file changes.
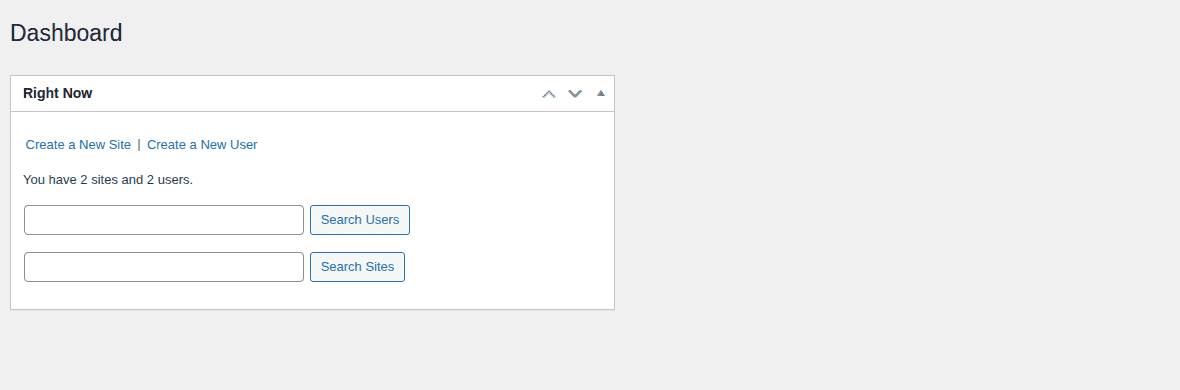
After login, look for My Sites > Network Admin in the admin bar. That menu means the network layer is active.
If you cannot log in, restore the saved files first. If restoring the files does not fix access, restore the pre-change backup. Debug from a known-good state instead of stacking more edits on top of a broken setup.
10. Add your first site
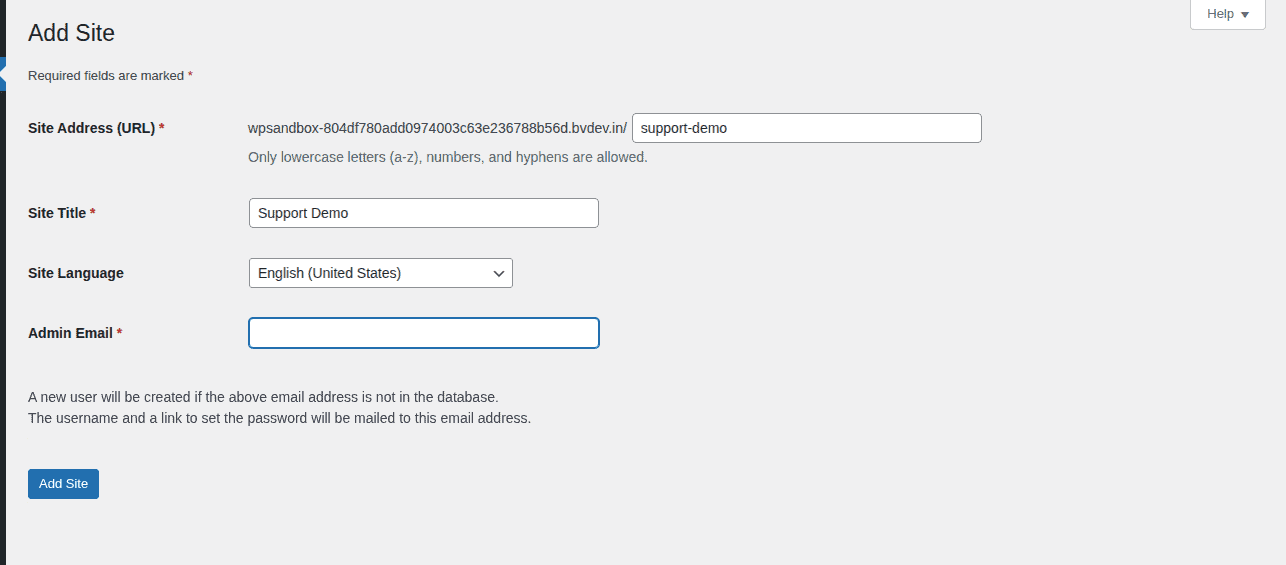
Go to Network Admin > Sites > Add New.
Enter the site address, title, language, and admin email. Add the site, then open both the frontend and the dashboard.
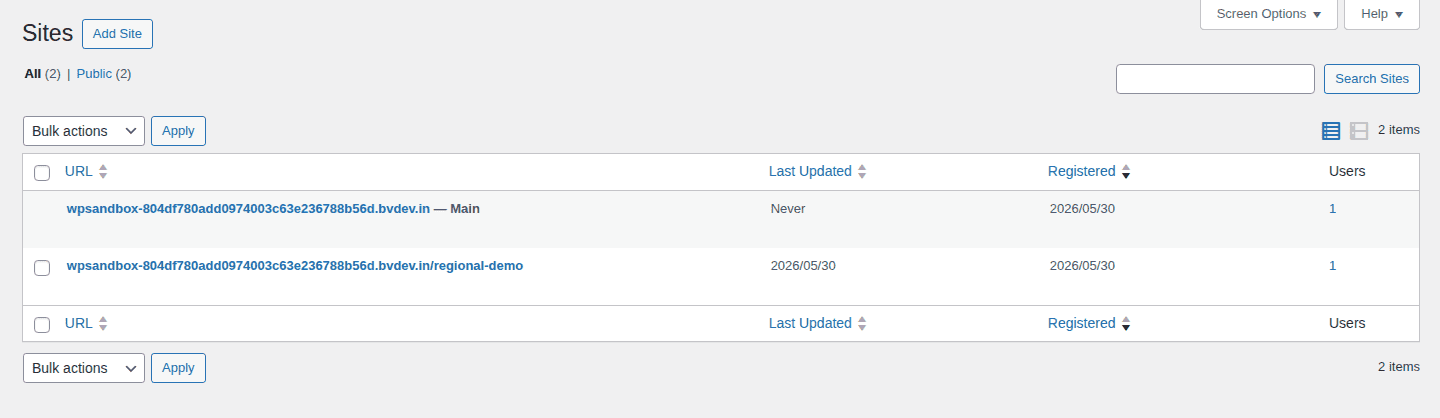
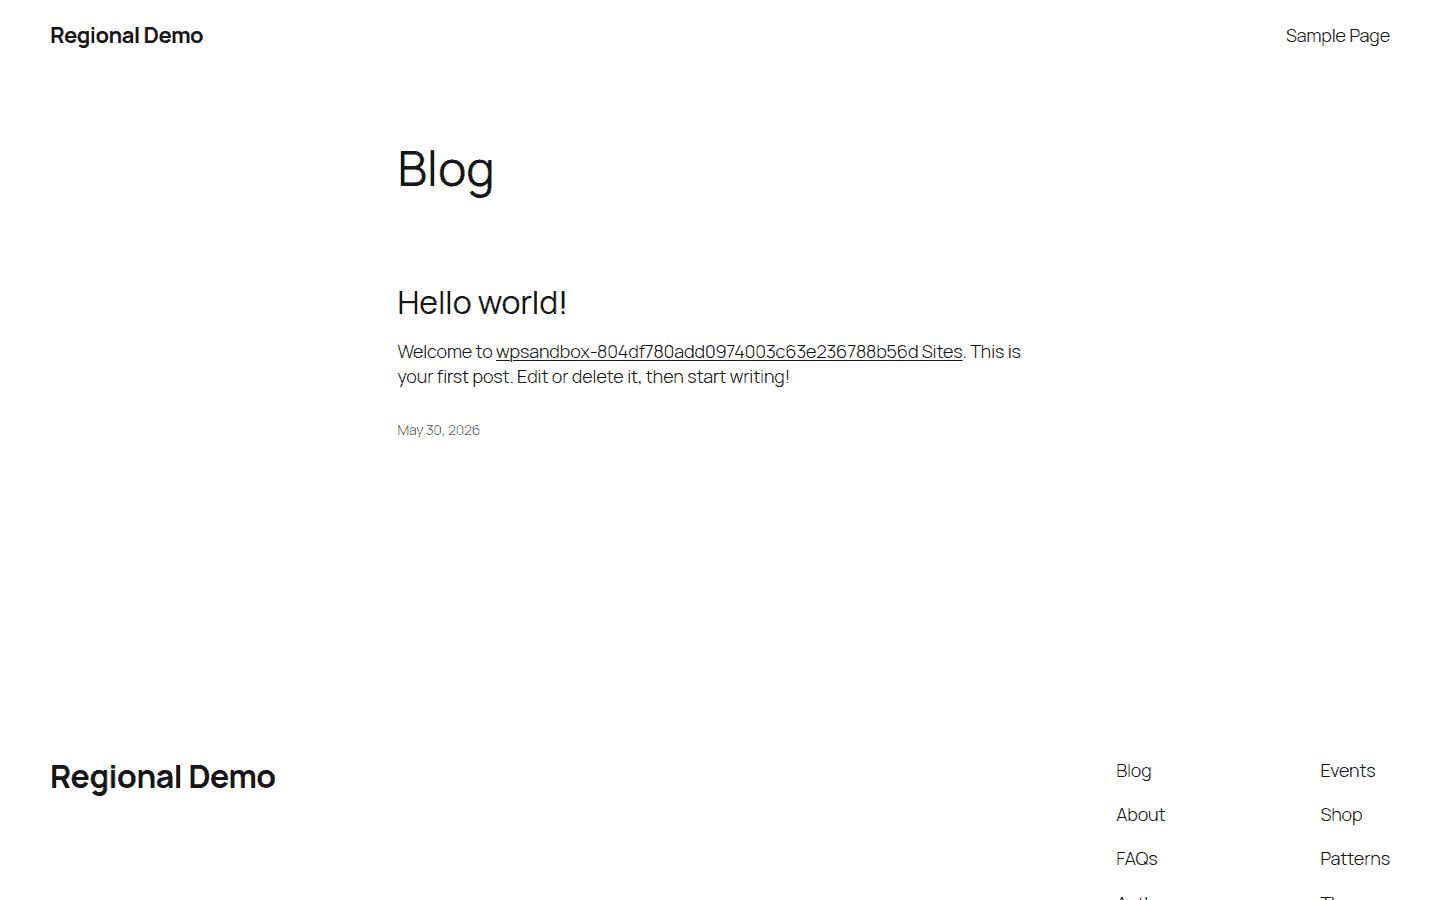
The job is not finished when WordPress creates the subsite. It is finished when the main site, subsite, dashboards, permalinks, media uploads, and SSL all work.
The Add Site screen is short, but each field affects the URL, ownership, and initial identity of the new subsite.
How to install WordPress Multisite on a fresh site
A fresh WordPress install is cleaner because there are fewer existing paths, plugins, and users to protect. It is still not a reason to skip planning.
Use this sequence:
- Install WordPress normally.
- Set the permalink structure under Settings > Permalinks.
- Configure DNS and SSL first if you plan to use subdomains.
- Add define(‘WP_ALLOW_MULTISITE’, true); to wp-config.php.
- Go to Tools > Network Setup.
- Choose subdomains or subdirectories.
- Click Install.
- Copy the generated code into wp-config.php and .htaccess, or follow host-specific server instructions.
- Log back in and confirm My Sites > Network Admin appears.
- Add the first subsite.
Some managed hosts and local development tools can create a Multisite install for you. Use the host-provided flow when it is documented. A host-specific Multisite option is usually safer than manual server-rule edits in an environment that abstracts those rules away.
After setup, start backups immediately. Fresh networks have a way of becoming real networks quickly: one test subsite becomes five active subsites, and suddenly nobody remembers whether backups were ever scheduled.
Also document the basics while they are still fresh: subdomain or subdirectory choice, DNS provider, SSL setup, Super Admins, network-critical plugins, and any host-specific rules. This note will save time when the first maintenance issue appears months later.
Verify the network before you move on
The easiest mistake is stopping after the dashboard loads. Multisite has more surfaces than a standalone site, so test the parts people will actually use.
| Check | Where to check | Failure sign |
|---|---|---|
| Main site frontend | Open the main domain in a private window | Homepage loads but posts or pages 404 |
| Network Admin | Admin bar > My Sites > Network Admin | Menu missing or access denied |
| New subsite frontend | Open the subsite URL | DNS error, SSL warning, blank page, redirect loop, or 404 |
| Subsite dashboard | Visit the subsite’s /wp-admin/ | Login loop or permission error |
| Permalinks | Open a normal page or post on each site | Homepage works but inner URLs fail |
| Media uploads | Upload an image from a subsite | Upload error, broken image, or wrong media URL |
| SSL | Open every public URL over HTTPS | Browser warning or mixed-content issue |
| Plugins | Test essential plugins on the main site and subsite | Plugin missing, active everywhere unexpectedly, or breaking one site |
| Themes | Check Network Admin and subsite appearance settings | Theme installed but not enabled where needed |
A successful subsite should load on the public frontend, not just exist in the Sites table.
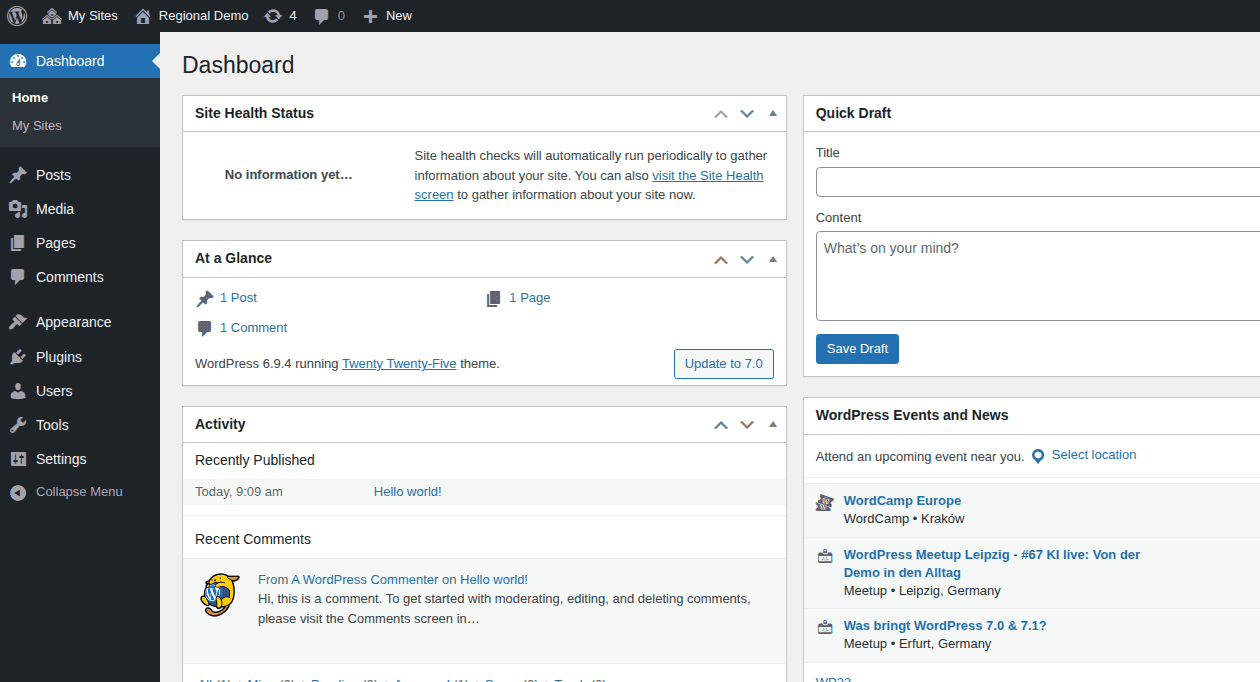
Check the admin side too, because each subsite should have its own dashboard inside the shared network.
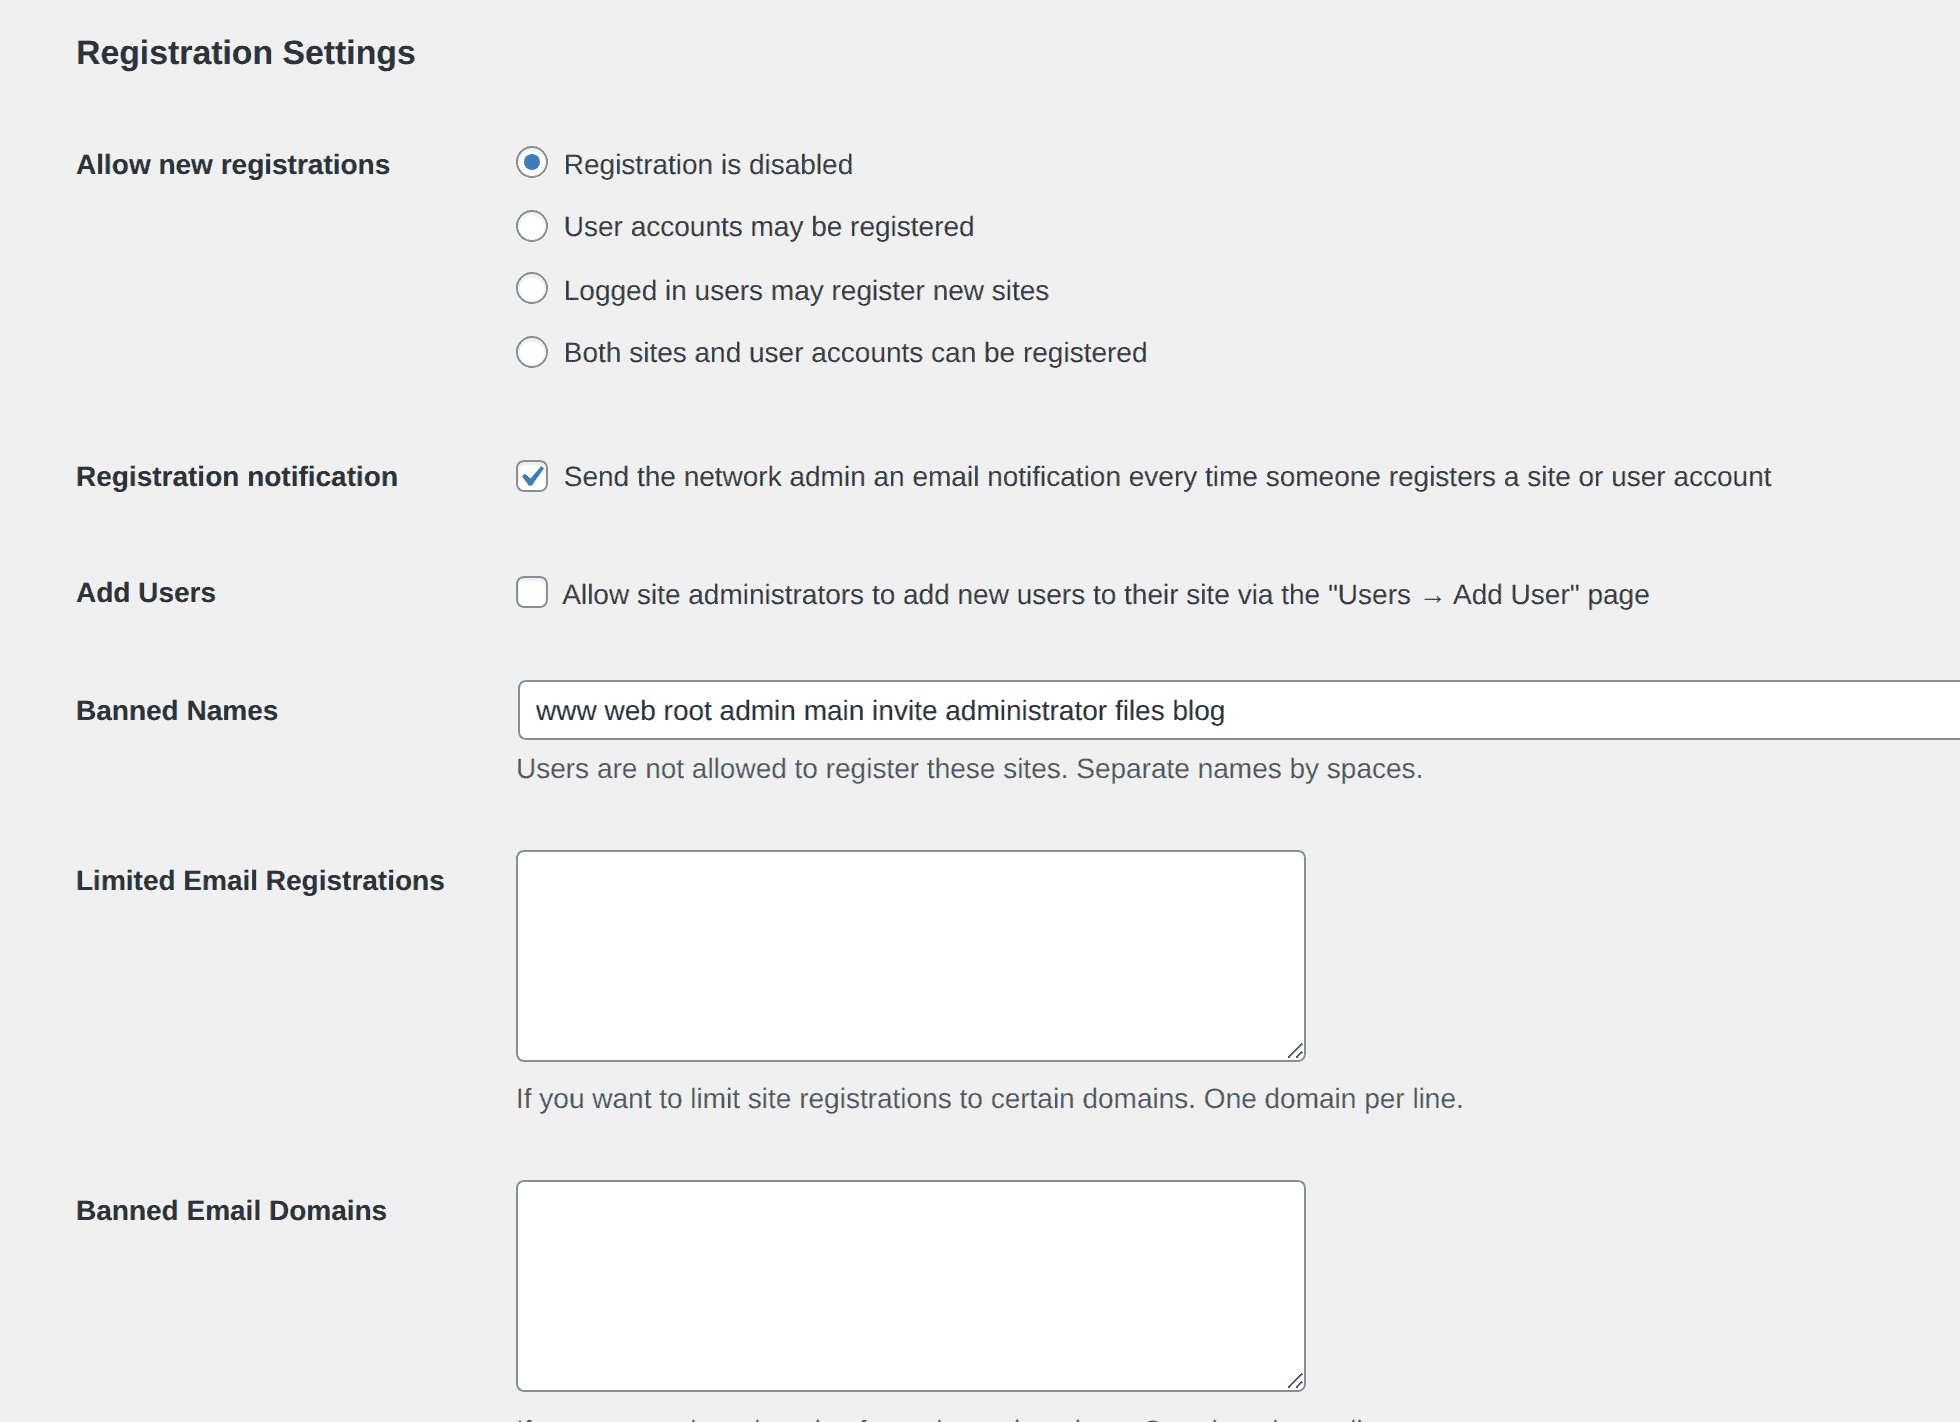
Then review the settings that shape how the network behaves:
- Super Admins: keep this list small, and review WordPress Multisite roles before delegating network access.
- Site admins: give each admin only the access they need.
- Registration: decide whether users or sites can be created publicly.
- Upload limits: set limits before media-heavy subsites appear.
- Allowed file types: avoid allowing more than the network needs.
- New-site defaults: check default language, welcome emails, starter content, and upload settings.
- Plugin menu access: decide whether site admins can activate available plugins.
Be careful with network activation. A network-activated plugin runs everywhere and usually cannot be disabled by individual site admins. That is perfect for essential network-wide tools, especially when you have already chosen WordPress Multisite plugins that belong across the network. It is a bad way to test a plugin you only need on one subsite.
Common WordPress Multisite setup problems
Most setup failures come from a small group of causes: the enable constant is missing, rewrite rules are wrong, DNS is not ready, SSL does not cover the URL, or a plugin does not behave well in a network.
Start with the symptom and check the boring cause first.
| Problem | Likely cause | Fix |
|---|---|---|
| Network Setup does not appear | WP_ALLOW_MULTISITE is missing, misplaced, or not saved | Reopen wp-config.php, confirm the line, clear cache, and refresh admin. |
| Subsite pages show 404s | Rewrite rules or permalinks are wrong | Resave permalinks, compare .htaccess with WordPress-generated rules, and confirm host rewrite support. |
| Subdomain does not load | DNS is missing or still propagating | Check wildcard DNS or explicit subdomain records and wait if records were just changed. |
| SSL warning appears | Certificate does not cover the subdomain or mapped domain | Issue the correct certificate and check host/CDN SSL settings. |
| Login loop | Domain, cookie, or HTTPS mismatch | Check site URLs, mapped domains, HTTPS consistency, and host cookie guidance if WordPress keeps redirecting to the login page. |
| Plugin breaks after conversion | Plugin is not Multisite-friendly or should not be network-activated | Deactivate it, test it on one subsite, and only network-activate if it truly belongs everywhere. |
| Locked out after file edit | Syntax error, wrong constants, or broken rewrite rules | Restore the saved file copies first; use the full backup if file rollback is not enough. |
This is where preparation changes everything. With a recent backup and clean file copies, a broken setup is annoying but recoverable. Without them, you are debugging production while hoping the next edit is the lucky one.
If you used BlogVault before conversion, restore the pre-change backup or recover the original files before making more changes. The safest troubleshooting move is often to return to the last known-good state, then repeat the setup more slowly.
Maintaining a WordPress Multisite network
Multisite setup is not the end of the job. It is the first day of operating a network.
The benefit is centralized management. The risk is also centralized management. One plugin update can touch every site. One overpowered Super Admin account can change the whole network. One traffic spike can affect other subsites on the same resources.
Build a maintenance routine around that reality:
- Schedule full-network backups.
- Test restores, not just backup creation.
- Test major WordPress, plugin, and theme updates in WordPress Multisite staging.
- Keep network-activated plugins minimal.
- Remove unused themes and plugins.
- Review Super Admins and site admins regularly.
- Monitor uptime, traffic spikes, storage, CPU/RAM, and database growth.
- Keep SSL certificates current for every domain, subdomain, and mapped domain.
- Document which plugins are network-critical and which are site-specific.
BlogVault fits naturally in this maintenance layer because Multisite increases the cost of ordinary WordPress mistakes. Backups, staging, update testing, restore confidence, uptime monitoring, and performance visibility matter more when one workflow affects many sites.
The practical rule is simple: if one dashboard controls many sites, the rollback plan has to be stronger than it was for one site.
FAQs
How do I enable WordPress Multisite?
Add define(‘WP_ALLOW_MULTISITE’, true); to wp-config.php, then go to Tools > Network Setup. Choose subdomains or subdirectories, click Install, and copy WordPress’s generated code into wp-config.php and .htaccess or your host’s equivalent server configuration.
Can I enable Multisite on an existing WordPress site?
Yes, but prepare first. Back up the full site, save copies of wp-config.php and .htaccess, deactivate plugins, confirm permalinks work, and make sure you can edit files outside WordPress admin.
Should I choose subdomains or subdirectories?
Choose subdirectories for a simpler setup under one domain, such as example.com/site-a. Choose subdomains when sites need clearer separation, such as site-a.example.com, and you can manage DNS and SSL correctly.
Does WordPress Multisite need wildcard DNS?
Subdomain networks usually need wildcard DNS or explicit DNS records for each subdomain. Subdirectory networks usually do not.
Can each Multisite subsite use different plugins and themes?
The Super Admin installs plugins and themes at the network level. Themes can be enabled for specific sites. Plugins can be network-activated for every site or activated per site if the network allows site-level plugin access.
How many sites can WordPress Multisite support?
WordPress does not set a practical hard cap for normal use. Hosting resources, database size, caching, traffic, storage, and management processes become the real limits.
Is WordPress Multisite safe?
WordPress Multisite can be safe when it is managed well. The risk is shared across the network, so backups, staging, permissions, updates, SSL, monitoring, and restore testing matter more than they do on a small standalone site.
Final recommendation
Install WordPress Multisite when your sites are related, shared management is useful, and you are ready to maintain the network as one system. Do not use it only because one dashboard sounds tidy.
For most site owners, the safest path is: decide whether Multisite fits, create a restore point, choose the URL structure, enable the network, verify every frontend and dashboard path, then put backups and update testing on a schedule.
If your sites are not closely related, or if one site may need to leave later, separate WordPress installs are less elegant but often safer.
The setup is a short sequence. The responsibility is the part that stays with you.

Shivani enjoys crafting guides that make every aspect of using WordPress simple and easy to follow. When she's not glued to her laptop, you can find her buried in a good book or occasionally, painting.