How to Backup WordPress To Dropbox?
Bulletproof Backups for Your WordPress Website
Fortify your business continuity with foolproof WordPress backups. No data loss, no downtime — just secure, seamless operation.

One thing to consider when taking a WordPress backup is where it is stored and how many you need to store. It is a great practice to have multiple backups stored in many places. It’s equally great to take a backup after every change to your site. This is especially true for WooCommerce sites where changes are made daily.
BlogVault is an excellent backup plugin because it stores your backups on different servers from your site and takes real-time backups. But, if you’d like to be extra cautious, remote storage solutions like Dropbox are also a great way to reduce the risk of losing access to your site.
Dropbox was built to be excellent cloud storage with amazing collaborative and organizing features. But, when it comes to finding remote storage for your WordPress site backups, is Dropbox the way to go? Is it safe? Is it easy? Is it worth it? This article will delve into the nitty-gritty of taking WordPress backup to dropbox.
TLDR: Dropbox is a great option for important backups to be stored but not for daily/regular use. BlogVault is the best way to backup your site because it does so automatically, in real-time, and on a schedule. Additionally, you can configure BlogVault to backup WordPress to Dropbox with just a few clicks.
How to backup WordPress to Dropbox using a plugin
To backup WordPress site to Dropbox with a plugin, you need to give it access to your Dropbox account. In this article, we explore how to do with 4 different plugins, starting from the easiest.
BlogVault
BlogVault was built with a full understanding of a site owner’s backup requirements and with ease of use at the forefront of its construction. With that in mind, BlogVault already stores your backups on its own servers, instead of on your site’s server like most other backup plugins. This feature wipes out any need for you to store them on Dropbox as a primary option, however it is always recommended to have an emergency backup just as well. BlogVault has an option to upload a WordPress backup to Dropbox directly, and here are the steps to do so:
- Install and activate the plugin: First hover over Plugins on the sidebar, and click Add New. Look for BlogVault in your plugin directory, and click Install and Activate. Scroll down till you see BlogVault and click Settings.
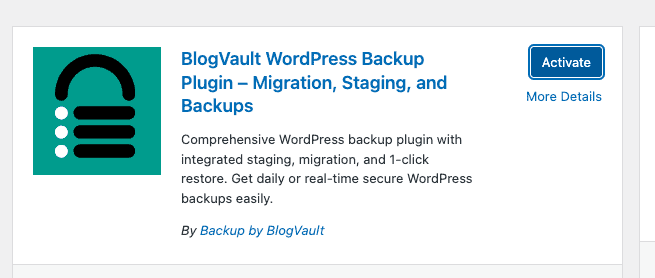
- Create an account: Fill in your email address and click Submit. On the next page, click Continue and Back to Dashboard. This will take you to your BlogVault account dashboard. Creating an account also automatically backs up your whole site for the first time. Give it a few minutes.
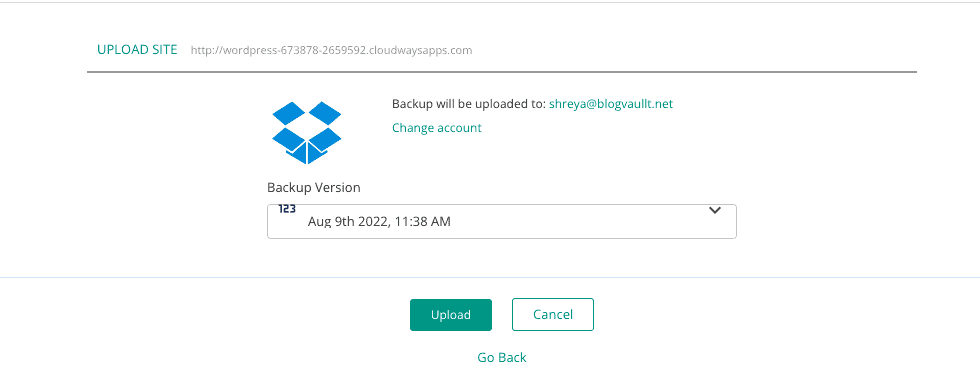
- Initiate an upload: Go to the Backups section on your BlogVault dashboard and click Details. Next, click the Upload to Dropbox icon at the top.

- Give Dropbox access: On the next page, you’ll be asked to authorize Dropbox access to BlogVault. Click Allow. Give it a few minutes and once it’s done, you can see the backup as a zip folder, in a folder called BlogVault on Dropbox.
The best WordPress backup plugin to use is BlogVault and we’re not just saying that. Here is a snippet of why BlogVault is the way to go:
- It automatically saves your site to multiple servers so you don’t have to.
- Backups are taken in increments so your site doesn’t suffer any performance issues.
- External dashboard that you can access and use to manage your site even if your site crashes or if you lose access to wp-admin.
- Restoring a backup is incredibly easy with just a few clicks.
- Add on the best WordPress security on higher plans.
UpdraftPlus
UpdraftPlus makes integrating Dropbox to your WordPress site easily and here are the steps to do so.
Keep in mind though, that UpdraftPlus will create a zipped backup of your full site on your site server, and then upload that file to Dropbox. Effectively, you will have two copies of your site on the server. For smaller sites, this won’t be too much of an issue, but with larger sites and perhaps on metered shared hosting, this is a huge waste of resources.
- Install and activate the plugin: Go to your wp-admin panel, hover over Plugins on the sidebar, and click Add New. Look for UpdraftPlus in your plugin directory and click Install and then Activate.
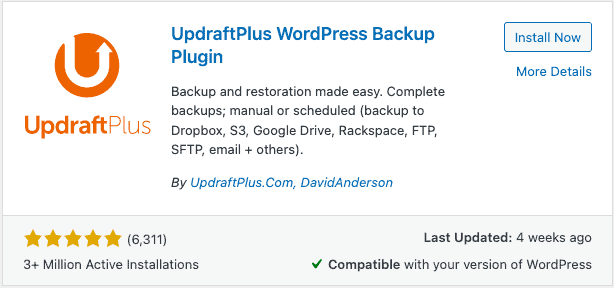
- Choose Dropbox: Back on the plugin page, hover over UpdraftPlus and click Settings. Then open the Settings tab and pick Dropbox as the remote backup option.

- Authorize Updraft to access Dropbox: You’ll have to sign in with your Dropbox account and Accept authorization.
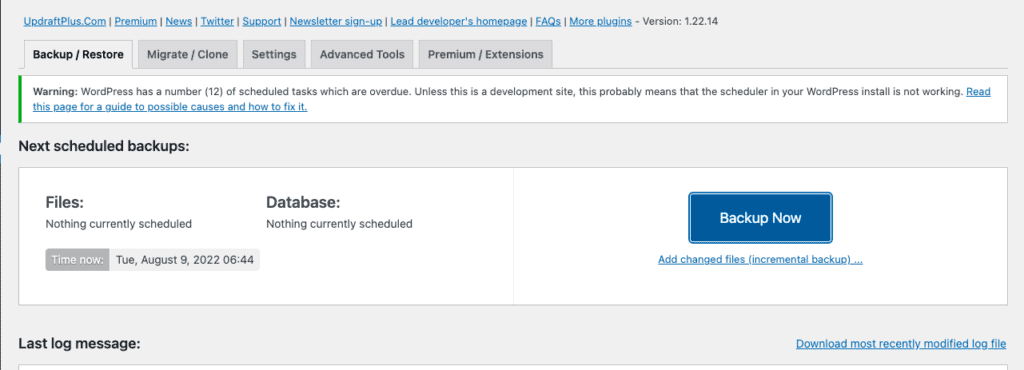
- Run a backup: Hover on the menu on the left and click Settings and UpdraftPlus Backup. In the Backup and Restore tab and click Backup Now. This will take a few minutes.
- Check if Dropbox has your backup: Login to your Dropbox account in a new tab and check if a folder called Updraft was created. The folder should contain zip folders that you can now use to restore.
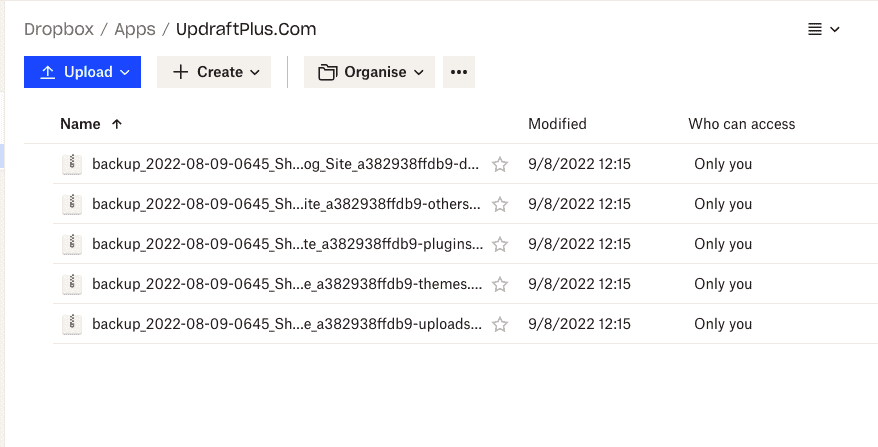
- Restore the backup: You can either restore the backup by clicking Restore on your site. Go to the UpdraftPlus settings and you’ll be able to find the Restore button for every backup you’ve taken. If you’ve lost access to your admin panel, you can manually restore your Dropbox backup.
Note: If you’re unable to authenticate your Dropbox account, try wiping the existing settings. Go to UpdraftPlus and click Advanced Tools and Wipe Settings.
BackWPup
While BackWPup has an option to upload your WordPress backup to Dropbox, they make it unnecessarily complicated. Additionally, backups are called jobs, and the interface needs some figuring out. You will require a code to integrate the plugin to Dropbox.
- Install and activate the plugin: Hover over Plugins in the side panel. Click Add New and look for the plugin in the directory. Click Install and Activate after that.
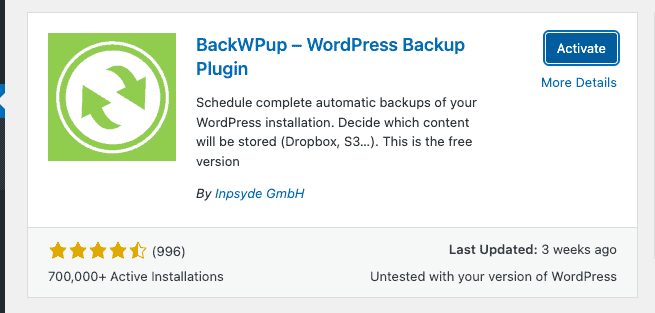
- Create a new job: Click BackWPup in the sidebar and click Create Job.
- Pick Dropbox: As part of the job settings, select Dropbox as the remote storage option.

- Create an account: A new tab should be created called To Dropbox. Click Create Account if you need to create one.
- Select level of access: Select either Get Dropbox App Auth code (allows access to only create a folder) or Get Full Dropbox App auth (allows full access to your Dropbox account).

- Provide Access: You’ll be asked to give BackWP access to your Dropbox account.
- Add the code: Once access has been granted, a code will be displayed in a pop up box. Copy the code. Paste it in the field beside the button you previously clicked, on the WordPress Admin Panel. If the authentication is successful, it should say Authenticated in green, at the top.
- Create a backup: Create a backup by running a job. If you hover over the name of the job on the Job page and click Run Now, this should show a progress bar.
- Check that the backup was successful: Once the progress bar completes, check that the file exists on Dropbox.
- Restore the backup: Unfortunately, BackWPup doesn’t have a free restore feature. So, unless you have the free version, you can only manually restore your site.
BackupBuddy
BackupBuddy is only available on the iThemes site. Purchase a license for your site from there, and download the plugin for installation. We do not recommend BackupBuddy, because it is a mediocre WordPress backup plugin, at best, and an ineffective one at worst. Backups are usually stored on the same server as your site, so having a Dropbox integration is actually an improvement for BackupBuddy.
- Install and activate the plugin: Once you buy the plugin from the iThemes site, you can download the zip file. Next, head to your wp-admin, and hover over Plugins in the side panel. Click Add New and Upload Plugin. Click Choose File and select the right file. Click Install and Activate after that.

- Add a new Remote Destination: Click Add New on the Remote Destinations page. Pick Dropbox as the destination. Select the version of Dropbox if prompted. You’ll have the choice to pick between Version 1 and Version 2 (the new version).
- Authorise access to Dropbox: Click Connect to Dropbox.com & Authorize. Click Allow when prompted to finish the process. You may have to login to your Dropbox account depending on whether you’re already signed into a Dropbox account.
- Add the code: Once you finish giving Dropbox access, a code will be provided. Copy it and go back to your wp-admin and paste the code in the Authorisation Field. Click Yes, I’ve Authorized BackupBuddy with Dropbox & Entered the Code above.
- Customise the settings: On the next page, you can customise details like limit the number of backups that can be stored, name of the folder that it will be stored in, etc. Click Add Destination when you’re done.
- Create a backup: You can create a new backup by clicking Backup in the sidebar. You should find the backup in your Dropbox after you’re done.
- Restore the backup: To restore, click BackupBuddy in the sidebar and click Restore Backup. Then, click Restore beside the backup you’d like to restore. You can pick if you want a partial or full backup. The next page will show you a progress bar. Give it a few minutes and your backup will be restored.
If for some reason you can’t restore your site using your dashboard, BackupBuddy can help you restore it manually.
Manually backup WordPress site to Dropbox
Manual backups are painful and time-consuming for the following reasons.
- Files and databases are exported separately; both of which can be time-consuming processes for larger sites.
- It is a serious load on your server and slows your site down.
- Server disconnections can be the bane of your life because they result in partial downloads of your files and incomplete backups.
- The process requires making copies of your site. One mistake in the mistake and your site could crash
The best way to go is to ditch the manual method and use BlogVault for its ease, reliability, and efficiency. But, if you’d like to take WordPress backup to dropbox manually and have the time to do so, we have an article on how you can manually backup your files and your database. Use an FTP client for your files and phpMyAdmin for your database.
Once you’ve backed up your site, zip the folder containing both your files and database and upload the zip folder to Dropbox.
Why Dropbox isn’t suitable as your main backup storage
Here are some things to consider when you’re talking about Dropbox as a main backup solution:
- Storage: It’s highly, highly recommended that you take frequent if not daily backups. Plus, we recommend having at least 30 days worth of backups, especially for sites that have regular changes. Unfortunately, with Dropbox, only 2GB is free. To put that into context, our trial site with no images and 12 dummy posts is about 445MB. If you’d like to regularly backup your site, 2GB of storage isn’t even remotely enough. This is why BlogVault is a vastly better option because you don’t have to worry about storing your site’s backups. The plugin takes care of it for you.
- Real-Time Backups: When managing a WooCommerce site, you need real-time backups that can keep up with every small change that is made to a site – like new orders. Saving real-time backups to Dropbox takes up an insane amount of storage and can be very hard to manage. This makes Dropbox an unsuitable storage solution for WooCommerce sites.
- Cost: For anything more than 2GB of storage, you have to pay for a plan. They do have different plans available but the least expensive plan is $16.58 for a month. We definitely don’t recommend using Dropbox as a primary storage solution for your backups.
- Renaming your backups: If you don’t rename your backups, you will have a hard time restoring the right backup when you need it. Unfortunately, you’ll have to manually rename every backup you create.
- Restore issues: You’ll have to manually restore your site and that is painstaking and prone to failures. In fact, you will often have to use FTP, because cPanel has a limitation on upload file sizes. Your life will be so much easier if you use a plugin like BlogVault where the restore process is just a few clicks.
- Security: When talking about the security of a site, a key thing to consider is where your sensitive information is stored. If all your critical data is stored in one spot, then you’re left vulnerable with just one hack. For example, when you install a plugin like UpdraftPlus, you’re storing your site information and your Dropbox information on your site’s servers. If your site is hacked, that’s a lot of information that the hacker has access to.
With BlogVault, your backups and Dropbox information are stored on your BlogVault account and servers. So, a hacker will have to hack their way through your WordPress account and BlogVault account.
Final thoughts
Dropbox can be a safe storage alternative if you invest in a paid account because 2GB of free storage is certainly not enough. Additionally, when it comes to sending a WordPress backup to Dropbox, BlogVault is a great solution because of its ease of integration and amazing backup infrastructure.
FAQ
- How to backup WordPress to Dropbox without loading your server?
Most backup plugins backup your site to your server first. When you want to send it to Dropbox, it clones these files on the server, zips it all, and then sends them to the remote storage location. While this can work well for small sites, larger sites can’t afford these loads on the servers. BlogVault comes to the rescue in this scenario. The plugin doesn’t create a backup on the site server, but its own Amazon S3 servers. So, even if it needs to duplicate your backup and send it to Dropbox, your site is unaffected. Check out these steps to backup to Dropbox with BlogVault.
- Should you auto backup the WordPress site to Dropbox?
It is definitely recommended that you take multiple backups of your site and store them in remote locations. Cloud storage solutions like Dropbox can be a great resource for this. Unfortunately, if you have a large site, Dropbox can be an expensive investment. This is why we recommend BlogVault. It automatically takes multiple backups of your site and stores them on various servers.
Recommended read: how to backup WordPress to google drive
Tags:
Share it:
You may also like
How to Limit Form Submissions with Droip in WordPress
Forms are an indispensable part of any website because of their versatility, letting you collect information for various purposes! However, people with ill intentions often attempt to exploit these forms…

How To Manage Multiple WordPress sites
Management tools help agencies become well-oiled machines. Each task is completed with the least amount of effort and highest rate of accuracy. For people managing multiple WordPress sites, the daily…

PHP 8.3 Support Added to Staging Feature
We’ve introduced PHP version 8.3 to our staging sites. Test out new features, code changes, and updates on the latest PHP version without affecting your live website. Update PHP confidently…
How do you update and backup your website?
Creating Backup and Updating website can be time consuming and error-prone. BlogVault will save you hours everyday while providing you complete peace of mind.

Updating Everything Manually?
But it’s too time consuming, complicated and stops you from achieving your full potential. You don’t want to put your business at risk with inefficient management.

Backup Your WordPress Site
Install the plugin on your website, let it sync and you’re done. Get automated, scheduled backups for your critical site data, and make sure your website never experiences downtime again.


