How To Recover A Deleted Page In WordPress
Bulletproof Backups for Your WordPress Website
Fortify your business continuity with foolproof WordPress backups. No data loss, no downtime — just secure, seamless operation.
We’ve all been there—that heart-stopping moment when you realize you’ve accidentally deleted a really important post or webpage. It might be due to a momentary slip-up, an unintended click, or even a result of external factors like cyber-attacks or technical glitches. Whatever it might be, the outcome is the same—the loss of content and potential ramifications for your website.
The urgency to recover that page intensifies if it holds significant SEO value, as losing it could negatively impact your search engine rankings.
Fortunately, there are several methods and tools available at your disposal to recover deleted pages in WordPress.
TL;DR Accidentally deleting an important page in WordPress can be stressful. With BlogVault backups, you can quickly recover just the deleted page without having to restore the entire website, ensuring minimal downtime and hassle.
Most good backup providers—us included—will preach the need for regular, automatic, and full-site backups. However, full site backups don’t automatically mean full site restores.
With BlogVault backups, you can restore a single page or post in seconds from any backup. Over and above that, if the page was a particularly heavy one, then you can test the restore beforehand to make sure that an older page works well with your current site.
This flexibility just doesn’t exist with manual backups or even other backup plugins, which is why BlogVault is the best insurance for your site.
Option 1: Recover deleted pages from wp-admin
WordPress has a built-in safety net: the Trash. Your deleted pages and posts aren’t immediately removed permanently. Instead, they’re tucked away in the Trash if you want to recover them.
- Access the pages or posts section: Click on Pages on the left-hand menu of your WordPress dashboard.

- Navigate to the Trash: You will find the Trash option on top of the list of pages, alongside other options like Published, Drafts, etc. If you’ve just deleted the page, you might still see an Undo button; click on it to reverse the deletion. If the Undo button isn’t present then clicking on the Trash button will show you all the pages or posts that have been deleted in the last 30 days.


- Restore your page: To restore your content, hover over the title of the page or post in the Trash, and a few options will appear beneath it. Select the Restore option to move it out of the Trash and return to its original status.

Note: WordPress automatically empties the Trash after 30 days. So act quickly if you need to recover pages or posts.
Tip: If you want to recover multiple pages or posts from the trash, you can restore them all at once by selecting the checkbox next to each page and choosing Restore from the Bulk actions dropdown menu.
Option 2: Recover permanently deleted pages using a plugin
It can be rather upsetting to unintentionally erase a significant page or post in WordPress, particularly if you’ve already cleared the Trash. Even though it can feel as though your content is gone forever, there are methods you can use to recover deleted pages or posts.
Recovering permanently deleted pages is easy if you have a reliable backup plugin like BlogVault. It allows you to restore your deleted pages with the help of backups without reverting your entire site.
Before doing so, we recommend testing your backups to ensure that your pages are included in the backup you plan to restore. Without further ado, let’s look at how to use a backup plugin to recover deleted pages.
- Access your backup on BlogVault: Navigate to the Backup card from your site’s dashboard. Click on Restore and choose the required Backup version after making sure it has your deleted pages.


- Start the restore process: Expand the Selective Restore option. Uncheck both the Restore Files and the Restore Tables boxes and click on the button that now says (No Table Selected). Look for the wp_posts table, select it, and click on Confirm. Click on Continue and your pages will be recovered to the selected backup version.

Option 3: Recover permanently deleted pages using a web host
Many web hosting companies come to the rescue with automated backup and restoration services, simplifying the process of retrieving erased content. These hosting backups are a reliable and straightforward method to recover your precious pages.
However, before you start breathing a sigh of relief, it’s essential to note a small yet crucial detail: not all web hosts automatically backup your site. Some require you to manually hit that Backup button—something that you should check when deciding on a web host. Others require you to write in to support to access backups at all. In sum, it is not always an easy process.
For this article, we’ll be using Cloudways as they take automatic backups of your site. Here’s how to go about it:
- Find your backup: Navigate to your site on your server and click on the Backup and Restore option on the left-hand panel. Select the version of your site you want to restore from the dropdown menu.

- Start the restore process: Click on the Restore Application Now button. Next, you must select the type of restore. Click on the Database option and then on the Proceed button.


Option 4: How to recover permanently deleted pages using Backup Wizard?
With the Backup Wizard feature, you can recover your deleted pages with the help of a backup copy of your database. Here’s how you can go about it:
- Access cPanel’s Backup Wizard: Login to cPanel and click on Backup Wizard within the tools section under the Files category.

- Initiate the restore process: Next, click on the Restore button. To restore your pages, you need to restore your database and click on MySQL Databases.


- Upload the backup files: A file browser will pop up once you click on the Choose file button. Choose the appropriate .zip backup files and click on Upload to proceed with the restoration process.
Once the upload is complete, the Backup Wizard will automatically start restoring your site to the chosen backup version that had your deleted pages present.
Option 5: Manually recover permanently deleted pages
You can choose to manually restore your pages if the automated solutions don’t work. This approach involves restoring your database and requires you to have a downloaded .zip file of your website’s database. Let’s walk through the steps to bring back your deleted pages.
A. Restore database
To recover a page, you will have to restore your database. We will do this using phpMyAdmin. Here’s how you can go about it:
- Upload your backup using phpMyAdmin’s Import section: Once you’re logged in to phpMyAdmin, locate and click on the Import tab. Click on the Choose File button to select the database file you want to upload from your computer. Ensure it’s the correct file to avoid any mishaps. Check the format of your database file and select the corresponding format from the dropdown menu.


- Start the restoration process: Scroll down to the bottom of the page and click on the Import button. This will restore your database along with the deleted pages.

B: Restore using Google web cache
Search engines like Google will cache web pages, saving a snapshot of your website’s content. Even if the original website becomes unavailable, these cached versions can be your last hope. You can use these pages as a reference to recreate a fresh page.
Although it is not recommended, here’s how you can use Google web cache to restore your deleted pages or posts:
- Access the cached version of your website: Open your browser and paste the following URL:
“http://webcache.googleusercontent.com/search?q=cache:http://user.com/”
Replace `http://user.com/` with your website’s URL. This will load the cached version of your site as stored by Google.

- Copy and store the visible content: Copy the entire content and paste it into a text editor like Notepad or directly into your WordPress editor for safekeeping.
- Create a new page in WordPress: Log into your WordPress dashboard. Navigate to Add New under the Pages section. Rename it to the original title to keep everything consistent. Paste the recovered text into the content area of your new page in WordPress and rearrange it accordingly.
- Save and re-upload images: From the cached snapshot, save any images to your system. Upload these images to your new page on your website and rearrange them to their original locations.
- Reapply themes to the pages: Manually look for the specific themes and plugins that were being used on the deleted page. Next, reapply and activate them as needed to restore your page’s original appearance.
Note: The process of getting the page from Bing’s cache is very similar.
C: Restore using Wayback Machine
The Wayback Machine is another invaluable archive that stores cached snapshots of your website which you can access. Restoring your site using the Wayback Machine is an effective way to recover lost content from specific dates. Here’s how you can make use of this digital time machine:
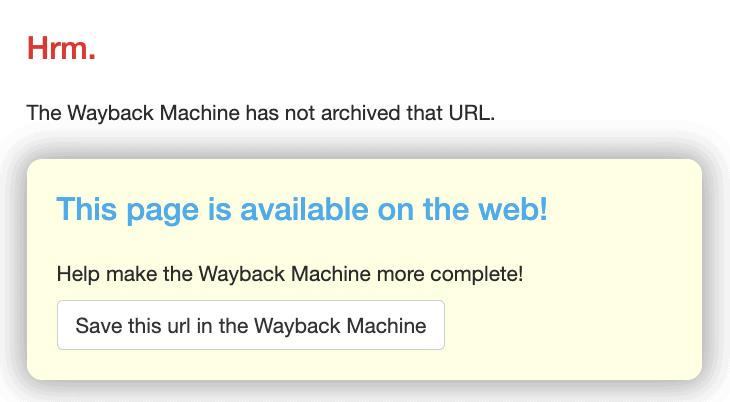
- Find your website on Wayback Machine: Open the Wayback Machine website on your browser. Enter your website’s URL in the search bar at the top of the page and press Enter. Note that not all sites are archives here and you might be presented with an error.

- Select a date from the timeline: You will see a timeline at the top with highlighted dates showing when your site was archived. Click on a specific year to narrow down the archives. Once you select a year, a calendar view will appear showing the specific days your site was archived. Click on a particular date to view the snapshot of your site from that time.

- Find and copy content from pages: Navigate through the archived version of your site to find the pages you need. Open each page and manually copy the visible textual content. Paste the copied text into a text editor like Notepad for safekeeping and further use.
- Create a new Page in WordPress: Log into your WordPress dashboard. Navigate to Add New under the Pages section. Rename it to the original title to keep everything consistent.
- Paste the recovered content: Paste the recovered text into the content area of your new page or post in WordPress and rearrange it accordingly.
- Save and re-upload images: From the cached snapshot, save any images to your system. Upload these images to your new page on your website and rearrange them to their original locations.
- Reapply themes to the pages: Manually look for the specific themes and plugins that were being used on the deleted page. Next, reapply and activate them as needed to restore your page’s original appearance.
How to prevent accidental deletion
It’s common for humans to make errors. It sure is frustrating to delete an important piece of your site, causing panic. Thankfully, there are some practices you can implement to avoid accidentally deleting any part of your site.
Regular backups: Having a recent backup is your first line of defense against data loss. Taking regular backups ensures that you can quickly restore your site to a previous state if a page or post is accidentally deleted.
Proper user role management: Properly managing user roles and permissions can prevent accidental deletions by unauthorized or inexperienced users.
Staging environment: A staging environment allows you to make changes and updates to your site in a safe, controlled setting before pushing them live.
Parting thoughts
Accidentally deleting important pages or posts in WordPress can be a nerve-wracking experience, but with the right tools and strategies, you can recover your lost content effectively.
Whether you choose to use a reliable plugin like BlogVault, your web host’s backup services, or manually restore files and databases, there are multiple ways to ensure your site remains intact. Remember, the best defense against data loss is a solid recovery plan.
FAQs
Are there any risks involved in the recovery process of a page?
Yes, there are risks involved in the recovery process of a page such as data corruption, overwriting newer data, and incomplete recovery. It’s crucial to follow recovery steps carefully and ensure you have recent, reliable backups. Testing your backups periodically can also help verify their integrity and mitigate potential issues.
How can I prevent accidental deletions in the future?
Preventing accidental deletions involves regular backups, managing user roles carefully, conducting regular content audits, and using a staging environment. Tools like BlogVault, UpdraftPlus, and BackupBuddy can automate backups. Assign roles like Editor or Administrator cautiously, conduct monthly or quarterly reviews, and test significant updates in a staging environment before applying them live.
Do I need any technical skills to recover the deleted page?
The technical skills required to recover deleted pages may vary. Plugins like BlogVault or your web host’s backup services are user-friendly and require minimal technical expertise. However, manual methods, such as using cPanel, FTP, or phpMyAdmin, require more technical know-how and involve navigating file directories and handling database imports.
Can I recover a page if it was deleted a long time ago?
Recovering a long-deleted page is challenging but possible. Tools like Google web cache and the Wayback Machine can help retrieve older versions of your pages, though they might not capture every detail.
What tools or plugins can help with content recovery?
Several tools and plugins can assist with content recovery. BlogVault is a reliable plugin for automated backups and easy recovery. Google web cache and the Wayback Machine can retrieve cached versions and historical snapshots of your site. These tools, combined with preventive measures, can effectively safeguard your content.
Tags:
Share it:
You may also like
How To Backup WordPress Site To Computer?
What do crashed sites, failed updates, and human error have in common? They are all fixable… if and only if you have a backup stored securely. Without a backup, you’ll…

How To Update A WordPress Theme From A Zip Folder?
A theme is to a WordPress site, what furniture is to a house. They add design and functionality to it. Without it, a website doesn’t work. You may crash your…
How To Recover WordPress Website: A Step-by-Step Guide
Imagine waking up one morning and discovering that your WordPress site is completely down. Instead of your familiar homepage, you’re greeted with an error message or, worse, a blank screen…
How do you update and backup your website?
Creating Backup and Updating website can be time consuming and error-prone. BlogVault will save you hours everyday while providing you complete peace of mind.

Updating Everything Manually?
But it’s too time consuming, complicated and stops you from achieving your full potential. You don’t want to put your business at risk with inefficient management.

Backup Your WordPress Site
Install the plugin on your website, let it sync and you’re done. Get automated, scheduled backups for your critical site data, and make sure your website never experiences downtime again.


