You’re new to DreamHost and wondering about their backup system. Does the platform automatically back up your site? Are those free hosting backups reliable?
Here’s the truth. DreamHost’s terms state that their backups are not guaranteed. You could be relying on a safety net that might not exist when disaster strikes.
To avoid that uncertainty, it’s important to understand how hosting backups work – what they cover, where they’re stored, and why they’re not always enough.
This guide breaks down DreamHost’s backup system and shows you what you need to keep your website secure.
DreamHost’s backups are not guaranteed and have short retention periods (2-4 weeks). You need a robust backup plugin to ensure reliable, long-term protection for your website.
Understanding the DreamHost backup system

Creating WordPress backups is non-negotiable. They protect you from hacks, bad updates, and mistakes. Here is what DreamHost offers its customers:
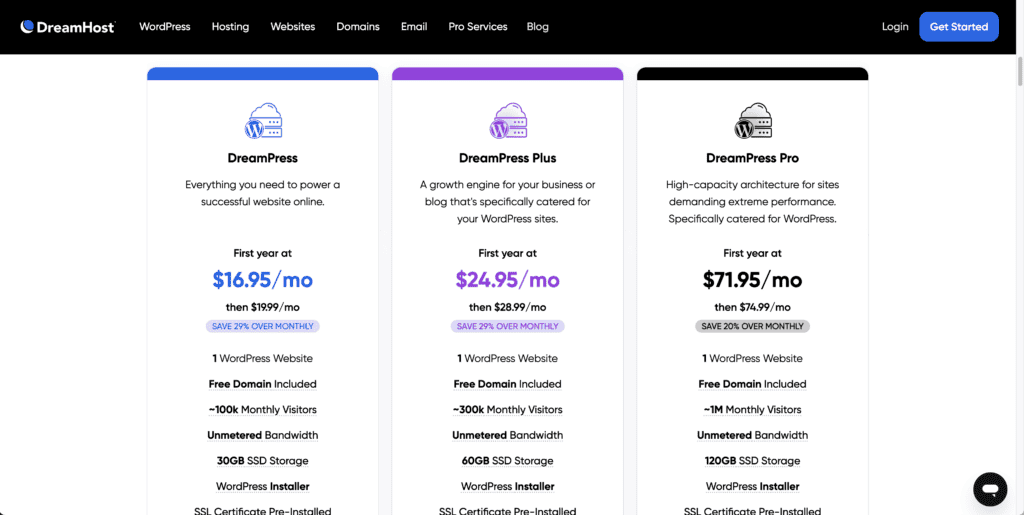
DreamHost runs automatic daily backups on all managed hosting plans (DreamPress). These happen without you doing anything. They capture your website files and database, though these might be saved at different times during the day.
You can create manual backups any time you want. DreamPress users can also lock important backups so they won’t get overwritten.
What is the backup retention period like?
Most plans only keep your most recent backup copy. DreamPress Basic and Plus plans store 14 days of backups. DreamPress Pro keeps them for 28 days. Database backups stick around for about 5 days separately.
All your backups live only on DreamHost’s servers. Nothing gets stored somewhere else automatically. If you want copies elsewhere, you’ll need to download and store them yourself.
Here’s the kicker: DreamHost states that its backups are not guaranteed to be available. They recommend you create your separate backups and keep local copies.
Think of DreamHost backups as a temporary safety net, not your main protection. You’ll need third-party backup tools or storage for reliable, long-term security.
How to backup your site via DreamHost
DreamHost gives you two ways to create backups. Let me walk you through both.
A) Backup within the DreamHost panel
This method depends on your hosting plan. Not all plans have this feature.
Find your backup section: Log into the DreamHost panel and navigate to Manage Account. Here, locate Back Up Your Account under the account management section.
Create backup: Click on Create a Backup and then hit the Back me up! Button to initiate the backup.
Check your email for backup completion notification within a few hours. Your backup will generate two files (site files and database).
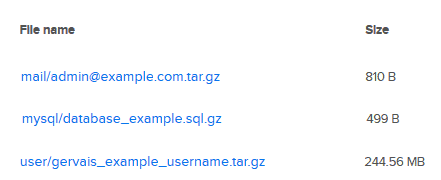
Return to the backup section and download each file separately within 14 days and store it in a remote location.
Extract files: Use 7-Zip on Windows or double-click on Mac to open .tar.gz and .sql.gz files.
B) Manual backup via FTP & phpMyAdmin
Manually backing up your site gives you complete control over your backup process, but it is also prone to human error. Make sure you follow these steps correctly.
Download website files: Use FileZilla or a similar FTP client to connect to your hosting account and download all files from your domain folder.

Access phpMyAdmin: Access the phpMyAdmin interface via your DreamHost panel.

Select database: Choose your source database from the left pane list.
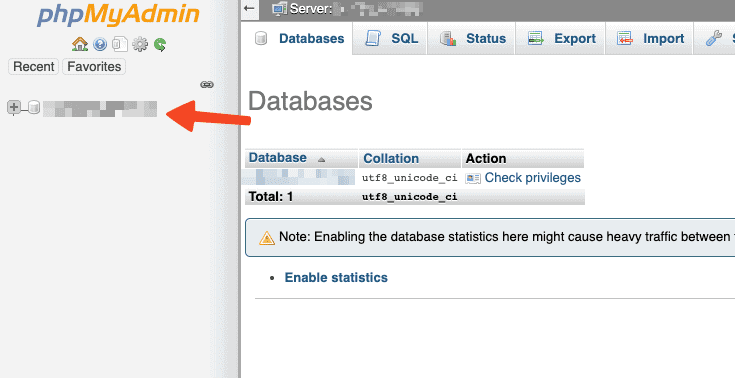
Export database: Click the Export tab in the top center pane. Next, choose export method: Select either Quick or Custom export method based on your needs.

Download database: Click the Go button and save the .sql file to your computer.
Remember, DreamHost’s backups aren’t guaranteed. Always keep your copies stored away from their servers.
How to restore your DreamHost backup
The restoration method depends on how you backed up your site originally.
A) Restore via the DreamHost panel
This only works if your backup is still available in DreamHost’s panel. If it’s not there, you’ll need to use the manual method with your downloaded files.
Part A: Restore your files
Access website management: Navigate to Panel, then Manage Websites. Click Manage for your domain.
Find backups: Head to the Content tab and click Backups under Manage Your Site.
Choose and restore: Find your desired date, click Restore, read the overwrite warning, and click Restore.
Make sure that you don’t work on your site until it finishes. You will be notified once it does.
Part B: Restore your database
Access and start restore: Go to Panel and click on MySQL Databases. Next, select Restore DB next to your database.
Select backup: Choose a date from the dropdown (only 5 days available) and leave tables as All for a complete restore.
B) Restoring your site with a backup manually
This overwrites your existing files and database. Ensure you follow the steps correctly to avoid breaking anything.
Prepare for restore: Enable maintenance mode on your live site before you begin the restore process.

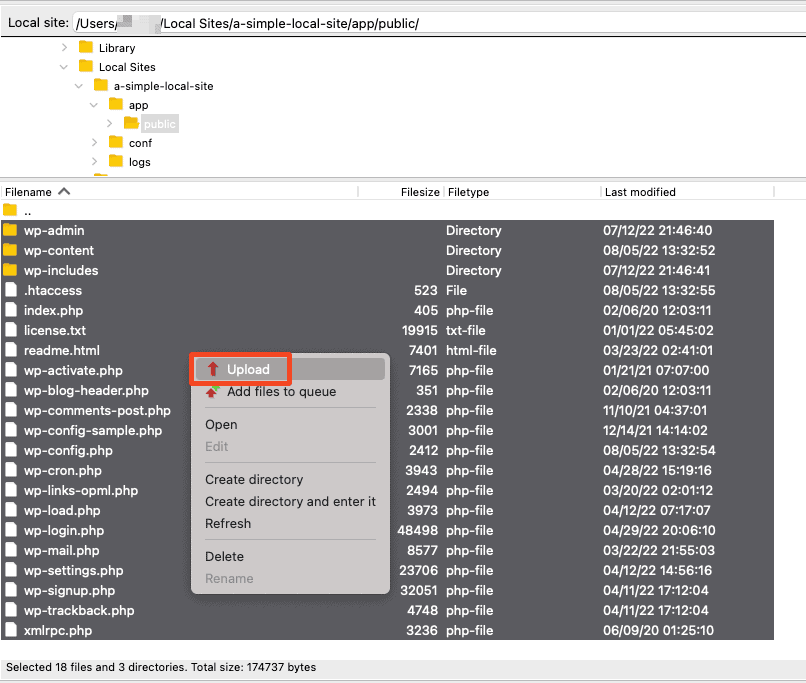
Upload files: Use FTP to upload your website files to the correct directory, ensuring you use file and database backups from the same date.
Import database: Access phpMyAdmin and import your .sql database file to restore content and settings.

Check configuration: Make sure your wp-config.php file points to the correct database credentials.
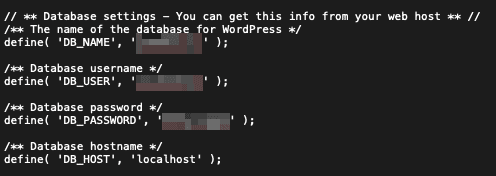
Test and verify: Clear all caches, test your login and key pages, then remove your site from maintenance mode.
Why DreamHost backups are insufficient
Let’s be honest about DreamHost’s backup limitations. They’re helpful as a basic safety net, but they have serious gaps.
The “Not guaranteed” problem
DreamHost clearly states that its backups may be unavailable when you need them. You’re expected to keep your copies as backup insurance.
Retention periods are too short
Website files are kept for about 2 weeks. Database backups disappear after 5 days. What if you discover a problem three weeks later? You’re out of luck.
Files and database sync issues
DreamHost backs up your files and database at different times. This creates timing mismatches on busy sites with orders, comments, and user activity happening constantly.
Single point of failure
All your eggs are in one basket. A DreamHost-wide issue could wipe out your site and all your backups simultaneously.
The best DreamHost backup alternative
Given DreamHost’s backup limitations, you need a more reliable solution. BlogVault stands out as a solid choice for WordPress sites.
True offsite protection
BlogVault stores your backups on its cloud servers, completely separate from DreamHost. If something happens to your hosting provider, your backups remain safe and accessible.
Automatic and on-demand backups
You get daily automatic backups plus unlimited manual backups whenever you need them. The system uses incremental backups, which means it only saves changes since the last backup. This keeps your server running smoothly.
Real-time monitoring
BlogVault captures changes as they happen, especially important for WooCommerce stores with constant orders and inventory updates. You won’t lose recent transactions between backup cycles.
Long-term storage
Your backups stick around for 90 to 365 days, depending on your plan. That’s way longer than DreamHost’s measly 5-day database retention.
Easy restores and staging
One-click restores work reliably, and you can restore specific files or your entire site. The built-in staging feature lets you test changes safely before pushing them live.
BlogVault fills the gaps that DreamHost’s backup system leaves wide open.
Parting thoughts
DreamHost’s 2-4 week retention period simply isn’t enough for most website disasters. The critical flaws are clear: no offsite backups by default, complex separate restores, and their own “not guaranteed” warning.
Follow the 3-2-1 backup rule: keep 3 copies of your data, use 2 different storage types, and store 1 copy offsite. A reliable backup plugin like BlogVault gives you the protection DreamHost can’t guarantee.
Even if you decide to move to other hosts like SiteGround or Wp Engine remember that their built-in backups while more consistent and better retained are still stored within their own infrastructure. Pairing those with an offsite solution such as BlogVault ensures your backups remain independent of your hosting provider.
FAQs
Does DreamHost do backups?
Yes, DreamHost performs automatic daily backups of website files and MySQL databases. DreamPress adds on-demand snapshots, 1‑click restores, lockable backups, and longer retention (2 weeks on Basic/Plus, 4 weeks on Pro). Backups are not guaranteed, so download panel backups within 14 days and keep off-site copies.
What are the 4 types of backup?
The four types of backups are full, incremental, differential, and mirror. Full copies everything; incremental captures changes since the last backup; differential captures changes since the last full. Mirror creates a point-in-time image that mirrors the source.
How do I manually backup my DreamHost site?
Manually back up files via SFTP or SSH by downloading your site directory and key config files. Export your database via phpMyAdmin to create an .sql or .sql.gz file. You can also use the panel’s Create a Backup tool, then store the archives offsite, such as DreamObjects or S3.
What are the disadvantages of DreamHost?
Backups are not guaranteed, website file retention is generally up to two weeks, and database retention is about five days. On-demand backups and 1‑click restores are limited to DreamPress, and daily offsite backups require the paid DreamCare PRO add‑on. Files and databases are backed up at different times, which can cause mismatches on dynamic sites.
What is DreamHost best for?
DreamHost is best for managed WordPress with DreamPress and affordable shared hosting for blogs and small businesses. It also suits developers who want SSH, WP‑CLI, VPS, or dedicated servers, and S3‑compatible storage via DreamObjects. Users who value open-source-friendly tooling and straightforward pricing often find it a strong fit.

Shivani enjoys crafting guides that make every aspect of using WordPress simple and easy to follow. When she's not glued to her laptop, you can find her buried in a good book or occasionally, painting.