How to Edit HTML in WordPress Without Breaking Your Site
Bulletproof Backups for Your WordPress Website
Fortify your business continuity with foolproof WordPress backups. No data loss, no downtime — just secure, seamless operation.
Need to make HTML changes to your WordPress site?
WordPress was designed to make website creation easy for anyone. It eliminates the need to know coding. But in case you want to add functionality or enhance its features by changing the code, WordPress enables you to do so in different ways.
Depending on the type of change you want to make, it can be simple or very risky. In this guide, you’ll learn:
1. How to Edit WordPress HTML in Block Editor
2. How to Edit WordPress HTML in Classic Editor
3. How to Edit HTML using cPanel or FTP
We also give you tips on how to edit HTML in WordPress safely without breaking your site.
Steps To Take Before Editing HTML On Your WordPress Site
Editing code on your website is risky and can cause it to break or malfunction. Below are two cautionary steps you can take to make sure your live site isn’t affected if things go wrong during your HTML edits:
Step 1: Take A Backup Of Your Site
Always take a backup of your WordPress site before you edit code.
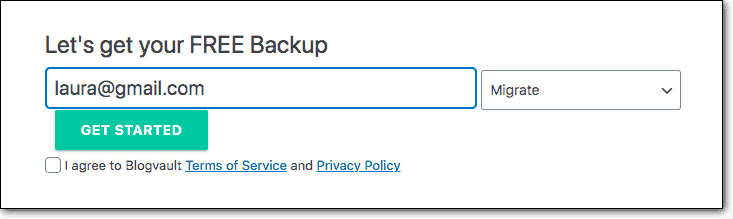
You can get a backup with a plugin like BlogVault. Install the plugin on your wp-admin dashboard and sign up:
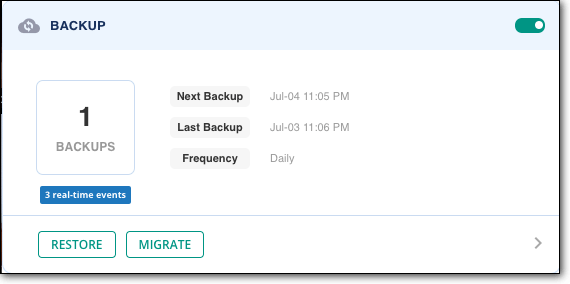
BlogVault will automatically take a backup of your website for you. If things go wrong, you can easily restore your backup by clicking on the Restore button.
If you want to explore other options of backing up your site, you may find our comparison of the best WordPress backup plugins and our guide to manually backing up your WordPress site helpful.
Step 2: Create a Staging Environment
If you are trying and testing out HTML, we recommend you use a staging site for this – especially if you plan on making changes to your WordPress theme or WordPress core. Do not attempt to make modifications directly on your live site.
A staging site is a replica of your live website where you can run tests and experiments. Any changes you make on this site won’t affect your live WordPress site. So if you make mistakes or things go wrong, your live site remains intact.
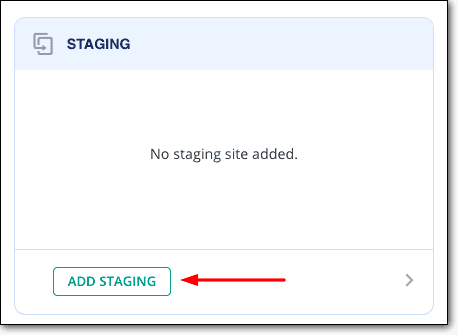
BlogVault enables you to set up a staging site for free. Once your backup is complete, you can navigate to the Staging section on the BlogVault dashboard and select Add a Staging Site.
The plugin will create a password-protected staging site that is hidden from search engines and any visitors.
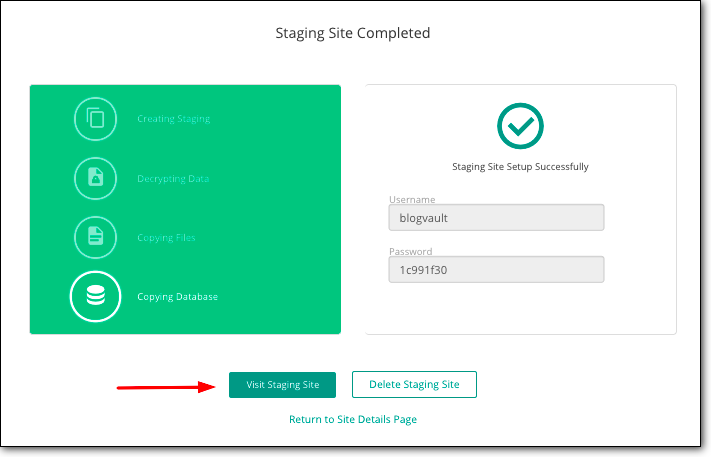
Once the staging site is ready, note down the username and password. Visit Staging Site, enter the login credentials you noted down and your staging site will appear.
To login to the wp-admin of the staging site, add ‘/wp-admin’ to the staging site URL, like so:
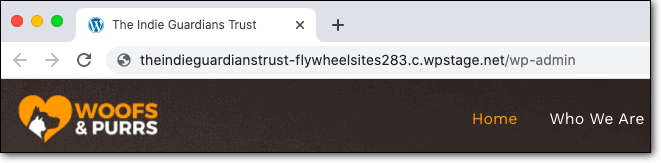
The login credentials are the same as your live site wp-admin credentials. Once you’re logged in, you can start making HTML changes. You can test various changes and once you’re happy with the modifications, you can push the changes from staging to your live site. This saves you time and effort of replicating the changes on your live site.

Your HTML edits will be added to your live site without any downtime and site breaks. Ready to make HTML edits? Let’s begin.
Editing HTML On Your WordPress Site
There are multiple ways to edit HTML code on your site. We’ll show you how to:
1. Edit HTML of Pages and Posts
You can edit the HTML of your pages and posts easily in both the Gutenberg Editor and Classic Editor.
A. How to Edit WordPress HTML in Block Editor
When WordPress introduced the Gutenberg or Block Editor, it frustrated many of us users. It was a big change all of a sudden and many of the old features – the ones we were so used to – disappeared.
If you’ve switched to Gutenberg and can’t find the HTML edit option, follow the steps below. This method will enable you to access and edit the source code for individual WordPress pages, posts, and other post types.
There are three ways to edit HTML in Gutenberg:
1. Create New HTML Block (Using Custom HTML)
This method will work if you just want to insert a snippet of HTML code into a page or post on your WordPress site. For example, if you want to use HTML to add a jump tag, heading, and so on. Here, you’ll create a new block on your page and then insert the HTML code.
Step 1: Log into your WordPress dashboard and navigate to the page or post you want to modify.
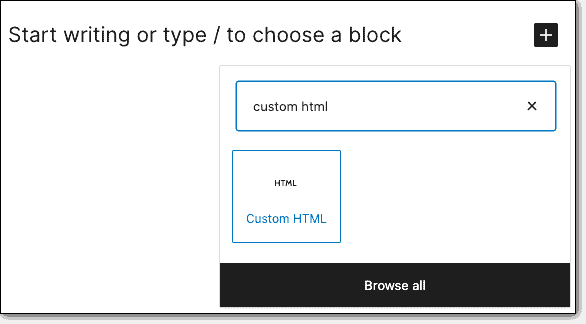
Step 2: At the place where you want to insert the snippet of HTML, click on the + symbol to create a new block.
Step 3: Search for ‘Custom HTML’ and select it.
Step 4: You’ll see an option to enter your code, like so:
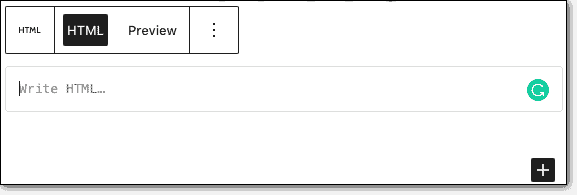
Once done, you can preview it to see what it looks like. Save it as a draft or publish it to see the changes on your site.
2. Convert Existing Block To HTML (Using Edit As HTML)
This method will work if you want to add HTML code to an existing block. Instead of creating a new block, you can convert a block that’s already present into HTML.
Step 1: Log into your WordPress dashboard and navigate to the page or post you want to modify.
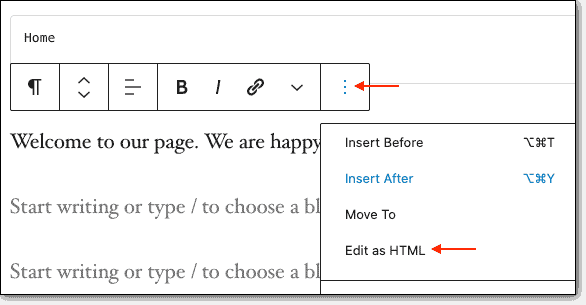
Step 2: Select the block you want to edit and a menu will appear over the block. Click on the three dots at the right-hand side.
Step 3: Select ‘Edit as HTML’ and you’ll be able to add in your code.
Step 4: Once you hit enter, you’ll most likely see this error:

Select Resolve and you’ll see your changes implemented in the Block Editor.
3. Convert Entire Page Or Post To HTML (Using Code Editor)
This method enables you to edit HTML of your entire post.
Step 1: Log into your WordPress dashboard and navigate to the page or post you want to modify.
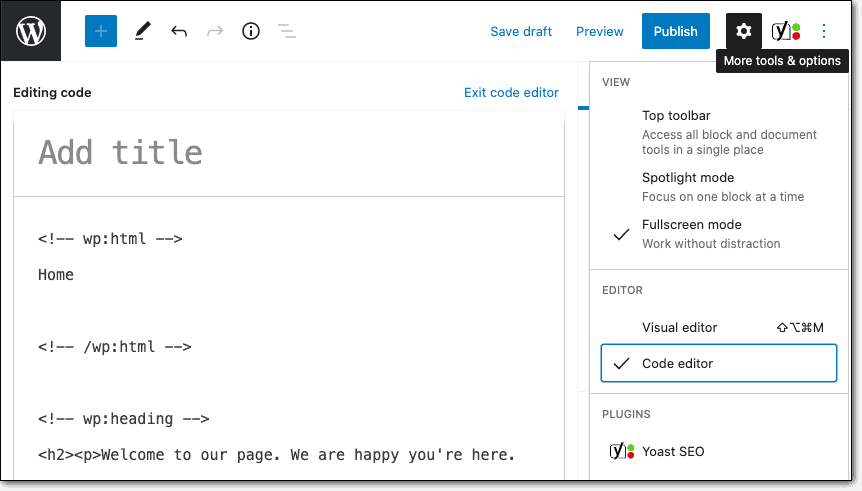
Step 2: On the top-right corner, select the three dots which gives you More Tools & Options.
Step 3: Select ‘Code Editor’ and you’ll see that your entire post is now converted to HTML.
If you have your own HTML page and want to insert it into your WordPress site, you can use the Code Editor to do so.
It’s that simple to edit HTML using the Gutenberg Editor. Now let’s show you how to use the Classic Editor.
B. How to Edit WordPress HTML in Classic Editor(HTML Editor)
If you’re using the Classic Editor in WordPress, editing in HTML is easy.
Step 1: Log into your WordPress dashboard and navigate to the page or post you want to modify.
Step 2: On the top-right corner, you’ll see two tabs called Visual and Text. Switch to Text Editor(HTML Editor).
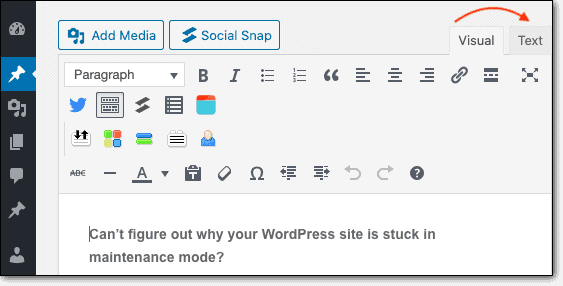
Step 3: The entire page converts to HTML. You can edit the code or add your own snippets of code here.
That’s it. You’ve successfully found the HTML option in Classic Editor.
2. How to Edit the Source Code in Your WordPress Theme
You may want to edit the HTML in your WordPress theme. The risk is much higher here so we strongly recommend taking a backup of your website and using a staging site to make these changes.
PRO TIP: Always use a child theme to make modifications to your theme. This is because when you make changes to your theme directly, once you update the theme, you’ll lose all modifications as the old version will be overwritten by the new one.
But if you create a child theme, then you can continue to update the parent theme without losing any modifications you make to the child. You can learn more about child themes in our guide to updating themes without losing changes.
There are two ways you can make HTML changes to your WordPress theme:
1. Using The Dashboard File Editor
2. Using cPanel or An FTP Client
1. Using The Dashboard File Editor
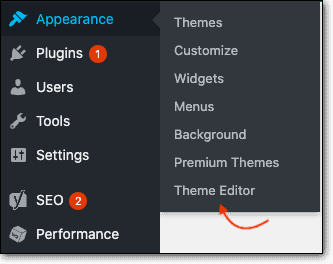
Step 1: Log into your WordPress dashboard and navigate to Appearance.
Step 2: Select Theme Editor.
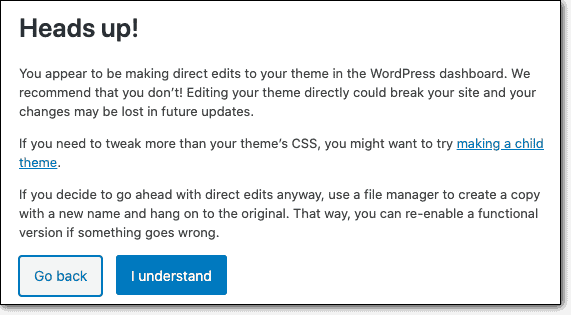
Step 3: When you open the Theme Editor, you’ll see a warning window. This tells you that WordPress doesn’t recommend making changes here. If you wish to bypass it, select I Understand.
Step 4: Here you can make all sorts of changes including editing HTML of your header and footer.
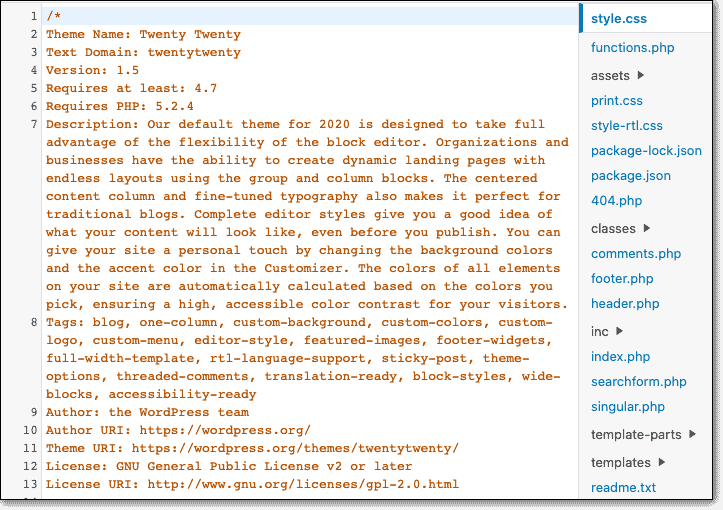
You can use the sidebar to navigate through different theme files. When you make changes here, you make changes directly to your theme.
2. Using cPanel or FTP
If you don’t have access to the Theme Editor or want an alternative method, you can use FTP or cPanel to access your themes files and make edits to them.
- Using cPanel
The control panel or cPanel is an in-built feature in most web hosting providers. You should be able to find cPanel on the dashboard of your hosting account. It gives you access to your website’s files and folders.
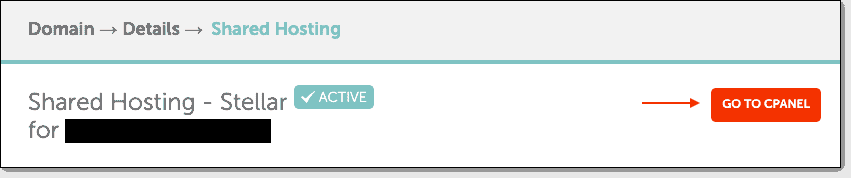
Step 1: Login to your web hosting account and access cPanel.
Step 2: Go to File Manager and open a folder called public_html. This is where your website’s files and folders reside. If you have named your folder something else, select that folder.
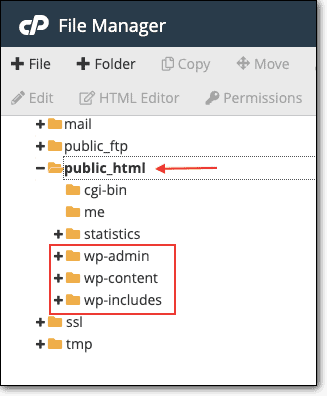
Step 3: Inside the wp-contents folder, you’ll find your Themes folder that houses all installed themes on your site.

Step 4: Select your current theme. Inside this folder, you’ll find all your files that you can edit and make custom coding changes.
- Using FTP
FTP stands or File Transfer Protocol which is a third-party software that enables you to connect to your web server that houses your website’s files and folders.
Step 1: Download and install an FTP client like Filezilla on your computer.
Step 2: Open FileZilla and enter your FTP credentials that comprise a host name, username, password, and port number. Click on QuickConnect.

Note: You can find your FTP credentials in your web hosting account. If you need more guidance to find this information, follow our FTP credentials guide.
Step 3: Once you establish a connection, you’ll see folders populate on the right panel. This is your web server.
Step 4: Open the folder called public_html. This is where your website’s files and folders reside. If you have named your folder something else, select that folder.
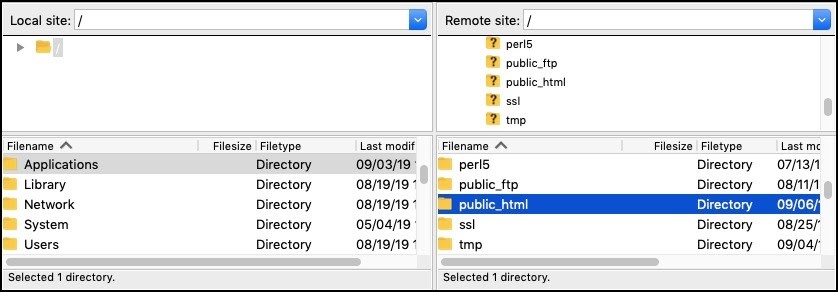
Step 5: Inside the wp-contents folder, you’ll find your Themes folder that houses all installed themes on your site.
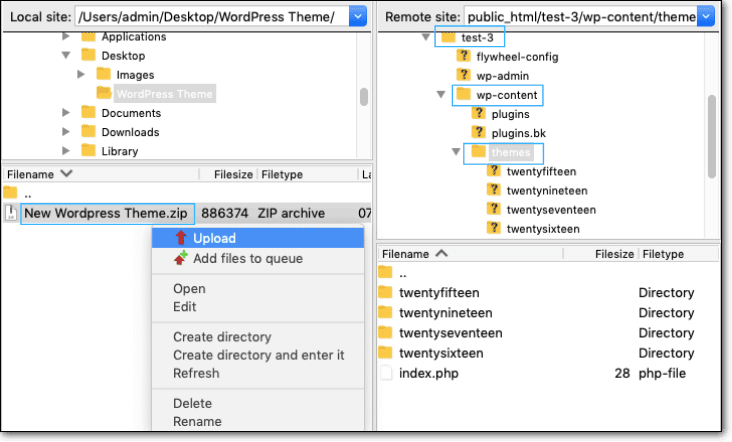
You can download and edit these files. You’ll need to upload them back to the same folder – overwriting the old files.
Bonus: Plugins To Edit HTML In WordPress
If all this is too technical for you, you can try a couple of plugins that enable you to edit HTML. Check out these plugins that enable you to edit HTML in different areas of your website:
These plugins remove the need for you to carry out any manual changes to your website’s files. You can continue to edit the HTML code from the front end of your website. It’s less risky but we still recommend testing these plugins on a staging site first.
Should You Edit HTML Code On Your WordPress Site?
HTML stands for HyperText Markup Language and it controls the content structure of your site.
As we mentioned, WordPress was designed to remove the need to edit such code. There are plenty of features on the front end of the WordPress dashboard that enable you to run your site without touching the backend coding of your site. There are also a multitude of themes and plugins that handle the technical bit for you.
Editing HTML code is serious business. The slightest error can cause your WordPress site to break or even go completely blank.
So, before we wrap up, we want to quickly touch upon when to edit HTML.
When To Edit HTML Code
Consider why you want to edit HTML and what your motive is. Do you want to customize your site? Are there plugins that can take care of it for you? Do you want to test things out or just learn how to edit HTML? Here are the top reasons you should edit HTML on your site:
- Add text, images, and videos using HTML but this can also be done from your dashboard.
- Add functionality or features to your pages and posts using HTML. You can add customized lists, headings, jump tags, font styles, and more.
- Customize or personalize your WordPress site.
- You’ve lost access to wp-admin and need to edit code to fix it.
- Can’t find a plugin that can do the task for you.
- Exercise better control and flexibility on your site.
When NOT To Edit HTML Code
WordPress is built on a combination of languages that include CSS, PHP, and HTML. So making changes in HTML may not work in all cases. There’s a long list of instances where editing HTML won’t work. These include:
- When you want to control the layout of multiple web pages all at once.
- When you need to write code to optimize for different devices.
- When you want to make styling changes to your theme.
Some changes can be made with CSS such as controlling the color, font, and the size of text across pages. You can determine how elements are positioned and laid out, the spacing between elements, what background colors and images are used. You can also set different displays for different screen sizes and devices. There’s a lot you can do with CSS.
To Sum Up…
Editing HTML in pages and posts is less risky. You can always preview your changes before making it live.
But when you make direct HTML changes to your website’s theme or the WordPress core, it’s extremely risky. We advise you to use the WP dashboard as far as possible. Or try to find a plugin that will enable you to edit HTML without touching the backend files.
In case you have to edit the HTML code on your site manually, always take a backup of your site and set up a staging environment. Use the staging site to test changes before implementing them on your live site. This will ensure that your live site is never disrupted.
Backup and Stage Your Website With BlogVault!
Tags:
Share it:
You may also like

How to Limit Form Submissions with Droip in WordPress
Forms are an indispensable part of any website because of their versatility, letting you collect information for various purposes! However, people with ill intentions often attempt to exploit these forms…

How To Manage Multiple WordPress sites
Management tools help agencies become well-oiled machines. Each task is completed with the least amount of effort and highest rate of accuracy. For people managing multiple WordPress sites, the daily…

PHP 8.3 Support Added to Staging Feature
We’ve introduced PHP version 8.3 to our staging sites. Test out new features, code changes, and updates on the latest PHP version without affecting your live website. Update PHP confidently…
How do you update and backup your website?
Creating Backup and Updating website can be time consuming and error-prone. BlogVault will save you hours everyday while providing you complete peace of mind.

Updating Everything Manually?
But it’s too time consuming, complicated and stops you from achieving your full potential. You don’t want to put your business at risk with inefficient management.

Backup Your WordPress Site
Install the plugin on your website, let it sync and you’re done. Get automated, scheduled backups for your critical site data, and make sure your website never experiences downtime again.


