How to Update WordPress Theme Without Losing Customisations or Breaking Site?
Bulletproof Backups for Your WordPress Website
Fortify your business continuity with foolproof WordPress backups. No data loss, no downtime — just secure, seamless operation.
WordPress is incredibly easy to use and customize, and this very facet of its personality can make updates of any kind a worrisome exercise.
You find yourself on the horns of a dilemma: update a WordPress theme and potentially lose all your hard work, like customizations; or risk the menace of malware and lose everything?
Neither option is particularly appealing, however, we have good news. There are several ways you can safely update a WordPress theme or WooCommerce store theme. We will take you through each option with detailed steps.
Before doing anything though, you do need to back up your site. This is a non-negotiable insurance policy for your site, and it will literally take a few minutes to do.
TL;DR The safest way to update a theme in WordPress is to use a staging site to test the update first. Create a staging site in minutes with BlogVault, from an automatic, full site backup.
What to do before you update a WordPress theme
Before updating a WordPress theme, there are a few things you should do to ensure that the update goes as smoothly as possible. Think of it like the mise en place before cooking a meal; small preparatory steps make the overall process much smoother.
- Take a full site backup. As you will see going forward, there are many ways to update a theme, depending on how your site is set up. However, the one thing in common is that a backup will bail you out if something goes wrong.
- Turn off any and all caching plugins. Caching plugins saves versions of your site to speed up loading. So the cached versions of your site have the older theme.
- Update plugins on your site. This step may not apply to you if you keep everything on your site regularly updated. However, you may have inherited a WordPress site that hasn’t seen an update for years, so need to proceed carefully. We advise updating plugins first, then themes, and finally updating WordPress—and that too in stages.
- Use a maintenance plugin. Some updates take a while and can mess with the design of the live site. To avoid a poor experience for your site visitors, install a maintenance plugin before making any changes.
How to safely update a WordPress theme without losing customizations
WordPress Staging is an exact replica of your site, so you can test out updates in a safe environment without it affecting your live site at all. If the update breaks the design or causes a critical error because of a conflict with a plugin, you can throw away the staging site entirely and start again while your live site is chugging away safely.
Step 1: Set up a staging site
With BlogVault staging plugin, you can set up a staging site in minutes from one of your site backups.
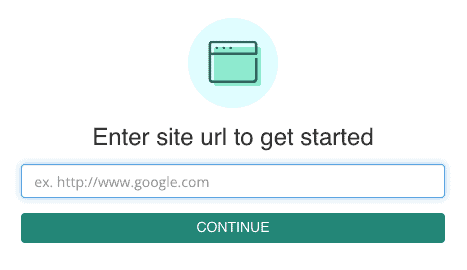
1. Create an account with BlogVault, and enter your site URL to get started.
2. Enter your wp-admin credentials to auto-install the plugin on your site.
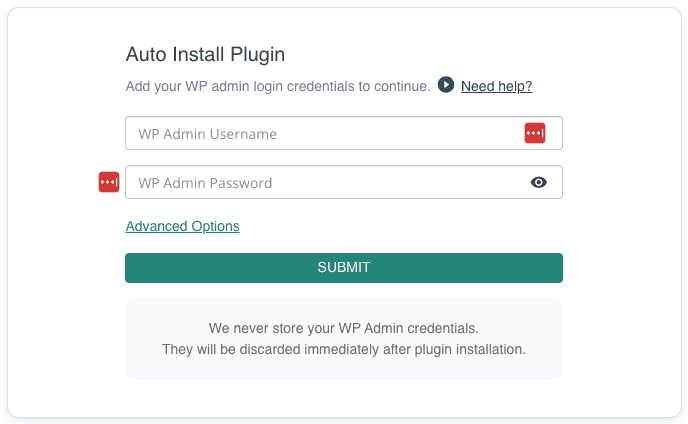
3. Wait for a few minutes for the plugin installation to complete.

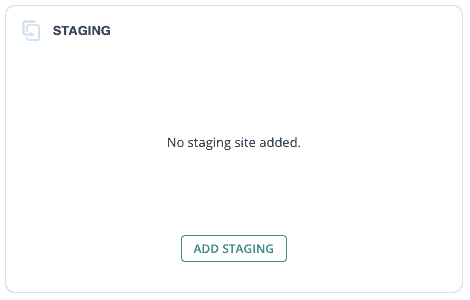
4. Click on the site on your BlogVault Dashboard to go to the Site Overview page. There, you will see a section for Staging. Click on Add Staging to get started.
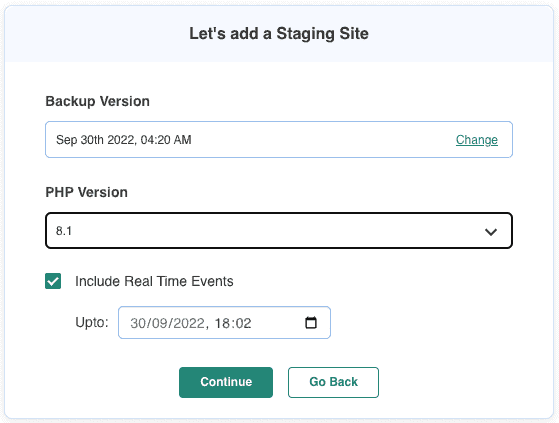
5. Here is where you are able to create a staging site from a site backup. If your BlogVault account is new, you can use the latest backup. With older accounts, you will have more options. Choose the settings you desire, ideally ones that mimic your live site exactly.
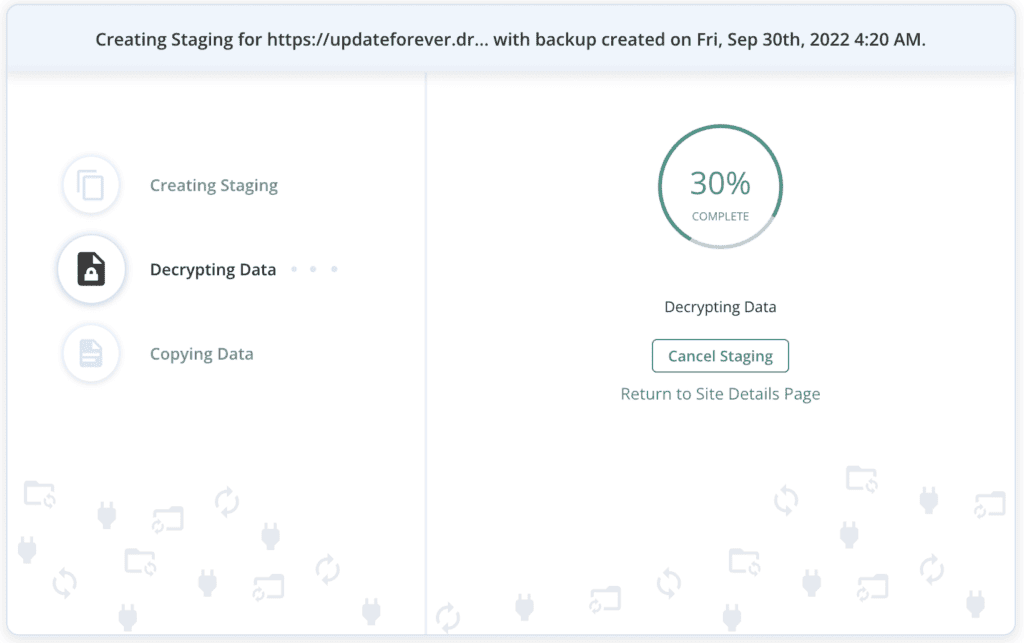
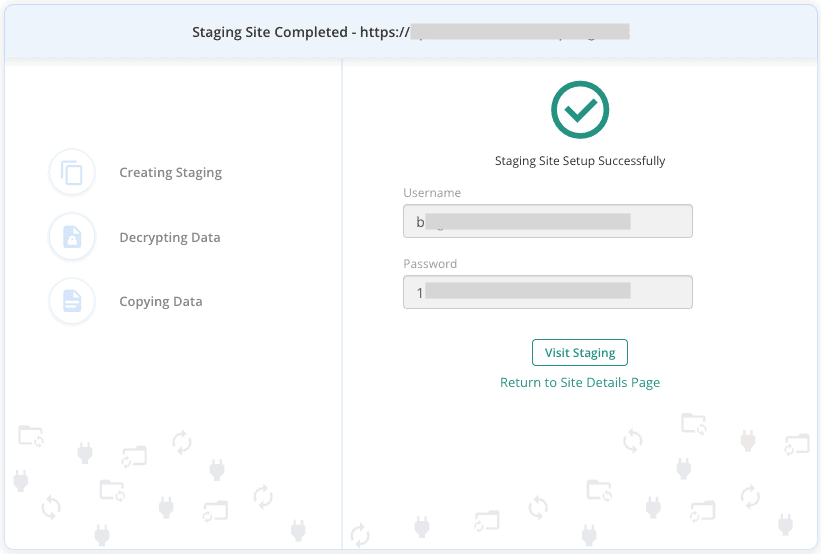
6. Wait for the staging site to be created, and copy the credentials. Click on Visit Staging to log into your newly created staging site. To log into wp-admin, use the same credentials you use to log into your live site.
Step 2: Consider customizations
If you have added customizations to your WordPress theme and would like not to lose them during an update, this is a good time to create a child theme. You may not have any customizations at all, in which case skip this step altogether.
1. Go into the wp-content directory, and then into themes, on your site, using either FTP or cPanel’s File Manager.
2. Create a folder in the themes directory, and then another folder inside it. Name this directory with the parent theme name and -child added to it. This format is not strictly necessary but it is considered best practice. So let’s stick with that.
3. Connect the child theme to its parent. You will need to do with the functions.php and the style.css files. Instructions on how to do this are available here.
4. Copy any and all customizations from the functions.php file and stylesheet (style.css) from the parent theme into the corresponding ones in the child theme.
5. Make the child theme the active one on your site.
As of now, your site should look and behave exactly the same as before.
Step 3: Update the theme on your staging site
There are several ways to update your WordPress theme, however, we recommend these depending on what type of theme you have installed:
To update themes that are available on the WordPress repository: Update via wp-admin
To update premium or custom themes that need to be downloaded as a ZIP file from the developer: Update via FTP or cPanel
We have listed the other methods below. You can pick the one that best suits your site, and try it out on the staging site, as per your preference.
Step 4: Merge changes to your live site
After the parent theme has been updated, make sure to test your staging site thoroughly. Look for broken design or UI, broken functionality in forms or buttons, and generally go through all your major pages to confirm that everything is working as it should.
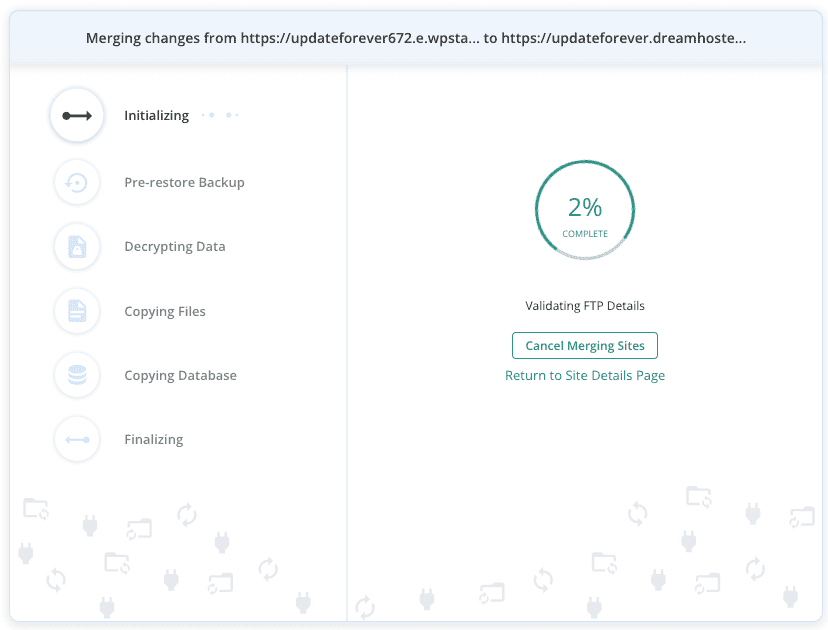
1. When you’re completely satisfied with the changes on the staging site, click Merge on your BlogVault dashboard.
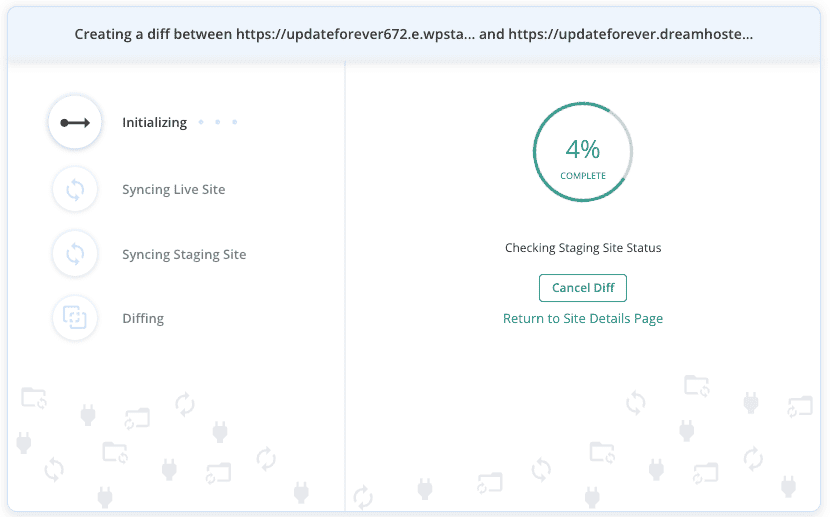
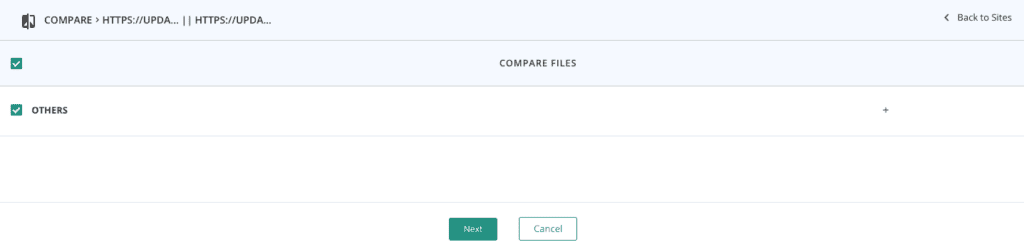
2. Wait for the syncing to finish, you will get a list of differences between the staging site files and those on your live site. Review all of these carefully, and select or deselect the changes you don’t want to merge. Click Next when you are satisfied with the changes.
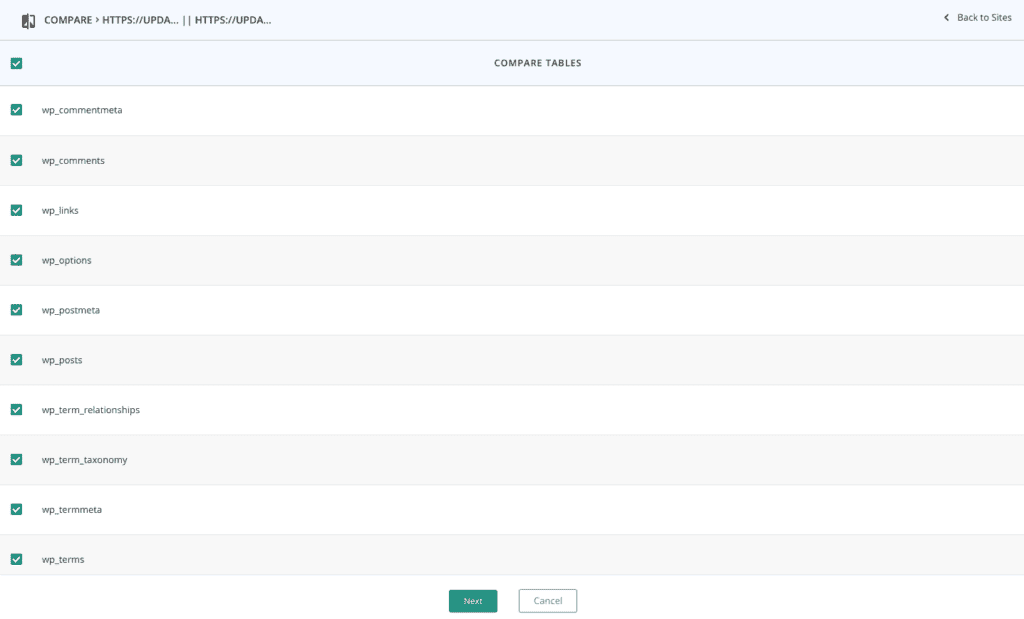
3. Similarly, you will need to review the differences in database tables. Click Next once you are done.
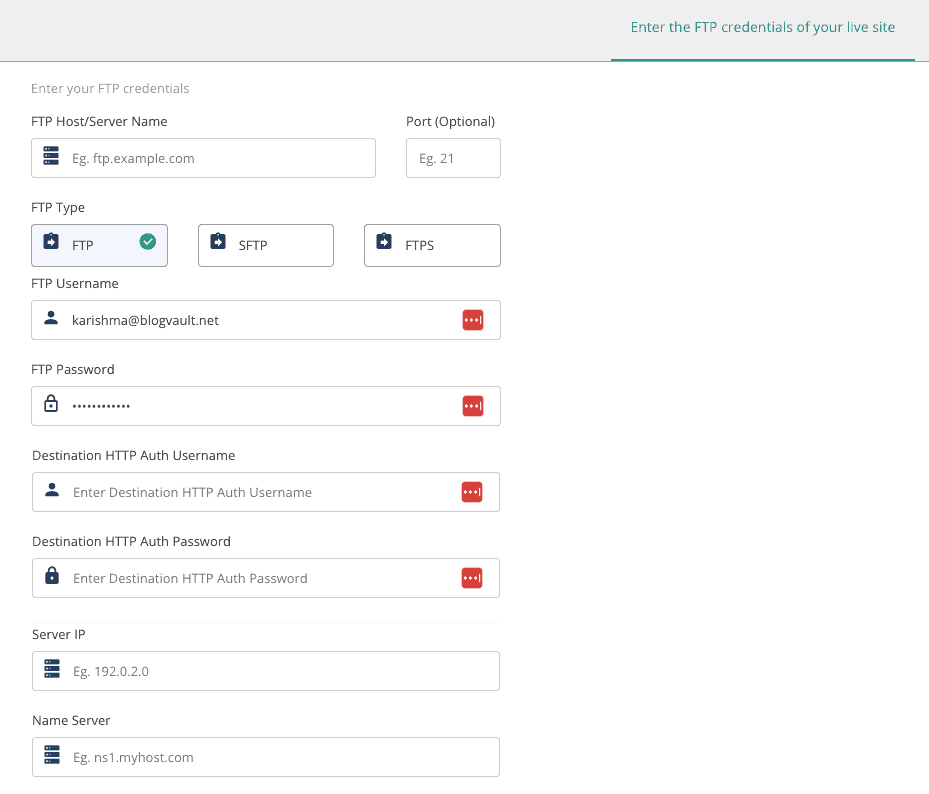
4. Enter the FTP credentials of your site, and click on Continue. If your site is password-protected, add in those details as well.
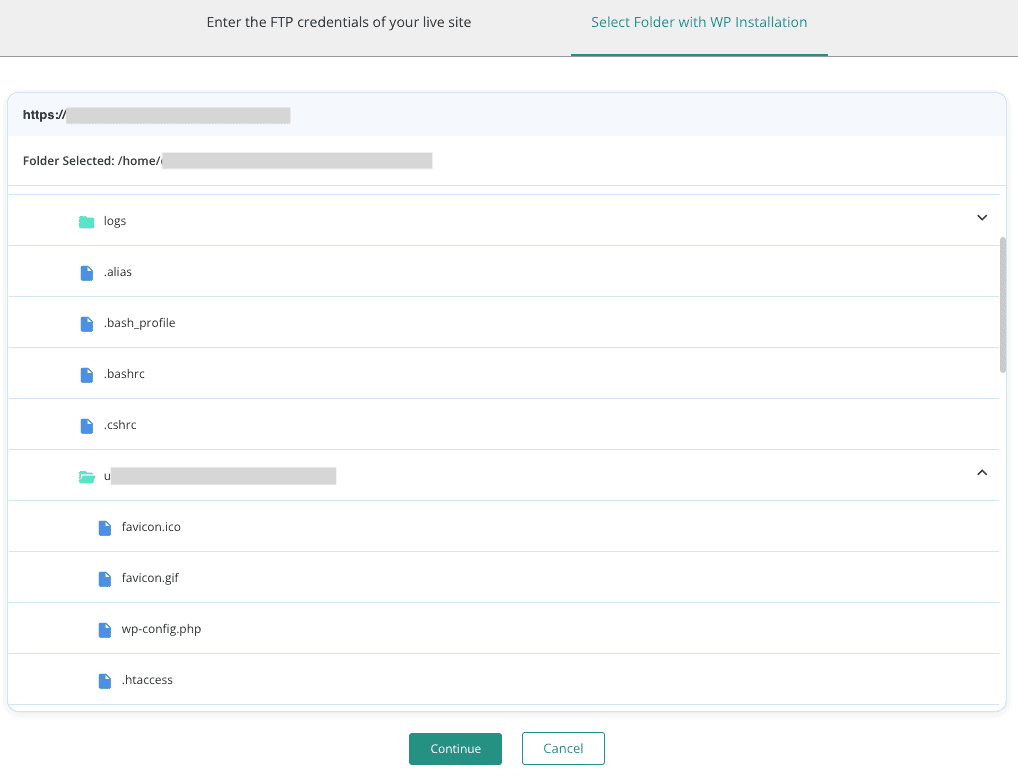
5. Select the folder where WordPress is installed. On our test site, it is the name of the site. However, it is quite often public_html or www. Once selected, click Continue.
Your live site will be updated with the changes you’ve tested out on the staging site. You’ll get an email from BlogVault confirming the successful merge as well.
The staging site is valid for 4 weeks, so you have plenty of time to test.

If you need more time, you find an icon in the Details section of the staging site to extend its validity.

How to manually update a WordPress theme (4 methods)
There are a few methods you can use to update a WordPress theme manually on your site.
a. Use a plugin to update a theme in WordPress
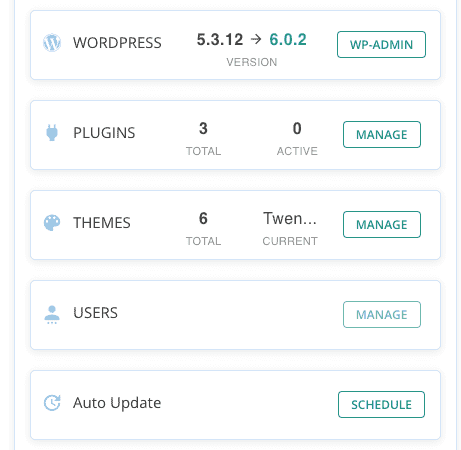
The BlogVault dashboard is a great place to view all available updates in one place.
1. Open the Site Details page, and scroll down. You’ll see a section with Plugins, Themes, and WordPress. The numbers indicate available updates.
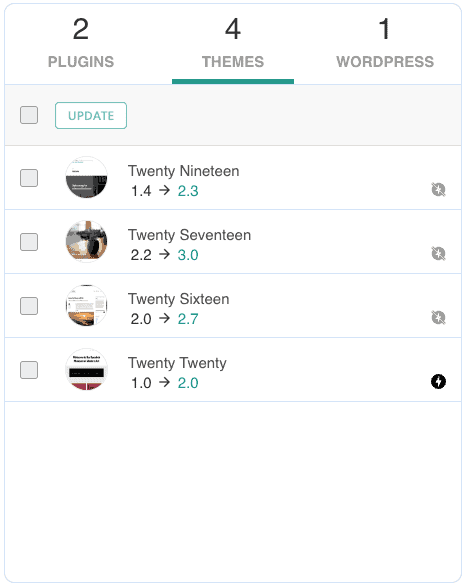
2. Use the checkboxes to select which themes you want to update. The icon in the bottom right corner is an indicator for which theme is currently active on your site. Once you’ve selected the themes to update, click on Update to apply.

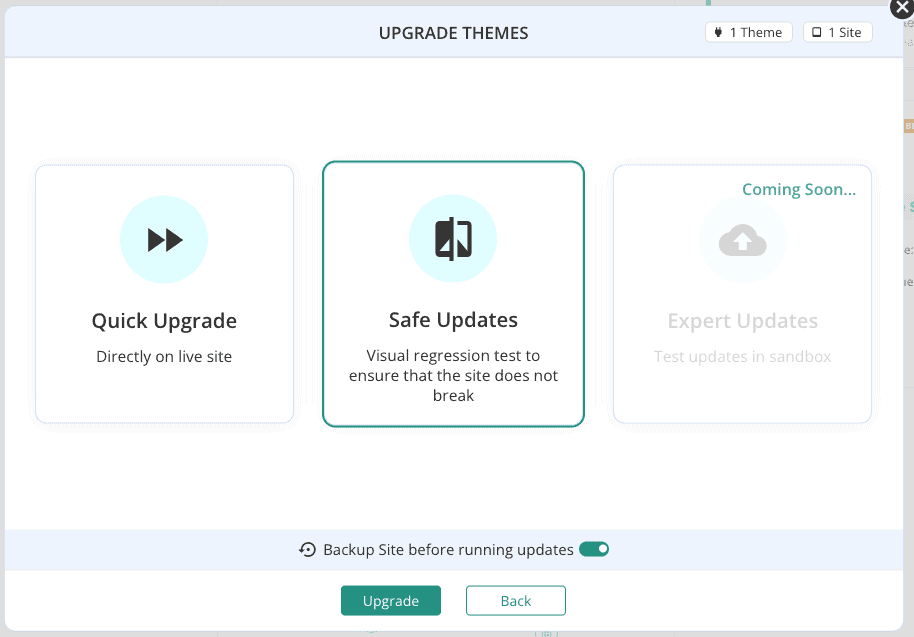
3. The next screen is to confirm which theme on which site is about to be updated. Click on Next Step to continue, once you’ve verified everything is correct.
4. Select Safe Updates and toggle a backup before running the update. This is the safest way to update a theme directly on your live site. Click on Upgrade to continue.
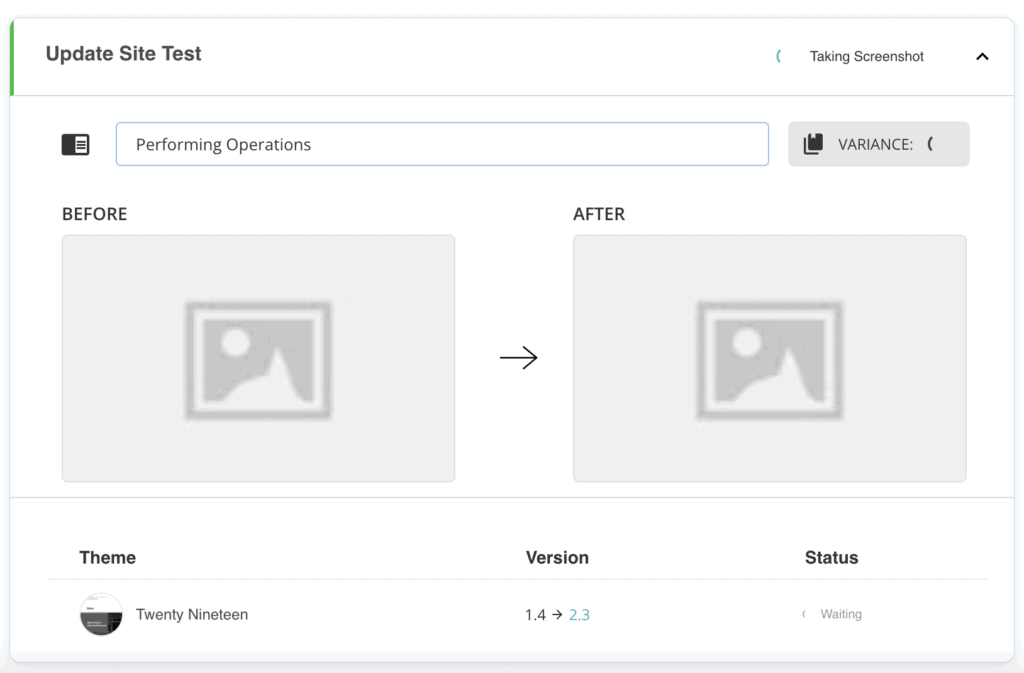
5. This will start the update. If you selected Safe Updates, you will see a visual regression of the site before and after the update. Check to see if everything is where it should be, and if the variance is 0%. That’s the update done.

b. Manually update a WordPress theme via wp-admin
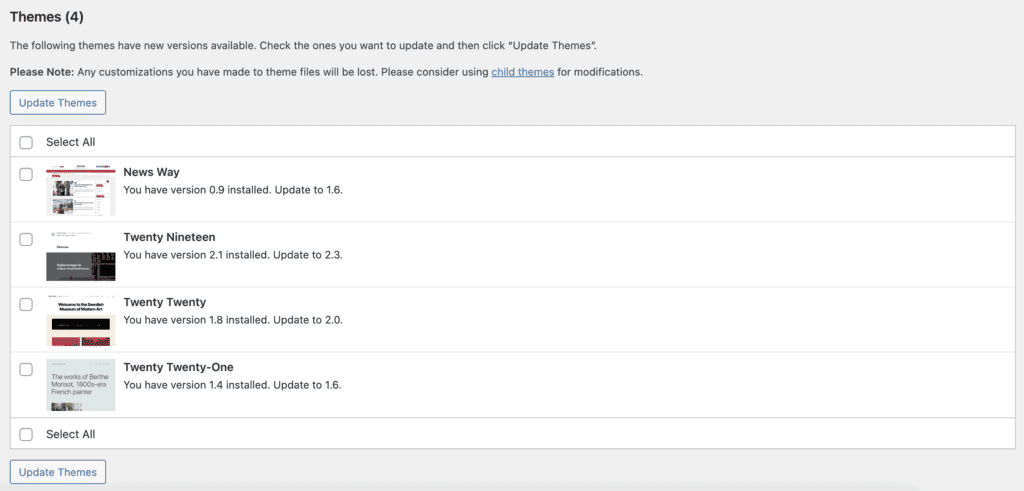
You’ll find available updates in two places on your WordPress dashboard:
In the Updates menu, scroll down till you see the Themes sections. The themes listed here have available updates. Use the checkboxes to select the ones you want to update, and click on Update Themes to do so.
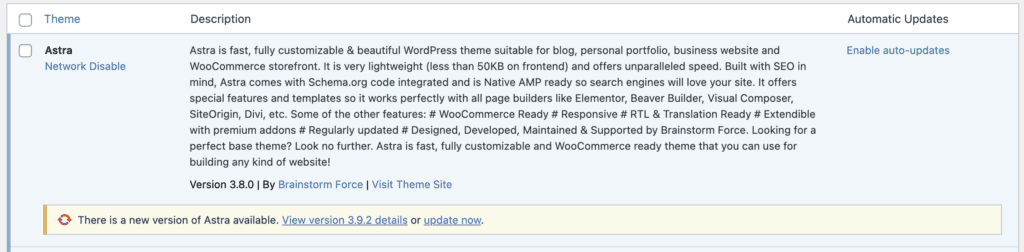
Alternatively, go into the Themes menu on your dashboard. The themes with available updates will have a message on top saying: New version available. Update now.
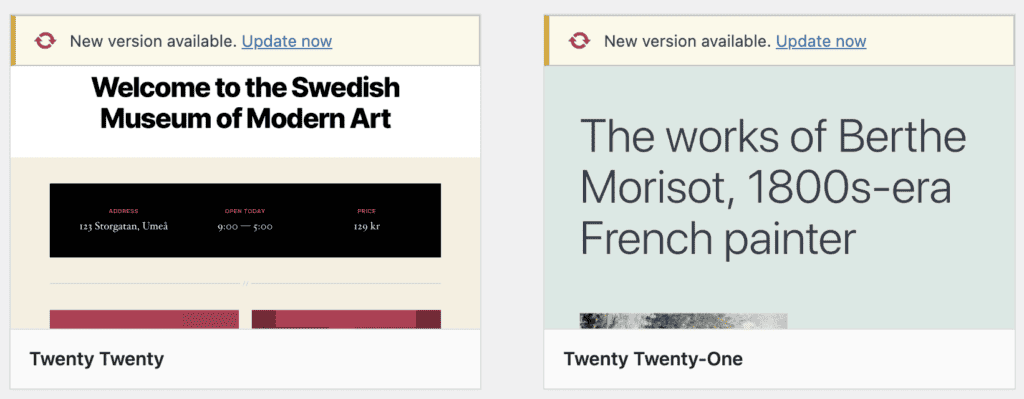
Both these updates work in exactly the same way.
c. Update a WordPress theme Manually via FTP or cPanel
You may need to update a WordPress theme manually via FTP or cPanel’s File Manager if automatic updates aren’t available for your theme. This is especially true in the case of premium and custom themes.
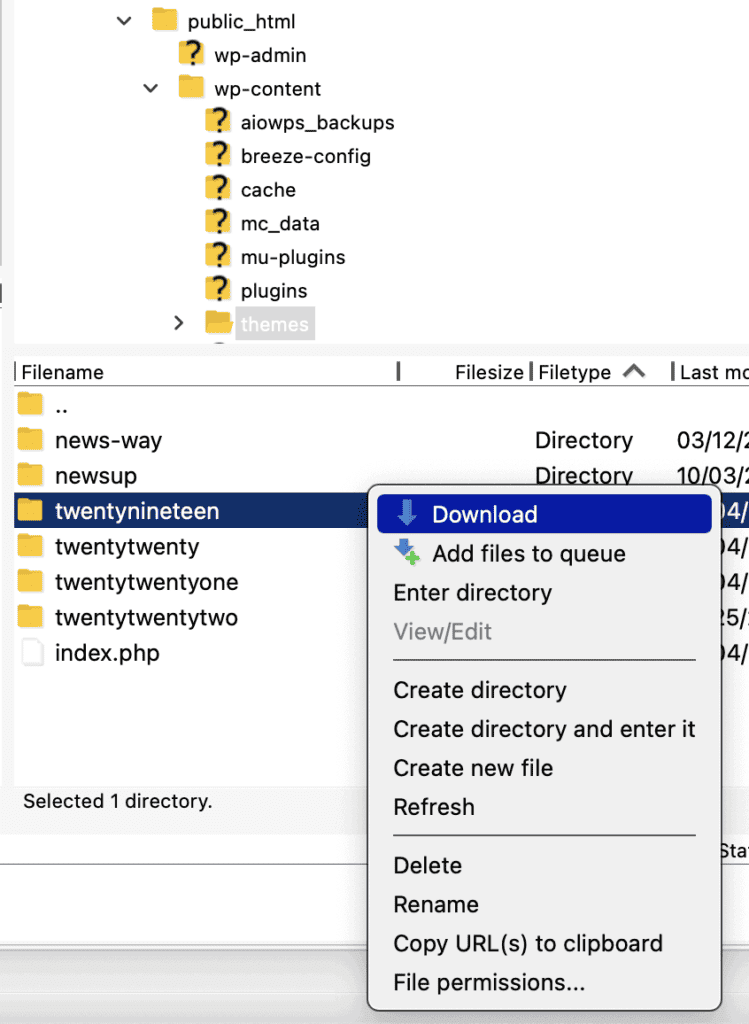
We’re going to go ahead and assume that there are customizations in the theme and walk you through the steps to update your theme considering those. If your theme doesn’t have customizations, simply skip those steps. An FTP client and cPanel work in very similar ways, so we’ll use FileZilla to demonstrate the steps.
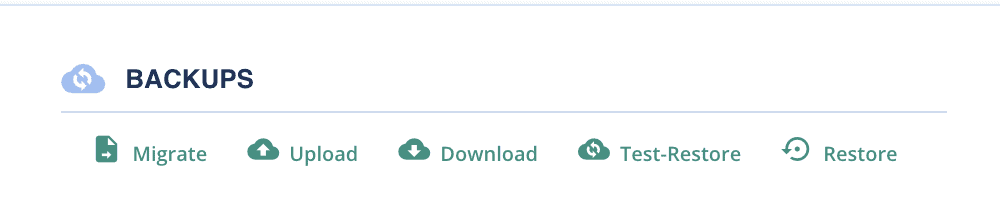
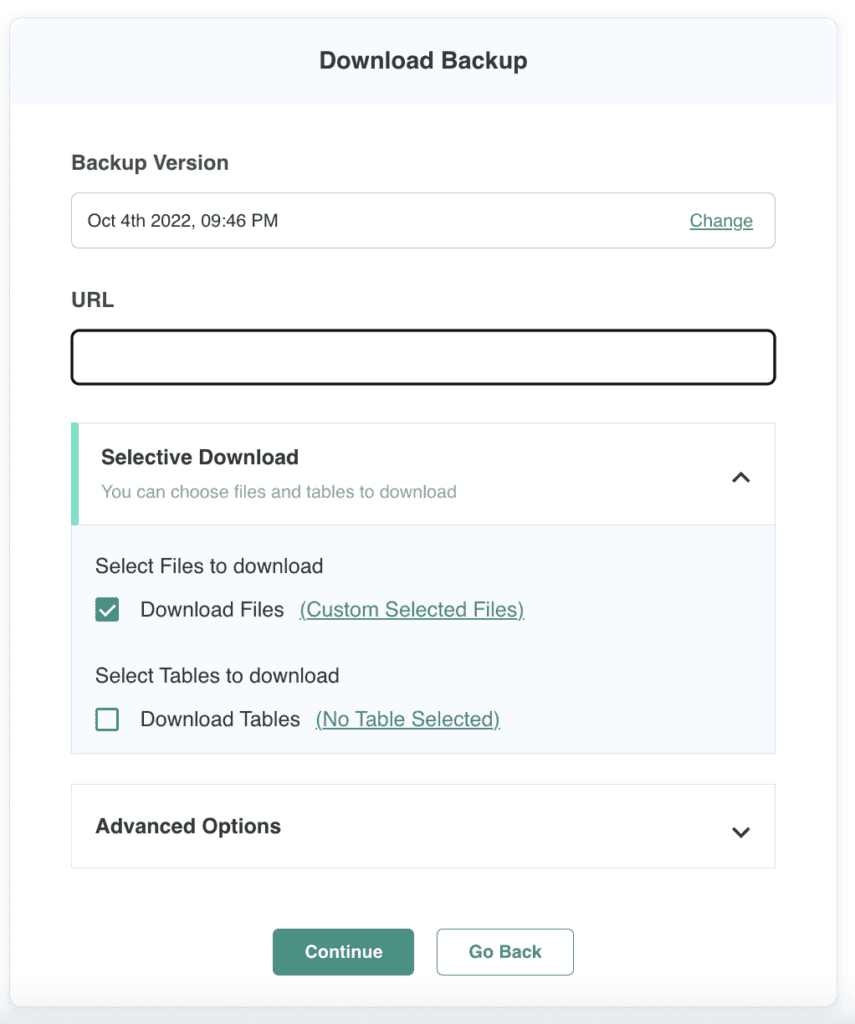
1. Download a backup of your theme files. From the BlogVault dashboard, you’ll find an option to download a backup of your site.
Since you need only the theme files, navigate to the directory in wp-content, and use the checkbox to select the theme folder.
Alternatively, you can use FTP to do the same thing. Log into your FTP client, and navigate to the themes folder. Right-click on the theme you want to update, and download it to your computer. This serves as a backup.
2. Get the new theme files from the repository, or wherever else the update exists. This could be from the theme developer’s site, for instance, or a zip file sent to you by a custom theme developer.
3. Copy over the customizations from the backup to the new version, keeping everything else intact. Generally, customizations are added to the functions.php and the style.css files. If you cannot remember the changes you have made, you can use a file comparison utility like a diff checker to find the differences.
4. Make sure to activate another theme on your site. This will avoid any issues of downtime.
5. Upload the updated theme folder to your site, in the themes folder. You may be prompted to overwrite the existing theme folder. Go ahead and do that.
6. Finally, activate the uploaded and updated theme on your site.
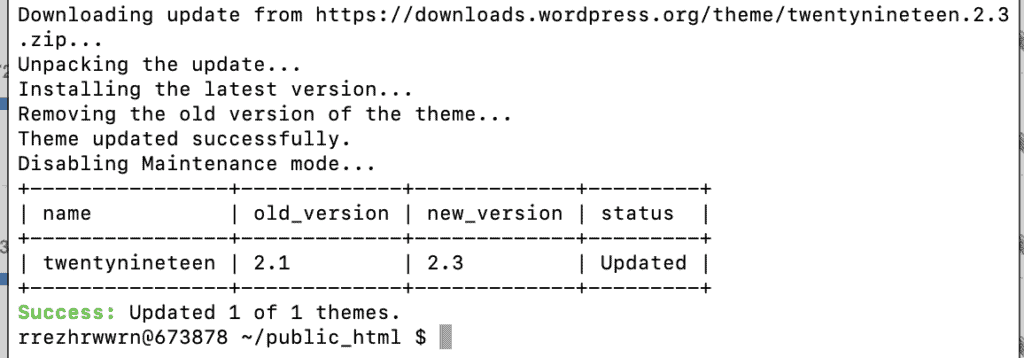
d. Manually update theme using WP-CLI
Many WordPress admins prefer managing their sites via the command line, as they can perform these tasks much quicker. That being said, you would need to have WP-CLI installed on your computer, and be familiar with command-line usage to do so successfully. If this is not something that’s up your alley, we suggest skipping this section altogether.
1. Connect to your site’s server using SSH credentials. These are often the same as the FTP credentials.

2. Navigate to the root directory of your site, where WordPress is installed. This could be public_html or www.
3. Use the wp theme update command to update themes.

There are a few ways to use this command, depending on which theme and how many of them you want to update in one fell swoop.
- To update all the themes on your site:
wp theme update --all - To update a specific theme (replace themename with the name of the theme folder):
wp theme update themename - To update multiple specific themes (replace theme1 and theme2 with the names of themes, and separate them with spaces:
wp theme update theme1 theme2 - To update all themes at once, except a certain one (replace themename with the name of the theme folder):
wp theme update --all --exclude=themename
How to update a WordPress theme automatically (2 ways)
In the event that your WordPress theme is a free one and has no customizations, you can save yourself the hassle and automatically update a WordPress theme instead.
There are 2 ways to enable auto-updates for your WordPress theme, which we will go into shortly. Whichever method you choose, please make sure to take a backup of your site. Even official updates from theme developers can have inadvertent issues that can cause a site to crash.
a. Scheduled and automatic theme updates with BlogVault
Automatic theme updates with BlogVault are especially useful, because you can set them on a schedule. Additionally, you can update the theme across multiple sites in one operation, and only receive update emails. The best part is that before each update, BlogVault takes an automatic backup of your entire site. So even if something is wrong with the update, you can restore your site immediately.
It is super simple to set up a schedule.
1. Go into your BlogVault dashboard, and go into the Site Details page.
2. Scroll down, and on the left side you should see a section to set up Auto Updates. Click on Schedule to set one up.
3. Name the schedule something meaningful, so you can identify it easily later. Pick a cadence, and finally select the themes you want to update automatically. We picked the WordPress stock themes on 4 test sites.
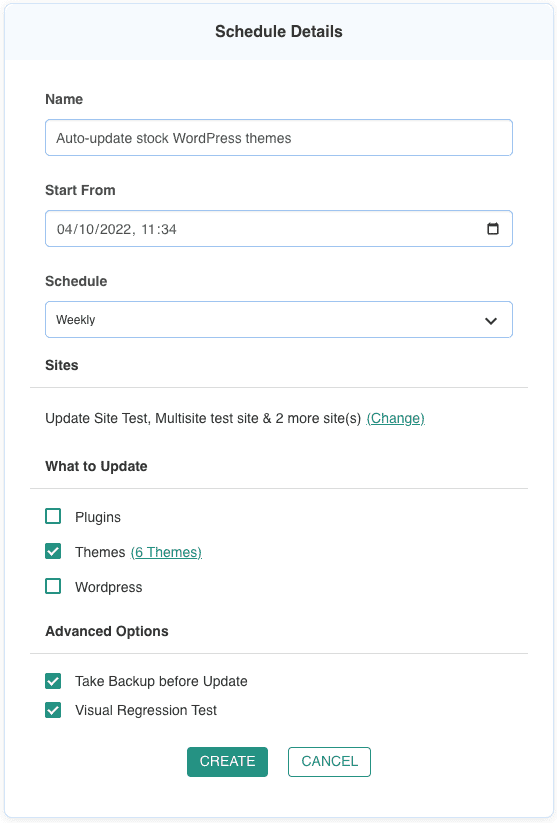
Make sure to check the backup and the visual regression test boxes. Finally, click on Create.
On the next screen, you will be able to see all the schedules you have created. Every time the schedule runs, you’ll get an email with the results. If the update fails, you can rest assured that there’s a backup readily available to restore your site in minutes.

b. Enable WordPress auto-updates for themes
WordPress launched the auto update feature in version 5.5 and included plugins and themes in addition to WordPress updates. If you are feeling confident that a theme update will not break your site, or have daily backups enabled, you can think about this as an option. There are many considerations, so we have a detailed guide on managing auto-updates for themes (and plugins for good measure) to help you through that decision.
Choose the right method to update your WordPress theme
There are several ways to update themes on your WordPress site. We’ve listed out the steps for every possible way to update your theme, however, which method you choose depends a great deal on your site and how it is set up. For instance, if you have a premium theme, one-click updates are generally not available from wp-admin.
Types of themes
The type of theme on your site will determine whether updates are available and what methods you can use to update them. There are 3 types of themes:
- Free themes are generally available on the WordPress repository and are automatically able to use WordPress’ auto update feature as a result. You can update them directly from your dashboard too. Please note that nulled themes are not ‘free’. They are illegal themes with cracked licences that invariably lead to malware infections on your site.
- Premium themes, as the name implies, are WordPress themes that are available for purchase from a marketplace like Themeforest. Premium themes have different pricing structures, like annual subscriptions or one-time fees, and often include licensing. Therefore, updating them can be somewhat more difficult, if the developer doesn’t include the option to update them from your site dashboard.
- Custom themes are premium themes built specifically for your site from scratch. They are rarely hosted on marketplaces or on the repository. You may or may not even have updates to a custom theme, because it depends on your agreement with the theme developer.
Different types of theme customization
Once you’ve figured out the type of theme, you can shortlist which methods can be used to update it; which method you should choose depends on theme customization.
As we know, a WordPress theme controls the aesthetics of a site: design, font, colours, etc. Themes are intended to be largely interchangeable, so WordPress advises functionality is best left to plugins.
However, that doesn’t stop many designers, developers, and even site admin adding special functionality to a theme, either by adding it to the functions.php file or bundling it into a companion plugin.
Depending on who has added the extra functionality to the theme—the developer or the site admin—it can impact the update process. If the theme developer does it, the functionality is considered a core part of the theme, and is unlikely to be overwritten or lost during an update. However, when anyone else makes a change to the theme files, these are known as customisations which can be lost during an update.
Customisation affects the time it takes to update a WordPress theme as well.
Editing the code in theme files
Perhaps you or your site developer has modified the theme files, and are now afraid that an update will wipe it out. This is a valid fear, because anything not included by the theme developer will be wiped out regardless of how critical it is to your site.
For example, consider tracking pixels and other code snippets required by analytics tools. According to most integration instructions, the tool developers will recommend adding it to every page on your site. On WordPress, the easiest way to do that is to add it to the theme’s header.php file. There are a plethora of plugins that can add the code to your header.php file, but you can choose to do so directly. In the latter case, if you were to update the theme, this code would get wiped out during the update.
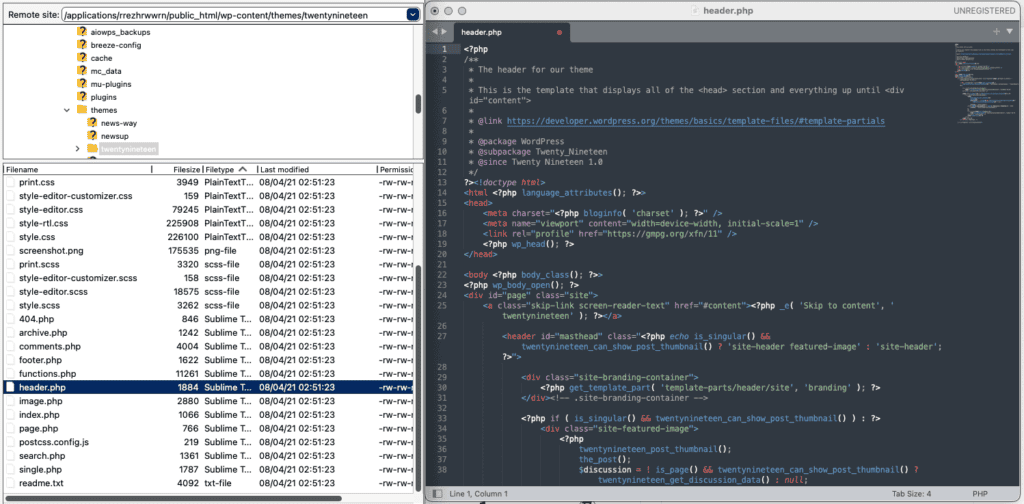
This is an example of a relatively small addition, so it can feel insignificant. However, many site admin and their designers can add a lot of functionality in the same way. Similar changes can be made to the theme stylesheet, the style.css file.
If you have edited the code, you will need to save changes elsewhere and then copy them back into the updated theme.
In-theme customisations using theme customiser or editor
Themes are meant to templatise WordPress site design, so that the aesthetics are in place. However, you will still need to tweak certain elements to customise them to your site, especially if you’re activating the theme on a brand new site.
For instance, you will want to change the site’s title, assuming you haven’t already done so from the General settings on wp-admin. Or perhaps you are changing the colour scheme (something you cannot do from General settings).
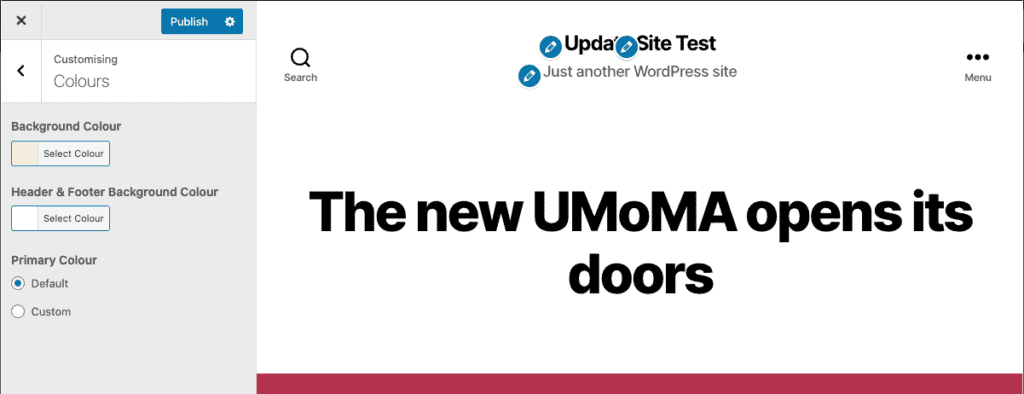
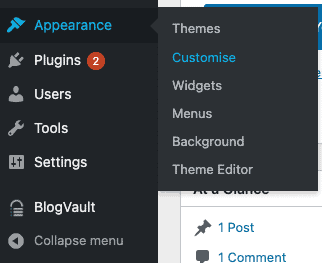
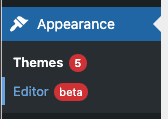
On older versions of WordPress, you would use the Customise option under the Appearance menu. After WordPress 6.0, you would use the Editor option.
These customisations are options that you have changed from their defaults to suit your website. In most cases, these options are stored in the site database, which is totally unaffected by a theme update.
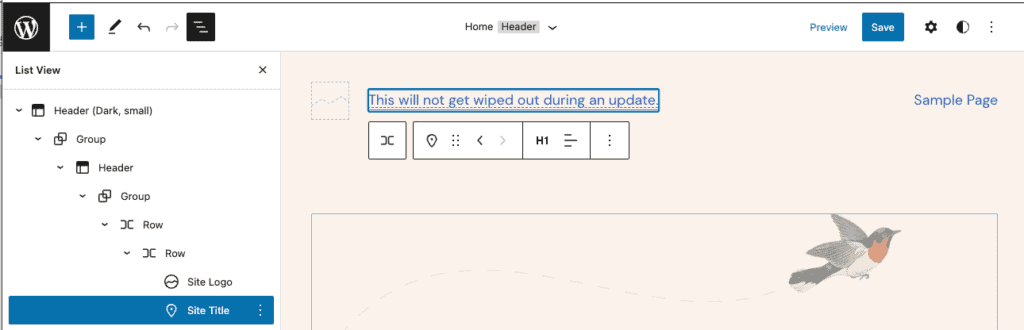
Page builder customisations
You can use page builder plugins to make changes to your site design as well. You can add and remove custom blocks, change the layout of pages, and import new templates altogether.
Page builders don’t so much make changes to your theme, as interact with them to change the design. The changes are controlled by the plugins, which are unaffected by theme updates.
Changes made via a child theme
A child theme is a WordPress theme that inherits its features, functionality, and styling from another theme, called a parent theme. Child themes are used to customise themes, by making changes to theme files. These changes are safe during updates, as the parent theme’s files are overwritten, and the child theme’s files are not. The child benefits from the update as well, as it is connected to the parent theme.
WordPress always recommends using child themes for customisation as far as possible. In the staging method of theme updates below, we will link to resources of creating a child theme as well.
In essence, any change made directly to a theme file is under threat of being wiped out, unless you are using a child theme. Any changes made via plugins (even page builders) are safe from deletion.
Extra considerations when updating a theme on a multisite network
We have tested the methods above on multisite networks as well, and our only observation is that they are applicable from the network dashboard only. Subsites in our experience will not have the option to update any themes directly.
Best practices for updating a WordPress theme
Any change to your site is fraught with worry, even if they are wholesome and necessary changes like updates. Here are a few tips to get you through the stress as unscathed as possible.
- When in doubt, use a staging site. This is the only way to ensure that your site will not experience any downtime while you’re ironing out the wrinkles. Actually, use even when not in doubt too. It is just the best way to test out changes, and we use a staging site for the smallest things because it is so easy to create one with BlogVault.
- If you choose not to use a staging site, please back up your site for sure. This should be a non-negotiable step in your process, because people have lost entire sites because of bad updates.
- Use a child theme for customisations to theme files. Updating an active theme is much easier and far less complicated if you don’t have to schlep code from the theme files to a text file and then back again to the update theme files. There is so much potential for things to go wrong in this process just because of something as pedestrian as a missed character or an extra space. Not worth the hassle, honestly.
- Changing or updating an active theme does have a resource impact on your site, because it draws on server resources to execute. For smaller sites, this may not be an issue at all, but for business-critical sites, spend some time figuring out when your site will have the fewest visitors, and apply the update then. Analytics might help with figuring this out.
- Put your site on maintenance mode, so that visitors don’t have a weird experience on your site when the theme updates as files change. Your site can react unpredictably, and unpredictable can signal malware. So just don’t take the risk.
- Be patient: wait a few days or a week before updating the theme on your live site. This is also a reason to use the staging site, because you can wait out any issues that may crop up right after the update. Perhaps a serious vulnerability was introduced by mistake, and it was discovered a few days after release. In this case, you would need to rollback the update. You can avoid the rigamarole by waiting a few days before applying the update. In the interim, you can also read the changelog provided by the developer to understand what to expect in the updated version.
Troubleshooting: what if something goes wrong with a theme update and how to fix it
In spite of all precautions, sometimes Murphy’s Law wins the day. Here are a few ways to troubleshoot commonly faced issues during a theme update.
- Can’t see update notifications on wp-admin. There are a few things that can be the issue here:
- You need to be using WordPress 5.5 and above to see auto update links in the Theme Details section. If you are using an older version of WordPress, please consider updating on priority, because a theme update is not remotely the biggest problem you are currently facing.
- Keep in mind that if you are using a premium, third party, or custom theme, you may not see update notifications. Good developers like Divi or Themeforest will show notifications—even if you cannot update directly from wp-admin—but it is not necessarily a given for any premium theme.
- For a custom theme, you would then need to contact the theme developer to request updates.
- Can’t update a premium theme on a staging site. This may be because of how licences work. Some premium themes require a licence per installation. In this situation, you can try writing into their support to see if they will make an exemption for staging sites. Otherwise you may need to forego staging altogether and use backups for insurance. Fingers crossed.
- Site crashes after theme update. This is why you used staging in the first place. Enable wp-debug on your staging site to figure out what has caused the issue. Perhaps there is a conflict with a plugin, in which case you need to figure out which plugin. Disable the lot and re-enable again one at a time to find the culprit. Alternatively the update didn’t go as planned. Restore a backup and start again. If you didn’t use staging, hopefully you took a backup. Restore that, and this time around use staging.
- An update changes something in the parent theme that breaks the way a child theme works. Troubleshooting this is a little more technical, as it involves understanding how the code in the child theme interacts with the parent theme, and why it is causing the issue. In this case, involve a developer and reach out to the theme developers for help.
- “Something went wrong. Your change may not have been saved. Please try again. There is also a chance that you may need to manually fix and upload the file over FTP.” If you encounter this error while using the WordPress theme editor to replace code customisations, there could be a bunch of things going wrong. This error was introduced into WordPress in version 4.9, and has since been resolved. If you are using such an outdated version of WordPress, this is the main problem. You need to update WordPress immediately. If that’s not possible for any reason, try updating the file you’re editing manually, and upload to your site via FTP.
As a general rule of thumb, anything that goes wrong with a theme update after you have taken the requisite precautions of a staging site and backups, fall within the purview of the theme developer. Support is a major perk of purchasing and using a premium theme, so you should absolutely use the facility.
Why update your WordPress theme
After reading about the many, many things that can go wrong and crash your site, you may well wonder if it is worth the stress to update at all. If things are going well, then why mess with perfection?
Well, because of these reasons:
- Security: Updates are the best way for developers to patch vulnerabilities in their code. Vulnerabilities are unintentional lapses in plugins and themes, and even in WordPress, which can lead to your site getting infected with malware. 95% of hacks are successful because of outdated software, like themes.
- Better performance: As tech evolves, there are better and better ways to do things. Good developers will actively work on their products to reduce page load times, patch bugs, and introduce performance improvements. All these have a direct impact on the user experience and SEO of your site.
- Feature upgrades: Theme updates can have feature upgrades too, like more types of blocks for instance. Why miss out on those?
- Compatibility with newer versions of WordPress: As you update the WordPress version on your site, you may need to update the theme as well. Although stock WordPress themes are designed to be backward compatible—and this is good practice—it doesn’t mean that all other themes will be as well.
In short, please always update your WordPress theme; in addition to plugins and WordPress itself. It is a necessary maintenance activity, but it doesn’t have to be painful.
Conclusion
There are several ways to update a WordPress theme. The safest and best way is to use a staging site, so you can test the WordPress theme updates out on an exact replica of your site beforehand. Any teething problems the update brings in its wake can be ironed out in this sandbox environment, and then merged with your live site.
BlogVault is your best friend for updates: 100% bulletproof WordPress backups and restores, an integrated staging site, and schedules to manage updates. All of this and much more in one package. We have a 7-day, full-featured trial for you to try it out.
FAQs
How do you update an existing WordPress theme?
The safest way to update an existing WordPress theme is to create a staging site, and apply the update there first. Once you are satisfied that the update will not break your site, then merge changes to your live site.
how to update a WordPress theme without losing customization?
The best way to update a WordPress theme without losing customization is to use a child theme. A child theme inherits the functionality and design of the parent theme and can be modified to include customization. Then, when the parent theme is updated, the customizations stay put in the child theme without being overwritten by the update.
How do I update a WordPress theme without losing content?
Updating a WordPress theme should not affect the content on your site, as it is stored in the database and therefore independent of the theme. However, if you are referring to changes made in the theme files, then those changes will be overwritten during an update. To retain those changes, either create a child theme and copy over the changes before an update, or take a backup of the theme, update the theme, and then copy the changes back into the updated theme.
How to update a theme in WordPress manually?
There are a few ways to update a theme in WordPress manually.
- You can do so via the wp-admin dashboard, either on the Updates menu or the Theme menu. Whichever theme has an update available will be visible in these two places. Follow onscreen instructions to update.
- Connect to FTP or cPanel’s File Manager to access the themes directory in wp-content. You can upload the updated theme folder or zip file here. Overwrite the older version of the theme, and your theme is now updated.
- Use SSH to connect to your site server, and use the wp theme update command.
How to update a child theme in WordPress?
A child theme is connected to its parent theme, and inherits its functionality and stylesheets. To update a child theme, all you need to do is update the parent theme.
How to update a theme on a site that hasn’t been updated for years?
To update a theme on a site that hasn’t been updated for years, consider using a staging site. First update all the plugins, then the themes, and finally WordPress. Since themes and plugins are only backward compatible to a point, this process will give you the best chance of bringing the site up to date with minimal downtime.
Additionally, update in steps, instead of going from ancient to the latest in one move. It may help you during troubleshooting if the site does break. That said, you should expect to see a bunch of things going haywire, as old versions don’t play well with newer ones.
Will the WordPress update change my custom theme?
No, WordPress updates do not impact custom themes at all. WordPress updates only affect the stock themes.
What code/files are affected by theme updates?
Theme files and code are affected by theme updates. For instance, if you are updating the Astra theme, the corresponding directory in the wp-content/themes directory will be affected. These changes will include any additional code you have added to those files unless you have used a child theme. The child theme remains unaffected because it is in its own directory.
Tags:
Share it:
You may also like

How to Limit Form Submissions with Droip in WordPress
Forms are an indispensable part of any website because of their versatility, letting you collect information for various purposes! However, people with ill intentions often attempt to exploit these forms…

How To Manage Multiple WordPress sites
Management tools help agencies become well-oiled machines. Each task is completed with the least amount of effort and highest rate of accuracy. For people managing multiple WordPress sites, the daily…

PHP 8.3 Support Added to Staging Feature
We’ve introduced PHP version 8.3 to our staging sites. Test out new features, code changes, and updates on the latest PHP version without affecting your live website. Update PHP confidently…
How do you update and backup your website?
Creating Backup and Updating website can be time consuming and error-prone. BlogVault will save you hours everyday while providing you complete peace of mind.

Updating Everything Manually?
But it’s too time consuming, complicated and stops you from achieving your full potential. You don’t want to put your business at risk with inefficient management.

Backup Your WordPress Site
Install the plugin on your website, let it sync and you’re done. Get automated, scheduled backups for your critical site data, and make sure your website never experiences downtime again.


