How To Create WordPress Test Site (Step-by-Step)
Bulletproof Backups for Your WordPress Website
Fortify your business continuity with foolproof WordPress backups. No data loss, no downtime — just secure, seamless operation.
Are you trying to figure out how to make bold changes to your site without affecting your visitors? Or do you want to test out the WordPress platform before you purchase a hosting plan? Or maybe you just want to learn how to use WordPress.
This is where WordPress test sites come in handy! There are different ways to set up a WordPress test environment, but each one serves a different purpose.
Some methods work only if you have an existing WordPress site while others enable you to create a dummy site without owning a domain or hosting plan.
In this step-by-step guide, we’ll show you the different methods available to create your own WordPress test site before going live according to your needs.
TL;DR –
There are many ways to set up a WordPress test site, but the easiest one is to use an efficient Staging Plugin such as BlogVault. You can create your test site in under a few minutes. Once you’re happy with your changes, you can push your changes from staging to live with the click of a button.
How To Set Up A WordPress Test Site
It was not too long ago when building a website required a sizeable investment and heavy coding skills. But with the dawn of WordPress, that all changed. It presented to the world a fast, easy, and affordable way to create a website. It’s no wonder it shot to fame and has retained its position as the most popular CMS (Content Management System) platform in the world to date.
Being so popular, there are a number of ways in which you can create a WordPress test site. There’s no single ‘best’ way to do it simply because it really depends on the reason you need the WordPress testing site. We’ve segmented it into two main motives:
- Create A Test Site Using Existing WordPress Site to test out major changes such as WordPress updates or trying new plugins and themes.
- Create A Test Site Without Existing WordPress Site to experiment with the WordPress platform, run quick tests, or to improve your WordPress skills.
Let’s get started.
A. Set Up A Test Site To Make Changes To Existing WordPress Site
When you’ve built and managed a WordPress site, you’ll know how delicate it is. Making changes to your site don’t always turn out the way you expected. You can make smaller changes directly to your live site such as publishing a blog post.
But when it comes to major changes such as switching your site theme or installing a plugin to add new functionality, they have the potential to break your site.
In times like these, a WordPress test site, more popularly known as a staging site, comes to the rescue. A test WordPress site enables you to experiment with your changes before making them on your live site.
There are a bunch of ways you can set up a WordPress test environment. We have an extensive guide on different ways to set up a WordPress staging site. Here, we’ll focus on two options:
- Using the BlogVault Plugin which is an easy-to-use option that’s reliable, guaranteed to work accurately, and doesn’t cost a dime.
- Setting it up manually through cPanel which is time-consuming and requires technical knowledge.
Note: You can use these methods to clone your existing WordPress website to set up a test environment. If you don’t have a live WordPress site and want to set up a dummy WordPress test site, skip to this section.
1. Create A WordPress Test Site Using The BlogVault Plugin
Step 1: Download the plugin called BlogVault on your WordPress site and activate it.
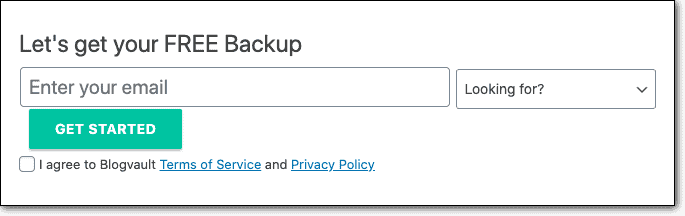
Step 2: Access the plugin on your WordPress console and enter your email address. From the drop-down menu Looking For?, select Staging and Get Started.
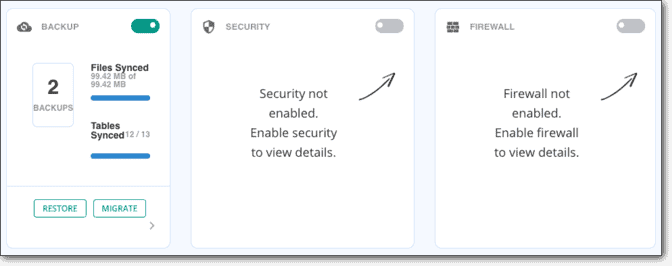
Step 3: You will be redirected to BlogVault’s dashboard where the plugin will sync with your website to create your first backup. Once complete, you’ll see your own dashboard like so:
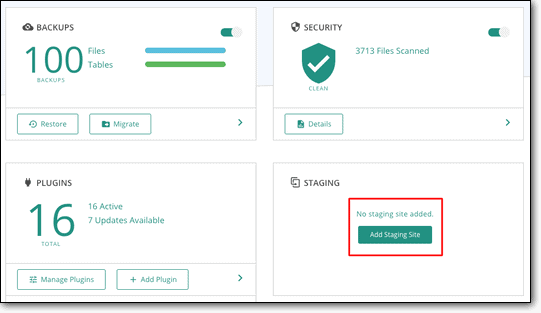
Step 4: Access the section called Staging and set up your first staging site by clicking on Add Staging Site.
Step 5: Select the latest backup copy created and Submit to create your testing environment. BlogVault will automatically password protect this site so that it is hidden from visitors and search engines.
Once your staging site is ready, BlogVault will provide you with a username and password. Take note of it, you’ll need it in the next step.

Step 6: Visit the Staging Site and use the credentials provided to access the site.
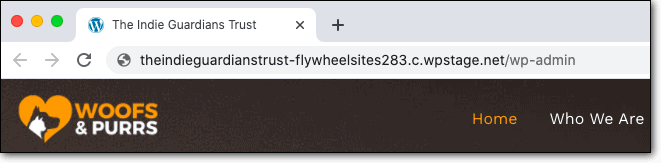
Step 7: Finally, to start working on your staging site, you can access your wp-admin console by adding ‘wp-admin’ at the end of the staging site URL.
This site has a validity of 30 days but you can extend it if you like. You can install plugins or a new theme, and try out major changes to your site. If anything goes wrong here, there’s no stress because your live or production site is independent of this test site and will not be affected.
Congratulations! You’ve successfully set up your WordPress testing site. You can experiment with all sorts of changes without affecting your live environment.
2. Create A WordPress Test Site Manually
Note: You can use this method to set up a staging site only if your web hosting provider grants you access to cPanel.
If you are using a Managed WordPress Host, you most likely will not have access to cPanel. We recommend using a WordPress plugin to stage your website. (Refer to the steps above.)
Before we dive in, we must caution you that setting up a testing environment manually isn’t for WordPress Beginners. A better option would be to use a plugin like BlogVault to automate the process for you.
We also don’t recommend this method because you will be duplicating the contents of your website on your web server. This means you’ll be running two websites on your server. This can slow down your live website and hamper its performance for your visitors.
That said, if you are keen on learning how to set up a test WordPress site on your own, we’ve detailed the steps below.
IMPORTANT: Take a complete backup of your WordPress site. This method requires you to access the backend of your WordPress site and carries a certain amount of risk. In case of any mishap, you can use your backup to restore your site to normal.
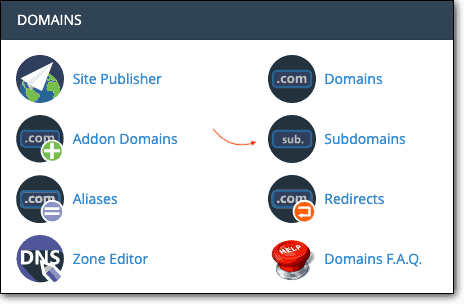
Step 1: Create A Subdomain
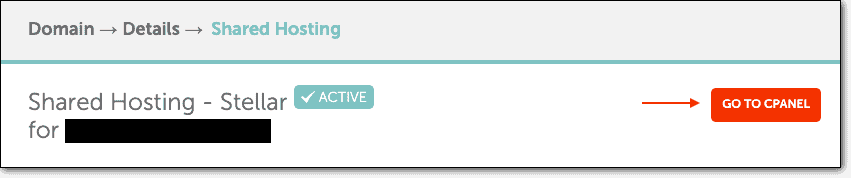
Log into your web hosting account and access cPanel. Inside, you’ll see an option of Subdomains.
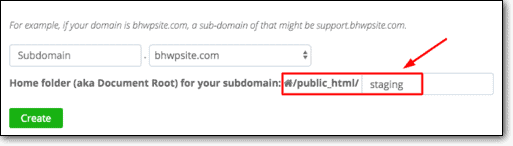
Inside, create a subdomain named Staging, like so:
Step 2: Download Files And Database Of Your WordPress Site
1. Download WordPress files
After you’ve installed WordPress to create your site, a number of files and a database will be created for your site. You need to access these files and database to create a test site.
To access your WordPress files, go to cPanel > File Manager. Here, look for a folder called public_html.
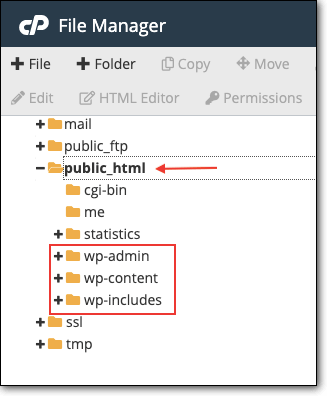
Select this folder, right-click and Compress it. This will create a zip file of your website’s files. Once the zip file is ready, right-click and Download it.
We recommend creating a folder to store WordPress locally on your computer called Staging. Put this WordPress zip file in this folder for easy access.
2. Download WordPress Database
Now to get a copy of your database, go to cPanel > phpMyAdmin. Here, select your database and Export it.
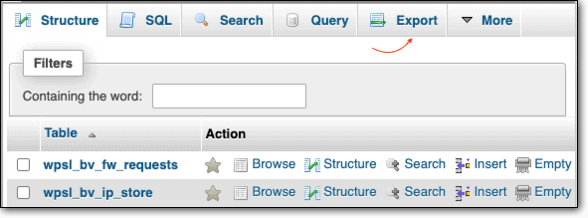
On the next page, leave the default settings as Quick method and SQL format and click on Go. A .sql file will download to your computer, save it to the same Staging folder you created in the previous step.
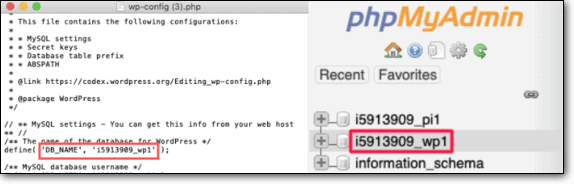
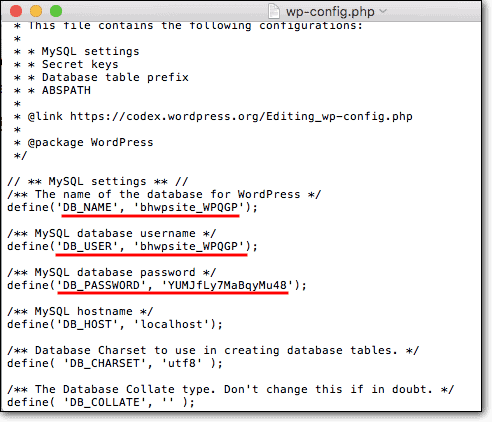
PRO TIP: If you see multiple databases and don’t know which is your website’s database, you can go to File Manager > public_html. Here, locate your wp-config.php file. Right-click and Edit this file. Here, you’ll see your database name and password, like so:
Step 3: Upload WordPress Files And Database To Your Staging SubDomain
1. Upload WordPress Staging Files
To set up your subdomain as a clone of your live site, you need to upload your website’s files and database to this subdomain folder.
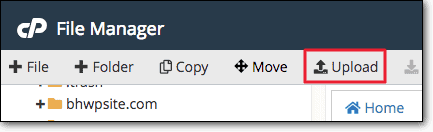
Access cPanel > File Manager > public_html. Here, select the Staging folder you created as a SubDomain. Inside this folder, select Upload, choose the zip file of your WordPress files on your local computer and upload it here.
Once uploaded, right-click, and unzip the file. Post this, you can delete the zip file.
2. Upload WordPress Staging Database
Go back to cPanel > phpMyAdmin > Databases. Here, Create A New Database.
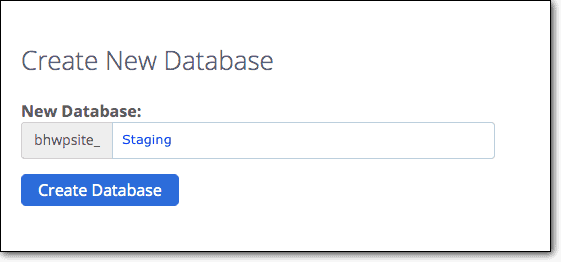
After this, scroll down on the same page and create a MySQL user for your database. Keep a note of your database and MySQL user information, you’ll need it in the next step.
Now, go to cPanel > phpMyAdmin > Databases. Select the new database you just created and select Import. Select the database you downloaded and stored on your computer.
Step 3: Update Database Details In The wp-config File
We mentioned earlier that your wp-config file contains your database information. The wp-config file uploaded contains your old database information. You need to update it to match the WordPress database you just created.
Navigate to cPanel > File Manager > public_html > Staging. Right-click on the wp-config file and Edit it.
Here, edit the following lines and enter your new database details.
To access your site, you need to use the URL staging.yourdomain.com. Replace ‘yourdomain’ with the name of your website. The login credentials to wp-admin panel will remain the same as your live website.
It’s important to remember that since you created this test site manually, you also have to delete it manually. As we mentioned earlier, running two websites on your web server can slow down your live WordPress site. So, once you’re done using this website, we strongly recommend deleting it immediately.
B. Set Up a Test Site to Experiment With WordPress
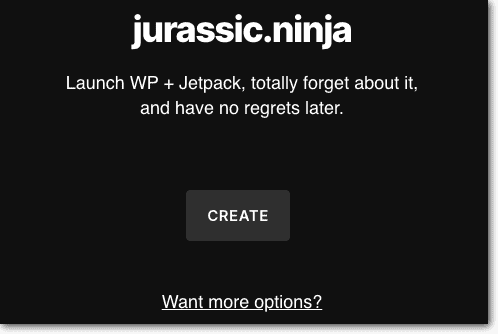
If you’re looking for a quick and easy way to set up a temporary test WordPress environment, try jurassic.ninja.
It’s a cloud-based software that’s simple to use. For those who are test driving WordPress, this is the perfect solution.
Note: jurassic.ninja creates a fresh WordPress installation. It does not clone your existing WordPress site to run tests.
Step 1: Visit the jurassic.ninja website and select Create.
Step 2: jurassic.ninja will set up your WordPress installation. It will only take a minute. Next, select the option The new WP is ready to go, visit it!

That’s it! Your dummy WordPress site is ready. The username and password to access this site are displayed on your WordPress dashboard. Take note of it and keep it safe to access this site again.
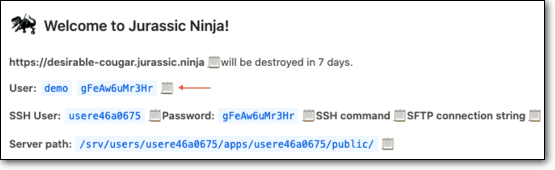
This site will be deleted after 7 days, so ensure you complete all your testing before it disappears.
Now that you’ve successfully created your WordPress test site, we’ll show you how you can move your changes from your test environment to your live site.
How To Move Changes From WordPress Test Site To Live Site
We’ll show you how to move your changes from your WordPress test site to live site for all three methods we covered above:
1. Merge Changes Using The BlogVault Plugin
Once you’re completely satisfied with the changes you’ve made on your live site, BlogVault has a nifty feature called Merge. This saves you the trouble of recreating all your changes on your live site.
Before you proceed, we strongly recommend testing your WordPress site’s performance and loading time. Ensure your staging site performs well and only then move your changes to your live site.
To push your changes from your testing environment onto your live website, follow the steps below:
Step 1: Visit the BlogVault dashboard and select Staging.
Step 2: Select Merge to Source. BlogVault will start syncing your live site and your staging site to determine the differences.

Step 3: On this page, you can view a list of all the changes you made. You can choose to merge all changes or select the changes you want to merge to your live WordPress site.
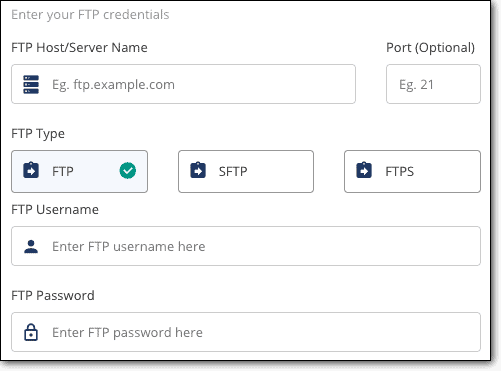
Step 4: Next, BlogVault requires permission to access your website’s server in order to merge your staging site with your live site. To grant access, enter your FTP or SFTP credentials. You can get your FTP credentials from your web host or use our guide to Finding Your FTP Credentials.
Step 5: Select the folder in which your WordPress live website resides. This is usually public_html unless you’ve created a separate folder for your website.
That’s it. It will take a few minutes for BlogVault to automatically push the changes you made on your staging site onto your live site.
Once complete, BlogVault will notify you. We recommend checking your website to ensure all the changes have been implemented and that your website is functioning fine.
2. Merge Changes Manually Through cPanel
When you create a test site manually, unfortunately, there’s no automated process to merge your changes.
Here’s what we recommend:
While making changes on your test site, make a note of each one. This way, you’ll have a record of the changes you made and in which order. Alternatively, if you have an activity log enabled on your site, you can refer to it while making and testing changes on your live site.
To move changes from your test site to your live site, login to the wp-admin panel of your live site. Refer to your change log and recreate the steps one by one.
This method is time-consuming which is why we don’t recommend it.
3. Merge Changes Using jurassic.ninja
Juraasic.ninja creates a dummy WordPress installation that has no connection to your live WordPress site. You can use this site to try a new plugin or theme for WordPress, but you won’t know how they will actually function on your live site.
Any changes you make here, you will need to manually recreate on your live site.
That brings us to an end on creating a WordPress test site before going live. We’re confident that you’ve learned how to set up a test site and move the changes to your live site.
Final Thoughts
Making changes to your live WordPress site can be nerve wracking as you don’t know how the changes will affect your site.
From the steps detailed above, we can see that the manual method is time-consuming and prone to mistakes. Plus, there’s no option to merge your changes with your live site.
It’s much easier to use a WordPress Staging Plugin such as BlogVault that uses an automated process. This makes creating and using a WordPress test site easier, faster, and much more efficient. If you want to build new site, test it without affecting your old site, you can check out the guide on how to build new site while the old site is live.
Create A WordPress Test Site With BlogVault!
Tags:
Share it:
You may also like

How to Limit Form Submissions with Droip in WordPress
Forms are an indispensable part of any website because of their versatility, letting you collect information for various purposes! However, people with ill intentions often attempt to exploit these forms…

How To Manage Multiple WordPress sites
Management tools help agencies become well-oiled machines. Each task is completed with the least amount of effort and highest rate of accuracy. For people managing multiple WordPress sites, the daily…

PHP 8.3 Support Added to Staging Feature
We’ve introduced PHP version 8.3 to our staging sites. Test out new features, code changes, and updates on the latest PHP version without affecting your live website. Update PHP confidently…
How do you update and backup your website?
Creating Backup and Updating website can be time consuming and error-prone. BlogVault will save you hours everyday while providing you complete peace of mind.

Updating Everything Manually?
But it’s too time consuming, complicated and stops you from achieving your full potential. You don’t want to put your business at risk with inefficient management.

Backup Your WordPress Site
Install the plugin on your website, let it sync and you’re done. Get automated, scheduled backups for your critical site data, and make sure your website never experiences downtime again.


