

WordPress errors are every owner’s worst nightmare. Your site is down, displaying a frustrating blank screen or a vague message. You have no idea what’s broken.
You’re stuck in a high-pressure situation, desperately guessing at solutions. You’re wasting time while visitors leave your offline site.
This guide shows you how to safely enable WordPress to display errors directly on your screen. You’ll instantly see the problem, fix it, and get your site back up.
Always start by taking a backup using a backup plugin to safeguard your data. Enable WordPress error display only when your site is completely broken and you need immediate answers. After resolving the issue, turn off error display to maintain security.
When should you display errors on your site
Displaying WordPress errors on your site shouldn’t be your first choice for debugging. Here are the specific situations where it will become necessary:
- When WordPress can’t create log files. Sometimes critical errors happen so early that WordPress never initializes its logging system. Your WordPress debug logs remain empty or aren’t created at all. Making errors appear on your screen becomes the only way to see what’s failing when the logging system itself is broken.
- When you’re actively developing your site. If you’re building or modifying your site on a private development environment, seeing errors pop up instantly on the page helps you fix mistakes much faster than constantly checking a separate log file.
What are the security risks of displaying errors on your site
Before you enable error display, understand these critical security risks:
- Your site becomes a roadmap for attackers. WordPress errors reveal the exact file paths on your server. Hackers can see where your website files are stored and how your folders are organized.
- Database details get exposed. Error messages often show pieces of your database configuration. This gives attackers clues about your database setup and potential entry points.
- Your software versions become visible. Errors reveal your specific plugins, themes, and WordPress versions. Attackers can instantly see what software you’re running and search for known vulnerabilities to exploit in those exact versions.
- Your professional image suffers. Visitors see technical gibberish instead of your website. They lose trust in your site’s reliability and professionalism.
- You’re handing over attack strategies. Every displayed error is essentially free reconnaissance for anyone with malicious intent. You’re doing the attacker’s research for them.
How to have WordPress display errors on your site
Method 1: Manually enable WordPress debug to display errors
This method is perfect when your site is completely broken and you have been locked out. You’ll add special lines to your wp-config.php file, which controls your WordPress site’s key settings.
Step 1: Take a backup of your site. Always backup before editing core files.

Step 2: Access your site’s files. Use your hosting control panel, FTP, or file manager to reach your website’s root folder (often public_html or www).

Step 3: Find wp-config.php. This file sits in your WordPress root directory, usually alongside folders like wp-content and wp-admin.
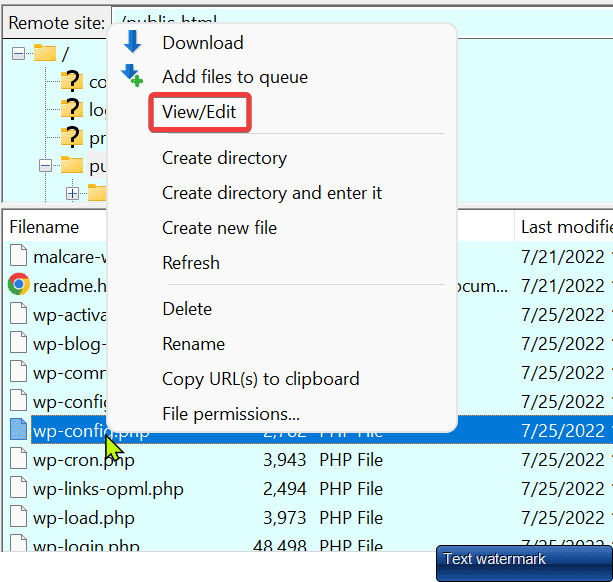
Step 4: Add the debug code. Insert these lines above the “That’s all, stop editing! Happy publishing” comment:
define( 'WP_DEBUG', true );

define( 'WP_DEBUG_DISPLAY', true );
Normally you’d set WP_DEBUG_DISPLAY to false for security reasons. But since you want errors displayed on your site, we’re setting this to true.
Optional: Create a separate log file. Add this line to also save errors to a debug log file in your wp-content folder:
define( 'WP_DEBUG_LOG', true );Step 5: Save and upload. Save the file and upload it back to your server, replacing the original.
Method 2: Use a debug log plugin
If editing files feels risky, use a plugin instead. Ensure you take a backup of your site before installing the plugin.
Step 1: Install the WP Debugging plugin. Multiple debug plugins exist in the WordPress repository. We recommend WP Debugging for its simplicity.
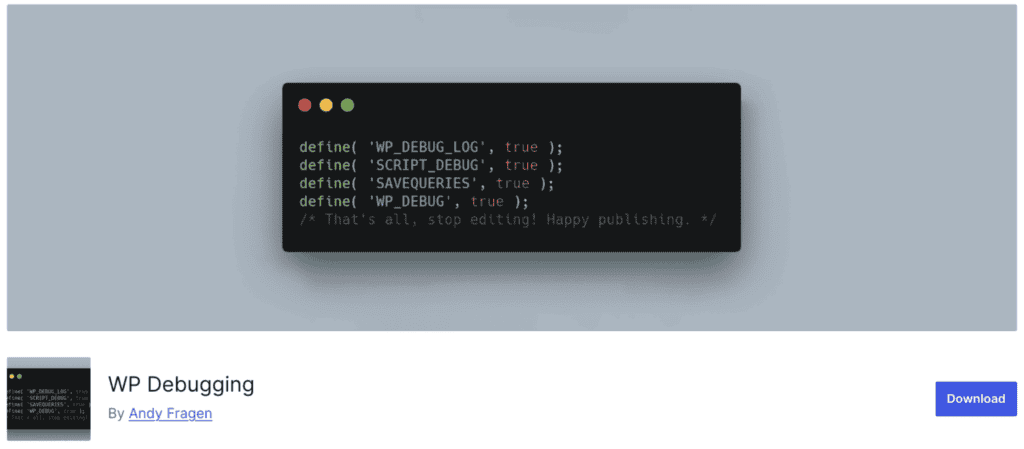
Step 2: Activate the plugin. The display constant is automatically set to true by default, so errors will appear on your site immediately.

The plugin lets you either display errors on your screen or save them only to a log file. If you want to hide errors from visitors but still track them, set the debugging constants to false. Errors will still be saved in the debug log file for you to review later.
The difference between displaying errors and logging errors
Displaying errors (on your website screen)
When you display errors, they appear directly on your web pages where visitors can see them. This approach works best for emergency fixes when you’re facing a blank screen and need immediate answers.
It’s also perfect for development work where you want to see issues instantly while building on private test sites.
The major drawback is the security risk. Displaying errors on live sites exposes sensitive information to visitors and makes your site look unprofessional.
Logging errors (to a private file)

Error logging saves all errors to a debug.log file on your server that only you can access. This method works best for live websites since it’s the safest way to track errors without exposing them to visitors.
It’s also ideal for ongoing monitoring because it records issues over time so you can review them later.
The key advantage is security. Logging hides sensitive information from visitors and keeps your site looking professional.
Post-debug protocol
You fixed the error and your site is working again, but you’re not done yet. These crucial steps will keep your site safe and ensure everything runs smoothly.
Hide errors immediately. If you used the manual method, change WP_DEBUG_DISPLAY from true to false in your wp-config.php file. If you used a plugin, deactivate the debug plugin completely.
Clear all cache. Empty your caching plugin completely. Flush your CDN if you use one. Purge hosting provider cache through your control panel. Refresh your browser cache too. This ensures visitors see the fixed version of your site, not old cached pages that might still show errors.
Test your site thoroughly. Click through your main pages, test your forms, and check that everything works as expected. Sometimes fixing one error can reveal new problems that were hidden before.
Double-check error visibility. Visit your site in an incognito window to confirm no error messages are visible to regular visitors.
Keep your debug log file. If you enabled WP_DEBUG_LOG, the debug.log file in your wp-content folder contains valuable information about what went wrong. Keep it for reference, but make sure it’s not accessible to the public.
Parting thoughts
You now know how to see what’s breaking your WordPress site instead of staring at blank screens. Turn on error display only when your site is completely broken, then turn it off immediately after you fix the problem. For regular monitoring, use error logging to keep your site secure while tracking issues.
FAQs
Where can I see WordPress errors?
WordPress errors are typically logged in a file called debug.log within the wp-content folder if logging is enabled. You can view them by enabling WP_DEBUG_LOG in your wp-config.php file. Alternatively, errors can be displayed directly on the site for immediate visibility during debugging.
How do I turn off error display in WordPress?
To turn off error display, ensure the line define(‘WP_DEBUG’, false); is set in your wp-config.php. This disables the display of errors on your site’s frontend. It’s important to disable this on live sites for security reasons.
How do I disable error log in WordPress?
To disable error logging, remove or comment out define(‘WP_DEBUG_LOG’, true); in your wp-config.php to stop generating error logs. Ensure you’ve addressed any ongoing issues before doing this. Keeping error logging disabled can help reduce unnecessary file generation.
Why is my WordPress website not displaying correctly?
Your site may not display correctly due to plugin or theme conflicts, outdated software, or coding errors. Check for incompatible scripts or styles, and update your WordPress core, themes, and plugins. Debugging tools can help identify the specific issue.

Shivani enjoys crafting guides that make every aspect of using WordPress simple and easy to follow. When she's not glued to her laptop, you can find her buried in a good book or occasionally, painting.


