

With a WordPress multisite, the domain is hardwired deep into the database. This makes changing it a truly delicate operation. Whether you’re moving a client site or rebranding your network, you need a method you can rely on.
You’re right to be cautious. Guesswork is not an option here.
This is exactly why we wrote this WordPress multisite change domain guide. We will walk you through the steps to get it done easily.
Changing a multisite domain requires editing wp-config.php and key database tables, then using a serialization-safe plugin for a full URL update. This process is risky, so create a restoration point with a strong backup plugin to ensure you can always undo your changes.
Prerequisites
Before you touch a single file, you must prepare. Skipping these steps is how simple projects turn into weekend-long emergencies.
Get full site access. You will need access to your server files through SSH or FTP. You also need database access, typically through your WordPress host’s database manager or a tool like phpMyAdmin.
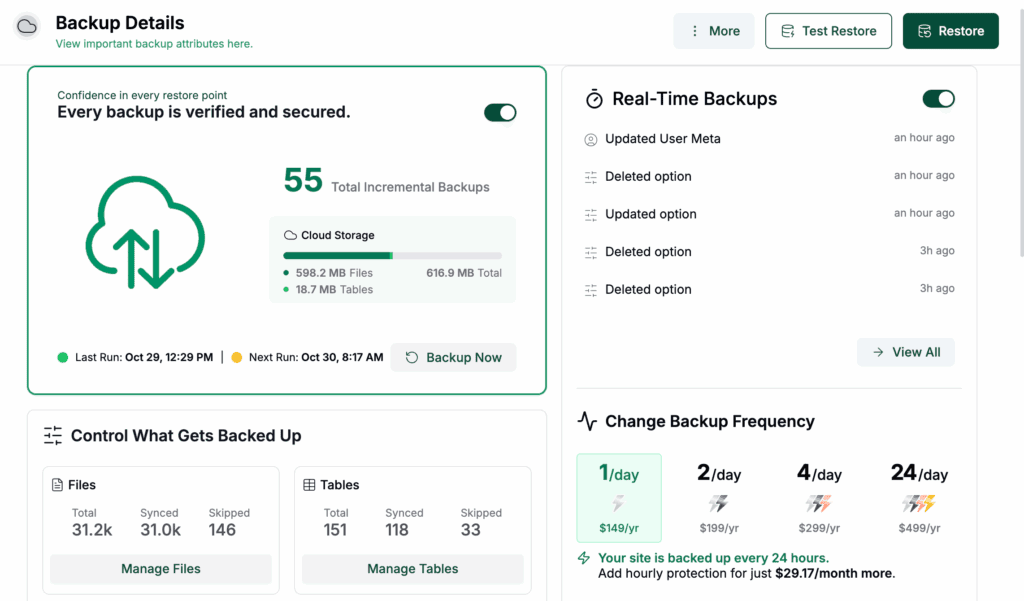
Create and verify a complete backup. Get a full backup of both your database and all your files. This includes WordPress core, themes, plugins, and uploads. This is your non-negotiable safety net. If anything goes wrong, this is what lets you hit the undo button.
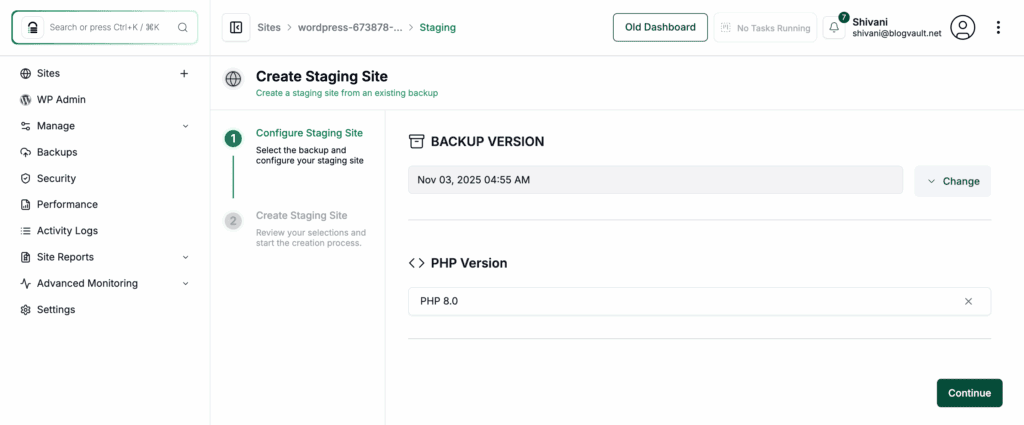
Work in a staging environment. We cannot stress this enough. Perform all steps on a staging site first. A good staging plugin creates a safe copy where you can work without affecting your live users.
Use maintenance mode if necessary. If you absolutely must work on a live site, enable maintenance mode. This shows visitors a friendly message instead of a broken site while you work.

Prepare your new domain. Point your new domain’s DNS A record to your server’s IP address. Also, make sure a valid SSL certificate is installed and configured for it. You want everything ready for the switch.
Configuring for a WordPress multisite change domain
With your safety net in place, it’s time to get WordPress ready for the change.
First, temporarily disable all caching and security plugins across your network. They can interfere with database changes. Sometimes they can even lock you out by blocking access from the new domain before you’re ready.
Next, we need the right tool to update the WordPress database. We will be using a plugin called Better Search Replace. It’s user-friendly and, most importantly, it correctly handles something called “serialized data.”

This is just a technical way of saying it prevents your site’s settings and content from getting scrambled during the change. It’s the safest way to do this.
Finally, open a text file and write down your old and new URLs. Be precise. Note whether they use http or https, and if they include www. You will need these exact strings for the search and replace steps.
Changing the domain for a subsite
This method is for when you need to change client.oldsite.com to client.newsite.com, while the main network domain stays the same.
This method is for when you need to change a single subsite’s domain (e.g., client.oldsite.com to client.newsite.com), while the main network domain stays the same.
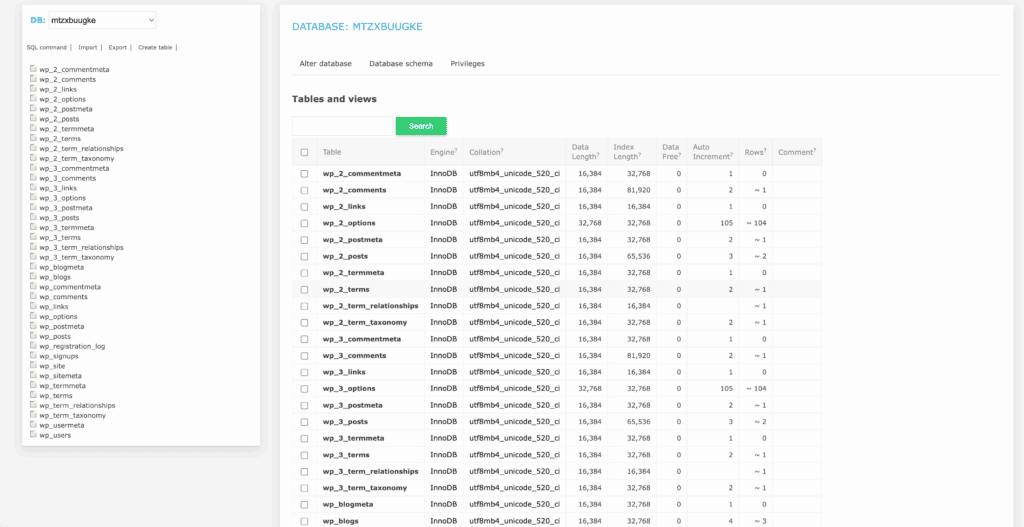
Find the Blog ID and update the domain. For this guide, we are using the Cloudways Database Manager, but the process is identical in any database tool like phpMyAdmin. Open the wp_blogs table.
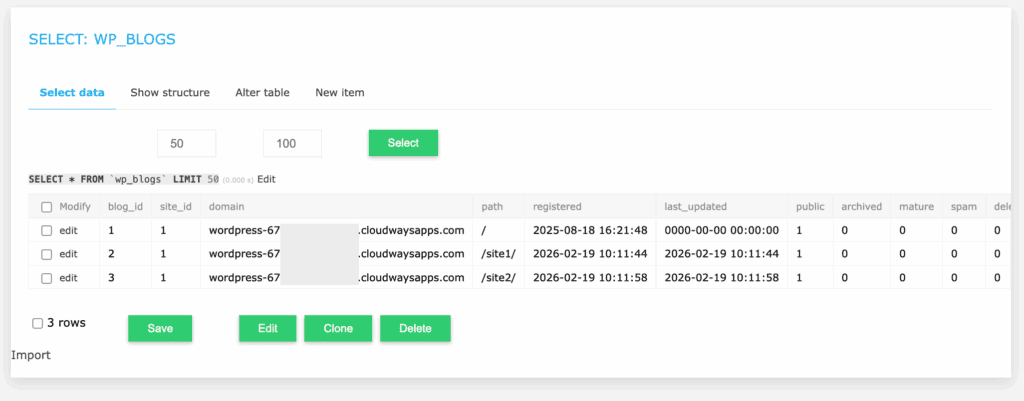
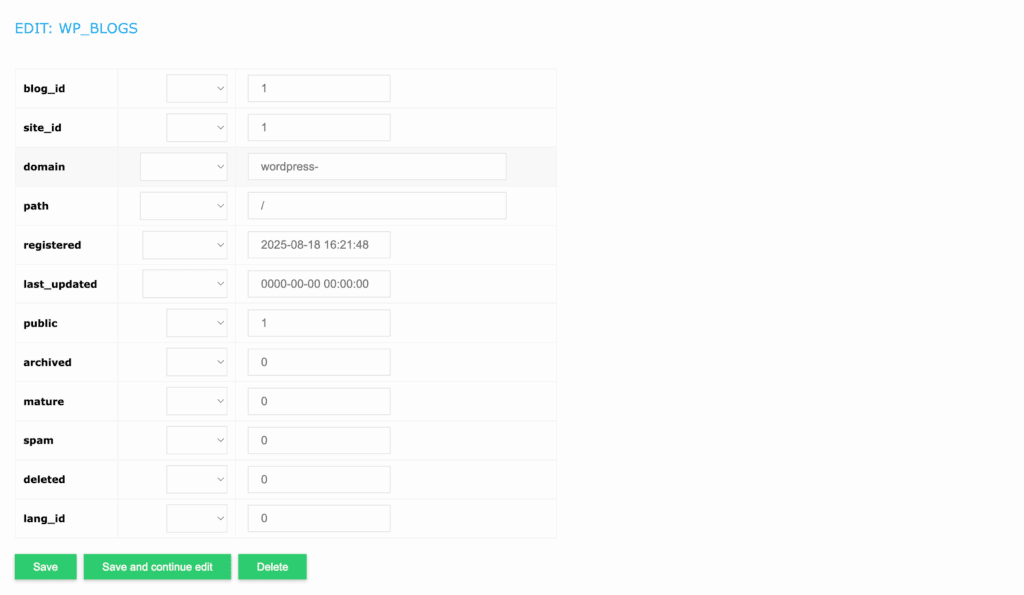
Scan the domain column to find your subsite’s current URL (e.g., client.oldsite.com). Note the number in the blog_id column in that same row—this is your site’s ID. While you are there, click to edit the domain column and change it to the new URL (e.g., client.newsite.com).
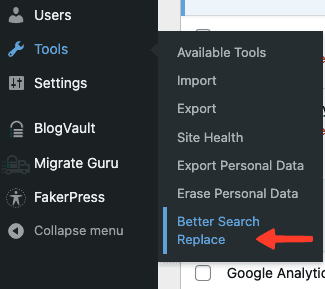
Run a safe search and replace. This is the most critical part. We will use the Better Search Replace plugin. Go to Tools → Better Search Replace.
- In Search for, enter the old subsite domain.
- In Replace with, enter the new subsite domain.
In Select tables, choose ONLY the tables for that specific site. They will look like wp_5_posts, wp_5_postmeta, and wp_5_options (where 5 is your Blog ID). Do not select general tables like wp_users, as this can cause WordPress errors.
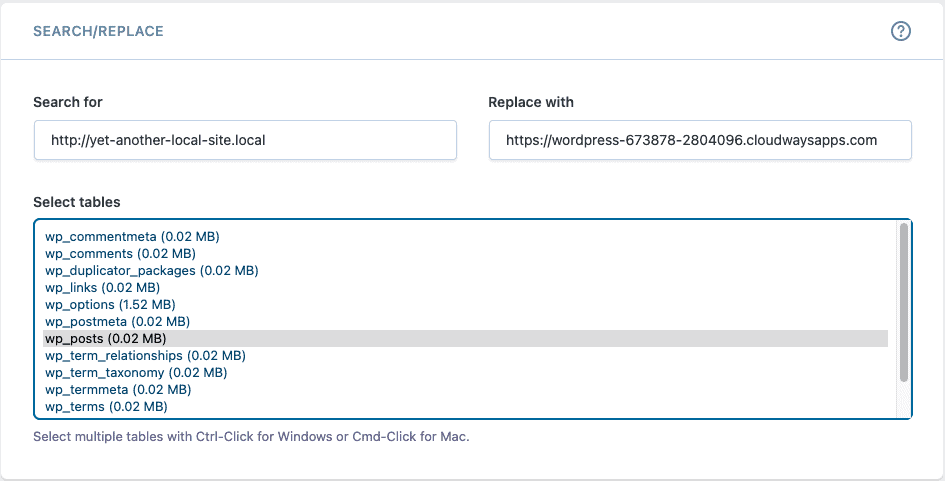
Always, always check “Run as dry run” first. This shows you what the plugin would change without actually changing anything. Review the results. If it all looks correct, uncheck the box and run it for real.
Update your domain mapping plugin. If you use a domain mapping plugin, go to its settings page in the Network Admin. Find the entry for the old domain and change it to the new one. Open a new private browser window and test. Can you visit the new domain? Can you log in? Do images load and links work?
Changing the domain for multiple subsites
When you need to change domains for several subsites at once, the methodical approach becomes even more critical. The process involves repeating the steps from Method 1, but your discipline here is what guarantees a safe outcome.
First, create a detailed change log. This is your roadmap to prevent mistakes. For each site, list the old domain, the new domain, and its Blog ID.
- Site A: blog.oldsite.com → blog.newsite.com (Blog ID: 3)
- Site B: shop.oldsite.com → store.newsite.com (Blog ID: 7)
Next, process each site one at a time. This is the most important rule. Treat each line in your log as a separate project. For the first site on your list (Site A), you will:
- Update its domain in the wp_blogs table.
- Run Better Search Replace on ONLY its specific tables (e.g., wp_3_*).
- Test the site completely to ensure it works.
Only after you confirm Site A is working perfectly should you repeat the exact same process for Site B. A good backup strategy ensures you can always go back if a test fails.
This one-at-a-time method is non-negotiable. It isolates risk. If a mistake happens with Site B, you know the problem is limited to that site, making it easy to fix without affecting the others.
Changing primary network domain
This is the big one. You are moving the entire network from oldsite.com to newsite.com. Be meticulous here.
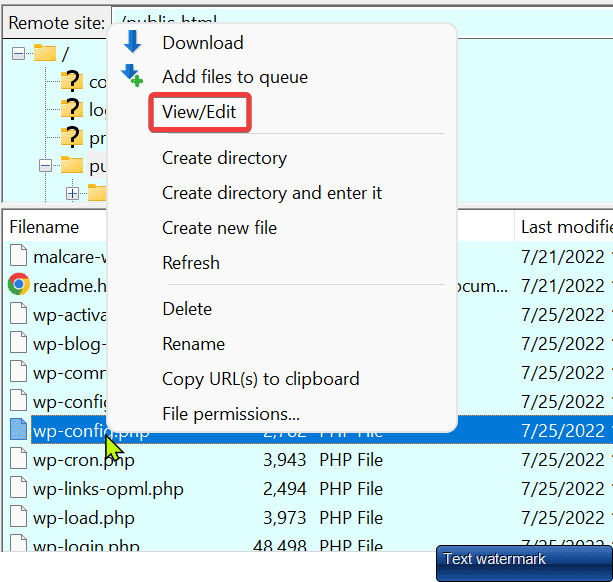
First, update the network’s core settings. This is a manual process. You will need to edit your wp-config.php file to define the new DOMAIN_CURRENT_SITE. After that, you must go into phpMyAdmin and update two key database records: the siteurl in the wp_sitemeta table and the main site’s domain in the wp_blogs table.
Next, run a network-wide search and replace. Once the core settings are updated, go to your dashboard and use the Better Search Replace plugin. You will run a search for your old domain and replace it with your new one across all tables. Again. aways perform a “dry run” first to check for errors before running it for real.
Finally, perform a quick cleanup. A common missed step is updating each individual subsite’s siteurl and home settings in their options tables. You must run a quick SQL query on each subsite’s wp_X_options table to finalize the change.
A final, critical warning: never change the guid column in any wp_posts table. These are permanent identifiers for RSS feeds and should be left alone.
Server configuration updates
With the database updated, you now need to configure your server so the new domain actually loads your site.
- For Apache servers (using .htaccess). Via FTP, find your .htaccess file. Open it and look for any lines containing your old domain. Update them to the new domain, then upload the file back to the server.
- For Nginx servers. If you have control, you can update the server_name directive in your Nginx config file. Otherwise, it’s best to contact your hosting support. Your host may need to restart Nginx for the changes to take effect.
- For cPanel/shared hosting. Go to your cPanel and find the Domains section. Remove the old domain if it is listed as an Addon Domain. Then, add the new domain, making sure it points to your public_html folder. Use the SSL/TLS Status tool to issue a certificate for the new domain.
Immediate post-change testing
- Basic accessibility. Open a new private browser window. Visit your new domain. Does the homepage load? Try to log in to the admin area.
- Network admin. Go to the network admin dashboard. Can you access all the features? Check the Sites list to ensure all sites are there.
- Site-by-site check. For each site in your network, visit its front page. Check if images load. Click a few internal links. Test a contact form.
- Media library. Go to any site’s dashboard and open the Media Library. Do all the image thumbnails show up? Click on an image to see if it opens correctly.
Fixing common problems
If something isn’t working right after the change, don’t worry; the solution is almost always one of these common fixes.
Login loop. Your browser cookies are probably confused. Via FTP, edit wp-config.php and add define(‘COOKIE_DOMAIN’, ”); right after the database settings. Clear your browser cookies and try again.
Broken images. This usually means a URL path was missed. Run Better Search Replace again. This time, search for oldsite.com/files and replace with newsite.com/files. Select only the wp_posts and wp_postmeta tables.
The network admin shows the old domain. Go to phpMyAdmin and double-check the siteurl record in the wp_sitemeta table. Also, verify the wp_blogs table for blog_id = 1.
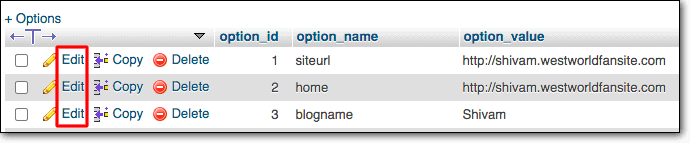
The individual site won’t load. Check the wp_blogs table to ensure that site’s domain column is correct. Then check that site’s wp_X_options table to verify both siteurl and home have the new domain.
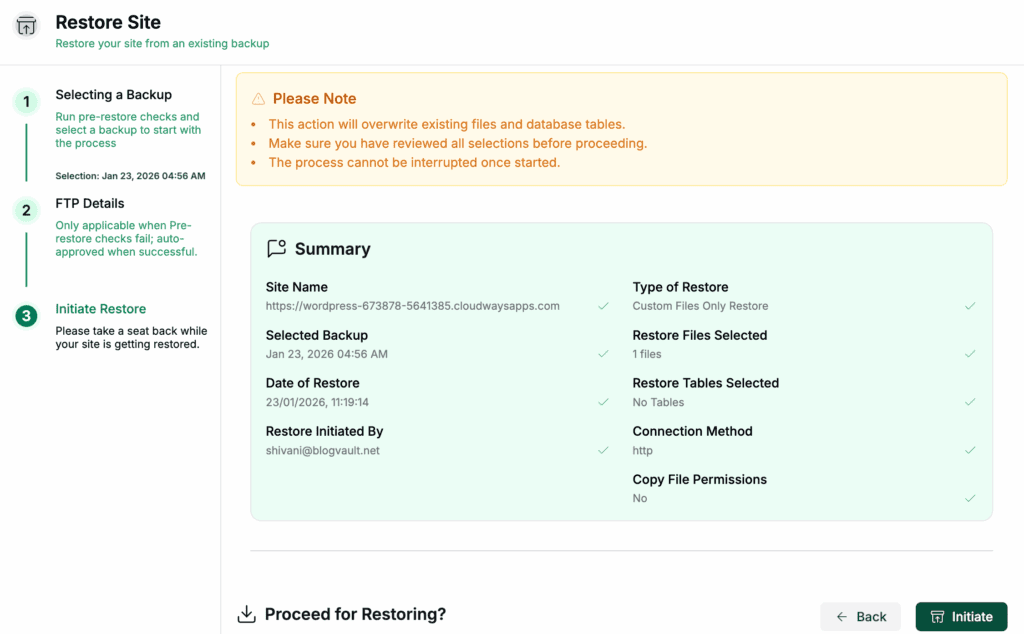
Emergency restoration. If everything breaks, this is why you made backups. Restore your website. You will be back where you started, ready to try again more carefully.
SEO & cleanup
- Set up 301 redirects. This is essential for SEO. In your .htaccess file, add rules to permanently redirect all traffic from the old domain to the new one.
- Update Search Console. Go to Google Search Console and add your new domain as a new property. Submit your new sitemap and use the Change of Address tool to inform Google.
- Update external services. Do not forget to update your domain in Google Analytics, Cloudflare, your email marketing tools, and your social media profiles.
- Monitor your site. Check your website uptime for the next 72 hours. Monitor Google Search Console for crawl errors and check for any 404 errors in your analytics.
Parting thoughts
You’ve just completed one of the most advanced procedures in WordPress by successfully changing your multisite domain.
By following a methodical approach with backups, staging, and precise database edits, you ensured a safe and successful change. This process has equipped you with the skills to test your work, protect your SEO, and troubleshoot like a pro.
FAQs
Will changing my Multisite domain affect my SEO rankings?
Yes, changing your domain can temporarily affect your SEO rankings if not handled correctly. To protect your rankings, you must implement 301 redirects from the old domain to the new one and update Google Search Console.
Why am I stuck in a login redirect loop?
You are stuck in a login loop because WordPress is likely confused by old domain information stored in your browser’s cookies. Adding define(‘COOKIE_DOMAIN’, ”); to your wp-config.php file and clearing your browser cookies will almost always fix this issue.
Do I need an SSL for different subsite domains?
Yes, you absolutely need a valid SSL certificate for each unique subsite domain to ensure it is secure and trusted by browsers. Most modern hosting providers offer wildcard SSL certificates or free Let’s Encrypt certificates that can cover all your subsites.
Can I change from subdomains to subdirectories easily?
No, changing a live multisite network from subdomains to subdirectories is a complex and risky process that requires deep database and server changes. It is strongly recommended to decide on your structure at installation, as switching later can cause significant downtime.
What is the safest way to search and replace URLs?
The safest way to search and replace URLs is by using a serialization-aware tool like the Better Search Replace plugin. These tools correctly handle complex data stored in the database, preventing the data corruption that a manual SQL query often causes.
Which database tables specifically control the Network Admin URL?
The Network Admin URL is controlled by the siteurl record in the wp_sitemeta table and the main site’s entry in the wp_blogs table. The DOMAIN_CURRENT_SITE constant defined in your wp-config.php file must also be updated to the new domain.

Shivani enjoys crafting guides that make every aspect of using WordPress simple and easy to follow. When she's not glued to her laptop, you can find her buried in a good book or occasionally, painting.


