WordPress auto update for Core: The Definitive Guide
Bulletproof Backups for Your WordPress Website
Fortify your business continuity with foolproof WordPress backups. No data loss, no downtime — just secure, seamless operation.
Automatic WordPress updates are both great and terrible at the same time. Great because updates have security improvements, fix bugs, and improve performance. Frequent updates are what have made WordPress great. Terrible because any change to your site can break it, and updates are no exception. If updates are applied automatically and your site crashes, you may not even know until a few hours later.
Updating WordPress manually is not a fun activity. It takes time and effort, and even then, it can still break your site.
So what is the solution? You want WordPress to update automatically—because it is a critical maintenance task—without the risk of downtime.
TL;DR: Backup your WordPress site with BlogVault, and enable WordPress auto update without a care in the world. BlogVault automatically backs up your site daily and monitors your site for downtime. If a WordPress automatic update breaks your site, you will get an immediate notification, and you can restore a backup in minutes. Better yet, manage all updates—WordPress, plugins, and themes—with BlogVault’s scheduled auto-updates feature.
Introduced from version 3.7, the WordPress automatic updates feature has caused quite the stir since it dropped. Initially, it only installed minor updates automatically, but recently the feature has evolved to include major updates as well.
Before we talk about how to enable WordPress automatic updates, it bears thinking about what they are.
What are WordPress auto updates?
WordPress updates are improvements made to the core by WordPress developers. The improvements often include security updates, vulnerability patches, bug fixes, performance improvements, and new features. For instance, an update could add support for an additional language, patch a cross-site scripting vulnerability, or indeed automate updates for WordPress.
What are the types of WordPress auto updates?
WordPress releases come in a few flavours: major, minor, and dev updates.
- Major releases include feature additions, improvements to existing features, and much more. For instance, WordPress 6.0 ‘Arturo’ had changes like an enhanced writing experience and additional templates.
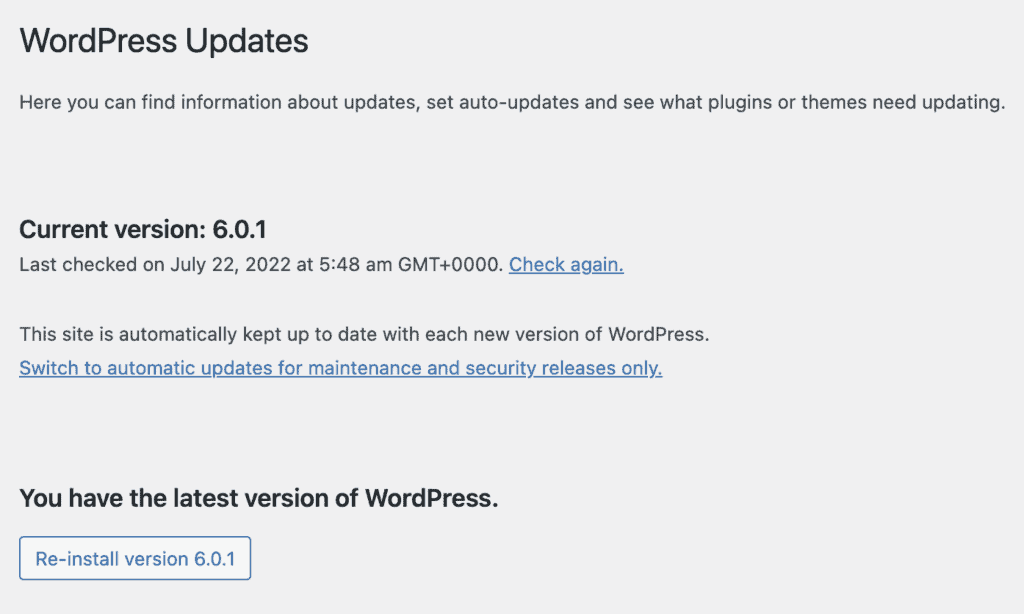
- Minor releases usually have a bunch of bug fixes. In the case of 6.0.1, which followed soon after the 6.0 major release, was a maintenance update. This is because it had only bug fixes, but no security fixes.
- Dev updates: These updates refer specifically to updates made for development versions of WordPress. These versions are never used on live sites, but for testing the upcoming releases of WordPress. In any case, we rarely have to deal with dev updates, so this is here for completeness.
In both cases, WordPress core files are changed. This means, the wp-includes and wp-admin directories, and some of the contents of the wp-content directory as well. Standalone core files like the .htaccess file will be overwritten as well. The wp-config file is a rare exception, because no WordPress releases actually have a wp-config file. It is generated dynamically during installation from a template file, wp-config-sample.
The releases can consist of different types of updates. You will largely see them referred to as follows:
- Core updates: Most releases are essentially core updates, with other types of updates thrown in for good measure. They are called core updates because they update core WordPress files.
- Plugin updates: As the name suggests, the plugin updates contain fixes, improvements, and new features for plugins. These auto updates are available for all plugins listed on the WordPress directory, as the update is uploaded there, and from there sent to sites.
- Theme updates: Theme updates usually only mean the WordPress stock themes or the free ones available on the directory. Premium themes are usually managed from other dashboards, and are not typically included in auto updates.
- Translation updates: WordPress is available in a bunch of languages, as you would have seen when installing it for the first time. These language packs are always being added to and improved via translation updates.
How do auto updates work?
Your WordPress site has a number of automatic scripts it runs in the background on a schedule. These are known as cron jobs. Cron jobs are used to carry out plenty of tasks, like publishing scheduled posts for instance. One of the things it handles is checking for updates.
The cron events are set to run twice a day, or every 12 hours. This is not an exact scheduling though. On every page load, WordPress will check if a job has been scheduled to run. If it isn’t, it will schedule it immediately and then set it up on a 12-hourly schedule. So the cron event for checking for updates will run every 12 hours.
The update checker, once run, will send information about the WordPress version, plugin and theme versions, and PHP version on your site to be compared with the latest versions available. If your site is running an older version of PHP and the latest versions are not compatible with that PHP, then the site gets a patch rather than an update. Otherwise, your site gets the auto update.
How to enable WordPress automatic updates
Minor WordPress updates are enabled by default. We strongly recommend you keep this as is because the minor updates are almost always security fixes. In the following sections, we will tell you how to customize which auto updates you want to enable.
Manage WordPress auto update with a plugin
We dug deep while writing this article, and tested out all the means of enabling WordPress automatic updates. We tried plugins, editing the wp-config file, using the Updates menu, and all the methods we’ve listed out below. The only method that didn’t cause us to have a nervous breakdown was using BlogVault to manage updates.
Managing WordPress updates with BlogVault’s auto-update feature is not strictly the same as enabling automatic updates, however it is the best solution. Updates are applied automatically but safely, because a backup is taken just before. Also, BlogVault’s visual regression test and uptime monitoring will keep you posted in case the update breaks your site.
How to use BlogVault’s auto-update feature
1. Create a BlogVault account, and set up your site to sync. It will take a few minutes to take the first backup, especially if your site is particularly large.
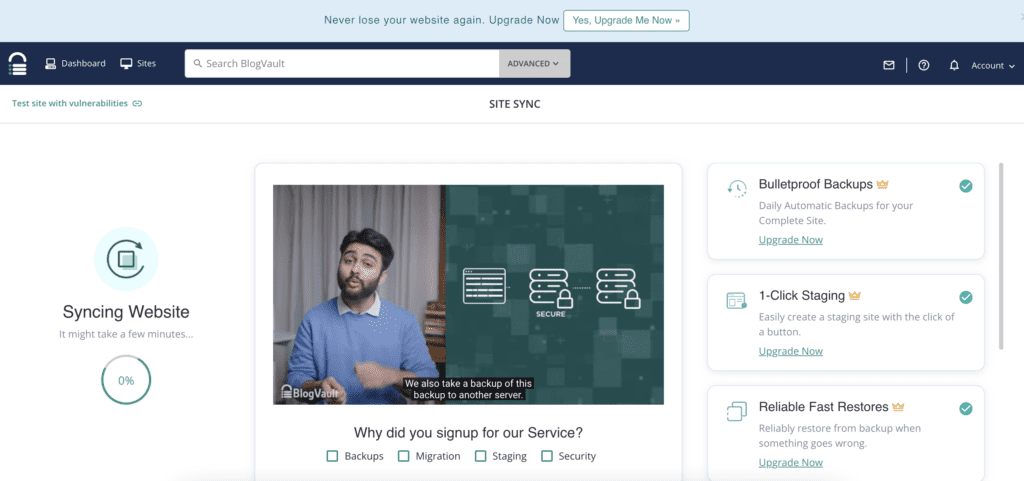
2. Open up your BlogVault dashboard, and navigate to the Site Details page. You should see an option for Auto Update.
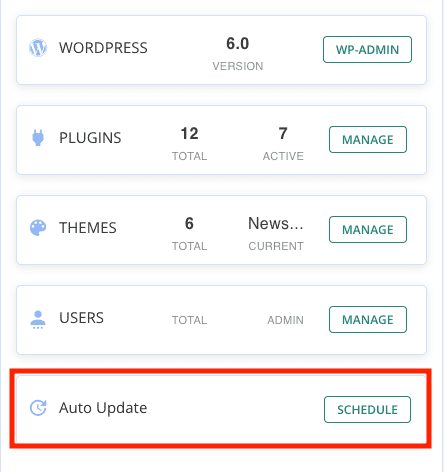
3. The Auto Update feature enables you to set up a schedule for plugin, theme, and WordPress updates. Click on Schedule to get started, and see the available options.
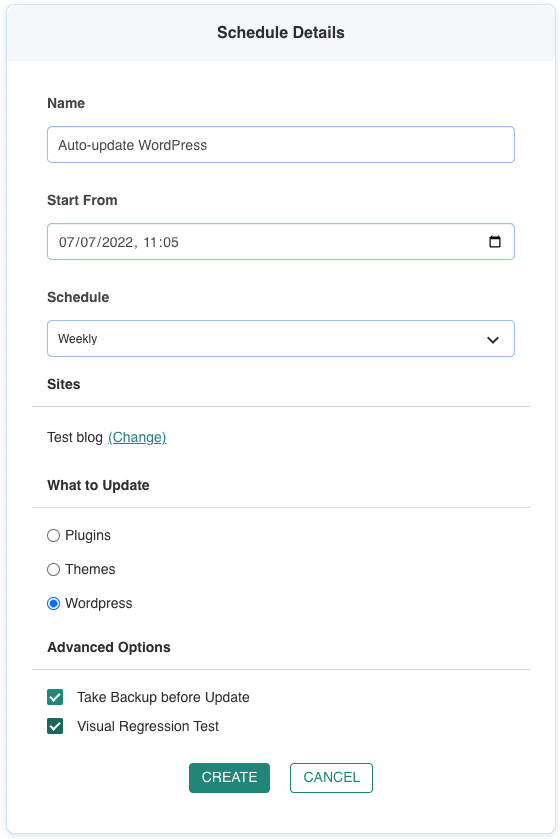
4. Even though it is optional, click the checkbox against backup and visual regression. These are valuable tools to have during any update, and can help to discover and revert a failed update quickly.
5. Finally, continue on to see all the schedules set up for your sites. You can change or delete them as per your requirements.
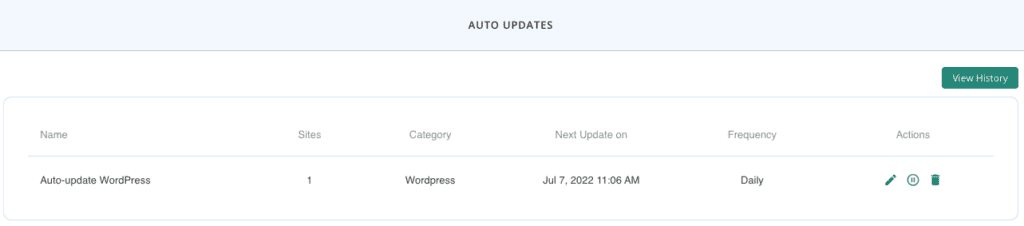
The Auto Update schedule will send you an email every time it executes. Therefore, if an update is unsuccessful, you will know immediately and can take necessary action. This is the best of both worlds with respect to updates: automatic and risk-free.
Enable WordPress auto update using the wp-admin dashboard
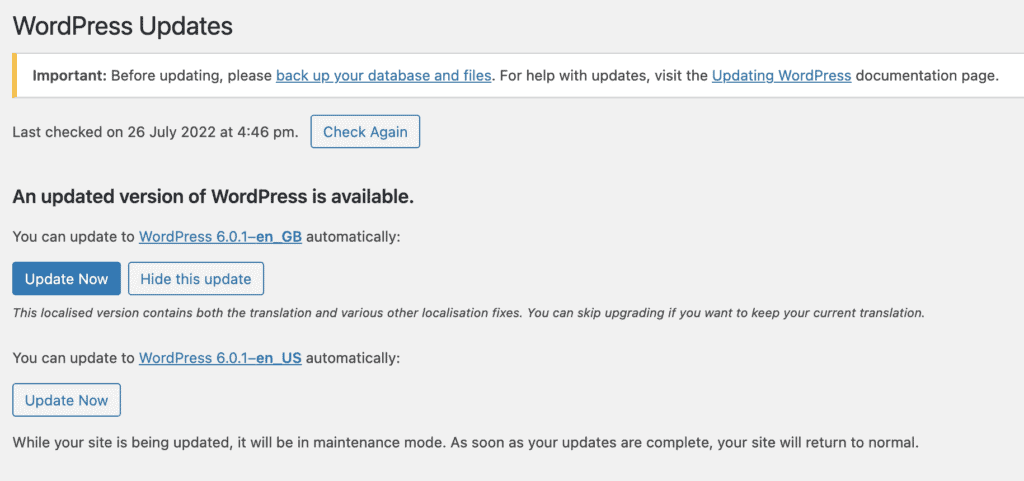
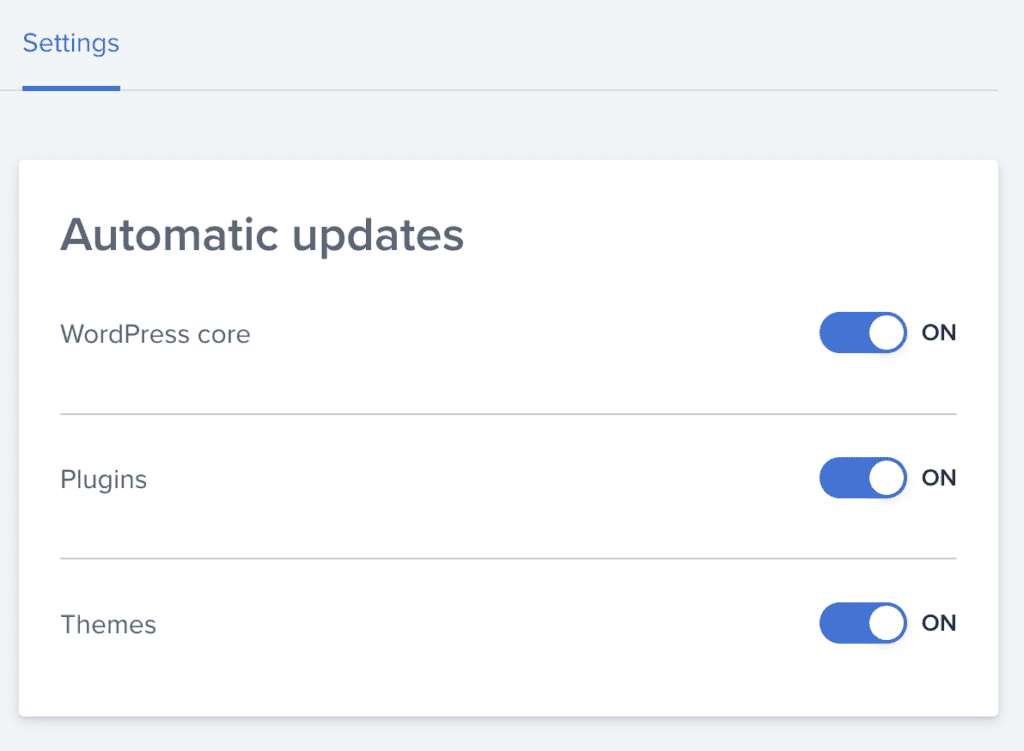
You can manage auto-updates from the Updates section on your wp-admin dashboard. As we said before, minor updates (security and maintenance releases) are enabled by default. There is no way to disable these updates from the dashboard.
To enable major updates, click on Enable automatic updates for all new versions of WordPress.

Enable automatic WordPress updates using the wp.config.php file
You can have finer-grained control over automatic WordPress updates by setting constants in the wp-config file.
A word of caution here: the wp-config file is a critical core file, responsible for connecting your site to the database, and managing user password security. A single character deleted by accident can cause your site to crash, and you wouldn’t know what went wrong. Be very cautious when making changes here.
1. Take a backup of your wp-config file before starting. We recommend using BlogVault, so that restores are also easy in case of a mistake. However, you can also just download a copy to your local computer.
2. Use File Manager on cPanel or use FTP to find the wp-config.php file in your core WordPress files. Generally, it is in the root directory of your site, public_html or public most commonly. Download the file, and open it in a code editor or a text editor application.
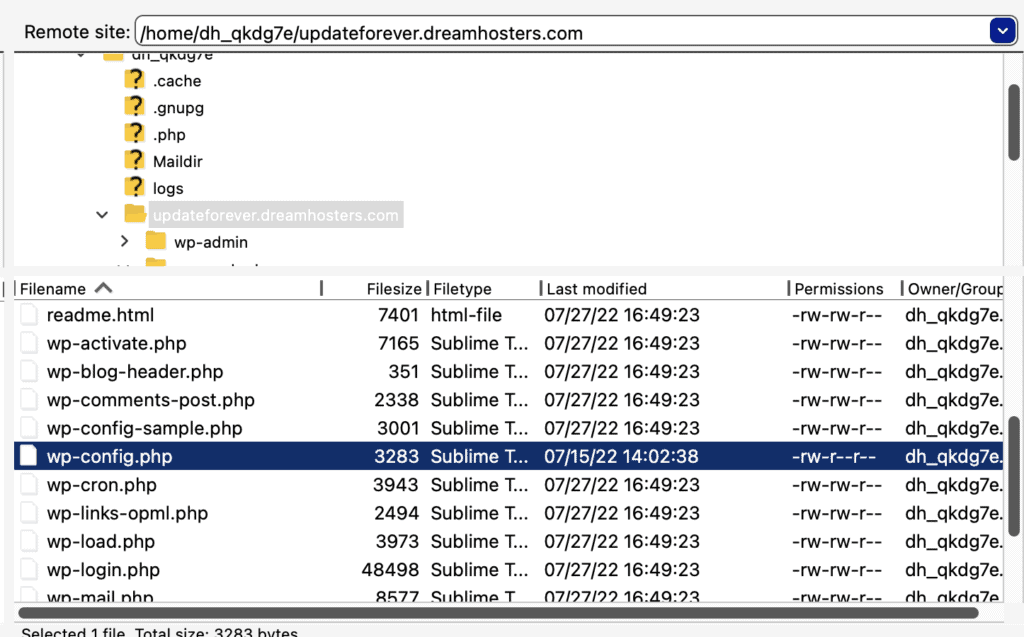
3. Look for the /* That’s all, stop editing! Happy blogging. */ line in the file. Please remember to add code just before this line. Definitely not after, and avoid adding it before unless you are very sure about what you are doing.
4. Add the line: define( ‘WP_AUTO_UPDATE_CORE’, true ); this will enable all auto updates. If you only want to enable minor updates, change ‘true’ to ‘minor’.

5. Save and exit the file.
6. Delete the wp-config file from the server, and upload the newly edited one in its place.
Turn on auto updates in WordPress using API filters
There is another, rather roundabout way to enable WordPress automatic updates by using custom code snippets. This method is for even finer-grained control over auto-updates but is honestly really useful for developers.
We aren’t sure why anyone else would want to use this method, considering the others are easier, and frankly don’t need extensive knowledge of WordPress development.
Before we begin the steps, there are two concepts to understand here: must-use plugins and filters. We’ll first explain a little bit about both and then move on to the steps.
Must-use plugins
WPMU is a relic from the first version of WordPress multisites, however, has since been rebranded to refer to must-use plugins. This is a special directory, called mu-plugins, inside the wp-content folder that contains plugins that load before WordPress does. These plugins cannot be managed from wp-admin. The folder may not be there, depending on your site configuration, so if you choose this method, you will need to create it.
WordPress filters
A filter is a piece of code that changes standard WordPress behaviour in some way. It is used extensively by theme and plugin developers to add functionality to WordPress, and it is one of the reasons that WordPress is so customisable.
Steps to create a custom code snippet for WordPress auto updates
To enable auto updates in WordPress using must-use plugins, you will need to create a filter and place it in the mu-plugins folder in the wp-content directory.
1. Create a text file, and add the basic plugin code.
<?php
/* Plugin Name: Managing auto updates plugin
Description: Using filters to manage auto updates
*/
?>
This is so WordPress recognizes the snippet as a plugin, and it shows up on the Plugins dashboard. You can customize the plugin name and description as per your convenience.
2. Add the following code to it:
add_filter( 'allow_dev_auto_core_updates', '__return_true' ); // Enable dev updates
add_filter( 'allow_minor_auto_core_updates', '__return_true' ); // Enable minor updates
add_filter( 'allow_major_auto_core_updates', '__return_true' ); // Enable major updates
Minor WordPress updates include dev updates as well usually. With these filters, you can choose which ones to enable or disable. In the code above, all the auto updates are enabled. In our example, we changed ‘true’ to ‘false’ for dev updates to disable them.
3. Save the file as a PHP file, with the extension .php.
4. Next, upload the file to the mu-plugins directory via FTP. It will be in the wp-content directory. If your site doesn’t have the folder, you can just create it.
5. Go to wp-admin and check the Plugins dashboard. You should see the new plugin there, under the filter ‘Must-use’.
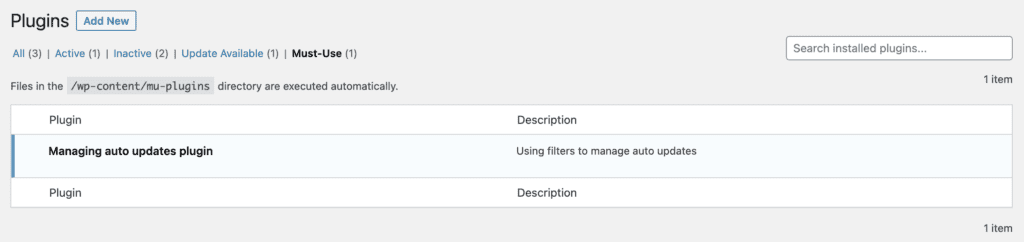
And that’s it. We tested this out on a much older version of WordPress, and it took about 12 hours for the code to run. You should get an email when the update is done.
A few things to keep in mind
While researching best practices for this article, we came across a ton of bad information about enabling auto-updates via filters.
- Do not ever put filters in the wp-config file, as it interferes with the load order in WordPress.
- The reason we add the custom code snippet to the mu-plugins folder is so that the plugin cannot be deactivated or modified inadvertently from wp-admin.
- Do not add the code to any core WordPress file. This is important for 2 reasons. Firstly, WordPress updates almost always overwrite core WordPress files and directories. Secondly, adding custom code to critical files is always a bad idea.
In our considered opinion, it is best to use BlogVault to manage updates for WordPress. All other ways—especially using filters—are significantly more complicated and prone to critical errors.
Turn on automatic updates in WordPress by a web host
Although this is not strictly about automatic updates in WordPress, it bears mentioning that some web hosts will update WordPress automatically for you, regardless of whether you are on managed WordPress or not.
Dreamhost, for example, has a one-click WordPress installation for when you create a new site. They then update WordPress on sites hosted with them 1-3 weeks after an update is released. In case you don’t want this feature, you need to opt-out of updates explicitly.

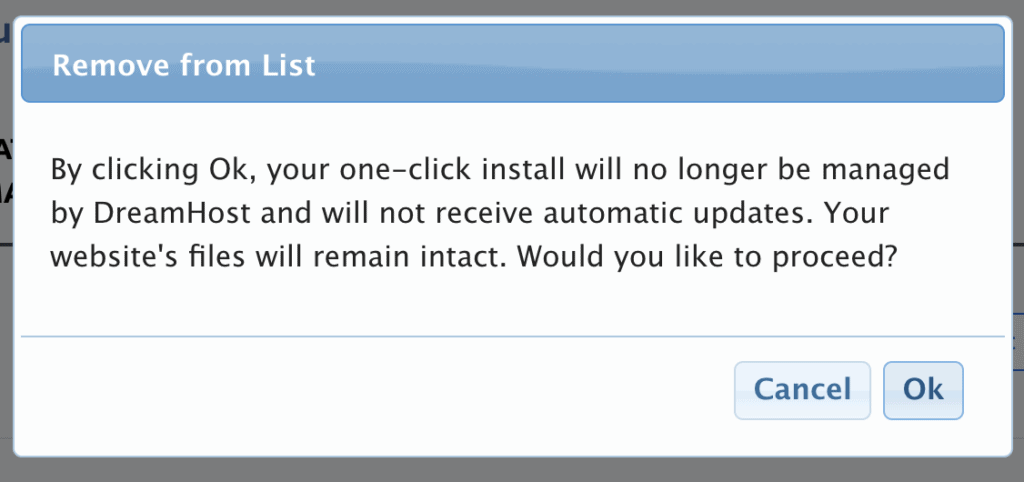
For managed WordPress sites, the updates are done for you. There is rarely an option to opt out at all.
Pros and cons of WordPress automatic updates
On the surface of it, automatic updates are a blessing:
- Your site gets updates automatically without any effort on your part
- Updates fix issues, add features, and plug security holes
- You don’t need to keep track of release schedules
However, while we are huge proponents of updates, there are downsides to automatic updates without the slightest human oversight.
- Your site can break; by that we don’t mean just misaligned headings and images—although those are frustrating enough—but the entire site can crash for many reasons
- Unless you have the insurance of regular backups with BlogVault, how would you recover your site? It is generally tricky to rollback an update, because the core files and directories have been overwritten.
While we will cover some troubleshooting in the next section, the fact is that each site is different from the other. A blanket operation like automatic updates takes a one-size-fits-all approach to sites that are distinctly different from each other. That’s the crux of the problem with auto updates.
Troubleshooting automatic updates in WordPress
Of course, as par for course with a site, things can sometimes go pear-shaped. Not to worry though, there are always solutions. Especially if you’ve taken a backup before making changes.
Reverting an update in case of a site crash
Note: This should be a temporary measure only, till you figure out the reason for the crash. It is usually because of a plugin or theme incompatibility, so revert the update by restoring a backup.
Then disable all the plugins and themes (except the active one; we recommend activating a WordPress theme for this troubleshooting process), and then reapply the update. Once the update is done, enable the plugins and themes one by one. Keep checking your site each time you enable an extension, to see if the site crashes. Don’t worry if you get through enabling everything and nothing crashes. That’s a good thing, and just means that the initial update broke something, which you were able to revert.
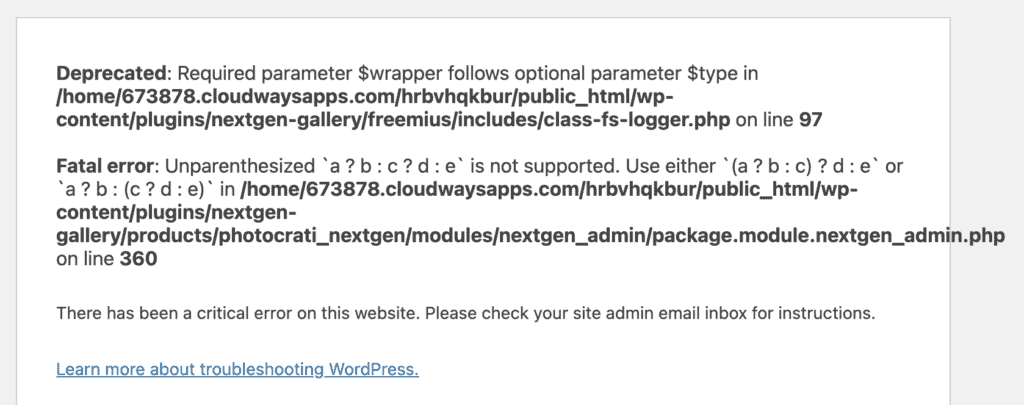
WordPress has experienced a critical error
This is a terrifying message to see, and can literally be anything on your site. The best way to figure out what is going on is to turn on the WordPress debugging mode.
Go into the wp-config.php file using FTP or File Manager on cPanel, and change ‘false’ to ‘true’ in this line: define(‘WP_DEBUG’, false).
Reload the page that was showing the critical error, and read the message carefully. You may recognise a plugin name or a theme in there. For example, we installed an old version of a plugin with known vulnerabilities for testing. It caused a critical error, when we tried to access wp-admin, even though the site was loading. So by enabling wp_debug, we were able to figure out it was the cause.
Nag failed update message on dashboard
You shouldn’t see this if you have used auto-updates, but the failed update message may appear if you previously tried a manual WordPress update which failed. In that case, use FTP to connect to your site server, and find and delete the .maintenance file. That should remove the message altogether.
Why updates are important
Updates are super important. Most security breaches and malware attacks are successful because software updates haven’t been applied, and hackers have exploited vulnerabilities in older code. This is especially true of plugins, but applies to WordPress just as strongly. When we analyse data from sites cleaned by MalCare, we see that over 95% of hacks are successful because of unpatched vulnerabilities.
However, because of site complexity, updates can break the site entirely. The answer is not to eschew updates, but to apply them carefully. In fact, we strongly recommend using a staging site to test any changes before touching your live site at all.
If updates are good, why do you need to be careful?
Updates aren’t good, they are great. But they are still code! Because of these core file changes, if something were to go wrong, you could lose access to your wp-admin altogether. Or your site could crash, causing hours or days of downtime.
You may well wonder why WordPress updates are in danger of causing downtime. After all, it is a WordPress site, shouldn’t you be able to blindly apply updates? Good question!
The reason is quite simply the extensions we use to make our sites better: plugins and themes. As you add plugins and themes to your WordPress site to increase functionality, improve design, and so on, you are increasing its code complexity. Each of these extensions are coded by different sets of people, and therefore we have no way of knowing how they will change in response to a WordPress update. In fact, this is why we recommend using staging before making any changes. Code can be unpredictable, even those made by the best developers.
With a few additional steps, you can avoid all that hassle. Make sure to use BlogVault to get a full site backup before any major changes. Site backups are saved offsite so you can restore them even without access to wp-admin, plus the Emergency Connector feature makes restoring even fully crashed sites a cinch.
Best practices for enabling auto-updates
Before enabling WordPress automatic updates, regardless of method used, there are a few things you should do to mitigate risk.
- Make sure to install BlogVault, an automatic, 100% reliable backup plugin for daily backups. Backups are the underrated heroes of any site disaster. No one thinks of them till things go wrong.
- Keep all your plugins and themes updated, so they are not the cause of a site crash. Even in general, this is good practice because updates have security patches and bug fixes.
- Avoid making any changes to core files, like the .htaccess file, for instance. If you have redirects or use the core file to blacklist IPs, find an alternative solution for those requirements. Almost all WordPress updates rewrite core files, even the minor ones. If you are enabling auto updates, rest assured these files will be overwritten at some point.
How do you know when there is a WordPress update available?
The most common way is that you will see a notification on your wp-admin dashboard. Alternatively, you can check under Updates on your dashboard, or run the command wp core check-update using SSH.
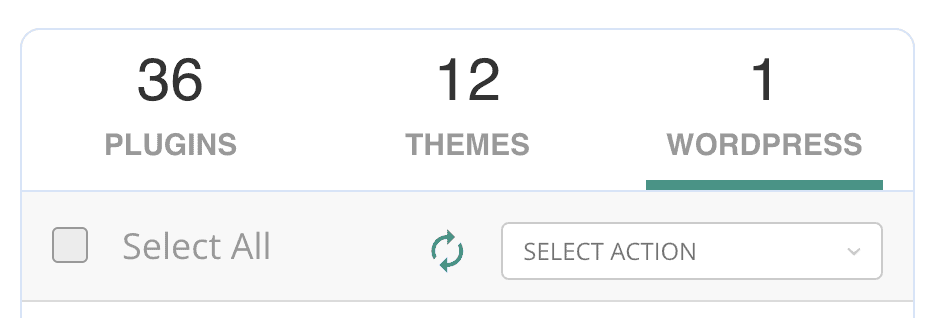
On your BlogVault dashboard, you will see a list of WordPress, plugin, and theme updates available on your site, along with the means to apply them safely.
Conclusion
It may seem like the advice in this article is a mixed bag, but we want to reiterate that WordPress updates are critical to the well-being of your site. WordPress auto update may be a boon for smaller sites without many plugins or complex themes. However for high-traffic, e-commerce, and business-critical sites, every minute of downtime is a problem.
The only way to avoid downtime and still profit from the convenience of WordPress automatic updates, use BlogVault’s Auto Update feature.
FAQs
Is WordPress auto update safe?
WordPress auto updates are not 100% safe, but they are 100% necessary. As with any update, you risk downtime and site crashes with automatically applied updates. The only way to mitigate the risk is to set up regular backups.
What is WP_auto_update_core?
WP_AUTO_UPDATE_CORE is a constant used in the wp-config.php file that is used to manage WordPress auto updates. It is added to the file with a define statement, and takes the following values: true, false, and minor, depending on which automatic WordPress updates you want to turn on.
When to disable WordPress automatic updates?
You should disable WordPress automatic updates when you want to have full control over your site. While updates are incredibly important, there are better and more safer ways to manage them.
Tags:
Share it:
You may also like

How to Limit Form Submissions with Droip in WordPress
Forms are an indispensable part of any website because of their versatility, letting you collect information for various purposes! However, people with ill intentions often attempt to exploit these forms…

How To Manage Multiple WordPress sites
Management tools help agencies become well-oiled machines. Each task is completed with the least amount of effort and highest rate of accuracy. For people managing multiple WordPress sites, the daily…

PHP 8.3 Support Added to Staging Feature
We’ve introduced PHP version 8.3 to our staging sites. Test out new features, code changes, and updates on the latest PHP version without affecting your live website. Update PHP confidently…
How do you update and backup your website?
Creating Backup and Updating website can be time consuming and error-prone. BlogVault will save you hours everyday while providing you complete peace of mind.

Updating Everything Manually?
But it’s too time consuming, complicated and stops you from achieving your full potential. You don’t want to put your business at risk with inefficient management.

Backup Your WordPress Site
Install the plugin on your website, let it sync and you’re done. Get automated, scheduled backups for your critical site data, and make sure your website never experiences downtime again.


