Are your contact form submissions vanishing into thin air? Learning how to set up Gmail SMTP in WordPress is the professional fix for your site’s unreliable email problem. This configuration ensures crucial notifications for password resets, user registrations, and order confirmations actually reach their destination. By authenticating your emails through Google’s powerful servers, you bypass common WordPress mail failures and build trust with your users.
A WP SMTP plugin is the easiest way to make this connection securely without needing to code. It handles the technical details by linking your site directly to the Gmail API for a more reliable and secure setup. In this guide, we’ll walk you through the entire process, from creating your Google credentials to sending a successful test email.
We tried WP Mail SMTP and found that it securely forces WordPress to use a reliable mailer like Gmail, fixing email deliverability issues without requiring you to write a single line of code.
The method in this article is the official and most reliable method for connecting your WordPress site to Gmail. It uses a secure technology called OAuth 2.0, which allows your website to send emails on your behalf without ever needing to store your password. By following these steps, you will create a secure, authorized connection that is less likely to be flagged as spam and is fully compliant with Google’s modern security standards.
Step 1: Install and Configure the WP Mail SMTP Plugin
The first step is to install the bridge that will connect your WordPress site to Google’s servers. The WP Mail SMTP plugin is the industry standard for this task.
In your WordPress dashboard, navigate to Plugins > Add New. In the search bar, type “WP Mail SMTP” and locate the plugin by WPForms. Click Install Now and then Activate.
Once activated, go to the new WP Mail SMTP menu item in your sidebar and click on Settings. Under the General tab, select Google / Gmail as your Mailer. This will reveal new fields for a Client ID and Client Secret, which we will generate in the next steps. For now, find the Authorized redirect URI field—copy this URI, as you will need it shortly.
Step 2: Create a Google Cloud Project and Enable the Gmail API
To use Google’s services, you first need to create a project within the Google Cloud Platform. This acts as a container for all your API settings.
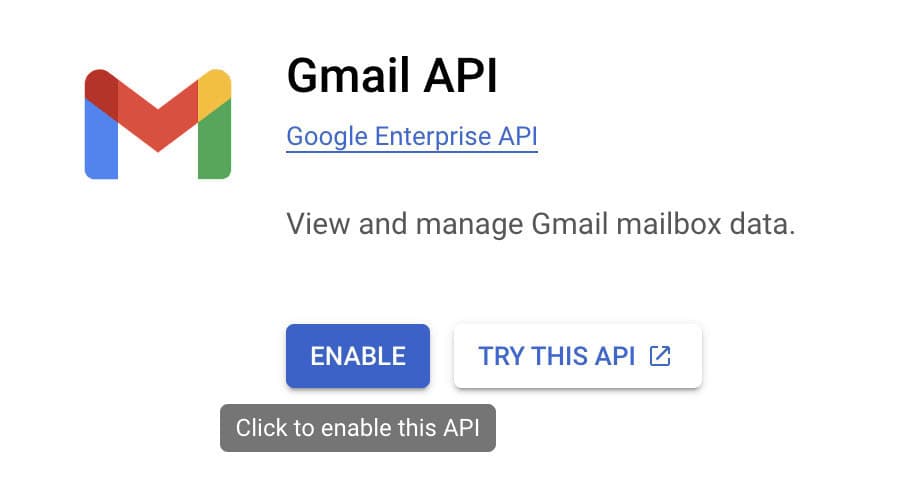
Navigate to the Google Cloud Console and sign in with the Google account you wish to send emails from. If you don’t have a project, you’ll be prompted to create one; give it a simple name like “My WordPress SMTP.” Once your project is active, go to the navigation menu and select APIs & Services > Library. In the search bar, type “Gmail API,” select it from the results, and click the Enable button. This action grants your project permission to access the Gmail API.
Step 3: Configure the OAuth Consent Screen
The OAuth consent screen is the permission pop-up that you (and potentially other users) will see when authorizing the connection. It tells Google what your application is and what information it wants to access.
In the Google Cloud Console, navigate to APIs & Services > OAuth consent screen. You will be asked to choose a User Type; select External and click Create. On the next page, you only need to fill in the required fields:
- App name: Give it a recognizable name, like “WordPress Email.”
- User support email: Select your email address from the dropdown.
- Developer contact information: Enter your email address again. Click Save and Continue through the next few steps (Scopes and Test Users) until you are back at the main dashboard.
Step 4: Generate Your OAuth Client ID and Secret
Now it’s time to generate the unique “username and password” for your application—the Client ID and Client Secret.
Navigate to APIs & Services > Credentials. Click the + Create Credentials button at the top of the page and select OAuth client ID. For the Application type, choose Web application.
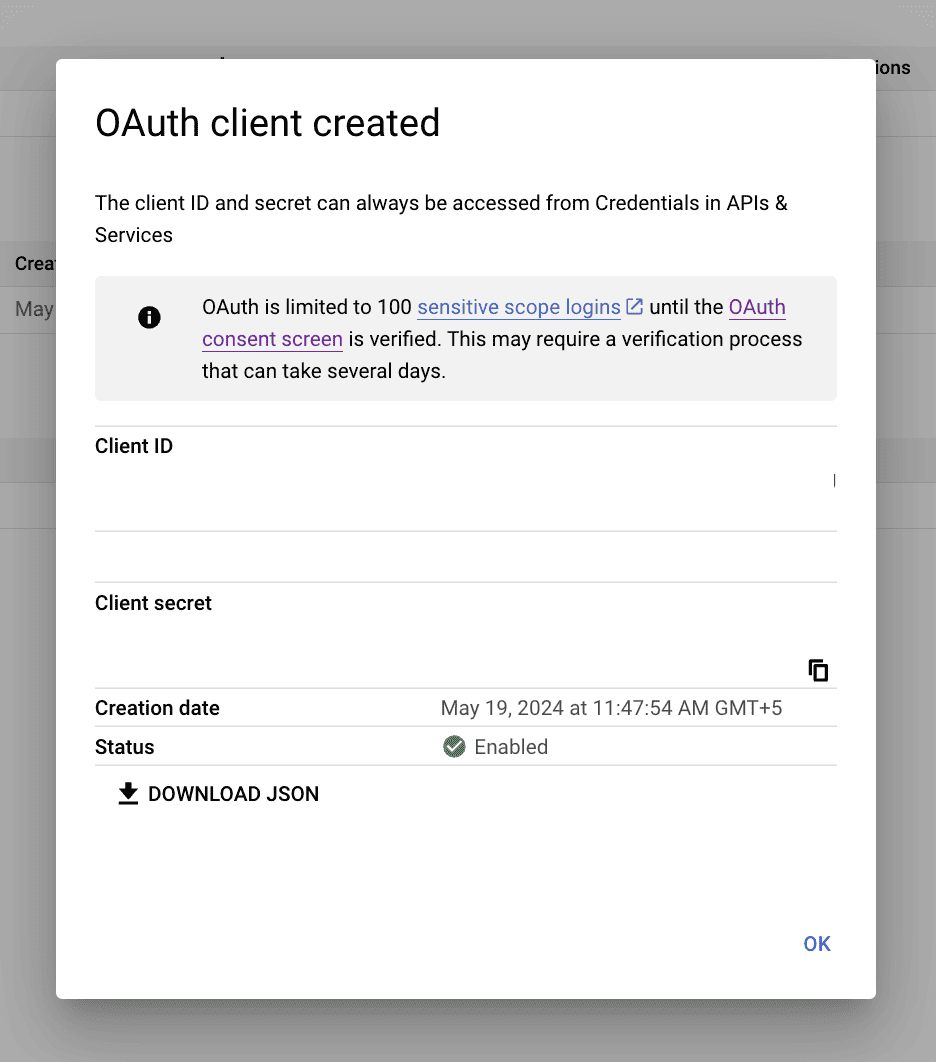
Give it a name (e.g., “WordPress Web Client”). Most importantly, under the Authorized redirect URIs section, click + Add URI and paste the URI you copied from the WP Mail SMTP plugin settings in Step 1. Click Create.
A pop-up will appear displaying your Client ID and Client Secret. Keep this window open and copy both of these values.
Step 5: Link WordPress and Authorize the Connection
With your credentials in hand, it’s time to return to WordPress and finalize the setup.
Go back to your WP Mail SMTP settings page in your WordPress dashboard. Paste the Client ID and Client Secret into their respective fields. Click Save Settings.
After the page reloads, scroll down and click the large button labeled Allow plugin to send emails using your Google account. You will be redirected to a Google sign-in page. Choose the correct account and grant the requested permissions. If you see a warning screen, you may need to click “Advanced” and then “Go to [Your Site Name] (unsafe)” to proceed. Once complete, you will be sent back to your WordPress site with a success message.
Troubleshooting Common Gmail API Issues
Are your emails not getting sent?
Even with a careful setup, a small misstep in the Google Cloud Console or your plugin settings can cause an error. Don’t worry—these issues are almost always due to a simple configuration mismatch. Before anything else, always use the Email Test tool in WP Mail SMTP > Tools to get a specific error message, which will help you pinpoint the problem.
Error: “Could not authenticate” or “Failed to connect to host”
This is the most common error and indicates a problem with the credentials or the final authorization step.
- Check Your Client ID and Secret: The most frequent cause is a copy-paste error. Return to the Credentials page in your Google Cloud Console, view your OAuth client, and meticulously re-copy the Client ID and Client Secret. Paste them back into the WP Mail SMTP settings, ensuring there are no hidden spaces before or after the text.
- Re-Authorize the Connection: If you’ve changed any settings, you must re-establish the connection. In your WP Mail SMTP settings, click the Remove Connection button and then click the Allow plugin to send emails… button again to go through the Google sign-in and permission process from the start.
Google Error: “400: redirect_uri_mismatch”
This specific error from Google means the URL in your Google Cloud project does not exactly match the one your WordPress site is sending.
- Verify the Authorized Redirect URI: This is the most critical link.
- Go to your WP Mail SMTP > Settings page and copy the Authorized redirect URI provided there.
- Go to your Google Cloud Console and navigate to APIs & Services > Credentials.
- Click the pencil icon to edit your Web application client.
- Under the Authorized redirect URIs section, ensure the URI you pasted from your plugin is listed there exactly. Check for http vs. https, www vs. non-www, and any trailing slashes. They must be identical.
Google Error: “403: access_denied”
This error indicates a permissions issue within your Google Cloud project.
- Confirm the Gmail API is Enabled: In your Google Cloud project, navigate to APIs & Services > Library. Search for the “Gmail API” and confirm that it has a green checkmark and says “API Enabled.” If not, you must enable it.
- Check OAuth Consent Screen Status: Go to APIs & Services > OAuth consent screen. If your app’s “Publishing status” is set to “Testing,” you must add your Google account to the list of Test users. Otherwise, only pre-authorized users can grant permissions.
Emails Send Successfully But Land in the Spam Folder
If the test email is going to spam, the issue is with how mailbox providers perceive your email, not the connection itself.
- Ensure “From Email” Matches: In your WP Mail SMTP general settings, the From Email address must be the exact same Gmail account you used to create the API credentials and authorize the connection. Tick the Force From Email checkbox to ensure all emails sent from WordPress use this address.
Best Practices for Proactive WordPress Email Management
Getting your Gmail SMTP connection running is a critical first step, but maintaining its health and security requires a proactive approach. Proper management ensures your emails continue to be delivered reliably, protects your sender reputation, and keeps your website secure from threats that can exploit your email system.
- Use a Professional “From” Address: Instead of a generic @gmail.com, use an address from your own domain (e.g., info@yourwebsite.com) via Google Workspace. This builds brand trust and improves deliverability.
- Test Your Connection Regularly: Don’t set it and forget it. After major plugin or theme updates, use the WP Mail SMTP Email Test tool and submit a live contact form to confirm everything is still working correctly.
- Protect Your Forms from Spam: Install an anti-spam plugin like Akismet or add Google reCAPTCHA to your forms. This prevents spambots from flooding your inbox and protects your Gmail account from being flagged for sending too many automated notifications.
- Install a Security Plugin: A security plugin like MalCare is essential. It prevents hackers from compromising your site and hijacking your SMTP connection to send spam, which would destroy your email reputation.
- Maintain Regular Backups: Use a backup plugin like BlogVault that takes regular backups. If a site error or bad update corrupts your settings, a recent backup allows you to restore your working email configuration in minutes.
Final thoughts
Configuring Gmail SMTP is essential for reliable WordPress email delivery, ensuring users receive crucial notifications. The API method is the clear winner; it’s a secure, professional solution that uses modern OAuth 2.0 authentication without storing your password, permanently solving the “WordPress not sending email” problem and building user trust.
Before starting this process, we strongly recommend taking a complete backup of your website with a plugin like BlogVault. The configuration involves precise steps across both your WordPress dashboard and the Google Cloud Console, and a small mistake can lead to unexpected issues. A one-click backup provides an essential safety net, allowing you to instantly restore your site to its previous state if anything goes wrong, ensuring the entire setup is completely risk-free.
FAQs
How do I set up Gmail SMTP in WordPress?
The most effective way to set up Gmail SMTP in WordPress is by using a dedicated plugin and connecting it via the official Google API. This recommended method involves installing the plugin, creating a project within the Google Cloud Console, and enabling the Gmail API. You will then generate a unique Client ID and Secret, which you’ll use to authorize a secure connection directly from your WordPress dashboard, ensuring reliable email delivery.
How do I set up SMTP for Gmail?
To configure any application for Gmail’s SMTP, you need specific server settings. The SMTP Host must be set to smtp.gmail.com. You then choose an encryption port: either Port 587 for TLS (the modern standard) or Port 465 for SSL. Authentication is always required, using your full Gmail address as the username. Importantly, the password is not your main Google password but a unique 16-character App Password that you must first generate from your Google Account’s security settings.
Is Gmail SMTP 465 or 587?
Gmail’s SMTP server supports both Port 465 and 587, with the correct choice depending on the encryption method. Port 587 is the modern and recommended standard, used for connections secured with TLS/STARTTLS encryption. Port 465, on the other hand, is designated for the older SSL encryption method. While still supported, most new configurations should default to using Port 587.
Is Gmail SMTP server IMAP?
No, SMTP and IMAP are entirely different protocols that serve opposite functions. SMTP, or Simple Mail Transfer Protocol, is used exclusively for sending emails from an email client to a server. In contrast, IMAP, or Internet Message Access Protocol, is used for receiving and managing emails stored on a server. Your WordPress site uses SMTP to send a notification, while your email app uses IMAP to retrieve it.

Shreya has been a writer for as long as she can remember. Now, she writes articles that help WordPress users manage the sites that they're proud of, with little to no coding