You usually search for how to make WordPress site private when something is half-finished, sensitive, or meant for only a few people. Maybe Google has already found an unfinished page. Maybe a client needs to review a redesign. Maybe a private PDF is sitting on a page that should never have been public.
The setting you choose matters because WordPress has several kinds of “private.” Some hide a site from search engines. Some block visitors. Some only protect one page. They are not interchangeable.
If you use WordPress.com, use Site Visibility and set the site to Private. If you use self-hosted WordPress, use a private-site plugin, password-protection plugin, or host-level password protection, and take a backup before changing access. Do not rely on “Discourage search engines” for privacy. It hides you from search results, not from people with the link.
Start with the privacy you actually need
The first mistake is looking for one universal “make private” switch. WordPress.com has a built-in whole-site privacy control. Self-hosted WordPress does not work the same way. Use the method that matches the job:
| Goal | Use | Watch for |
|---|---|---|
| WordPress.com private site | Site Visibility: Private | Not for self-hosted sites |
| Self-hosted private site | Privacy plugin or host password | Check media and cache |
| Hide while building | Staging or coming soon mode | Not permanent privacy |
| Hide from Google only | Settings > Reading > discourage indexing | Links can still open |
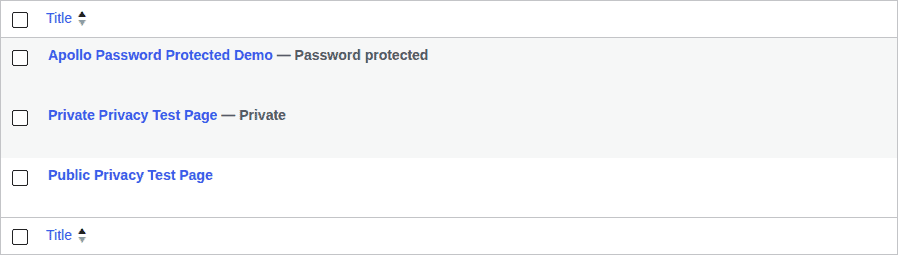
| Hide one page or post | Private or Password Protected | Files may stay public |
| Member or client area | Membership/restriction plugin | Avoid manual page-by-page rules |
| Sensitive internal site | Host auth, VPN, or server rules | Easy to misconfigure |
Are you on WordPress.com or self-hosted WordPress
WordPress.com and self-hosted WordPress can look similar in the dashboard, but privacy instructions split here. WordPress.com is a hosted service. It includes a Site Visibility setting that can make the whole site private and let approved people view it.
Self-hosted WordPress, often called WordPress.org WordPress, is the open-source WordPress software running on your own hosting account. It does not have the same whole-site Private switch. To make the whole site private, you normally use a plugin, hosting-level password protection, or server-level access control.
Prerequisites
Privacy settings are usually easy to turn on. Recovery is the part people forget. Before you install a privacy plugin, add a host password, edit server rules, or change code, do this:
- Use a reliable backup plugin to back up your WordPress site.
- Confirm you can access WordPress admin, your hosting panel, and files.
- Use a staging site for a redesign, long rebuild, or client review instead of hiding the live site for days.
- Decide who needs access and give them the lowest role that works.
- Write down exactly how you will undo the change.
- Clear or bypass cache when testing.
The safest privacy method is the one you can reverse without panic.
Make a WordPress.com site private
Use this when the site is hosted on WordPress.com and the whole site should stop being public.
- Open the site settings: Log in to WordPress.com, choose the site, and open the settings area for visibility or privacy.
- Choose Private: Set Site Visibility to Private and save the change. Labels can shift over time, but the control is the one that decides who can view the site.
- Invite approved viewers: Add the people who should be allowed to see the site. Do not make someone an administrator just because they need to review the site.
- Test while logged out: Open the site in a private browser window. A normal visitor should not be able to browse the site.
Use Private when the site itself should be restricted. Use Coming Soon when the site is not ready for launch but does not contain sensitive content.
Make a self-hosted WordPress site private with a plugin
For most self-hosted sites, a plugin is the simplest whole-site privacy method. Use it when public visitors should be blocked but selected users, clients, or password holders still need access. Ensure you have a good sense of password security for WordPress.
- Use one shared password for a small trusted group.
- Require WordPress login when each person should have their own account.
- Use roles or membership rules when different groups need different access.
Then set it up:
- Backup the site first: Do this before installing a privacy plugin on a live site. A plugin that controls access can also block access if configured badly.
- Choose a maintained plugin: Check recent updates, support history, active installs, compatibility with your WordPress version, role controls, exclusions, and whether it protects media files.
- Install and activate it: Go to Plugins > Add New, install the plugin, and activate it.
- Turn on whole-site protection: Enable private-site, password, or login-required mode.
- Add users or passwords: Give access only to people who need it.
- Check registration settings: Turn off “Anyone can register” unless public signup is intentional.
- Test direct URLs: In a logged-out browser, open the homepage, a post URL, a page URL, and the login or password screen.
Use staging, coming soon, or maintenance mode
If the site is only unfinished, do not automatically make production private. Choose the least disruptive option.
- Use staging for rebuilds, risky edits, client review, theme changes, or plugin testing. A staging site is a private copy of the site where work can happen without hiding the live site; if you are still experimenting with access rules, use a separate WordPress testing environment first.
- Use coming soon mode for a new site before launch. Visitors see a placeholder while you finish the real pages.
- Use maintenance mode for short work on an existing site. It is meant for temporary updates, not permanent privacy.
- This matters most on revenue sites. Leaving production in maintenance mode for days can cost leads, bookings, and sales when staging would have solved the same problem more cleanly.
Hide site from search engines only
Use this only when you want search engines to stop indexing the site. It is not visitor privacy.
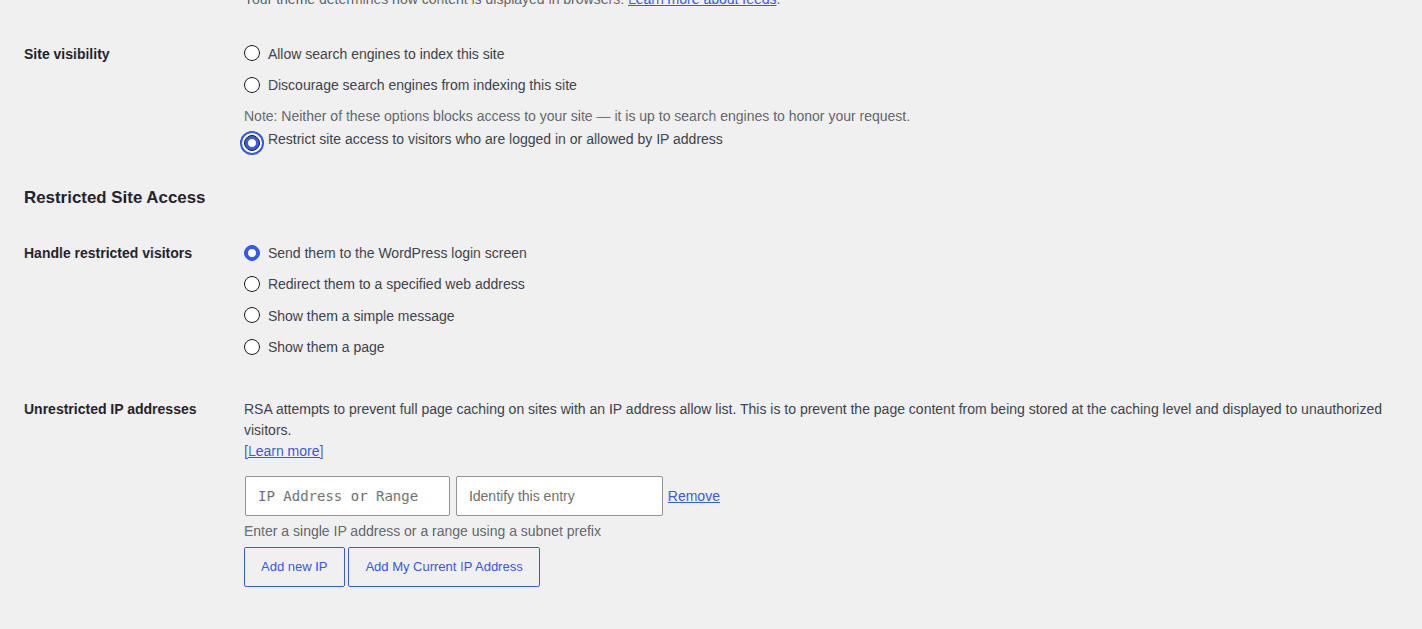
- Open Reading settings: In self-hosted WordPress, go to Settings > Reading.
- Discourage indexing: Check “Discourage search engines from indexing this site.”
- Save the change: WordPress will ask search engines not to index the site.
- Add it to your launch checklist: Turn this off before the site goes public.
This setting does not block a person who has the link. It also does not remove already indexed pages immediately. If pages are already in Google, use Google Search Console removals and give search engines time to recrawl. Noindex is a visibility request. It is not a locked door.
Make one page or post private
Use page-level privacy when only one item needs protection. Do not use it as a workaround for a whole private site.
- Open the page or post: Go to the editor for the content you want to hide.
- Find Visibility: In the publish or status settings, choose Private or Password Protected.
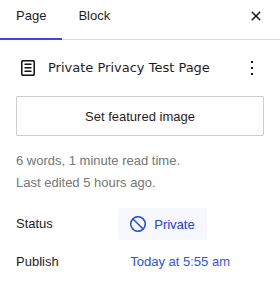
- Use Private for admin-side content: Private content is visible only to logged-in users with the right permissions.
- Use Password Protected for simple sharing: Anyone with the password can view it, so treat the password like a shared key.
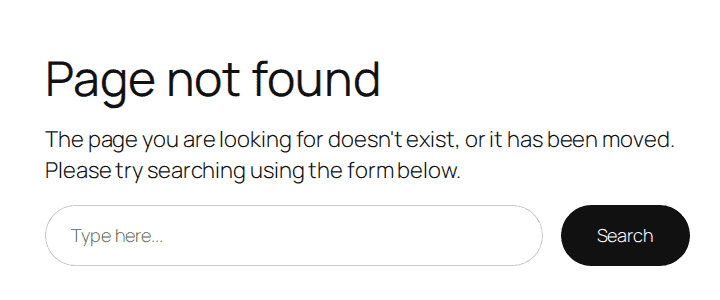
- Update and test: Open the URL while logged out.
On a WordPress 6.9.4 test site, a private page was blocked for logged-out visitors while a normal public page stayed open. That is the behavior you should see too.

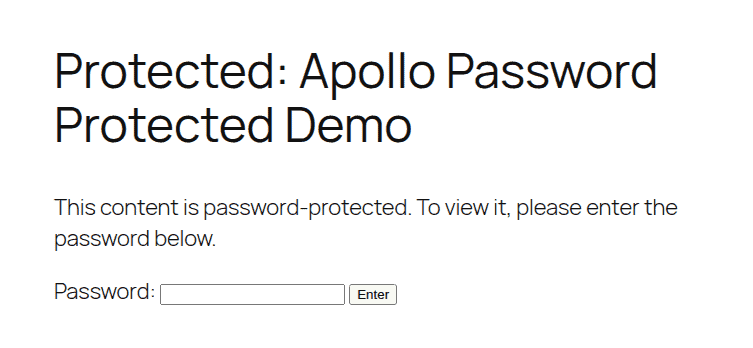
For password-protected pages, WordPress shows a password form instead of the page content.
Make part of a site private for members or clients
If privacy follows a pattern, protect the pattern. Do not manually mark dozens of related pages private and hope you never miss one.
Use a membership plugin, content restriction plugin, category protection, learning management, or client portal plugin when only part of the site should be private. This works for client portals, course lessons, paid downloads, event pages, family content, and internal documents.
The plugin should give people a clear login path and protect the whole section, not just the pages you remembered to edit. Manual privacy is fine for one page. It becomes fragile when it turns into a system.
Make a WordPress site private without a plugin
No-plugin methods can be stronger because they can block visitors before WordPress loads. They also require more care. Common options include:
- Host-level password protection from your hosting control panel.
- HTTP basic authentication, which shows a browser username and password prompt before the site loads.
- IP allowlisting, which allows only approved internet addresses.
- VPN or Zero Trust access for internal teams.
- Apache or Nginx server rules that block or allow traffic before WordPress handles it.
- Custom redirect-to-login code, ideally in a child theme or small custom plugin, not a parent theme file.
Use these when the content is sensitive, internal, or should be protected before WordPress runs. Ask your host or developer for help if you are not comfortable recovering the site from file access.
Backup first, keep hosting access open, and test rollback. If a code snippet or server rule breaks access, a restore path matters more than a clever rule. BlogVault can help you restore your site to a working version if the privacy change breaks the frontend or blocks admin access.
Verify that the site is actually private
Do not trust what you see while logged in. Admin users often bypass private-site plugins, maintenance screens, and visibility rules. Check the site like a stranger:

- Open a private browser window where you are logged out.
- Test the homepage.
- Test direct page and post URLs.
- Test uploaded PDFs, images, and downloads if they are sensitive.
- Check feeds and sitemaps if search visibility matters.
- Ask a non-admin user to test if clients or members need access.
- Clear plugin, host, and CDN cache if old public pages still appear.
Cache is a saved copy of a page. A caching plugin, host cache, or CDN can keep showing an old public version after you changed privacy settings. Uploaded files need their own checks because they may remain reachable through direct URLs.

Privacy is not finished when a setting is saved. It is finished when the wrong visitor cannot see the content.
Fix common privacy problems
Most privacy problems come from one of four places: the wrong method, cache, direct URLs, or user permissions.
| Problem | Likely cause | Fix |
|---|---|---|
| You can still see pages | Admin login or cache | Test logged out and clear cache. |
| Direct URLs still work | Rules are too narrow | Check posts, pages, exclusions, and media. |
| Google still shows pages | Removal takes time | Use noindex and Search Console removals. |
| Users cannot get in | Role, password, or rule issue | Test with a real non-admin account. |
| Maintenance mode is stuck | Failed update state | Remove it through hosting or file access. |
| You are locked out | Plugin, redirect, or server rule | Disable the change or restore a backup. |
Do not stack privacy methods until something works. Fix one layer, test it, then move to the next.
Make the site public
Private settings are easy to forget because they keep doing exactly what you asked them to do. Before launch or after private work is finished:
- Turn off private-site plugins, coming soon pages, and maintenance mode.
- Remove temporary host passwords, IP rules, redirects, or server rules.
- Uncheck “Discourage search engines from indexing this site” if the site should appear in search.
- Re-enable affected sitemaps, analytics, and CDN settings if you changed them.
- Clear cache.
- Test the site as a logged-out visitor.
- Submit the sitemap or request indexing in Google Search Console if search traffic matters.
- Take a fresh post-launch backup, then return the site to your normal backup schedule.
The most common launch mistake is not dramatic. It is a forgotten privacy setting quietly hiding the site after everyone has moved on.

FAQs
How do I make a WordPress site private?
Use WordPress.com Site Visibility if the site is hosted on WordPress.com. Use a privacy plugin, password-protection plugin, host password, or server access control if the site is self-hosted WordPress.
Is “Discourage search engines from indexing this site” private?
No. It asks search engines not to index the site. It does not stop people with the URL from visiting.
What is the difference between Private and Password Protected in WordPress?
Private content is for logged-in users with the right permission. Password Protected content can be viewed by anyone who has the password.
Do private or password-protected pages protect images and PDFs?
Not always. A page can be protected while the direct file URL remains open. Protect the file itself if it contains private information.
Can I make a WordPress site private without a plugin?
Yes. Use host password protection, HTTP basic authentication, IP allowlisting, VPN or Zero Trust access, or server rules. These can be stronger than plugins, but they are easier to misconfigure.
Conclusion
The right way to make a WordPress site private depends on what you need to block. Use WordPress.com Private for WordPress.com sites, a plugin or host password for most self-hosted sites, staging for private rebuilds, page visibility for one-off content, and server-level controls for sensitive internal access.
Keep the main distinction in your head: search privacy is not access privacy. If the content matters, back up first, choose the method that matches the risk, test while logged out, check direct file URLs, and write down how to undo it.

Shivani enjoys crafting guides that make every aspect of using WordPress simple and easy to follow. When she's not glued to her laptop, you can find her buried in a good book or occasionally, painting.