5 Steps to Safely Update WooCommerce Without Downtime
Bulletproof Backups for Your WordPress Website
Fortify your business continuity with foolproof WordPress backups. No data loss, no downtime — just secure, seamless operation.

Update notifications are endless. Every time you open your wp-admin, something needs to be updated. This is not only annoying but also worrying. And when the notification is to update WooCommerce, then exponentially worrying.
We all know that updates are important. They contain bug fixes, new features, improvements to features, and, most importantly, security fixes. Many updates patch vulnerabilities in older versions, which could easily be exploited if left as it is.
On the flip side though, updates have been known to make sites crash. WooCommerce updates are especially notorious for causing sites to go down and costing owners to lose revenue and customers.
But, worry not! In this article, we have put together the definitive guide to updating WooCommerce safely and without the risk of downtime.
TL;DR Updating WooCommerce is basically like updating a plugin, but the risks are much higher because it affects your entire site. The safest way to update WooCommerce is to test the update on a staging site first, and then apply the update to your live store. This is the only way to prevent downtime from negatively impacting customers and sales on your site.
WooCommerce powers almost 30% of online stores, and with good reason. It is open source, highly customisable, and builds on a solid WordPress foundation. However the updates are painful, to say the least.
WooCommerce updates are well known to crash sites. Although WooCommerce is technically a WordPress plugin, it is a very complex plugin that is closely interconnected with extensions and the database (which has all your product, order, customer, and sales data). So even though a crashed site is a major worry, it is not even the biggest. That dubious honour goes to loss of data.
If anything were to put people off updating WooCommerce that would be it.

That being said, you need to keep your WooCommerce plugin updated for many important reasons like vulnerability patches. So, before we get into the update process, please make sure to backup your store.
Use BlogVault to take a backup, and use the same backup to create a staging site with a click of a button. It is the best backup plugin for WooCommerce sites, and for your peace of mind. If anything goes wrong, you can restore your site in literal minutes. Even once the update is over, BlogVault safeguard your store with real-time backups that save every order, transaction, and event on your store as they happen.
A quick note here: generally you will see advice to backup your database, as this has all your data. However, your site files are also important. Plugins and themes, not to mention uploads and other information are also necessary for your site.
Step 1: Pre-update checklist
Before beginning any kind of update on your site, there are a few things you need to do to safeguard your data and minimize downtime as much as possible. You’ll see a version of this list in every one of our articles about updates, however, this one is tweaked specifically for WooCommerce stores.
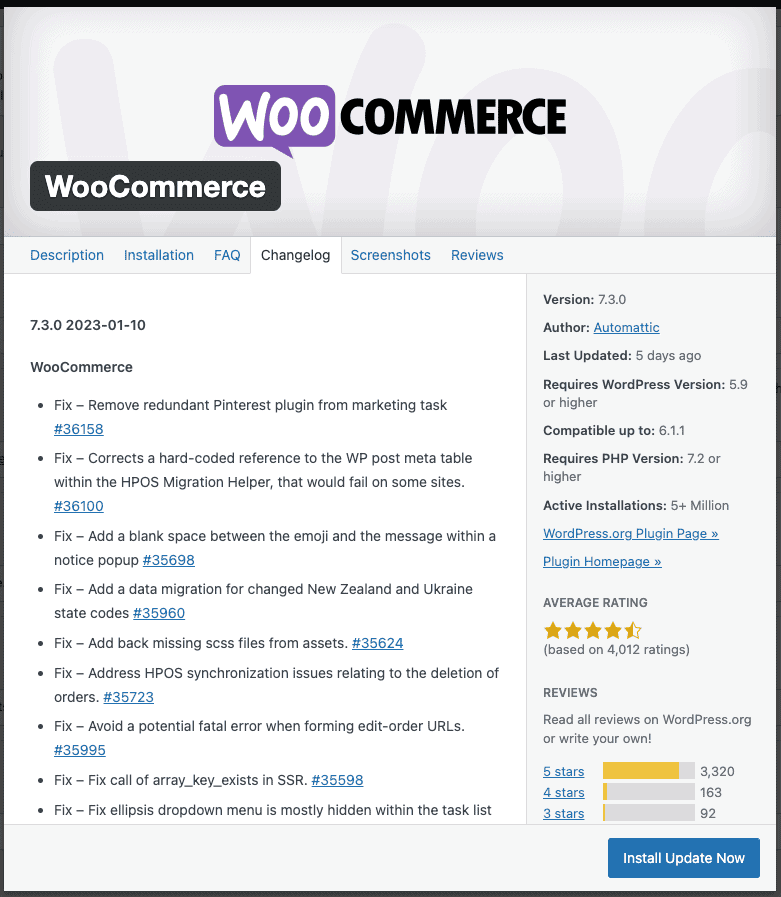
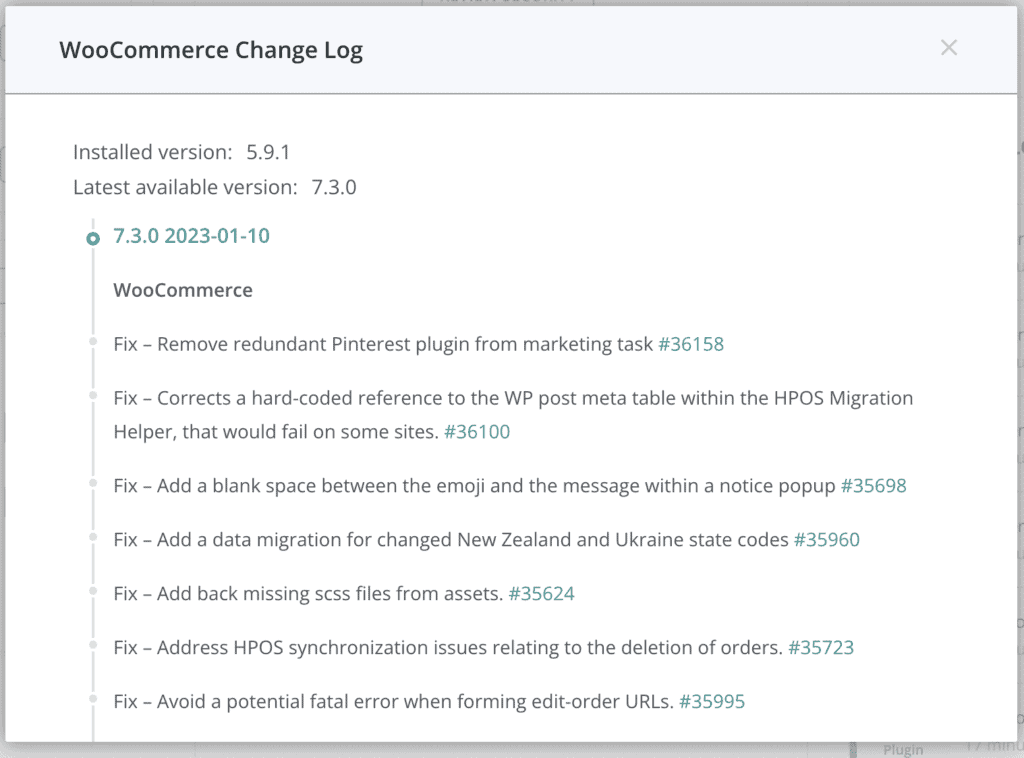
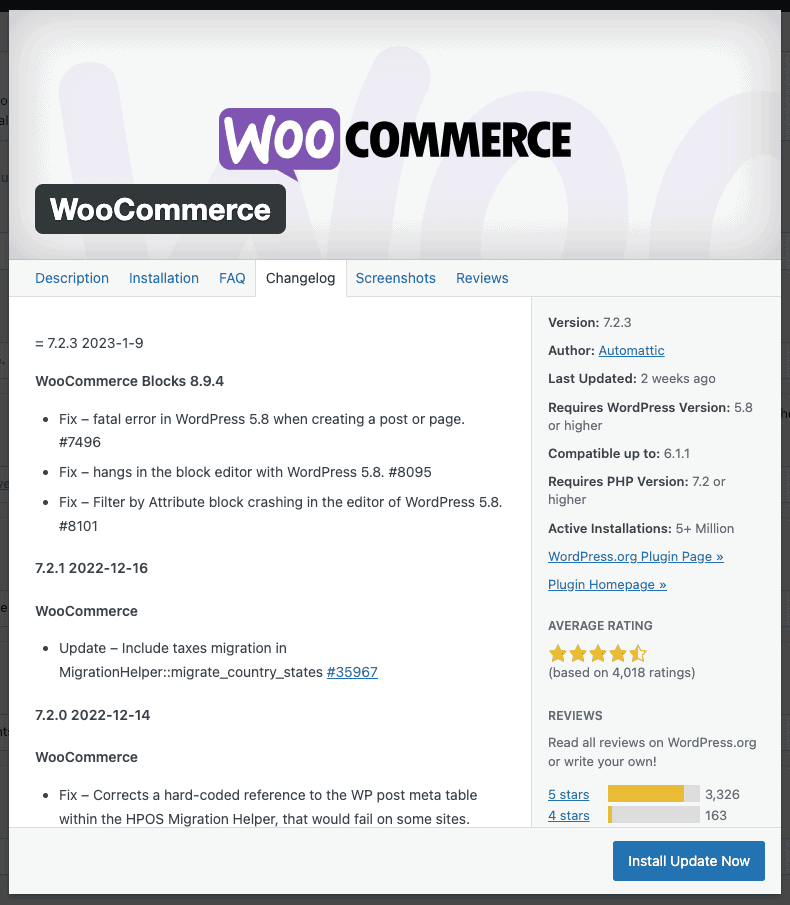
- Check the update details: To get a sense of what is about to change on your site, you can read the changelog. You’ll find a link to the changelog alongside any update notification on your dashboard. It is helpful to know which bugs are getting fixed, or what new features have been added. Think of it like a mini onboarding of the update.
- Save customizations elsewhere: If you have added any code to WooCommerce files, like actions or filters, make sure to copy that customization and save it into an external file. If you have heeded our advice and taken a backup with BlogVault, you can skip this step and get the custom code from the backup itself. BlogVault backups are stored on external servers, so no matter what happens on your site, the backups are safe.
- Determine a good time to update your site: Maybe you already know when traffic is lowest on your site, so you can pick the appropriate time to update your site. Otherwise, use Google Analytics to figure out when traffic is lowest. Additionally, when you are going to do the update, send out emails to your visitors, especially if you have a lot of them. It is a small task and very useful in case something happens. You don’t want to deal with a disgruntled customer because a payment or order has vanished into the ether during the update.
- Take a full backup of your WooCommerce store: Core, plugin, and theme files, in addition to the database for good measure. Just backing up the database is not sufficient, even though it contains all your data. Files are just as important, and should your site crash, you want to be able to restore an identical copy of your site, rather than reinstall WordPress, every theme and plugin, redo customisations, and then import your database into the site to get it working again.
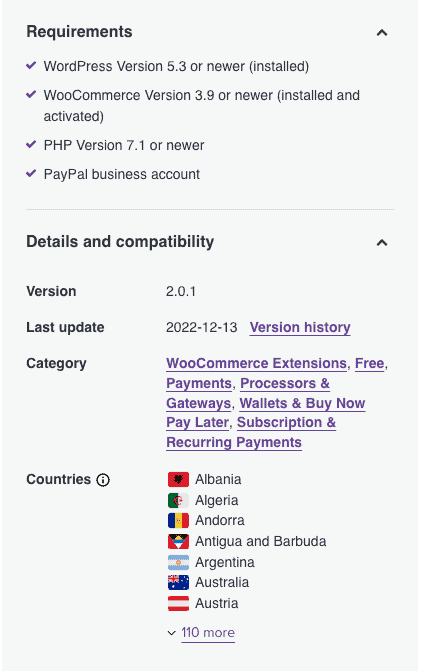
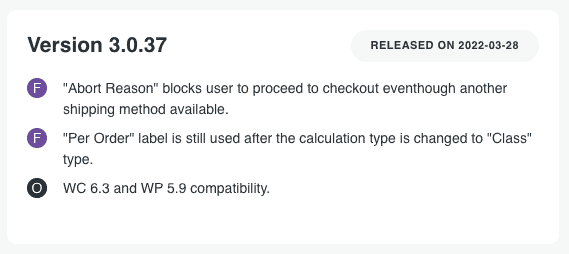
- Check WooCommerce extensions for compatibility: If you have purchased or installed any extensions from the WooCommerce store, have a look at the extension’s compatibility with the new update. In the information boxes in the right sidebar, you’ll see details about requirements and compatibility. This information will vary between extensions. In some cases, you will see relevant info in the requirements section, and in others you will have to click on version history to see more information.
In most cases, extensions will require the newest versions of WooCommerce, but should the case be different, make sure to update the extension first and then WooCommerce.

This is especially important for critical extensions like payment gateways that need to work flawlessly every time. Always use a staging site to update WooCommerce or its extensions, as we will show you in the next section.
Step 2: Create a staging site to update WooCommerce safely
Updating WooCommerce is a big task, and requires your full attention. It is not a lightweight plugin that you can enable auto-updates for and forget. It affects every aspect of your store, and should be treated with appropriate gravitas.
The absolute safest and best way to update WooCommerce on your site is to use a staging site. Many people baulk at the thought of creating a copy of their sites, and let’s face it, it is a time-consuming and very daunting task in most cases.
With BlogVault, you can create a staging site in literal minutes. None of the fuss, and all of the convenience. We’ll show you how easy it is.
1. Create a BlogVault account, and add your WooCommerce site. It will take a few minutes for your site to sync.
2. Once the sync is done, click on your site to go to the Site Overview page.
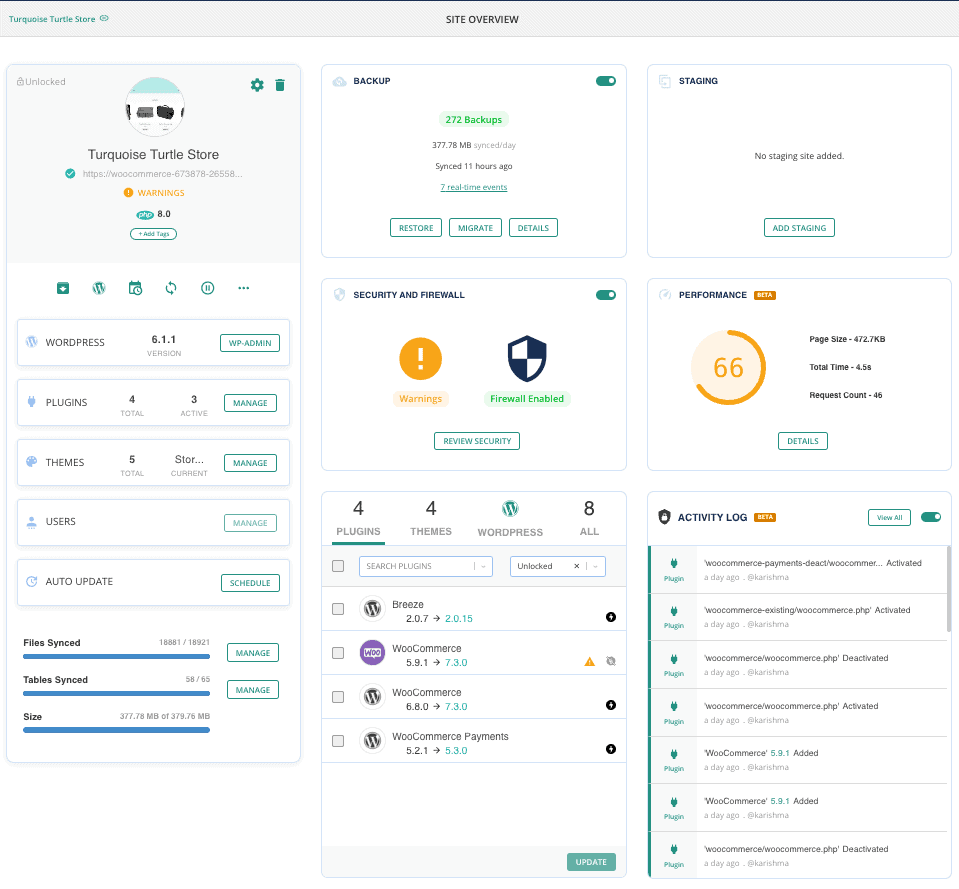
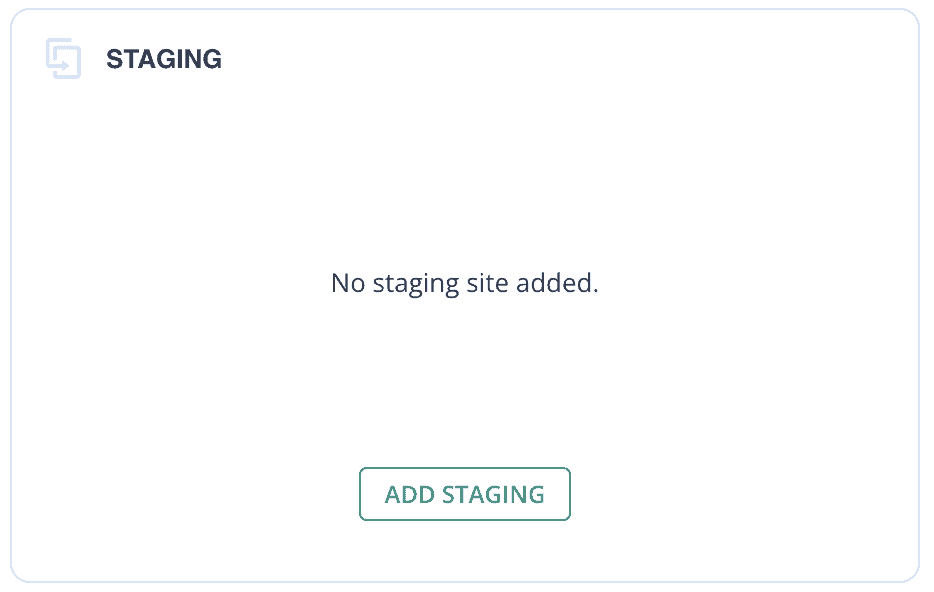
3. Look for the Staging widget, and click on Add Staging.
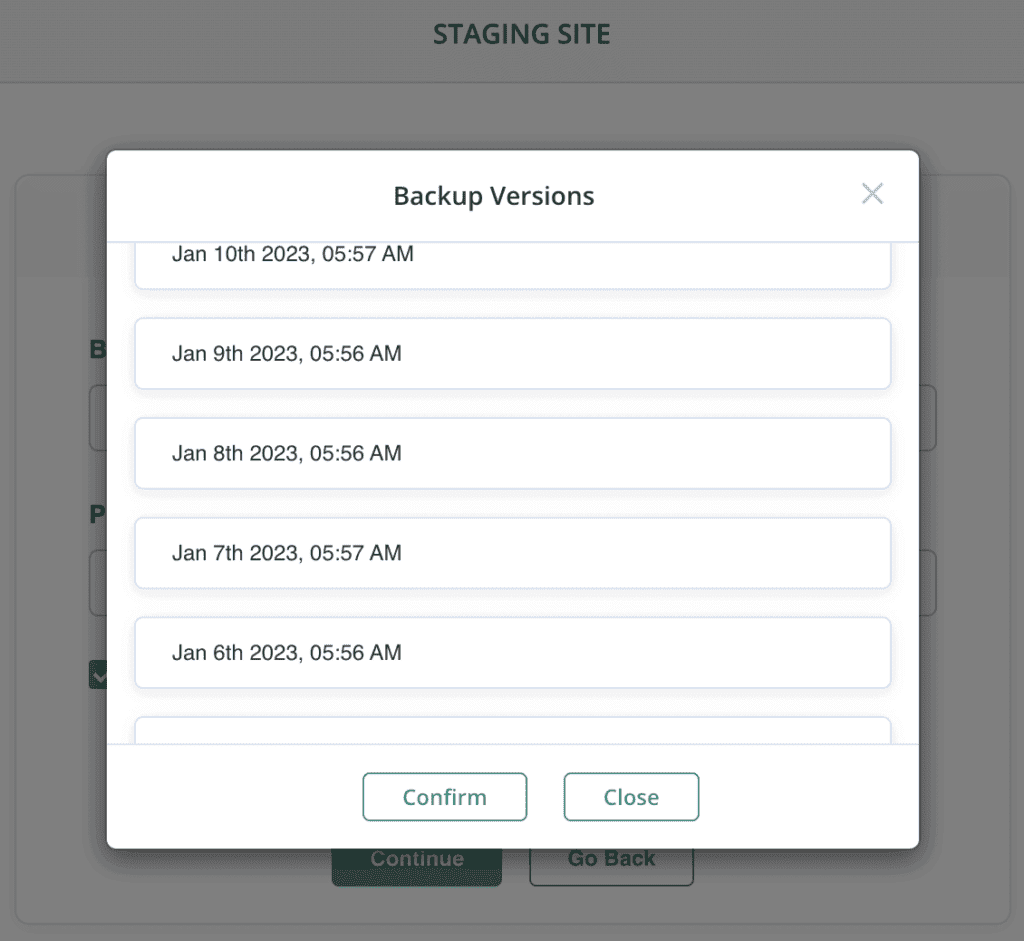
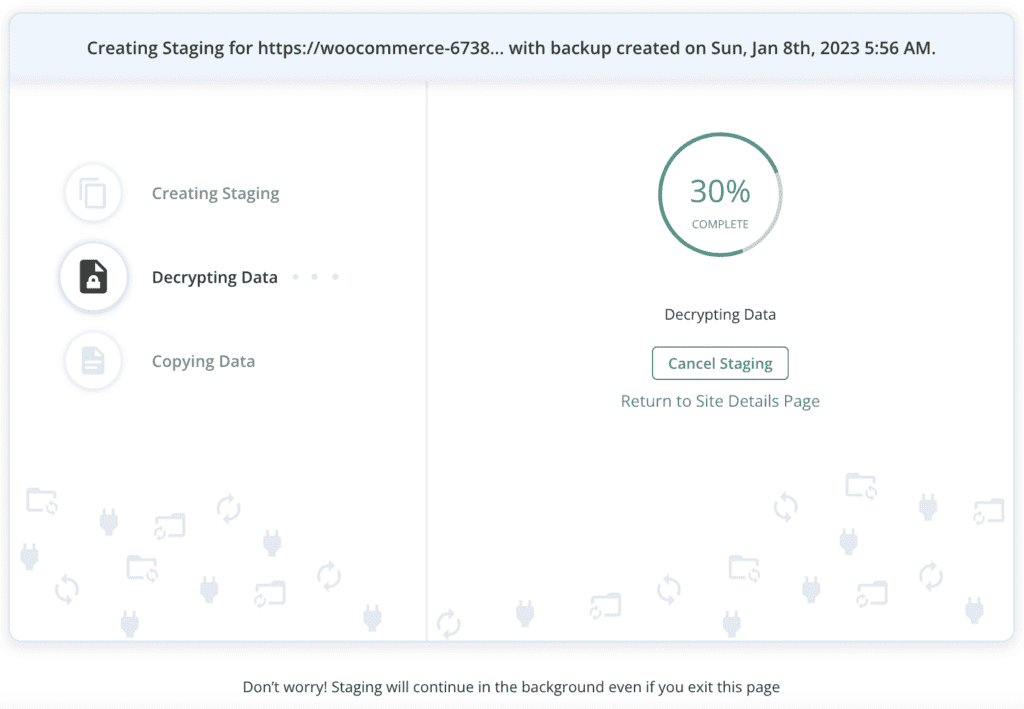
4. Select the latest backup, and click on Continue. Wait for the staging site to get created. We recommend the latest backup so that your staging matches your live site as much as possible.

5. Copy the login credentials from the dashboard, and log into your staging site. This will open up your homepage. To log into wp-admin, use the same credentials as you do for your live site.
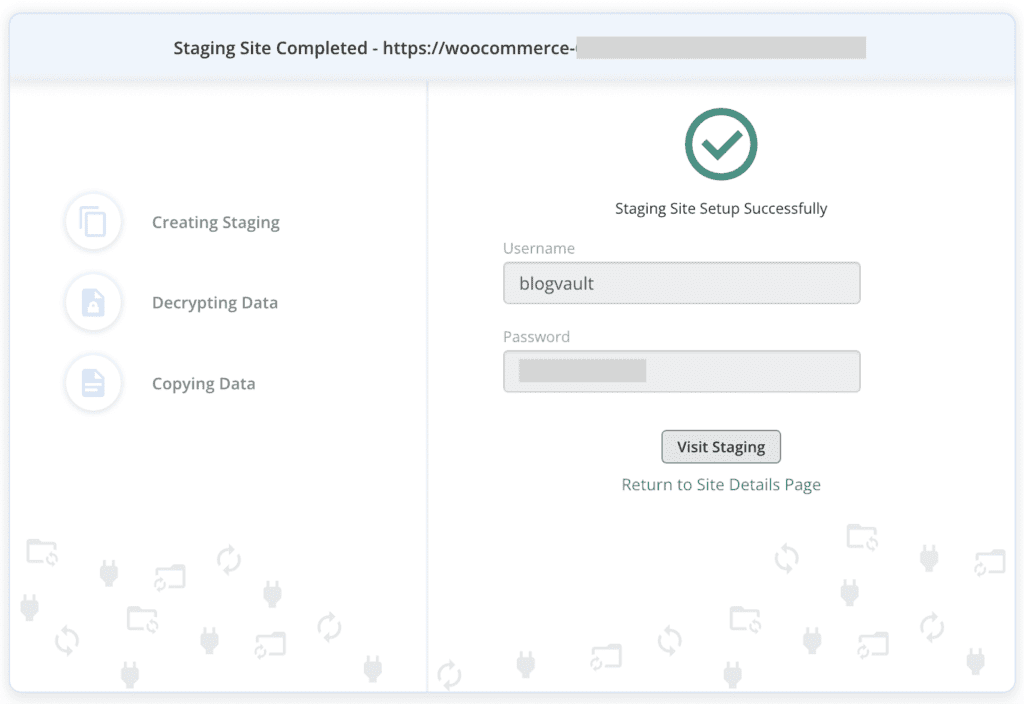
Note: WooCommerce extensions will automatically detect that the site is a staging one and not the live one, and disable payment gateways. In any case, since the staging site is password-protected, there is no way for a customer to inadvertently make a purchase on your staging site, but it is nice to have a fail-safe nevertheless.

Step 3: One-click update through wp-admin
On your staging site, update WooCommerce directly from your wp-admin dashboard.
1. Log into your wp-admin, and go into the Plugins menu.
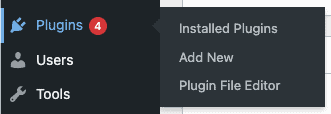
2. Scroll down the list of installed plugins and look for WooCommerce. There, you should see a notification if a new update is available.
Click on ‘update now’, and wait for the update to complete.

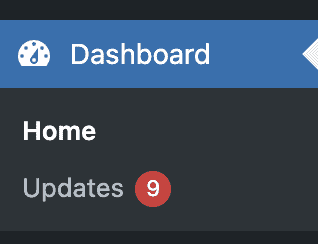
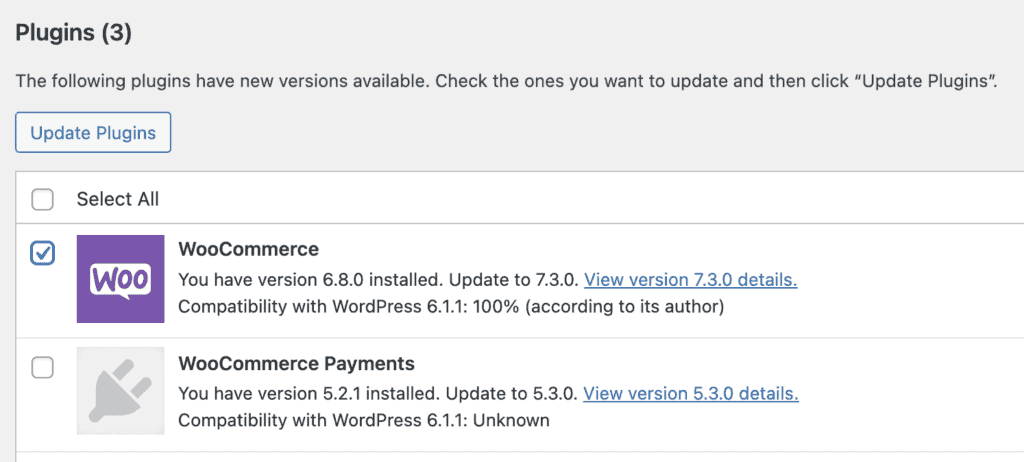
You can also run the update from the Updates menu on your dashboard. Scroll down to the list of available updates. Check the box against WooCommerce, and click on the Update Plugins button.
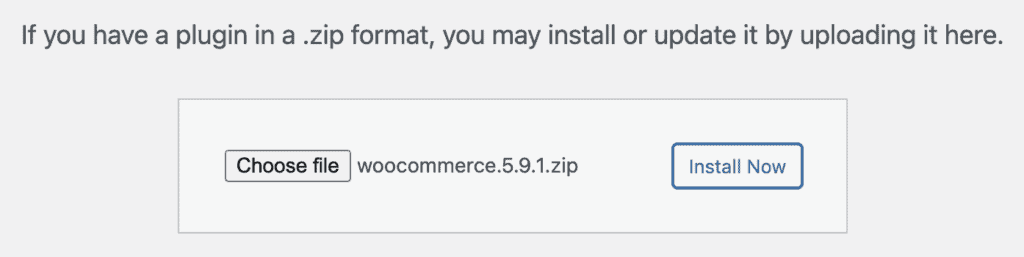
Alternatively, if you have downloaded a zip file of the plugin from the WooCommerce site or WordPress.org, you can also upload it to your site from the same Plugins menu. This is especially useful if you are updating from a very old version, and need to do the update in steps.
Step 4: Test the WooCommerce update on the staging site
When you are done with the update, make sure to test your staging site thoroughly. Check all the main pages: homepage, cart, checkout, about, contact, etc. Also go through the main workflows to ensure they work as expected. Look for any design anomalies, and fix everything that you need to.
Step 5: Repeat the update on your live site
After all the checks are done, we now need to update your site store. Redo all the steps you did on the staging site.
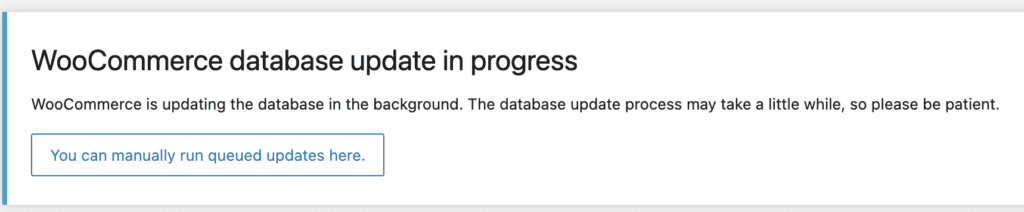
Once the WooCommerce plugin has finished updating, refresh wp-admin. You’ll see a notification to update the database.

All you need to do is click on the button, and wait out the update. It will take place in the background, so you can go about your work as normal.

And that’s it! You’ve safely updated WooCommerce on your site. The best part about using a staging site is that your live site is not affected at all. Plus you can continue to receive visitors and orders, while you make sure the update is safe for your site.
After update checks
Congratulations for getting this far. WooCommerce updates are minefields, so getting your store intact across the minefield is no small feat. Just to be on the safe side though, make sure to perform the following checks.
- First thing to do is clear out all the caches. Caches are stored versions of your site, and may not immediately reflect your updated site. You might have seen this happening when you update the content on a page, and it doesn’t show up on your browser, but on someone else’s. This happens because of cached copies of your site.
- Next, check all the important pages on your site. Of course, this depends on your site, but typically will include the homepage, cart, checkout page, about us, and so on. Check your analytics as well, to see which pages get the most traffic, and make sure all those are as expected.
- Try out a few workflows in your store. Try adding a product to the cart, changing the quantities, logging into a dummy customer account, checking purchase history, and so on. If something has broken in this process, you want to find out about it before your customers do.
- Check the wp-admin dashboard for error messages. If WooCommerce updates fail partially, you will see a message on your dashboard. We’ve included a troubleshooting section below to help with resolving the most common issues.
This checklist is mostly indicative, and meant to get you started. You may well feel that you need to check several other important aspects of your site before you’re completely satisfied that the update was successful. You should absolutely do that, and we also suggest you make it a firm checklist to follow after every major update.
Updating across multiple versions of WooCommerce
WooCommerce updates are meant to work seamlessly, and therefore it is theoretically possible to update from the oldest to the newest version of WooCommerce. Please note that we said theoretically though. These are lab-tested situations that will not work in the wild.
In reality, your site has a mix of plugins and themes that work together in complex ways. Think about a Jenga tower that is finely balanced. The latest WooCommerce update is right at the bottom, so pulling out that block will destabilise the whole structure. Instead, you want to pull out a block closer to the top, and slowly make your way down the tower.
All this to say that you should incrementally update WooCommerce. Start with a major version closest to what you currently have on the site. For instance, if you have 3.4 installed, install the 4.0 update first. Then, depending on the outcome, move through the minor and major updates mindfully to reach the latest update.
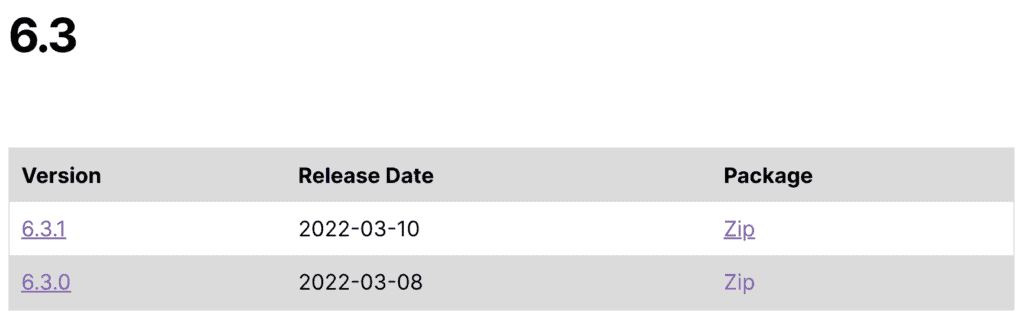
Download each version of WooCommerce from their releases page, and perform the updates incrementally.
We get that this is a tedious process, but it is a small investment in time now versus a lot of troubleshooting and stress later.
Troubleshooting
You can do everything right, and something can still go wrong. Here are some common issues that crop up when updating WooCommerce. We’ve experienced all of them firsthand, so you can rest assured that the fixes are tried and tested.
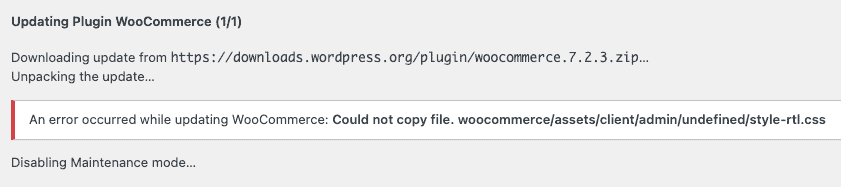
- Update failed: Could not copy file. <filename> OR Update failed: Could not create directory.: You may see these errors when trying to update WooCommerce. The filename or directory in question isn’t important. Every time you refresh, you are likely to see another filename. This is an annoying one that had us stumped for a while as well. Clear out all the caches—WordPress, browser, etc.—and log in and out. Also leave it alone for a few hours, and try again.

If this doesn’t work, you may have an incompatible plugin or theme lurking somewhere. Switch to a stock theme, and deactivate all other plugins. Next, update WooCommerce. Finally, enable the plugins and themes one by one, and see which one causes an error.
- ‘WooCommerce database update in progress’ message doesn’t go off: The database update can get stuck if WP Cron is disabled on your site. Open up the wp-config file to check, or check with your developer.
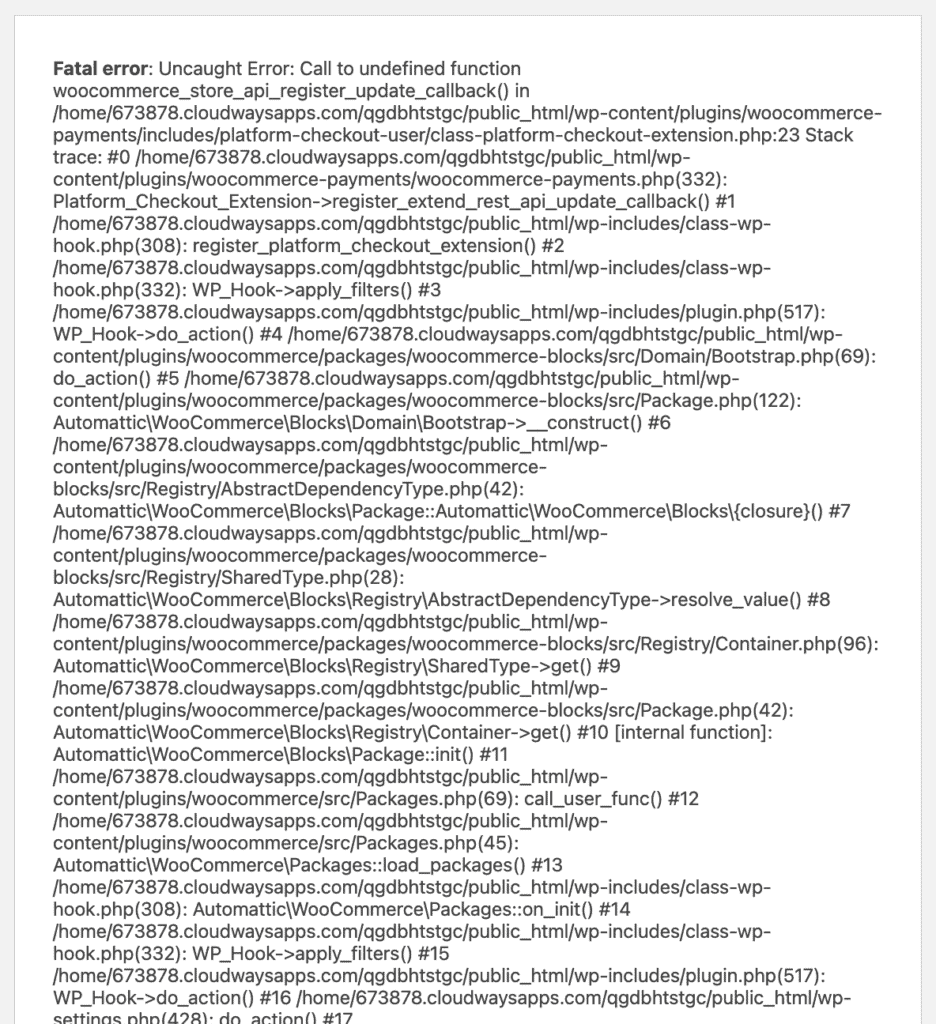
- Critical error: We love WordPress, but this error is horribly unclear. What is causing the error? Why is it critical? What is happening to my site? We ran into this error while trying to downgrade WooCommerce via FTP. Luckily, we can figure all those things out. Enable wp-debug in your wp-config file to see the actual error message.
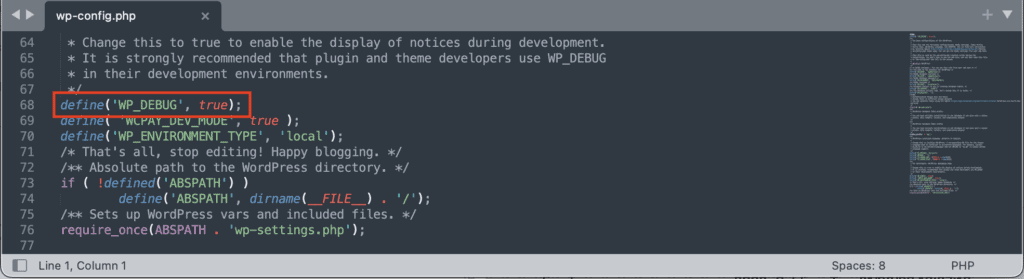
You may see some clues as to which plugin or theme is causing the issue, like in the screenshot below. In our case, the WooCommerce Payments plugin wasn’t compatible with the older version of WooCommerce. So we changed the folder name there too, and the error went away. If you can’t figure out the culprit, deactivate all the plugins and change to a stock theme. Reactivate plugins one by one and see which one is causing the issue.
- Maintenance mode didn’t go off: When WooCommerce is updating, maintenance mode is enabled automatically. It keeps visitors and site users from inadvertently making changes to the store. However it is meant to last only as long as the update, which is a few minutes at most. If you see the maintenance mode persisting for longer than say 20 or 30 minutes, go into your site backend and delete the .maintenance file. You will need to log in via FTP or cPanel to do this.

If none of these troubleshooting steps work, then we need to consider the nuclear option. Restore a backup and try again. There are innumerable reasons why an update may appear to have finished correctly, but has actually failed. For instance, we tried to update a plugin via FTP, and the transfer went through fine. However, we lost Internet connectivity for a couple of minutes, so one of the files may have gotten corrupted during the transfer. Just retransferring those files didn’t fix the issue, and we had to reinstall everything.
And while you’re at it, check the forum for help. Chances are other people may have faced the same issues. WooCommerce support is also excellent and very responsive.
Alternatives to the one-click update
There are other ways to update WooCommerce, and we’ll include them here just in case you aren’t able to update via the dashboard. Most of these methods will update WooCommerce directly on your live site. We don’t recommend this unless you are using BlogVault, because you can backup your site just beforehand.
Managed updates through the BlogVault dashboard
You can manage site updates directly from your BlogVault dashboard, which is an especially useful feature if you want to update WooCommerce on many sites at once.
1. Log into your BlogVault account, and navigate to the updates sections of your dashboard. You can apply the update to multiple sites at once, or just the one.
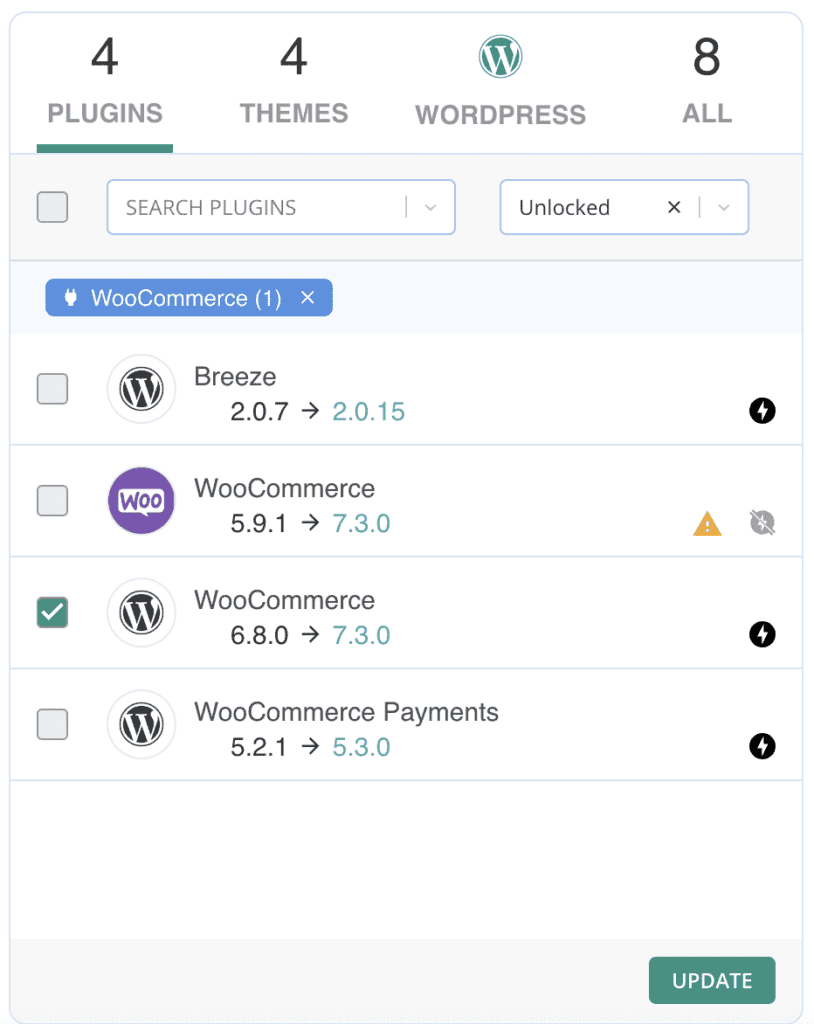
2. You’ll see that there is an available update for WooCommerce. Clicking on the new version number will open up the changelog, which contains details about what has changed in the new version.
3. Select WooCommerce from the list, and click on update. You’ll be asked to confirm what is being updated. Click on Next Step to proceed.

4. You’ll be presented with two options: Quick Update and Safe Update. Choose Safe Update to take a backup just before the update is applied, and for the visual regression tests after. Click on Update.
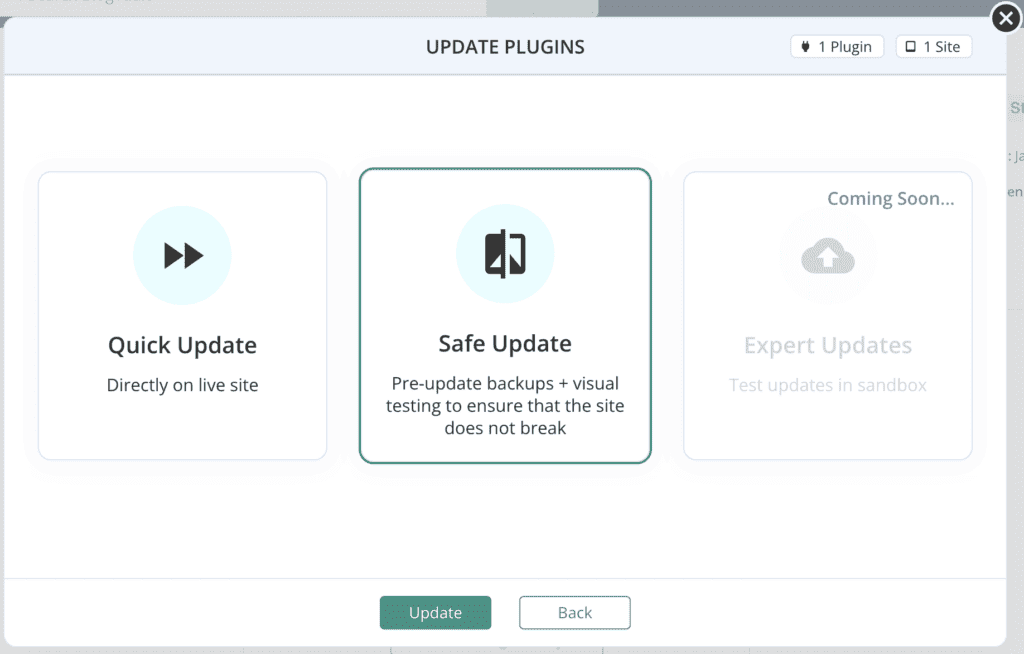
5. Sit back and wait for the update to complete. You can go through the visual regression results to confirm that the update was successful and hasn’t broken anything on your site.
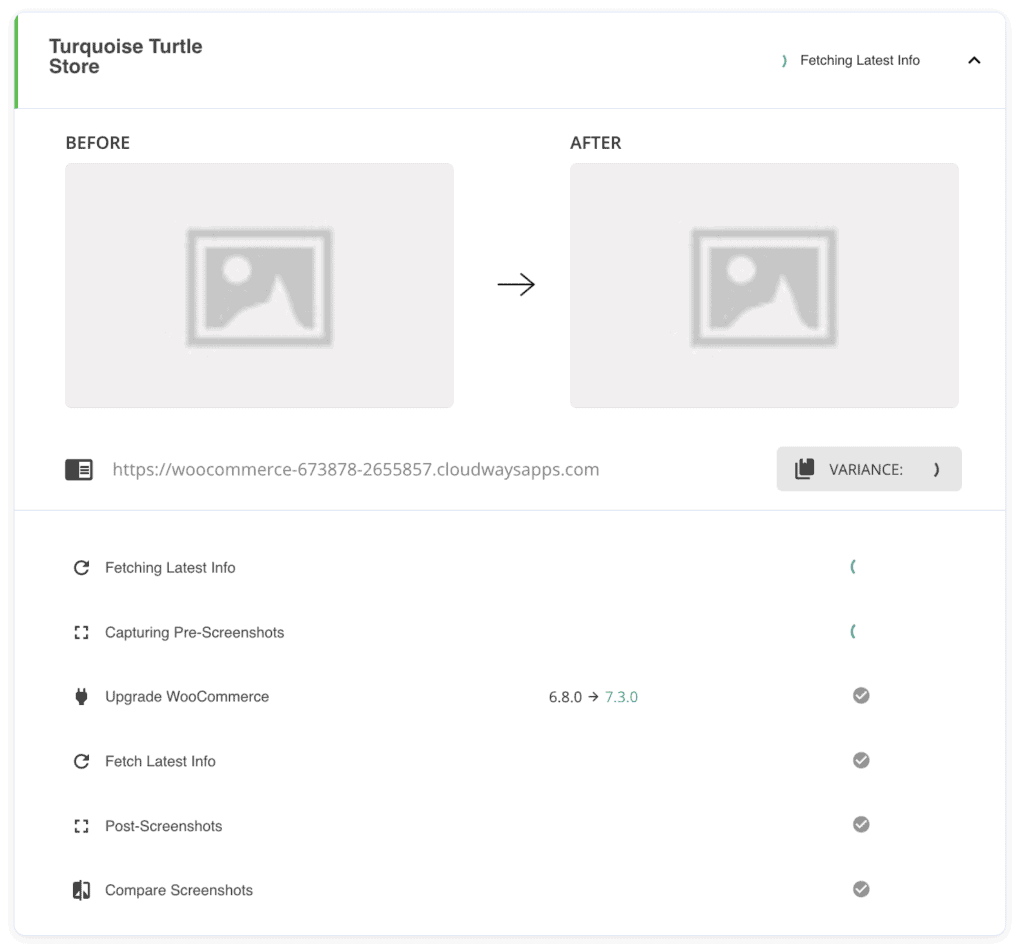
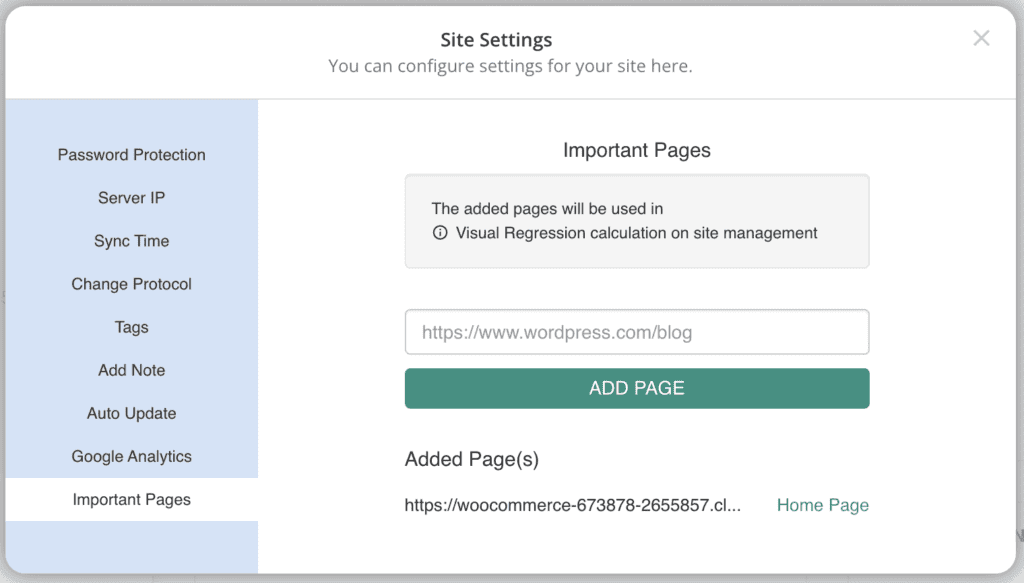
The visual regression feature will take screenshots of your site before and after the update. By default, the test is only for your homepage. However, you can set up visual regression for all your important pages from the settings menu on the Site Details page.
Scheduled automatic updates with plugin
We usually recommend automatic updates for smaller and less critical plugins, however you can set them up for WooCommerce as well. With BlogVault, you can set a schedule to update core, plugins, themes, or a combination of them.
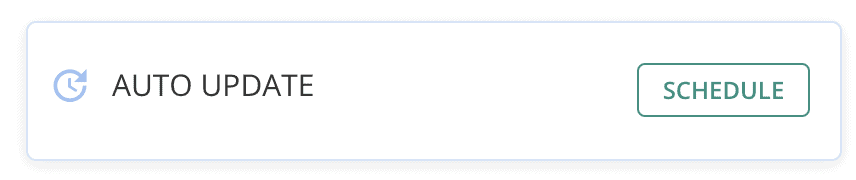
1. Log into your BlogVault account, and navigate to the Site Details page for your WooCommerce site. On the left sidebar, you’ll see a button to schedule auto updates.
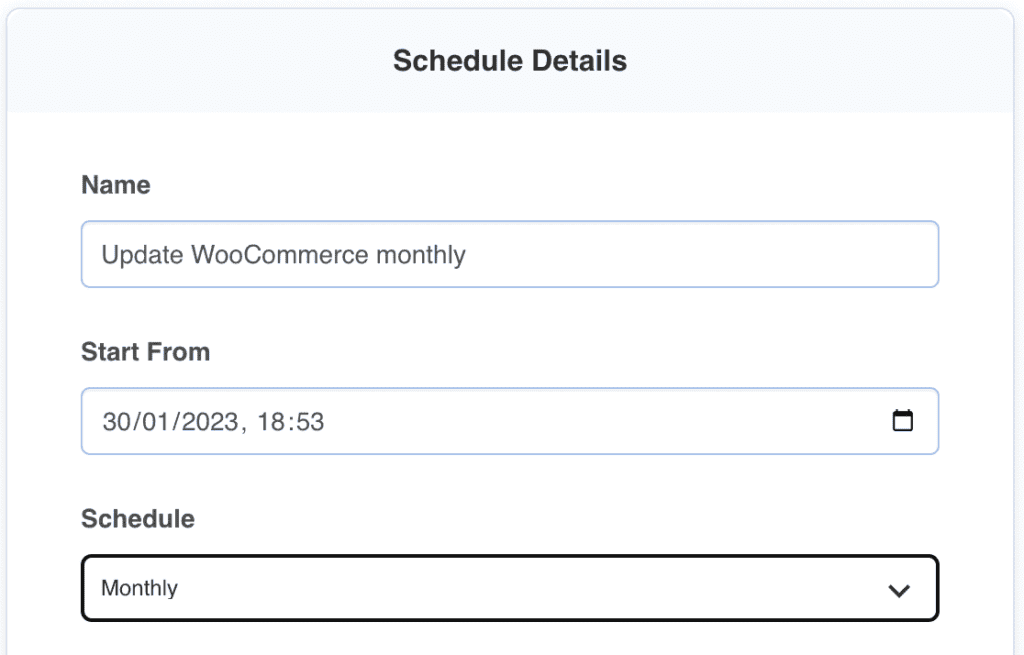
2. Customise the schedule as you wish. You can set up daily, weekly, or monthly schedules. We’ve set up a monthly schedule just for WooCommerce.
3. Next, choose which plugins and themes you want to add to the schedule. This is a WooCommerce article, so unsurprisingly we’re going to make a special schedule just for WooCommerce.
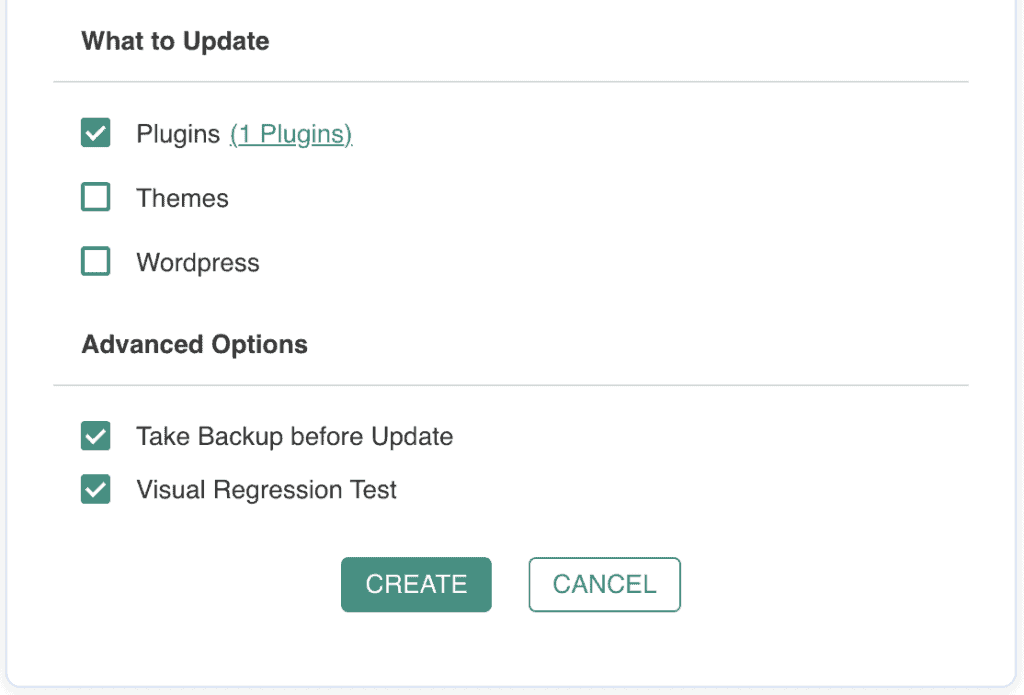
4. Make sure to check the boxes for backups and visual regression tests in Advanced Options. And then click on Create. You can modify, pause, or delete these schedules at any time.
Every time a WooCommerce update appears, BlogVault will apply the update. We aren’t a fan of automatic updates for WooCommerce, but this schedule will take a backup just before the update is applied.
Setting up auto updates for WooCommerce
We’re laying out the steps for enabling auto updates for WooCommerce but we strongly recommend against doing so. WooCommerce is a fantastic plugin and is constantly evolving, but the updates have crashed sites regularly.
1. Go into the Plugins menu on your wp-admin dashboard, and click on Enable auto-updates against the WooCommerce listing.

2. If there is an available update, you’ll see when it will be automatically updated.

You may have read about selectively enabling auto updates via filters, and perhaps were considering enabling auto updates for minor WooCommerce updates only.
However, there are two issues to consider. Firstly, it is complicated to do, and you have to be very clear about how filters work to pull it off. Secondly, the versioning on WooCommerce is complicated and minor updates have also been known to bring down sites like a house of cards.
Update using WP-CLI
WP-CLI is a command line interface for commands specifically designed to control your site. It is often used by developers to quickly set up sites without having to wade through screens on the dashboard.
WP-CLI works by connecting to your site server via SSH, and running a few commands to update WooCommerce.
1. Connect to your site server via SSH. You’ll need the site server IP, a username, and a password. You will find these details on your hosting dashboard or with your web host’s support.

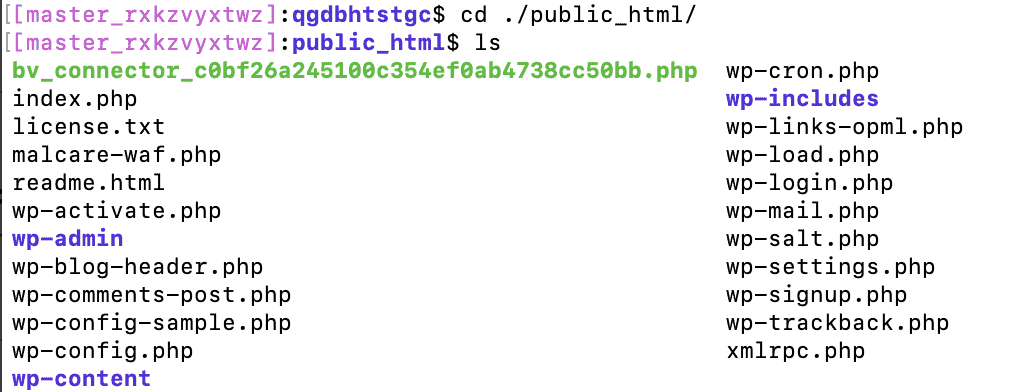
2. Next, navigate to the root folder of your site. In our case, that is public_html. It may be different, depending on your web host’s server configuration. The root folder is where all your site files and folders are located.
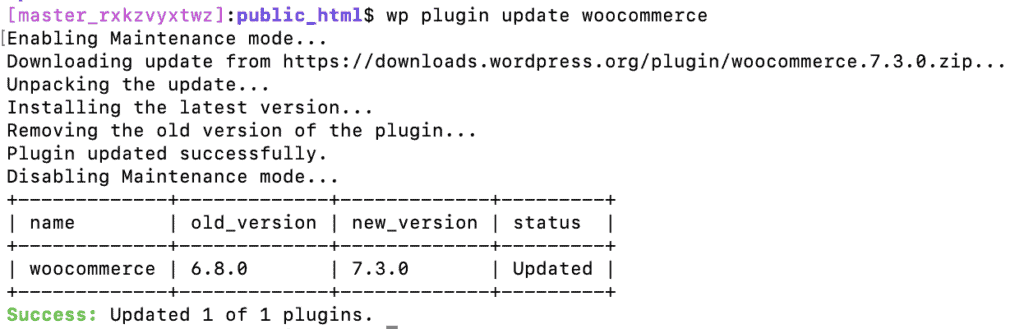
The command to update WooCommerce from WP-CLI is
wp plugin update woocommerceIn a matter of seconds, you should see a success message.
3. Next, you need to update the WooCommerce database as well.
wp wc update
That’s all there is to it.
WP-CLI is quite simple to use, but it was an absolute nightmare to set up on our computer. Because we are using MacBooks, we had to set up an environment, install libraries and packages, and much more. It all took over 24 hours to set up just so we could test out these commands to make sure they work as expected. If you’ve got WP-CLI set up already? Great, have at it. Otherwise, good luck.
Manual update using FTP
The only really manual method on this list is to update WooCommerce via FTP. In essence, you will be replacing the WooCommerce plugin folder on your site with another version. This is a bit of a hatchet job, and we don’t recommend doing anything remotely clumsy with your site. Plus your site will be down the whole time. It takes a while to upload WooCommerce via FTP. That is something to consider.
You’ll need an FTP client like FileZilla or Cyberduck for this. Both are free-to-use tools and very popular. We’ve used FileZilla below, but the steps are the same regardless of the FTP tool used.
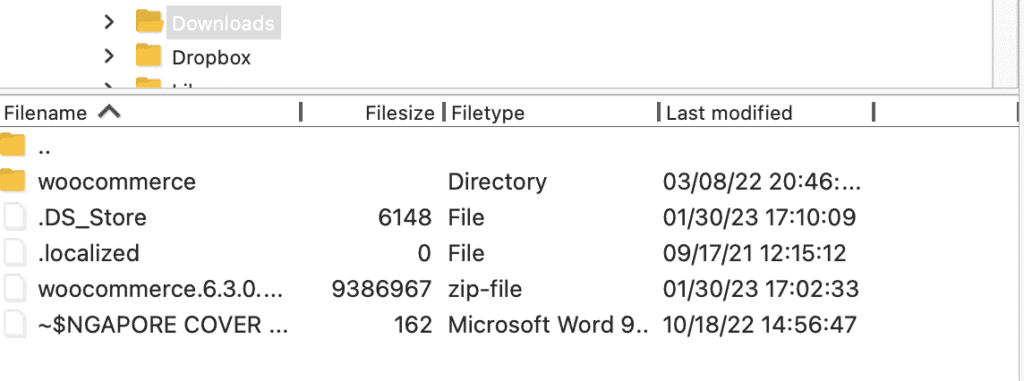
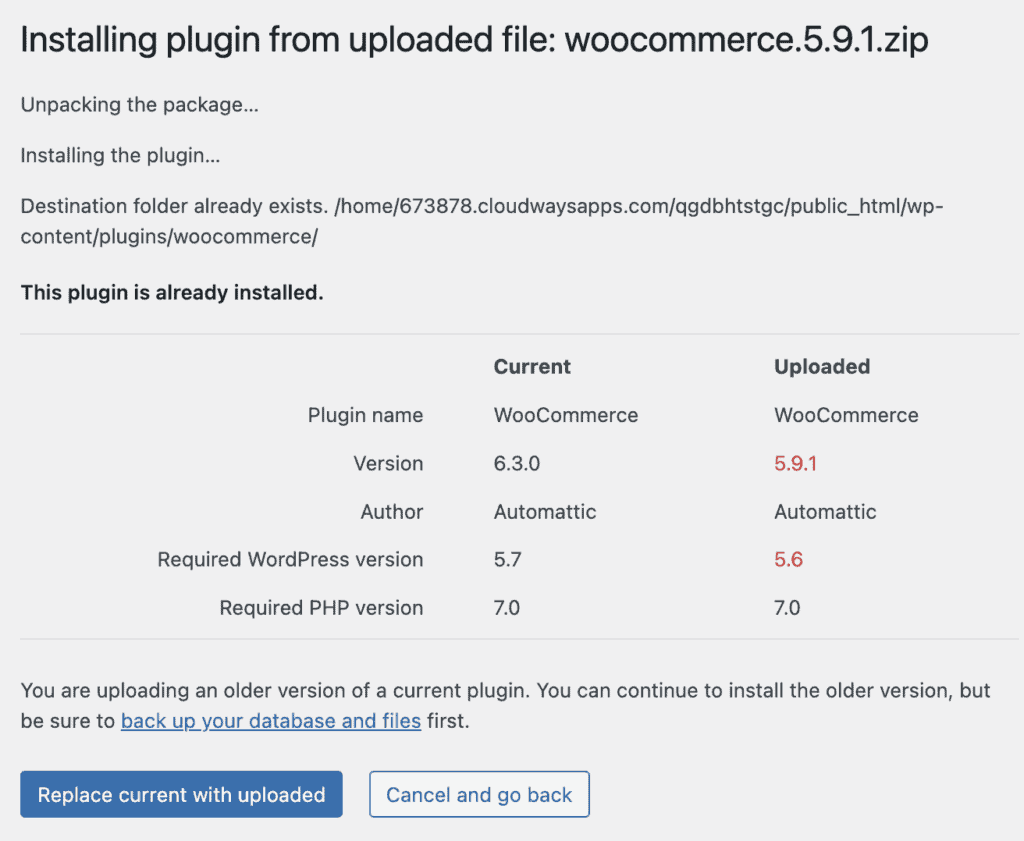
1. Download the right version of WooCommerce. We’ve gone with an older version just to stress test our site, so that you don’t have to.
Take a backup of your site. Our test sites are dispensable, and we still back them up regularly.
2. Connect to your site via FTP using the server’s IP address, username, and password. You may need a port number depending on your web host’s configuration.

3. Navigate to the plugins folder. From the root directory, go to wp-content, and then to plugins.

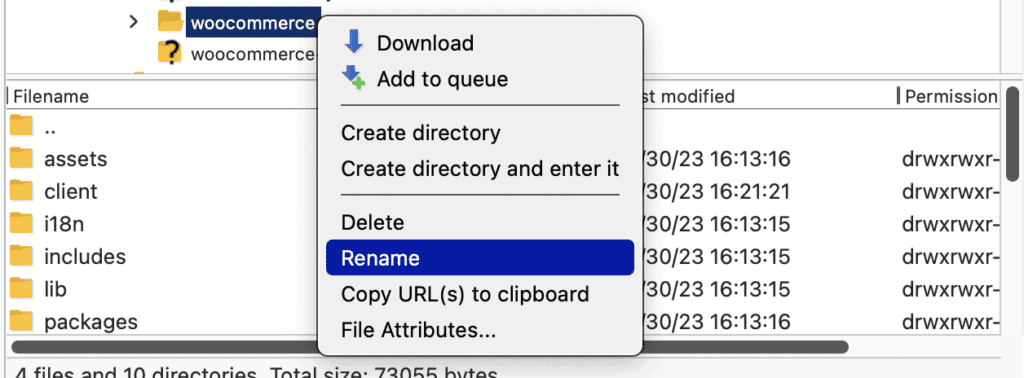
4. Find the WooCommerce plugin folder and rename it to something else. We’ve changed ours to ‘woocommerce-existing’.
5. Upload the unzipped WooCommerce folder you downloaded from the releases page. On FileZilla, you can navigate your computer’s file system from the left pane, and drag and drop it to the right pane, which shows your site’s file system.
This may take some time, because FTP is a very slow transfer protocol. As you can see, we have to wait until 3800 files transfer to our site server. The files were about 10 MB in total, and took around 40 minutes on a moderately fast Internet connection.
You can also do much the same thing from cPanel’s File Manager, if your host provides it.
Don’t update WooCommerce manually: here’s why
Updating a plugin manually—by which we mean through FTP or cPanel—is not usually a fraught exercise. However, with WooCommerce updates, it behoves us to be a little more careful.
First of all, WooCommerce updates are known to cause site crashes—which is honestly why you are reading this article. We tested it a bunch of times, and we lost count of the number of times it failed. You see that troubleshooting section below? We experienced all of it firsthand.
Second of all, messing around with your site files and folders if you aren’t a WordPress developer is like playing with fire. The smallest misstep, and your website will go up in flames.
Finally, anything that goes wrong during a one-click update via the dashboard will still apply here. If the database doesn’t update then, it won’t update now. If the maintenance mode doesn’t get turned off, it will remain even with this method. But it is far more difficult to diagnose and fix, so that’s why we don’t recommend manual updates at all.
How often do you need to update WooCommerce?
The short answer is: every time there is an update.
Updates are extremely important from a security perspective. If your older WooCommerce version has a vulnerability, this could lead to your website getting hacked.
That being said, you need to update your store mindfully because updates have been known to cause crashes. To that end, use a staging site to test out the update first, and suss out if there are any plugin or theme conflicts, breaks in the store’s frontend, or even if the update causes a crash.
Check the release notes to see if the update contains a security patch. If so, you will need to start the update process (via staging) immediately. If not, then you can stand to wait a week or so for any issues to surface and be resolved.
Why WooCommerce updates are important
There are several reasons why WooCommerce updates are very important. As a rule of thumb, WordPress updates should be applied regularly because of the following reasons.
- Security patches: Even if you ignore the other reasons (you shouldn’t), security is extremely critical to your store. Apart from the safety of your site, data, and visitors, hacked sites are used to attack other sites as well. Everyone apart from the hacker loses when a site is infected with malware. Many developers discover vulnerabilities in their products, and release patches via updates. The security patch prevents hackers from exploiting the vulnerabilities and injecting your site with malicious code.

- Bug fixes: Have an annoying bug on your dashboard? Maybe a post crashes whenever you try to add an image to your post, for instance. A bunch of people complain about this bug, and the developer fixes it in—you guessed it—in an update.
- Feature improvements or additions: New features, enhancements to existing features, removal of unnecessary elements, and smoother workflows, are often included in WooCommerce updates. Version 7.3.0 added a Pinterest extension to the dashboard, and the ability to add WooCommerce marketing extensions directly from the dashboard.
- Other improvements: Page speed has become a critical factor for the success of your website. Plugin developers make their products more efficient with improved code and newer tech.
On an average, a regular store has upwards of 35 plugins installed and activated. Everything from payment gateway plugins and dropshipping extensions to SEO plugins and other marketing tools needs an update once in a while. The easiest way to manage these updates is to use BlogVault to create auto-update schedules for small plugins, and to test major ones on a clone of your site beforehand.
What does updating WooCommerce mean?
Alright, so we’ve talked about every way to update WooCommerce, why the updates are important, and everything else in between. What’s left? Oh right, what does an update actually contain.
WooCommerce, as we all know by now, is a WordPress plugin that converts your site into an ecommerce store. While it may have started out that simple, it no longer is just that.
There are many parts to WooCommerce, as it stands. There’s the core, which is the main plugin, and then there is the admin and the blocks as well. These components combine to give you the rich experience you’ve come to expect with WooCommerce. Courtesy the blocks component, you can design a really sophisticated storefront, with matching product pages, checkout page, and cart experience.
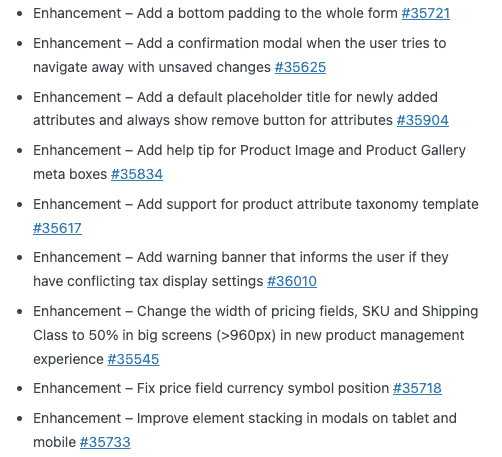
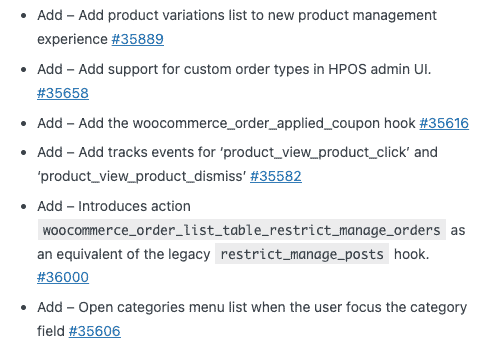
The updates will contain changes to a combination of these components. Changelogs and release notes have details about minute changes to WooCommerce included in updates. This could mean the ability to customise a button, translation updates for sections, or just fixes for small bugs.
Like with a WordPress, plugin, or theme update, you should assume that files and folders will change or get overwritten. Any changes or modifications to these files will be lost. Remember what we said about taking a backup? This is yet another reason why backups are indispensable.
Some updates will contain updates for the database as well, but these are not supposed to affect the data in any way. However, if you are upgrading from a very old version of WooCommerce, bear in mind that the database structure could have changed dramatically, even though it is all meant to be backward compatible.
That’s a wrap
Updates are scary. Updates that can crash your store and lead to loss of revenue and all the other domino effects of that are terrifying. The best way to safeguard yourself from these situations is to test updates on a staging site. This is especially true of WooCommerce. If you’re feeling very very intrepid, then you can update your store directly, but please take a backup beforehand.
FAQs
How do I update WooCommerce to the latest version?
The best way to update WooCommerce to the latest version is use the one-click update on your wp-admin, first on a staging site and then on your live site. This is the only way to ensure you update to the latest version without any downtime on your store.
Can I update WooCommerce?
Yes, you can update WooCommerce. However, if you want to do so safely and without downtime, you need to first test the update on a staging site.
How long does it take to update WooCommerce?
The actual update doesn’t take very long; about 5 minutes at the most. What does take time is testing the update thoroughly before and after it is done. However this is a crucial step, and it is very much a question of putting in a little effort in the beginning to save much more down the line.
How do I manually update WooCommerce?
You can manually update WooCommerce via FTP or cPanel, if your host provides it. Download the version you want to install from the WooCommerce releases page on their site or from the WordPress repository, log into your site server, and upload the folder to the plugins folder on your site. This will install WooCommerce on your site.
Is it safe to update WooCommerce?
Without testing first on a staging site? No. WooCommerce updates are notorious for crashing sites. The best way to safely update your site is to test on a staging site first, make sure there are no issues, and then merge changes to your live site. If you do encounter issues during the update on staging, you can write into WooCommerce support for help. This way, you get the update, and have safeguarded your site from any downtime.
How do I update WooCommerce to a specific version?
To install a specific version of WooCommerce, which is not the latest version, go to the WordPress repository or the releases page on the WooCommerce site. There, you can download a zip file of the version you want to install.
Then, you can go to the Plugins menu on your wp-admin dashboard and add a new plugin. You should see an option to upload a zip file to your site. Follow onscreen instructions to install WooCommerce on your site.
How do I downgrade WooCommerce to a previous version?
Download the version you want to downgrade to from the WooCommerce releases page. Then, go into the Plugins menu on wp-admin, and upload the zip file. Install and activate the plugin.
Before doing this, however, make sure that you aren’t using any WooCommerce plugins that require a later version. Otherwise you will see a critical error on your site, and have to manually deactivate the plugin using FTP on cPanel’s File Manager.
A word of caution here: there is a reason that WordPress doesn’t give you the ability to easily downgrade a plugin. It is not recommended at all because newer versions are much better, with security fixes and feature updates. So we advise using this as a last resort only.
Tags:
Share it:
You may also like

How to Limit Form Submissions with Droip in WordPress
Forms are an indispensable part of any website because of their versatility, letting you collect information for various purposes! However, people with ill intentions often attempt to exploit these forms…

How To Manage Multiple WordPress sites
Management tools help agencies become well-oiled machines. Each task is completed with the least amount of effort and highest rate of accuracy. For people managing multiple WordPress sites, the daily…
PHP 8.3 Support Added to Staging Feature
We’ve introduced PHP version 8.3 to our staging sites. Test out new features, code changes, and updates on the latest PHP version without affecting your live website. Update PHP confidently…
How do you update and backup your website?
Creating Backup and Updating website can be time consuming and error-prone. BlogVault will save you hours everyday while providing you complete peace of mind.

Updating Everything Manually?
But it’s too time consuming, complicated and stops you from achieving your full potential. You don’t want to put your business at risk with inefficient management.

Backup Your WordPress Site
Install the plugin on your website, let it sync and you’re done. Get automated, scheduled backups for your critical site data, and make sure your website never experiences downtime again.


