Moving WordPress from Localhost to Server – Complete Guide
Bulletproof Backups for Your WordPress Website
Fortify your business continuity with foolproof WordPress backups. No data loss, no downtime — just secure, seamless operation.
While most web hosting providers install WordPress on the domain name you purchase from them, it is not uncommon for some folks to develop their WordPress websites locally, on their own computers. Developing websites locally has several advantages over developing online, but if you want your site to be accessible to the world, you’ll have to host it on a server on the Web.
Uploading WordPress from localhost to a live server can be intimidating. But fear not. In this article, I’ll show you how you can migrate WordPress from localhost to server in simple, easy-to-follow steps, whether you want to use a plugin or do it yourself.
TL;DR The safest, quickest, and easiest way to move WordPress from localhost to server is to use the Duplicator plugin. It’s a powerful plugin that can migrate your local site to a server on any web host for free and with no downtime.
What to do before you migrate WordPress from localhost to server
Before you transfer WordPress from localhost to server, there are a few things you need to do. Namely the following:
- Purchase a domain name. If the IP address of your website is like its residential address to which visitors are directed (like 2530 Maple Street), then the domain name is the human-readable name that people usually call it by (like Wheeler House). You can purchase a domain name from a domain registrar like Namecheap or a web hosting provider like Bluehost. Some providers will grant you a domain name for free if you buy a hosting plan from them. Make sure your domain name is connected to your hosting account, as it will make the migration process with Duplicator much easier.
- Sign up for web hosting. Your website needs a home on the Web to be seen by others. When you’re thinking about what hosting provider to sign up with, make sure you choose one that meets the WordPress requirements. If it doesn’t, then you may expose your site to security vulnerabilities.
- Install WordPress on the server provided by your web host. Most web hosting providers will install the latest version of WordPress for you when you sign up with them. If yours doesn’t, then you’d have to install it yourself.
- Make sure the WordPress and PHP versions of both your local site and on the live server are the same.
- Obtain the FTP/SFTP credentials of the live server from your web host. You can usually find them from the control panel of your hosting account. If you can’t find them, look up the specific instructions for your host online or contact its customer support team. Specifically, you’ll be needing your destination server’s IP or FTP address, FTP username, FTP password, and port number.
- Create a new, blank database on your live server
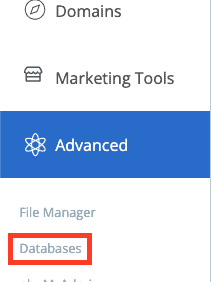
The option to create a new database should be in the ‘Databases’ section of your web hosting dashboard. You’ll be importing your local site’s database to this blank database. To illustrate this process, I’ll use Bluehost. The steps should largely be the same for any other web host.
- Go to Advanced > Databases from the left-hand navigation menu.
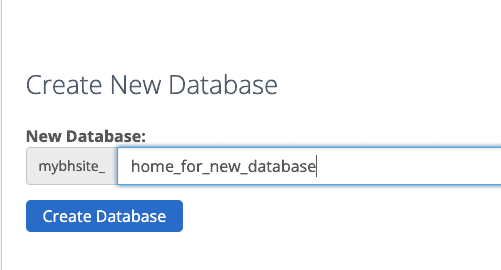
- Under the section ‘Create New Database,’ provide a name for your new database, then click on Create Database. In my example, I’ve named the database ‘mybhsite_home_for_new_database.’
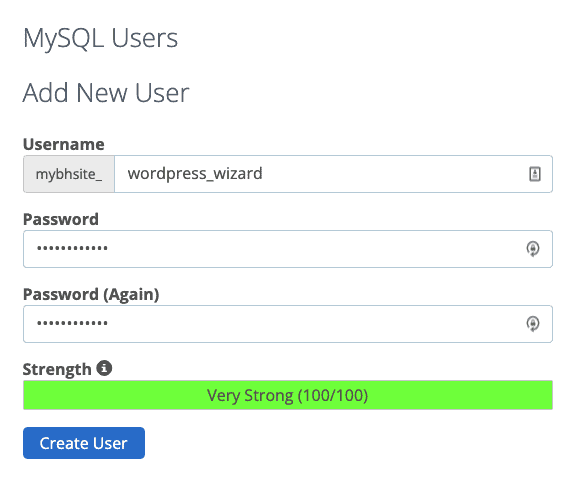
- Now, we’re going to add a new database user for our account. Scroll down to ‘Add New User’ under ‘MySQL Users.’ Choose a username and a strong password for this user, then click on Create User to finish creating.
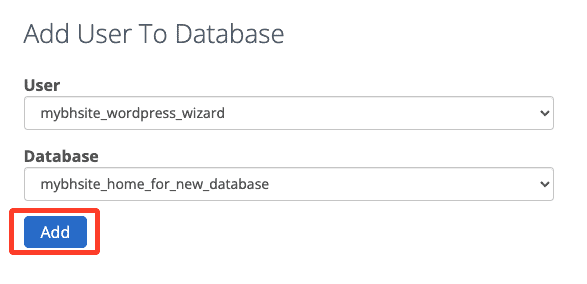
- Now, add the user you created in Step 3 to the database you created in Step 2 as shown in the image below.
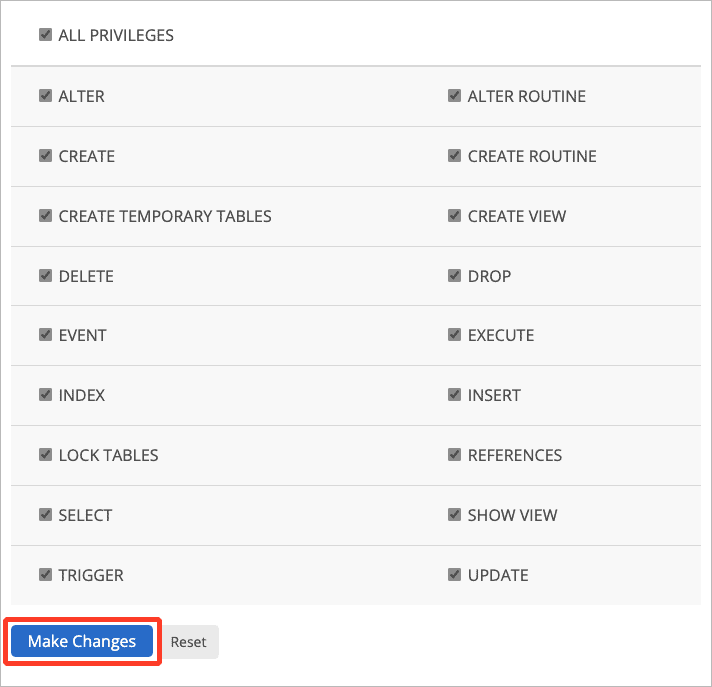
- On the next page, assign all privileges to this new user and then click on Make Changes.
That’s it! You now have a new, blank database to which you can export your local database.
A Note Regarding Staging
Note that if you already have a live site, you can use a local site as a staging environment. For example, if you want to redesign your live site from the ground up, you can create a staging site for it on localhost. Then you can start the redesign process on this staging site and once you’re happy with the changes you’ve made, you can use the procedures I’ll describe in this article to move your entire staging site to your web server, effectively replacing your earlier live site.
However, there’s something you need to keep in mind: you need to integrate your live site’s database into your local site’s database first before migrating. The database is a critical component of any WordPress installation. It’s where all the data related to your website is stored, like post content, settings, user information, etc. If you don’t integrate your live site’s database first, then when you migrate your local site to your live site, you will overwrite the live site’s existing database, wiping out all changes made to it since the staging site was created.
How to migrate WordPress from localhost to server using a plugin
Using a migration plugin is easier, faster, and less error-prone than trying to export a WordPress site from localhost to a server manually. For this section, I’ll be using Duplicator to illustrate the process. The process should be similar if you use any other plugin.
Step 1. Build a package for your site with Duplicator
- Install and activate Duplicator on your local WordPress site.
- Go to Duplicator > Packages in the admin menu.
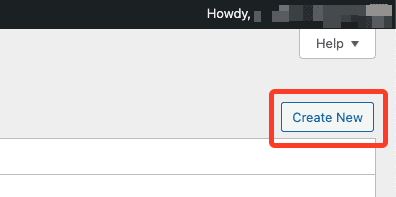
- Click on Create New on the top-right corner of the screen.
- The default settings should be fine. Click Next.
- Duplicator will now scan your site to make sure everything is okay before it can proceed to create a backup of your site. There, the results for everything should be ‘Good’ like in the image below:
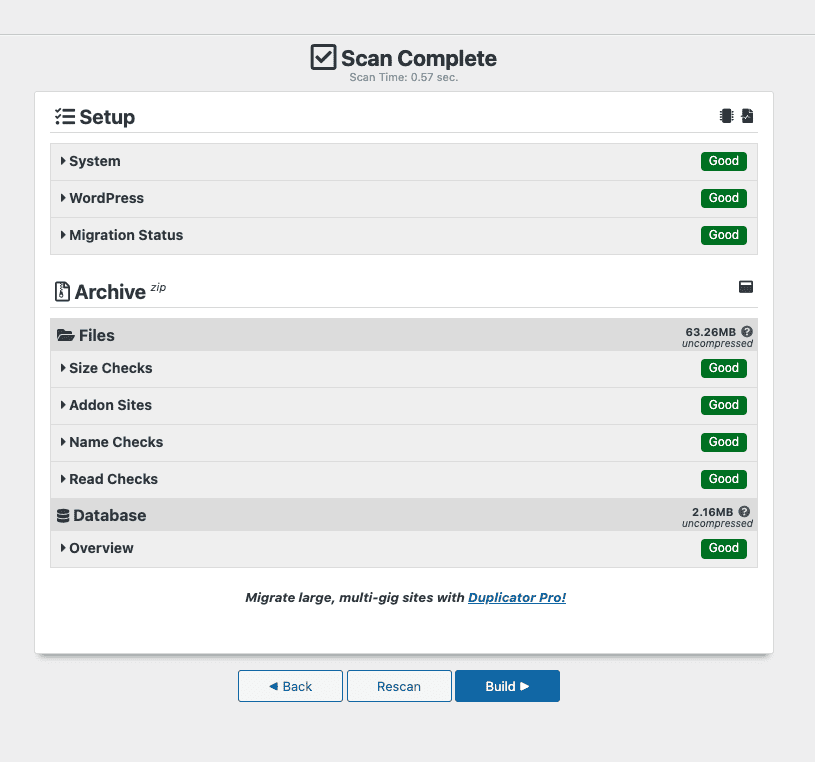
You might see ‘Notice’ next to Size Checks. Don’t worry, it just means that your website is huge. You can proceed without risk. Click on Build to build the package.
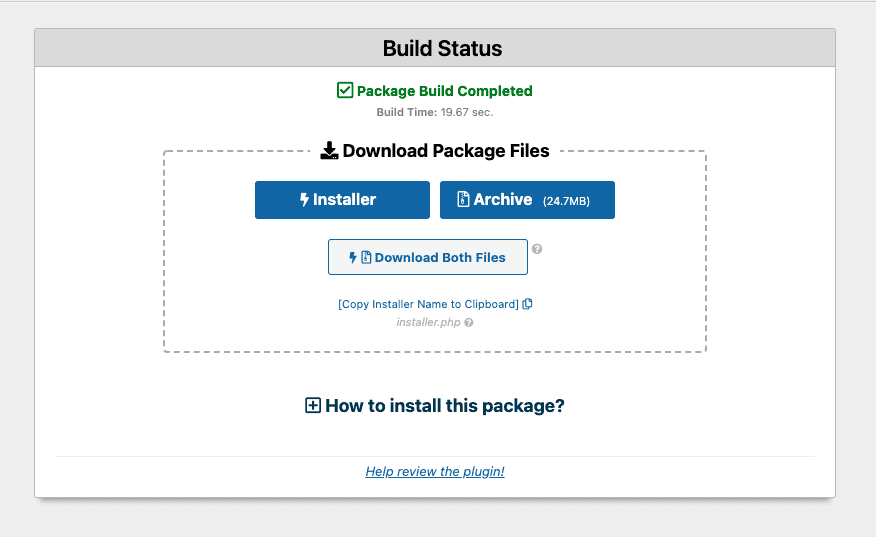
- It may take a while for Duplicator to build a package, depending on how big your website is. After the build completes, you’ll get a confirmation. Download both the installer and the archive. This archive is essentially a backup of your local site.
Step 2. Upload your WordPress files and folders from localhost to your live server
In this step, we’ll be uploading the Duplicator package and the installer.php file to our live server. You’re going to need an FTP client to do so. I’ll be using the popular FileZilla client to demonstrate the process.
- Connect to your web server on FileZilla by entering your FTP credentials at the top and then clicking on Quickconnect. You can also use ‘Site Manager’ under the File menu to do the same.

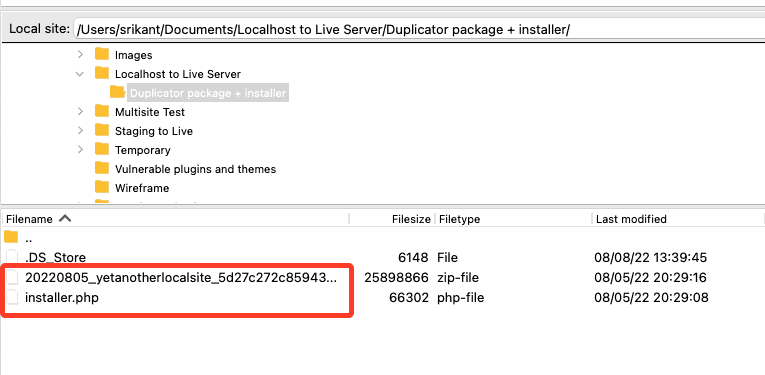
- Navigate to the folder on your computer where you downloaded the Duplicator package and the installer.php file from the left pane. FileZilla displays your local files in the left-hand area labeled ‘Local site.’
- Navigate to the root directory on your web server in the ‘Remote site’ area (the right pane), unless you or your web host specifically installed WordPress in a different directory, like a subdirectory. The root directory is usually called public_html or public but could vary depending on your host’s configuration.

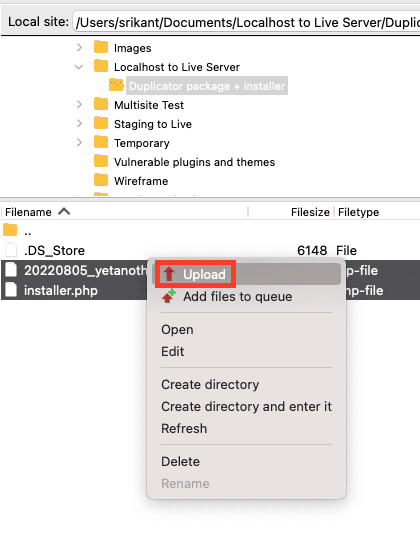
- Upload the Duplicator package and the installer.php file to the root directory of your live server.
Step 3. Install the Duplicator package on your live server
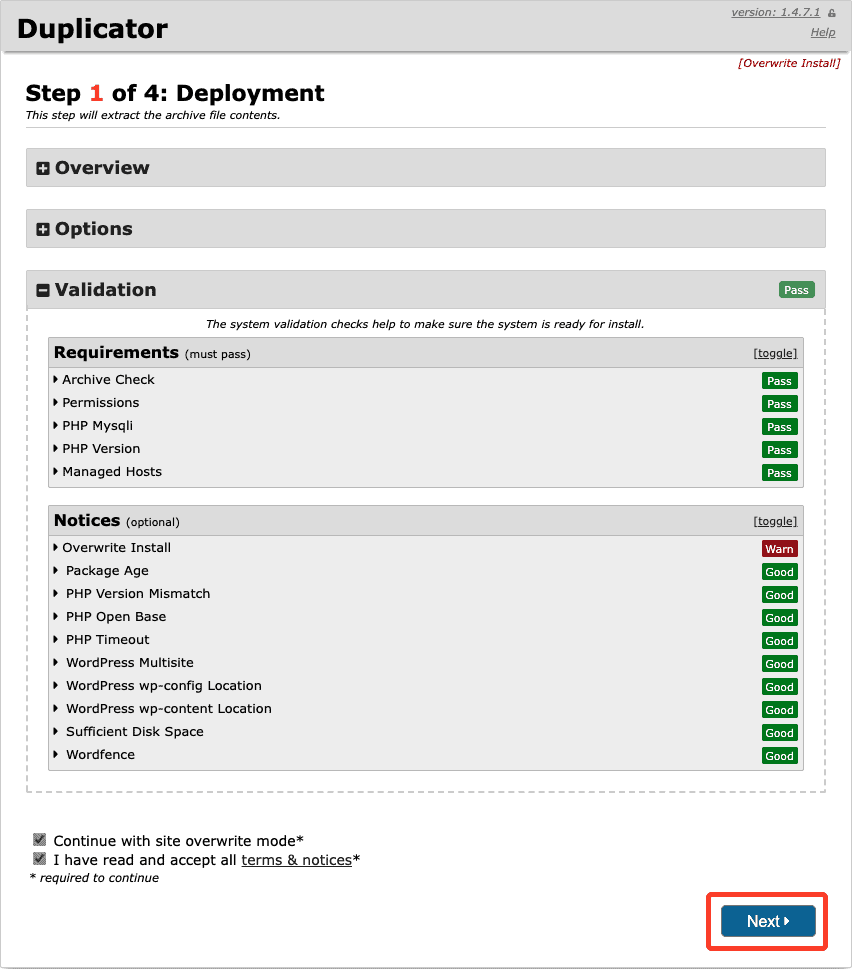
- Go to yourwebsite.com/installer.php (replacing ‘yourwebsite.com’ with the actual domain name of your live website).
- Step 1 of 4: Deployment. In this step, Duplicator will perform validation checks to ensure your live site is suitable for deploying the package. If all the checks pass, click Next at the bottom. Duplicator will start extracting the contents of the package. Note: if your live website already has a WordPress installation, then you’ll see the label ‘Warn’ next to ‘Overwrite Install.’ That’s okay.
- Step 2 of 4: Install Database. At this step, Duplicator will try to install your local site’s database on your live site. If your live site already has a populated database, then its contents would be overwritten. If you created a new, blank database, then your local site’s database will be imported into this new database. You should see some fields already populated with the correct details of your live site’s database. The default value ‘localhost’ for the host field should be correct, but this value can change for certain web hosts, so make sure to confirm it with your web host before proceeding. Anyway, click on Test Database to test if Duplicator can connect to your database successfully.
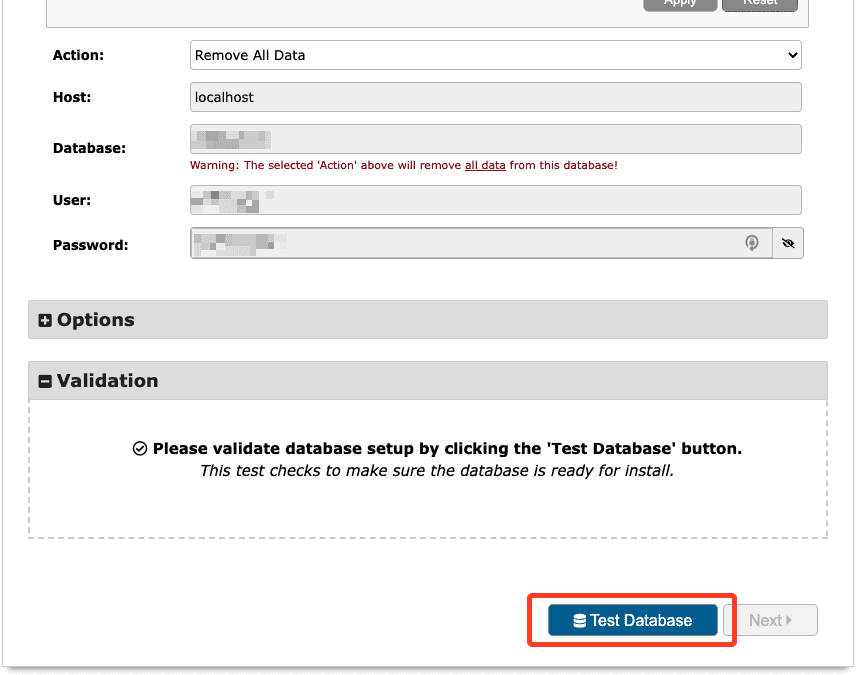
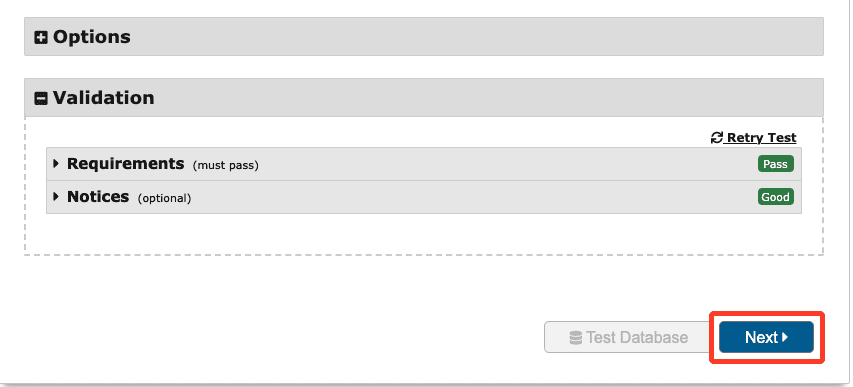
If all tests pass, then you’re good to go. If they don’t then make sure all the field values are correct and try again. If you’re still unable to diagnose and fix the issue, then contact your web hosting provider for help. Now, Click Next to install the database. On the popup that appears, make sure all the values are correct, and then click OK to continue. Duplicator will now proceed to install the database.
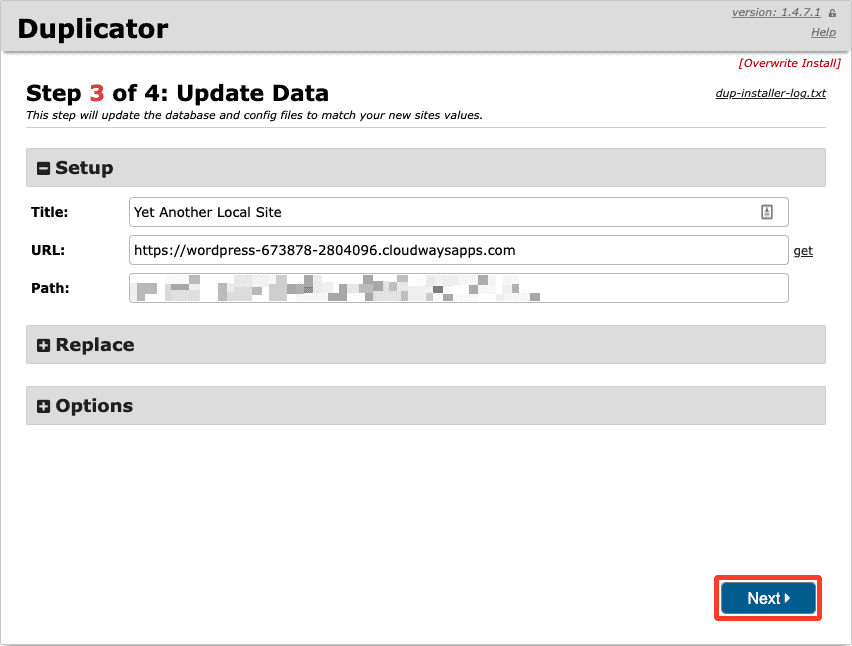
- Step 3 of 4: Update Data. On this page, Duplicator will automatically populate the Title, URL, and Path fields. Make sure the values are correct, then click Next to continue.
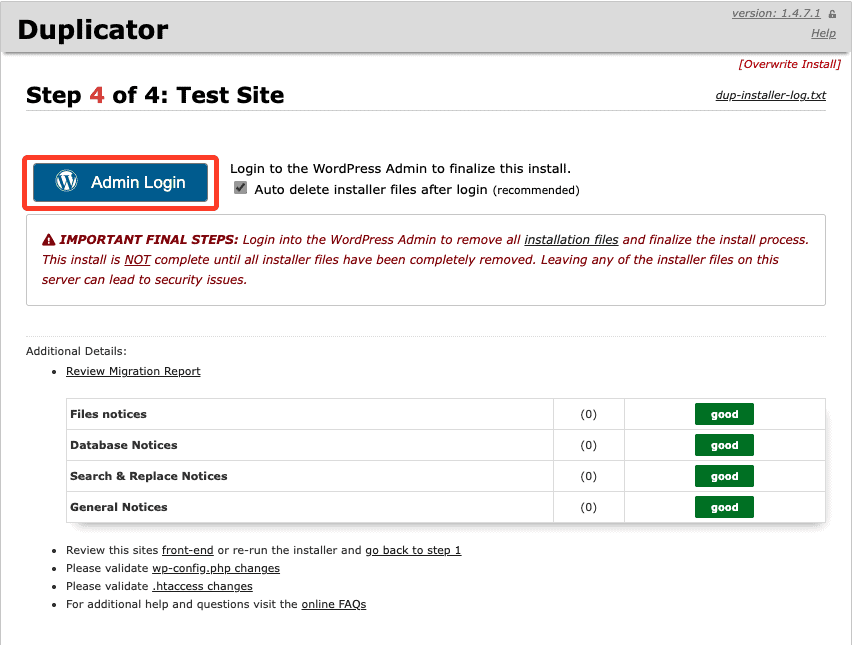
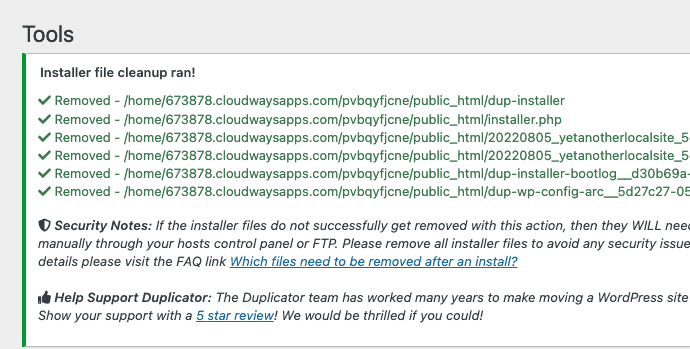
- Step 4 of 4: Test Site. Your local site should now be live. To finalize the installation, click on Admin Login. Make sure the checkbox named ‘Auto delete installer files after login’ is checked. Log in to your website, and you’ll see that Duplicator will start deleting the installer files, which you no longer need.
How to manually move WordPress from localhost to server
While using a plugin to make a WordPress site live from localhost is a safe and easy option, if you prefer to do it manually, this section is for you. You’ll need an FTP client to transfer files between your local site and your live server. For this tutorial, I’ll use FileZilla, but note that all FTP clients essentially work the same way so that the steps will apply to any client. Anyway, here are the steps.
Step 1. Take a backup of your local site
Trying to upload a WordPress site from localhost to a live server manually can be risky and lead to errors. If anything goes wrong during the migration process and you’re unable to access your site, having a WordPress backup means that you can restore a fully functional version of your site and can get going again.
Step 2. Upload your WordPress files and folders from localhost to your live server
- Connect to your web server on FileZilla by entering your FTP credentials at the top and then clicking on Quickconnect. You can also use ‘Site Manager’ under the File menu to do the same.

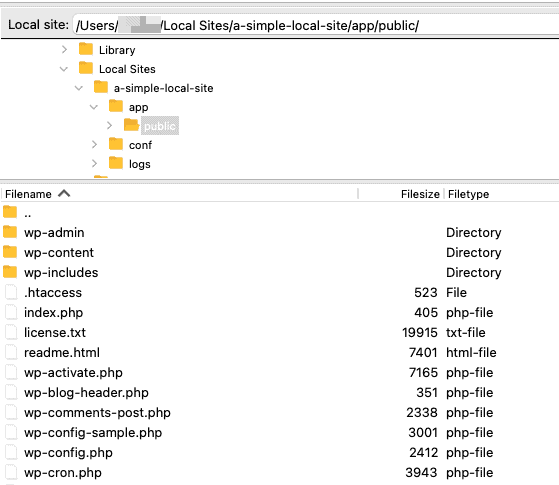
- Navigate to your local website’s root directory (where WordPress is installed) on your computer in the ‘Local site’ area (the left pane). If you see the directories wp-admin and wp-includes, then you’re in the right place.
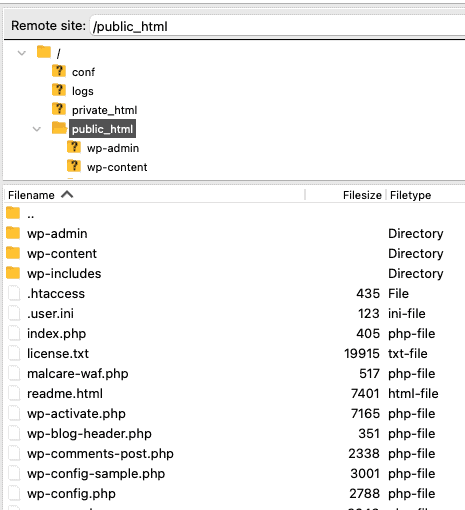
- Navigate to the root directory on your web server in the ‘Remote site’ area (the right pane).
- To copy your local site’s files and folders to your live server, select all, right-click, and then click on Upload. They will replace their web server’s equivalents, essentially moving your local site to the live server.

Step 3. Export your local site’s database to your live server
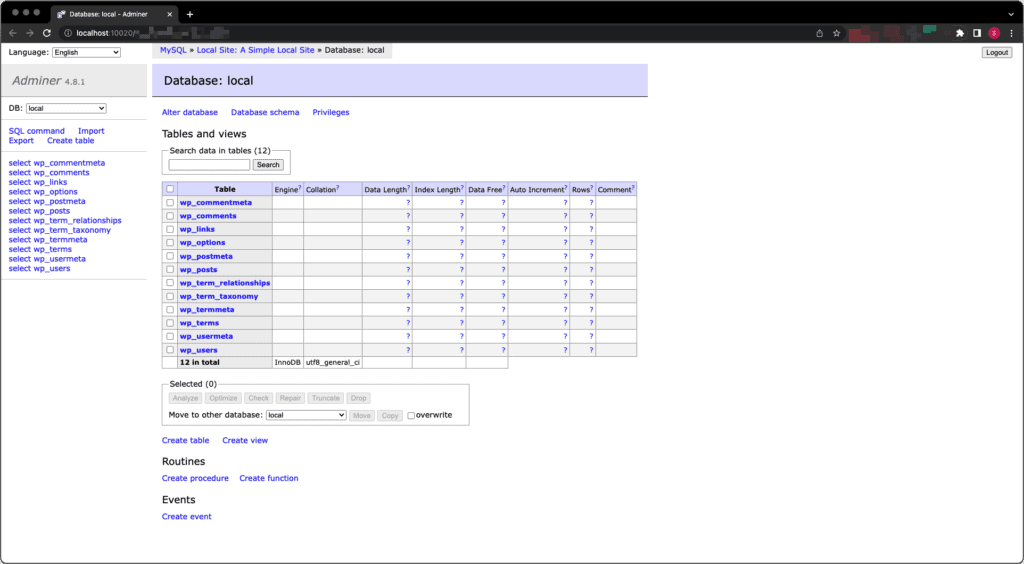
Simply copying the files and folders to the live server isn’t enough. You’ll need to export your local site’s database to the brand new database you created earlier on your live server. To export our database, we’ll be using a database management tool. The two most common ones are phpMyAdmin and Adminer. Both of them support MySQL and MariaDB, the two most popular database management systems out there. Your website’s database likely uses one of these two. I’ll be using Adminer for this section since it supports many more database management systems than MySQL. The steps are essentially the same for phpMyAdmin.
- Open the Adminer dashboard for your local site. It should look something like this:
- Click on Export from the left-hand pane.
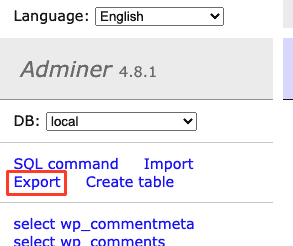
- Select ‘save’ as the output, SQL as the data format, and then click on Export.
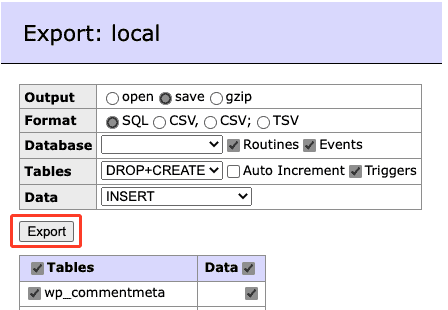
- In the pop-up window, give the SQL file a suitable name and download it to your computer. Make a note of the download location since you’ll be needing it in a bit.
Before you can import your local site’s database to this new database on the web server, you have to make some changes to your site’s wp-config.php file. WordPress uses this file to connect to the database of your website, which, as I mentioned earlier, contains important data like post content, user information, and various settings. Our site’s wp-config.php file currently includes information for our local site’s database. So, we have to update it with the live server’s database information so that our live site will be able to communicate with it.
- On FileZilla, open the site’s wp-config.php file by right-clicking on it and then clicking Edit.
- Edit the following lines of code with the correct information related to your live server’s database:
// ** Database settings - You can get this info from your web host ** //
/** The name of the database for WordPress */
define( 'DB_NAME', 'live_database_name' );
/** Database username */
define( 'DB_USER', 'live_database_user' );
/** Database password */
define( 'DB_PASSWORD', 'live_database_password' );
/** Database hostname */
define( 'DB_HOST', 'localhost' );
The DB_HOST will still likely be localhost unless your web host uses a different one. Be sure to check.
Also, add the following lines before the comment that says “That’s all, stop editing! Happy publishing.”:
define( ‘WP_SITEURL’, ‘URL_of_your_live_site’ );
define( ‘WP_HOME’, ‘URL_of_your_live_site’ );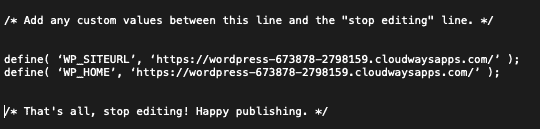
- Save the file and exit.
Now that you’ve correctly pointed the wp-config.php file of your live server, you can go ahead and import the database you exported earlier. I’ll be using Adminer to demonstrate the process.
- Launch the database manager of your web host.
- Select the database associated with your live server, then click on Import.
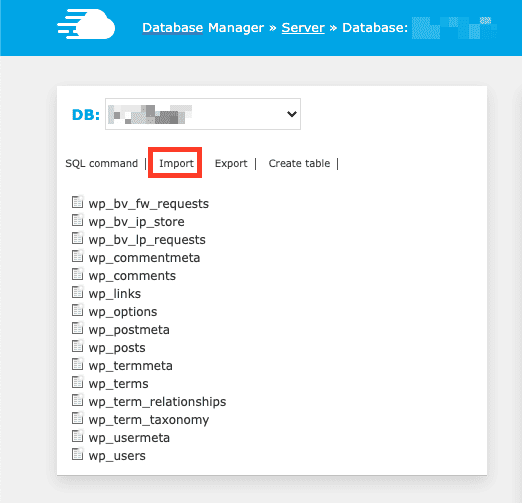
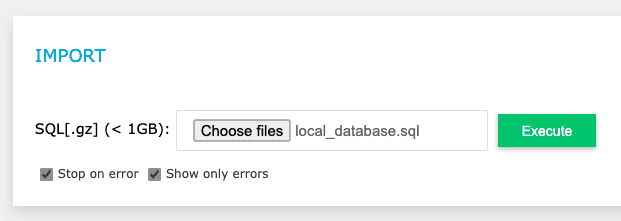
- Choose the SQL file to import, and then click on Execute to start importing.
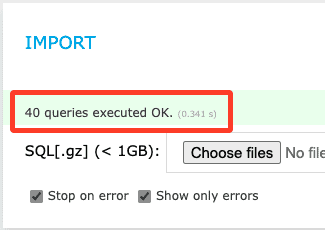
It can take a while to import the data if the database is huge. After a successful import, you’ll see a message confirming so.
The migration still isn’t fully complete. I’ll talk about the remaining steps in a separate section later in the article, which will essentially serve as a post-migration checklist for you.
Things to consider for WooCommerce sites
While the step-by-step process that I’ve described in the previous two sections also applies to WooCommerce sites, there is something you should keep in mind. Any e-commerce site has transactions taking place in real-time as people sign up and buy stuff. So, the site is constantly changing, and as you can imagine, migrating a site while it’s going through changes in real-time can cause errors and break the site.
Therefore, if you have a WooCommerce site, before trying to move it from localhost to a web server, I strongly recommend putting it into maintenance mode first using a plugin like Themeisle’s WP Maintenance Mode & Coming Soon. Maintenance mode will effectively “pause” your site, preventing any user from making changes to it.
Things to consider for WordPress multi sites
If you have a multisite, then you know that it stores content a little differently from a normal site. When you create a WordPress multisite, it creates an additional folder called sites in the wp-content/uploads directory, which contains all the uploads and plugins relevant to each site on the multisite network. As such, there are certain things you need to do when moving a multisite:
- Search for all instances of localhost in the wp_x_posts tables and replace them with the domain name of your live site.
- Edit the wp_blogs entries to change the folder name correctly if you’re moving from one folder to another.
- Review wp_site and wp_blogs to ensure all site changes are correct.
- Edit the following fields in all the wp_x_options tables:
- home
- siteurl
- fileupload_url
What to do after you make a local WordPress site live
Well, even though you may have made your local site live, the job is not quite done yet. There are still some things you need to do to finish the job.
1. Change your site’s URLs in your database
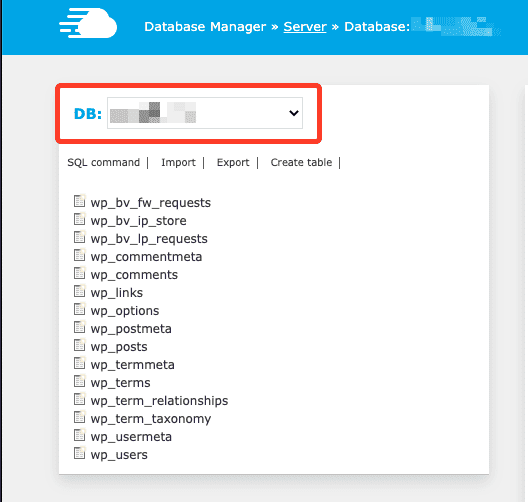
- Open phpMyAdmin or Adminer (or whatever database management software your web host uses) and select your database.
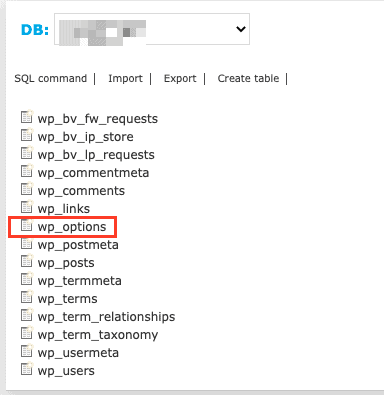
- Click on the wp_options table from the list of tables shown.
- You should see a list of option names and their values. In Adminer, you would need to click on the ‘Select data’ tab at the top to view these options.
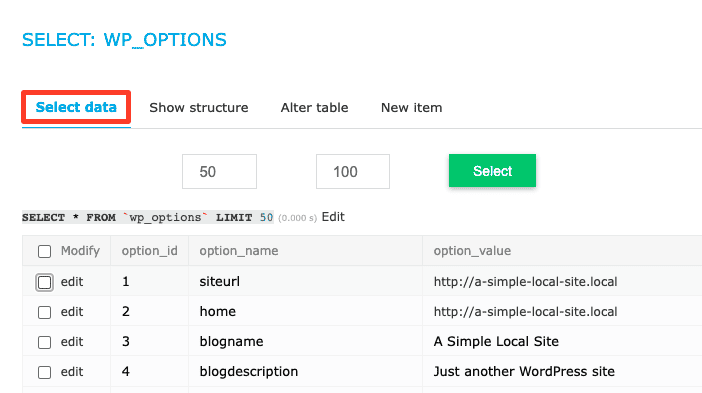
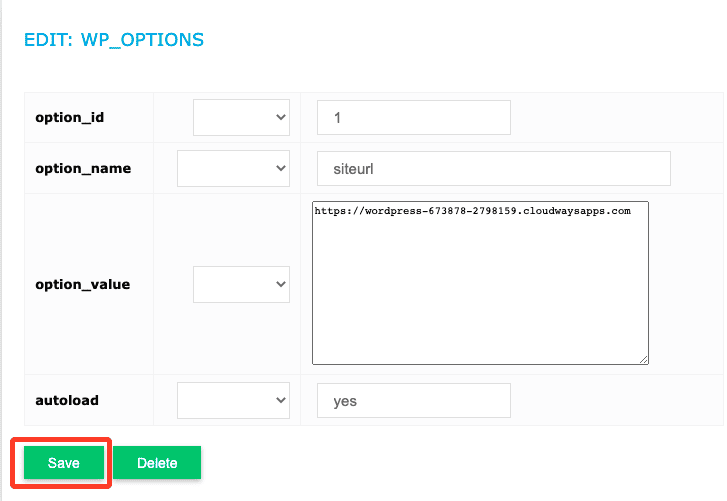
- Change the values of the siteurl and home options to whatever the URL of your live site is. Leave out the trailing slash at the end.
2. Flush your permalinks
A permalink is essentially a permanent hyperlink. When you move your local site to a live server, the permalinks to your posts and pages might not work. So, you have to flush your permalinks first. It’s a very simple process:
- Log into your WordPress dashboard.
- Go to Settings > Permalinks.
- Click on Save changes.
3. Run a search-and-replace operation on your live database
Now, there might still be instances of your localhost URL in your live database, which may cause broken links. To fix this problem, we have to perform a search-and-replace operation, essentially searching for all instances of the localhost URL and replacing them with the URL of your live site. Doing it manually isn’t an option as it may cause issues with data serialization. We recommend using the Better Search Replace plugin.
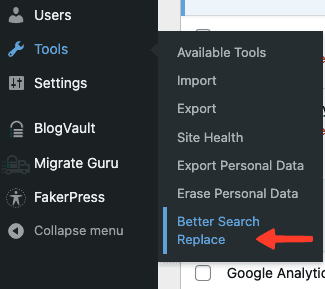
- Install and activate Better Search Replace on your live site.
- Go to Tools > Better Search Replace.
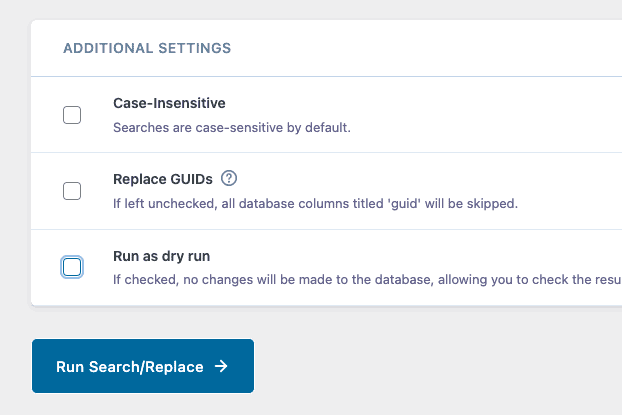
- In the Search for field, put your localhost URL. In the Replace with field, put the URL of your live site. Select wp_posts from the Select tables list.
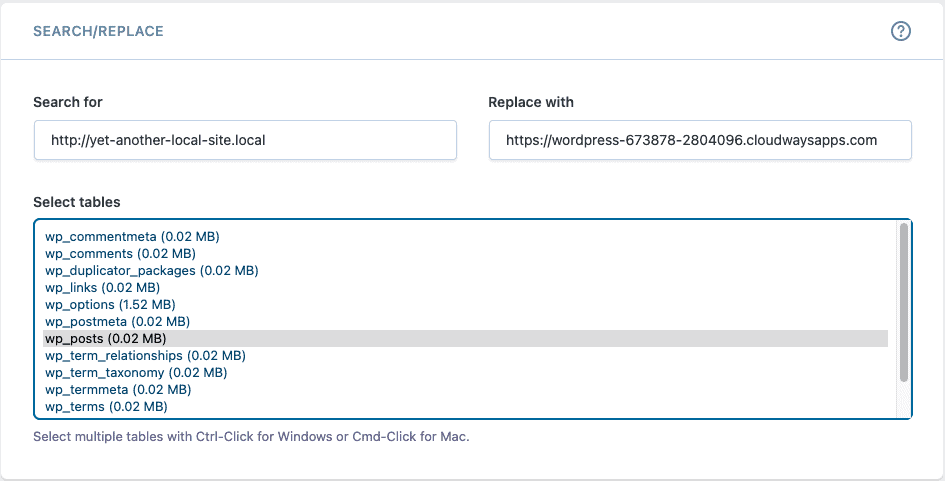
- Next, click on Run Search/Replace at the bottom. Check Run as dry run if you wish to verify the changes before the actual operation takes place. Once you’re happy with the suggested changes, you can uncheck it and run the operation again to make the changes final.
The three tasks above are critical. Additionally, I suggest doing the following:
- Activate SSL on your new site to ensure a secure connection when someone visits your site. Use the Really Simple SSL plugin to do so quickly and easily.
- Test every critical component of your site to make sure it’s functioning properly. This includes pages, posts, hyperlinks, images, analytics code snippets, ads, and so on.
- Disable maintenance mode if you enabled it before moving your local site to a live server.
- Clear all caches related to your site.
In the future, if you wish to make changes to your site, you can easily do so by creating a staging site for it using BlogVault. In addition to creating staging sites, BlogVault takes automatic backups of your site daily, granting you peace of mind.
Troubleshooting issues after making the WordPress site live
I outline some of the common issues that can encounter either during or after the WordPress migration along with possible solutions to them below:
- HTTP ERROR 500: This means your web server is unable to fetch your website. This error can be caused by several things and can be hard to diagnose and resolve. It is why I advise people to disable caching and firewall plugins and to make sure that the PHP versions on the source and destination sites match. If you get this error, head on over to our guide for troubleshooting it.
- 404 Errors with pretty permalinks and images not working: After moving your site to a live server, you may experience 404 errors with your pretty permalinks and when you try to upload images, you may get a white screen and the image won’t upload. If this is the case with you, then it’s likely that the mod_rewrite extension module of the Apache web server software isn’t enabled. You can fix this by resetting your permalinks through Settings > Permalinks. If this doesn’t work, then you’ll have to edit the .htaccess file manually. Make sure your .htaccess file looks like the following:
# BEGIN WordPress
<IfModule mod_rewrite.c>
RewriteEngine On
RewriteBase /
RewriteRule ^index\.php$ - [L]
RewriteCond %{REQUEST_FILENAME} !-f
RewriteCond %{REQUEST_FILENAME} !-d
RewriteRule . /index.php [L]
</IfModule>
# END WordPress
Conclusion
Working on your site locally is a great way of experimenting with it. When you think it’s time to migrate WordPress from localhost to server, you can do so via a plugin or manually. Both processes are straightforward and fairly easy.
Once your site is live, if you wish to make significant changes to it in the future, you can do so with BlogVault. BlogVault lets you create a staging site for your live site, allowing you to work on your website without risk or disrupting your visitors’ experience.
FAQs
Q – How can I move WordPress from localhost to server?
A – You can move your site from localhost to a live server using a plugin like Duplicator or do it yourself using FTP.
Tags:
Share it:
You may also like

How to Limit Form Submissions with Droip in WordPress
Forms are an indispensable part of any website because of their versatility, letting you collect information for various purposes! However, people with ill intentions often attempt to exploit these forms…

How To Manage Multiple WordPress sites
Management tools help agencies become well-oiled machines. Each task is completed with the least amount of effort and highest rate of accuracy. For people managing multiple WordPress sites, the daily…

PHP 8.3 Support Added to Staging Feature
We’ve introduced PHP version 8.3 to our staging sites. Test out new features, code changes, and updates on the latest PHP version without affecting your live website. Update PHP confidently…
How do you update and backup your website?
Creating Backup and Updating website can be time consuming and error-prone. BlogVault will save you hours everyday while providing you complete peace of mind.

Updating Everything Manually?
But it’s too time consuming, complicated and stops you from achieving your full potential. You don’t want to put your business at risk with inefficient management.

Backup Your WordPress Site
Install the plugin on your website, let it sync and you’re done. Get automated, scheduled backups for your critical site data, and make sure your website never experiences downtime again.


