As a powerful WP speed optimization plugin, W3 Total Cache promises to drastically speed up your site. But it’s primarily known for its caching features. Is that enough? What do you really need to make a website fast? If not W3 Total Cache, then what is the better solution.
A slow site can cost you visitors and hurt your rankings, so getting this right is crucial. This guide will cut through the confusion. We’ll break down exactly what W3 Total Cache does, walk you through the best and safest settings for your site, and help you decide if it’s the right tool for the job.
W3 Total Cache is a powerful and free caching plugin. However, true website speed involves much more than that. For a comprehensive, hands-off solution that automatically optimizes every aspect of your site’s performance—not just caching—a service like Airlift is the superior choice.
W3 Total Cache is one of the most popular plugins for WordPress caching. Like all the other performance plugins we tested, we measured it against the pillars of performance solutions
- Caching Features: We looked for a complete caching toolkit, including standard page and browser caching, as well as advanced options like mobile-specific caching and seamless CDN integration.
- Asset Optimization: A crucial aspect is the ability to optimize code files. We checked for features like CSS/JS minification and combination, deferred script loading, and critical CSS generation.
- Media Optimization: Since images are often the heaviest assets, we looked for built-in tools for automatic image compression, lazy loading, and support for next-gen formats like WebP.
- Database Optimization: We assessed its tools for improving database performance, including caching database queries and providing utilities for routine cleanup of post revisions and transients.
- Ease of Use: We evaluated the user interface, the initial setup process, and how accessible the plugin is for beginners versus the level of technical knowledge required for configuration.
- Pricing and Value: We analyzed the plugin’s pricing model, comparing the capabilities of the free version against the cost and features of the Pro version to determine its overall value.
Here is.a quick look at how the plugin held up:

Caching capabilities
Let’s start with what W3 Total Cache does best: caching. This is the main superpower of this WordPress caching plugin.
When you dive into the settings, you’ll see it offers different kinds of caching for your pages, database, and even your visitors’ browsers. It gives you a lot of control with different “methods” like ‘Disk: Enhanced,’ ‘Memcached,’ or ‘Redis.’ Honestly, this can be a bit confusing at first, especially since advanced options like Memcached aren’t available on every hosting plan, yet they still show up as a choice.
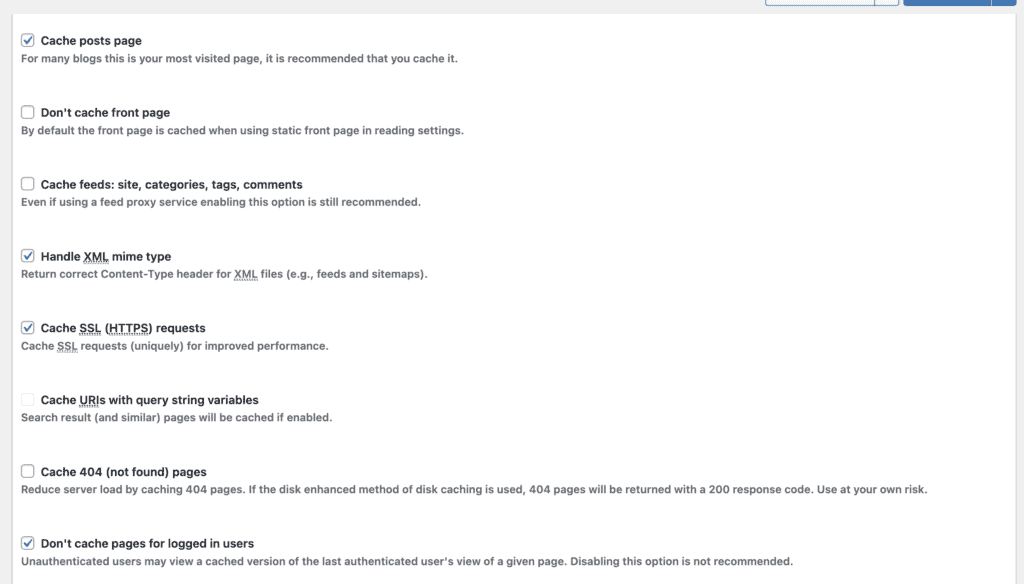
Expert opinion: For things like Database and Object caching, you’ll want to be careful if you’re on a standard shared hosting plan. These advanced features can be pretty resource-hungry. We noticed during our tests that they can cause a spike in server activity.
For the biggest and safest speed boost, your best bet is to focus on Page Cache (using the ‘Disk: Enhanced’ method) and Browser Caching. These two alone will make a huge difference for your visitors and are much less likely to cause any headaches.
Asset Optimization
Optimizing your site’s assets, like CSS and JavaScript files, is a key step in making your website load faster. By shrinking these files and combining them, you reduce download times and the number of requests a browser has to make.
Expert Advice: Use a backup plugin before you install and enable asset optimization on any performance plugin.
W3 Total Cache handles this through its ‘Minify’ feature, which is designed to automatically handle both shrinking and combining your code files. However, this is one of the most powerful—and trickiest—settings in the plugin. Because it actively rewrites your site’s code, there’s a real chance it can conflict with your theme or other plugins, which can cause your site’s layout to look broken or for certain features to stop working.
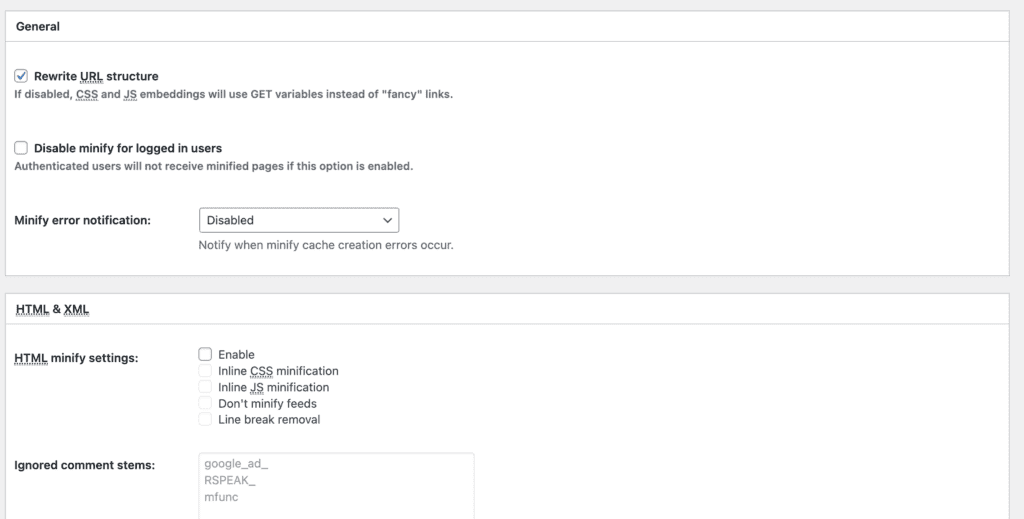
During our testing on a site built with a popular theme and page builder, enabling the default minify settings did cause some of these display issues. Our recommendation is to approach this feature with caution. Instead of turning everything on at once, try enabling just one setting at a time—like combining CSS files—and then thoroughly check your site in an incognito window. For many users, the small speed gain from minification might not be worth the potential headache of troubleshooting.
Media Optimization
When it comes to improving the performance of any website, media files—particularly images—are a bottleneck. Good performance optimization plugins like Airlift functions by reducing file sizes through compression and modern format conversion.
Our review found that the plugin offers no features for the most critical optimization tasks like image compression or automatic resizing. If you upload a large 2MB image, W3 Total Cache will not shrink it.
Expert advice: We compared W3 Total Cache and WP Rocket, we found that WP Rocket was far more efficient at image optimization than W3 Total Cache. It will compress and convert images to optimal versions that are good for performance.
Instead, the plugin’s functionality is strictly limited to optimizing the delivery of your existing media assets. It accomplishes this in two ways:
- Browser Caching: This feature works as advertised, instructing visitors’ browsers to store local copies of images. In our tests, this significantly improved load times for repeat visitors, as images were served directly from their local cache.
- CDN Integration: The plugin provides a robust framework for connecting to a Content Delivery Network (CDN). This is a valuable feature that effectively shortens the distance data has to travel, speeding up image delivery for a global audience.
Database Optimizations
In our review of W3 Total Cache’s database optimization capabilities, we found its scope to be narrowly focused on a single function: Database Caching. Notably, the plugin lacks the common database maintenance utilities found in other solutions, such as cleaning up post revisions or expired transients.
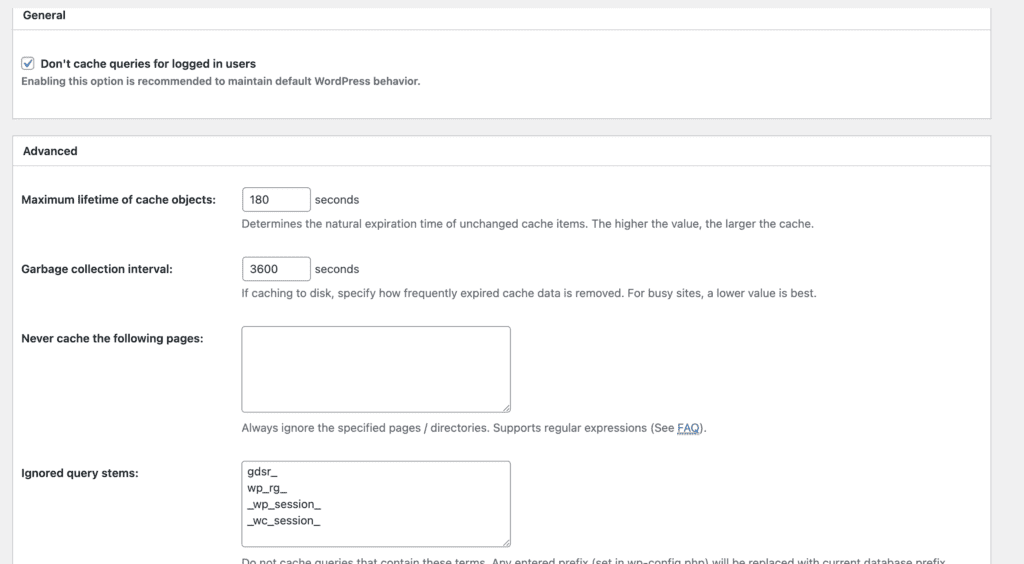
Side note: Take a database backup before you get started with any optimizations. This makes sure that you have something to revert to if it is badly optimized.
Our analysis centered on this feature’s performance in a typical shared hosting environment. When activated, our monitoring consistently registered an increase in server resource consumption, specifically I/O and CPU load. This overhead is a critical concern on multi-tenant servers, as it can lead to performance degradation and risks violating a host’s resource usage policies.
Furthermore, our performance benchmarks showed that for a standard website, enabling the Database Cache resulted in no measurable improvement to page load times or Time to First Byte (TTFB). The resources required by the server to manage the disk-based cache appeared to offset any benefits gained from reducing direct database queries.
Pricing Model
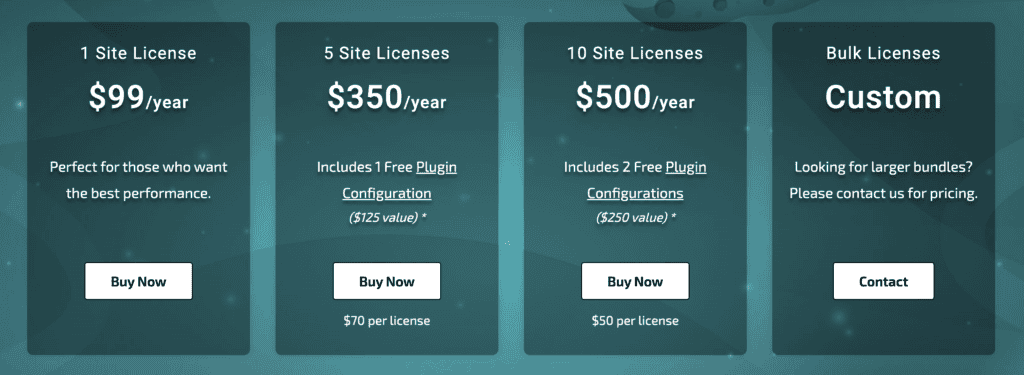
W3 Total Cache operates on a freemium model. However, due to the considerable complexity of the free plugin, the primary incentive for many users to upgrade to the Pro version is access to premium support.
The advanced features included in the Pro plan, such as fragment caching, are developer-centric and offer little utility for the average site owner. This positions the Pro version less as a feature upgrade and more as a paid solution for navigating the complexities inherent in the free product. This model may not be ideal for beginners who are simply seeking an easy-to-use performance tool.
Best W3 Total Cache Settings for Beginners
To get the most out of W3 Total Cache without risking your site’s stability, it’s best to start with a simple, safe configuration. Follow this step-by-step guide to enable the most effective features.
Important First Steps
Before you change any settings, follow these crucial best practices:
- Create a Backup: Always ensure you have a recent, complete backup of your website.
- Use a Staging Site: If possible, test these configuration changes on a staging site first.
- One Change at a Time: Enable and test one major feature at a time. This makes it easy to identify the source of any potential issues.
Step 1: General Settings (The Dashboard)
Navigate to the Performance > General Settings page. Enable only the following two options:
- Page Cache: Check the “Enable” box.
- Browser Cache: Check the “Enable” box.
Leave Minify, Database Cache, and Object Cache disabled. These are advanced settings that can be tested individually later, once your site is running stably with the core features.
Step 2: Page Cache Settings
From the main menu, go to Performance > Page Cache.
- Under the “General” section, locate the “Page Cache Method” dropdown.
- Select Disk: Enhanced. This method offers the best balance of performance and compatibility for the vast majority of hosting environments.
Step 3: Browser Cache Settings
Navigate to Performance > Browser Cache.
- Simply ensure this feature is enabled. The default settings for file expiry times and other options are generally effective and do not need to be adjusted for a basic setup.
Step 4: Minify Settings (Optional & Advanced)
Our strong recommendation for beginners is to keep Minify disabled. This feature is the most common cause of theme display issues and plugin conflicts.
If you choose to experiment with it, proceed with caution:
Expert Advice: We would recommend that you test it out on a staging site first,
- Enable Minify, but start by only selecting the “Combine only” option for your CSS or JS files.
- After saving and clearing your cache, thoroughly test your site’s appearance and functionality in a private browser window.
Step 5: Finalizing Your Changes
After you have saved your settings, two final steps are essential:
- Clear the Cache: Purging your cache is the next step. The changes you made may not be implemented till you do so. Navigate to Performance > Dashboard and click the “Empty All Caches” button.
- Verify Your Site: Open your website in a new private or incognito browser window to see the live version. Click through several pages to confirm that your layout, forms, and interactive elements are all functioning correctly.
Is W3 Total Cache Good?
Whether W3 Total Cache is “good” depends entirely on who is asking. It’s a tool with a very specific user in mind, and for everyone else, it can be a significant liability. Here’s a breakdown of its strengths and weaknesses.
The Pros: Power and Flexibility
- Granular Control: For developers or advanced users, W3 Total Cache offers an unparalleled level of control. You can configure nearly every aspect of caching and asset delivery.
- Comprehensive Features: It bundles page caching, browser caching, object/database caching, minification, and CDN integration into a single, free package.
- It’s Free: The core plugin is completely free, making its powerful feature set accessible to everyone.
The Cons: One piece of a large puzzle
- Incomplete performance solution: It doesn’t handle important optimization features like asset optimization of media optimization. Even database tables aren’t cleaned. So, it’s incomplete.
- Steep Learning Curve: The interface is dense and filled with technical jargon, making it overwhelming for beginners.
- High Risk of Misconfiguration: Unlike simpler plugins, incorrect settings (especially with Minify) can easily break your site’s layout or functionality.
Top Alternatives to W3 Total Cache
For users who want exceptional performance without the complexity of W3 Total Cache, several excellent alternatives exist.
- Airlift: Airlift is more of an automated performance platform than a simple plugin. It’s designed for users who want guaranteed speed improvements without touching any settings. Airlift handles everything from caching and CDN configuration to image and code optimization automatically, backed by a team of experts. It’s the ideal choice for business owners who value their time and want a completely hands-off solution for site speed.
- WP Rocket: WP Rocket is widely regarded as the best premium caching plugin on the market for its blend of power and simplicity. It applies about 80% of web performance best practices upon activation, and its user-friendly interface makes configuring the remaining options incredibly simple. For those who want the control of a plugin without the steep learning curve of W3 Total Cache, WP Rocket is the industry standard.
Final thoughts
Here’s the simplest way to think about it: W3 Total Cache is a fantastic tool for handling one very important piece of the website speed puzzle: caching. And it does that one job very thoroughly.
But here’s the thing: caching is just one piece.
A truly fast website also needs its images shrunk down, its code cleaned up, and its files delivered quickly from a CDN. When you rely only on W3TC, you’re forced to find other tools to solve the problem.
This is where a more comprehensive solution like Airlift really shines. Instead of just handing you one puzzle piece, Airlift solves the entire puzzle for you. It’s a service that handles everything—the caching, the image optimization, the code cleanup, the CDN—all automatically.
Your job is to run your business, not to become a part-time web performance expert. Why stress over mastering one part of the problem when you can have a service that takes care of all of it for you?
FAQs
What is W3 Total Cache?
W3 Total Cache is a free and comprehensive performance optimization plugin for WordPress. Its primary functions are to improve site speed through various methods like page caching, browser caching, database caching, and integrating with Content Delivery Networks (CDNs).
How to use W3 Total Cache?
For beginners, the safest way to use W3 Total Cache is to install it and enable only the core features. Navigate to Performance > General Settings and enable Page Cache and Browser Cache. Set the Page Cache Method to “Disk: Enhanced” and leave more advanced settings like Minify and Database Cache disabled until you are more experienced.
How much does W3 Total Cache cost?
The core W3 Total Cache plugin is 100% free and available on the WordPress plugin directory. There is also a premium version, W3 Total Cache Pro, which is a paid annual subscription that offers additional advanced features and dedicated customer support.
Is W3 Total Cache good?
It can be very good for the right user. For developers and technical experts who need granular control, it is a powerful tool. However, for beginners and most business owners, it is often considered too complex and risky, as incorrect settings can easily break a site. Simpler alternatives often provide better results with less effort.

Shreya has been a writer for as long as she can remember. Now, she writes articles that help WordPress users manage the sites that they're proud of, with little to no coding