How to Build a WooCommerce Store with WordPress? (Step-By-Step Guide)
Bulletproof Backups for Your WordPress Website
Fortify your business continuity with foolproof WordPress backups. No data loss, no downtime — just secure, seamless operation.

Gone are the days when setting up an online business meant incurring a huge expense! Entrepreneurs can access the world of e-commerce platforms instantly and free of cost with WordPress. A WordPress ecommerce store stands out among the rest of the ecommerce sites due to its enhanced functionalities, affordability, and ease of use.
To add to the functionality of websites created with its help, WordPress.org offers a plethora of themes and plugins. It is these added features make the platform the best website builder available today.
Of all the different plugins offered by WordPress CMS, WooCommerce has earned a distinct accolade for the e-commerce conveniences it offers to e-businesses. When you install the WooCommerce plugin on a WordPress website, the end result is a fully functional online store that looks good and provides stellar performance.
Being just a plugin, it can be easily integrated into any existing website. It puts the WordPress website owners in complete control of the way their online store looks and functions. Plenty of additional themes, plugins, and extensions also empower businesses to scale with speed. Lastly, a sturdy user support team of developers ensures that the onboarding process is seamless for all users.
1. Converting an Existing WordPress Site to a WooCommerce Store
Since we have established that WordPress sites with WooCommerce serve as the best kind of e-stores for businesses, it would help to prepare yourWordPress site to integrate the features that the plugin offers.
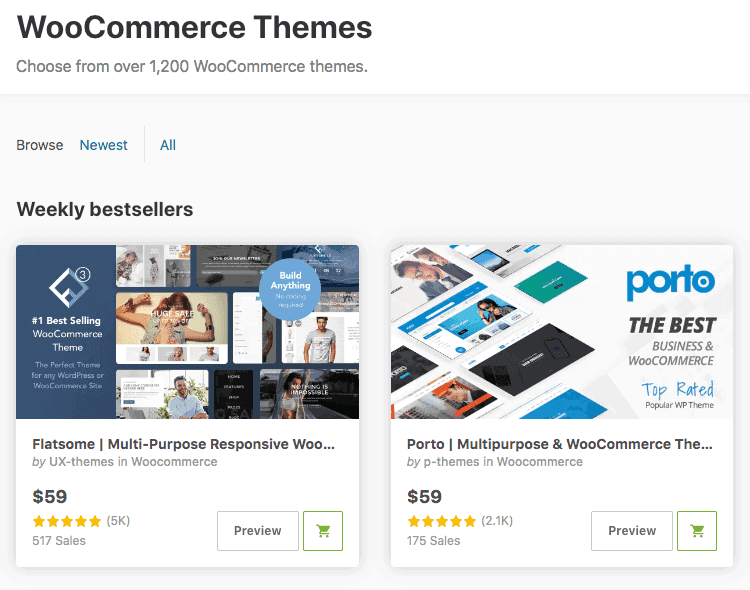
The WooCommerce plugin can be installed on any WordPress website that is compatible with the current version of the plugin. It is also easy to integrate the plugin with many free and premium WordPress themes. A large number of these themes come with templates that accommodate must-have WooCommerce components like the checkout and products pages. You can further enhance the functionality of the WordPress WooCommerce plugin using a variety of extensions or additional plugins.
If you want your online store to excel in terms of looks and performance, upgrade your website to feature the latest version of WordPress. No matter how insignificant a role the plugin plays on your site, you must ensure that all the pages on the site are compatible with the features of the plugin.
2. Setup a WooCommerce Store from Scratch
If you are a business looking to move online, here is a basic guide to help you start on a WordPress website with the WooCommerce plugin. Just follow the steps mentioned below.
Step I: Get a Domain Name & Web Hosting
The foremost thing to do to build an online store with WordPress and WooCommerce is to get a domain name and sign up with a good web hosting services. A domain name will provide you with an identity on the web. There are plenty of domain name providers; choose a domain name that aptly represents your business and is easy to grasp.
Once you pick out a domain name, you can check for its availability with the domain name provider and buy it. The next step would be to consider a suitable web host. Sign up for a plan with a renowned hosting provider and you are good to go.
Step II: Install WordPress
The next step is to install and activate WordPress on your web hosting account. You will be glad to know that this step is easier than it sounds. Go to the ‘user’ section of your web hosting account and click on the ‘Install WordPress’ option or a simple WordPress icon. Next, you’ll have some on-screen instructions for you to follow.
Just do as directed and you will have a fully functional website in no time. You can confirm the live status of your website by entering the domain name URL on a search engine. Next, you access your site from the backend by logging in through your registered email account and password.
Step III: WooCommerce Installation
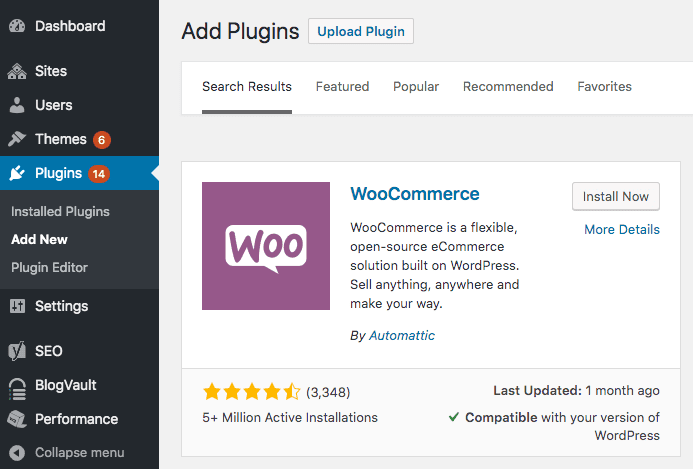
Access your website’s dashboard by logging in to WordPress. Select the ‘Plugins’ option and choose ‘Install New.’ You will be directed to the official WordPress Plugin directory. Look up the WooCommerce plugin on the directory page. You can instantly install the plugin on your website once you locate it in the plugin directory. Then wait for a few minutes and click on the ‘activate’ button that appears on the screen to access the features of the plugin.
WooCommerce allows the user the ease of a WooCommerce setup wizard that eases the configuration process on the website. Even a newbie user can easily develop a store set up with the help of the plugin, on his/her website.
After activating the plugin, it will allow you to set preferences for key features like product type, shipping methods, currencies accepted and appearance. No matter what you are trying to sell, it can help you set up an online store to sell things online.
Install and configure the plugin into the website. Store pages like ‘shop’, ‘cart’ and ‘checkout’ enhance the shopping experience and thus are important components of an e-store. Set up these store pages according to the needs of the business. You can begin adding products once you have configured the plugin as detailed above. Access your site dashboard and click on the ‘add product’ option.
Fill in details like product images, product descriptions, and prices and click on ‘publish.’ You can also specify various criteria about the things you choose to sell like quantity available, color options and style variations; however, these are optional. It is best if you add tags and categories to aid search results on search engines.
Step IV: Install Extensions, Plugins, and Themes
Sometimes businesses need e-stores that are slightly more complex than what the WooCommerce plugin is originally designed to do. For example, there might be a need for language support for sites that cater internationally, or a business might want to increase their retention rates by streamlining billing.
Nonetheless, these advanced business needs should not deter you from choosing the WooCommerce as your preferred e-commerce solution. The WooCommerce extensions are available in both free and premium versions and come with a host of features.
It is easy to choose additional plugins from the WooCommerce platform. Alternately, you can look them up on third-party developer sites. While all the additional plugins listed on the site are compatible with WooCommerce, this can not be guaranteed for third-party plugins.
Certain WooCommerce themes and plugins may not work with WooCommerce. Sometimes even the themes and plugin that pass with flying colors in the development environment fail miserably in the production environment.
Step V: Setup a Staging WooCommerce Website
Website staging allows the creation of duplicate production environment to evaluate the code before it goes into production. A WordPress staging helps in checking the compatibility of new plugins and themes, diagnosing website crashes, looking-up for a suitable backup version and even testing new code. Hence, professional developers always choose to stage a website for switching themes, adding or removing plugins or integrating custom code instead of doing it on a live site.

Staging a site is an ideal way of checking if everything is working properly before the changes are made live on the actual website. BlogVault is an excellent security and backup plugin that takes care of staging your website as well. It allows you to create a staging site of any size instantly, with real-time progress display. The staging site created with this plugin is accessible via SFTP and the WordPress dashboard as well.
💥 The ecommerce world is booming. Set up your very own #WooCommerce store today! 🚀 Click To TweetParting Thoughts
WooCommerce is a free open source software plugin. Thanks to vivid aesthetic liberties, cost-effectiveness, and mobile-friendliness that the setup offers to business owners, it has become everyone’s favorite for selling products.
Setting up a WooCommerce store is not rocket science either. Just some basic knowledge about WordPress sites and the plugin would be enough for even a layman who wants to start selling his products and services through an online store, free of cost. Additionally, managing WooCommerce is easy given the tech support that a seasoned team of developers provides to all its users.
So what are you waiting for? Use WooCommerce to set up an efficient and effective e-store!
Tags:
Share it:
You may also like

How to Limit Form Submissions with Droip in WordPress
Forms are an indispensable part of any website because of their versatility, letting you collect information for various purposes! However, people with ill intentions often attempt to exploit these forms…

How To Manage Multiple WordPress sites
Management tools help agencies become well-oiled machines. Each task is completed with the least amount of effort and highest rate of accuracy. For people managing multiple WordPress sites, the daily…

PHP 8.3 Support Added to Staging Feature
We’ve introduced PHP version 8.3 to our staging sites. Test out new features, code changes, and updates on the latest PHP version without affecting your live website. Update PHP confidently…
How do you update and backup your website?
Creating Backup and Updating website can be time consuming and error-prone. BlogVault will save you hours everyday while providing you complete peace of mind.

Updating Everything Manually?
But it’s too time consuming, complicated and stops you from achieving your full potential. You don’t want to put your business at risk with inefficient management.

Backup Your WordPress Site
Install the plugin on your website, let it sync and you’re done. Get automated, scheduled backups for your critical site data, and make sure your website never experiences downtime again.


