How To Update A WordPress Theme From A Zip Folder?
Bulletproof Backups for Your WordPress Website
Fortify your business continuity with foolproof WordPress backups. No data loss, no downtime — just secure, seamless operation.

A theme is to a WordPress site, what furniture is to a house. They add design and functionality to it. Without it, a website doesn’t work. A failed update can crash your site. This is why a theme update is a delicate process.
A zip folder is one of many ways to update a WP theme. But, there are a few reasons why it can become necessary. If you’re trying to fix a failed theme update, it might be the only way to go. If you’ve customized the theme, you may need to update the theme using a zip folder because an auto-update will overwrite everything.
Whatever your reason, this article will tell you the best ways to do so.
TL;DR: Theme updates are already complicated enough. Doing it manually is even riskier. Instead, use BlogVault to take a backup first. Then create a staging site in minutes, on the BlogVault dashboard. Test your new update and then push those changes to the live site if all goes well.
Updating a WordPress theme is an essential part of maintaining your website’s security, functionality, and appearance. The easiest way is to use the built-in WordPress theme updater or you can use a plugin like BlogVault to update it.
However, automatic updates aren’t always feasible or advisable, especially if you’re using a custom theme. Customizations made directly to the theme files can be overwritten during an update, leading to a loss of specific design elements, functionality, or custom code. To avoid this, it’s strongly recommended to make any customizations on a child theme instead. But, you will need a more hands-on method of updating files.
You can manually upload the theme files via FTP, or, for convenience and flexibility, update the theme by uploading a ZIP file. Interestingly, even within the method of uploading a ZIP file, you have multiple options, such as using the WordPress dashboard or FTP.
No matter which method you choose, it’s crucial to take a backup of your website before making any changes. Using a reliable tool like BlogVault can ensure your data is safe, giving you peace of mind during the update process. With that out of the way, let’s talk about how to update your theme from a zip folder.
Step 1: Prepare for the update
Before you dive into the actual update, you have to take some measures to prevent a failed update. You’re essentially making sure you won’t face any technical glitches and incompatabilities. We’ll also help you take an update in the safest way possible.
- Take a backup: The first and most important step is to back up your website. This includes your database, theme files, plugins, and media uploads. Using a reliable tool like BlogVault can offer automated backups and one-click restorations, ensuring your data is safe and can be easily recovered if anything goes wrong.
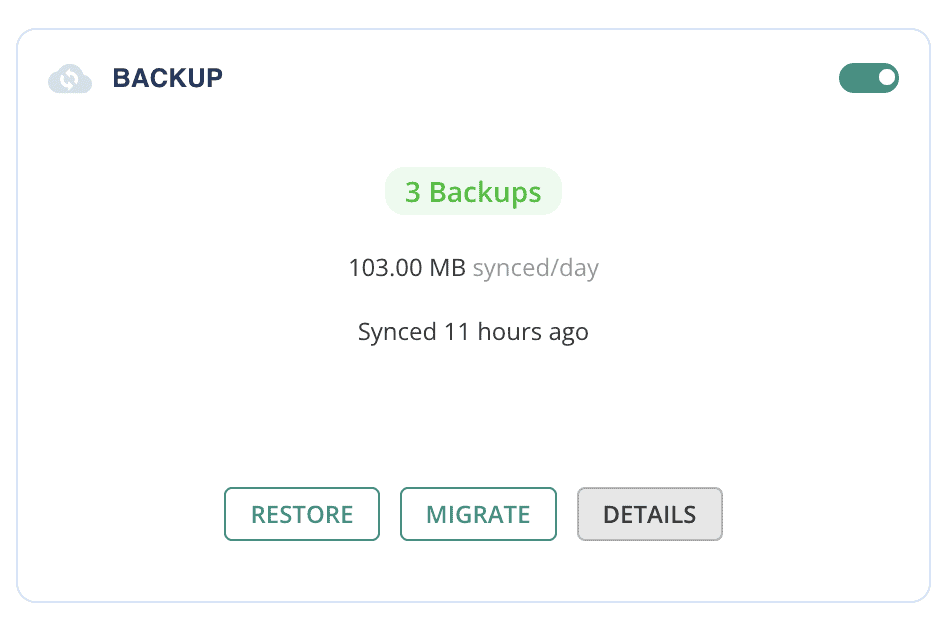
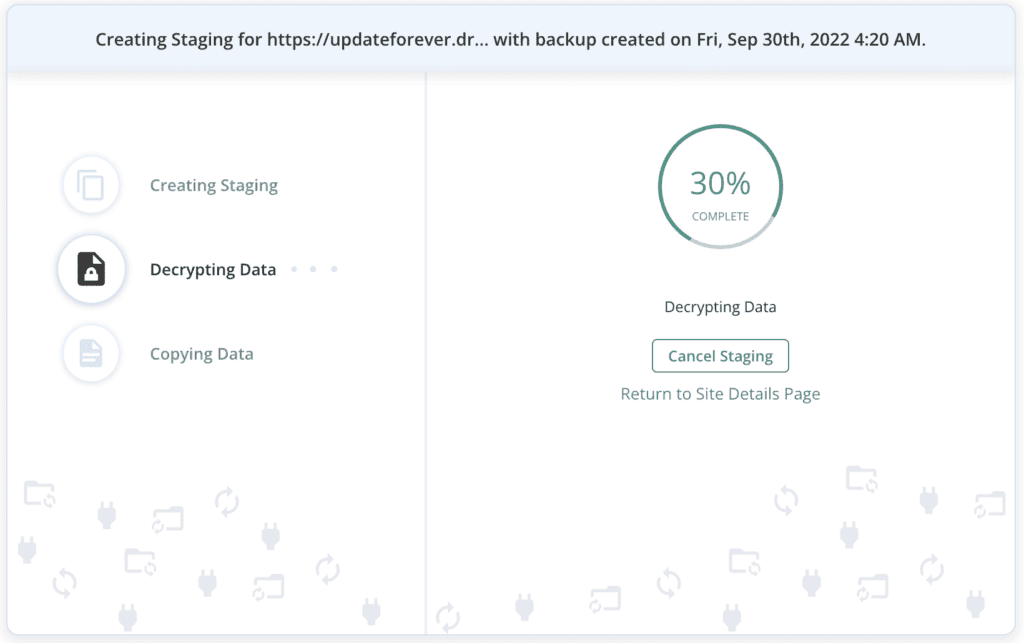
- Create a staging site: This helps identify potential issues, conflicts, and errors that could disrupt your website’s functionality and user experience. BlogVault simplifies this process by creating an easy-to-use staging site. With just a few clicks, you can clone your live site into a staging environment, where you can perform the update, review changes, and ensure everything works perfectly before making them live.
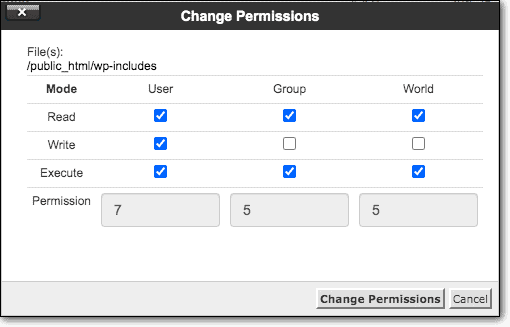
- Verify file permissions: Verifying file permissions is essential for the success of your theme update, as incorrect permissions can lead to issues with file access and updates. This simple step can prevent many potential problems during the update process.
- Check internet connection: A failed or interrupted connection during the update process can lead to incomplete installations, corrupt files, and even website downtime.
- Verify theme compatibility: Reading the theme’s changelog and documentation is a critical step in the update process. It provides insights into new features, bug fixes, and potential compatibility issues with your current WordPress setup. The changelog gives you a detailed account of what has been modified, added, or removed. This allows you to assess the benefits and any potential drawbacks of the update.
- Review customizations: Customizations made directly to theme files—such as unique design elements—can be overwritten during the update process, leading to the loss of these modifications. To safeguard these customizations, meticulously go through your theme files and document any changes that were made. Make a comprehensive note of all custom code snippets, including the specific files and lines where they were added. This way, after the theme update is completed, you can easily reapply these customizations to restore the unique features and functionalities that are crucial to your site’s branding and operations. We know this is a time-consuming process. So, we recommend making customizations to a child theme instead.
- Examine PHP version: Go to your hosting control panel to check the current PHP version your server is running. It’s essential to ensure that this version aligns with the requirements of the theme you’re updating to avoid compatibility issues. If the PHP version is outdated or not supported by the new theme, it may cause errors or impact site performance. Upgrading to the recommended PHP version can help ensure a smooth and efficient theme update process.
Step 2: Update the theme on a staging site
Before implementing any theme updates on your live site, we highly recommend using a staging site for testing. A staging site is a clone of your live website where you can safely test updates, changes, and new features. With BlogVault, you can create a staging site in minutes. It is very easy to use and requires no technical knowledge.
Once you’re done, use one of the following methods to update the theme on the staging site:
Option 1: Using the admin panel
Updating your WordPress theme via the admin panel is a straightforward and user-friendly method. Follow these steps to ensure a smooth update process:
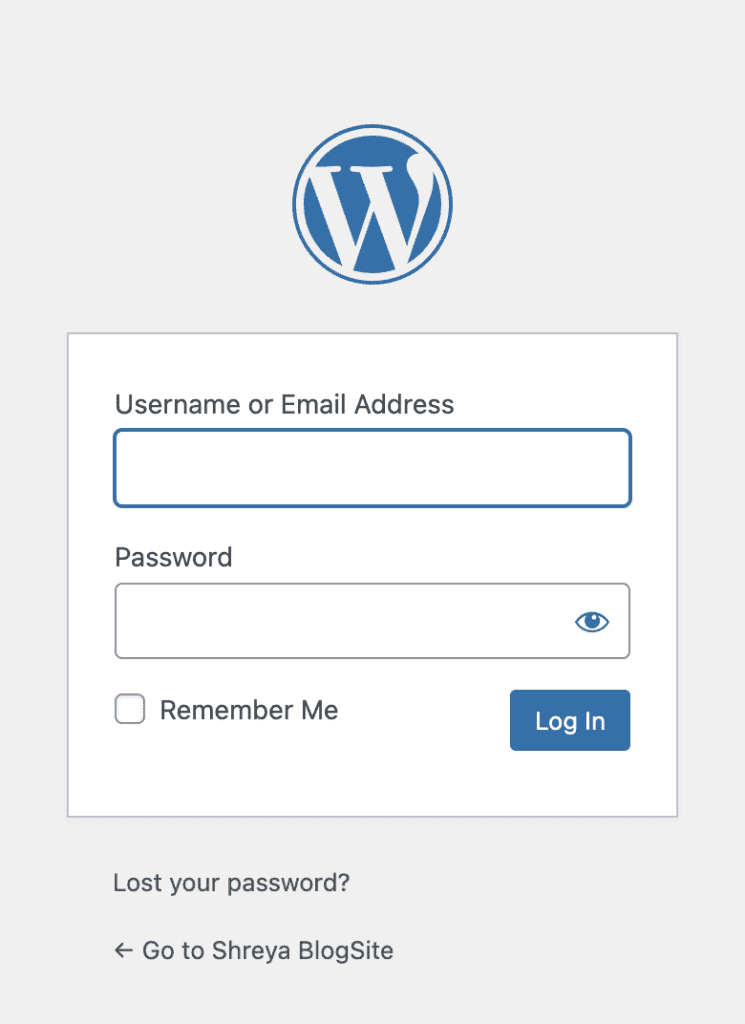
- Begin by logging into your WordPress admin dashboard.
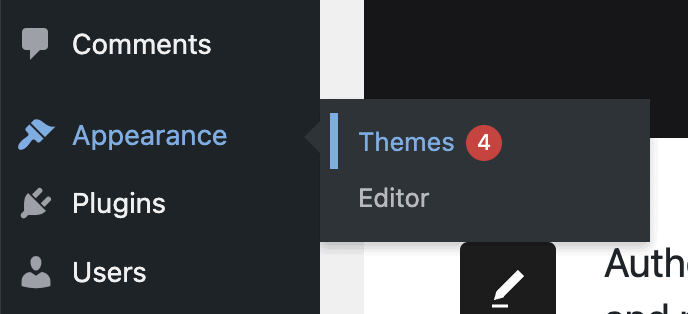
- Go to the sidebar menu, hover over Appearance, and then click on Themes.
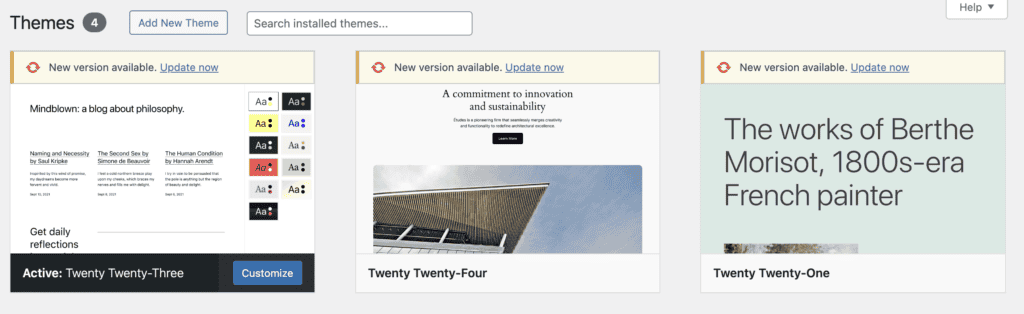
- Before updating your theme, it’s a good idea to activate a different theme temporarily. This precaution helps avoid potential issues during the update process. Hover over any other theme available—preferably a stock WordPress theme—and click Activate.
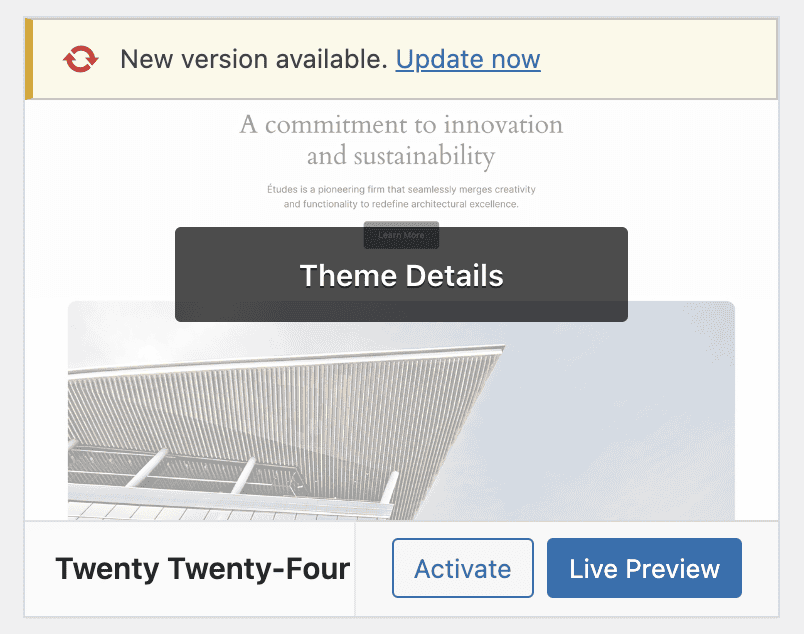
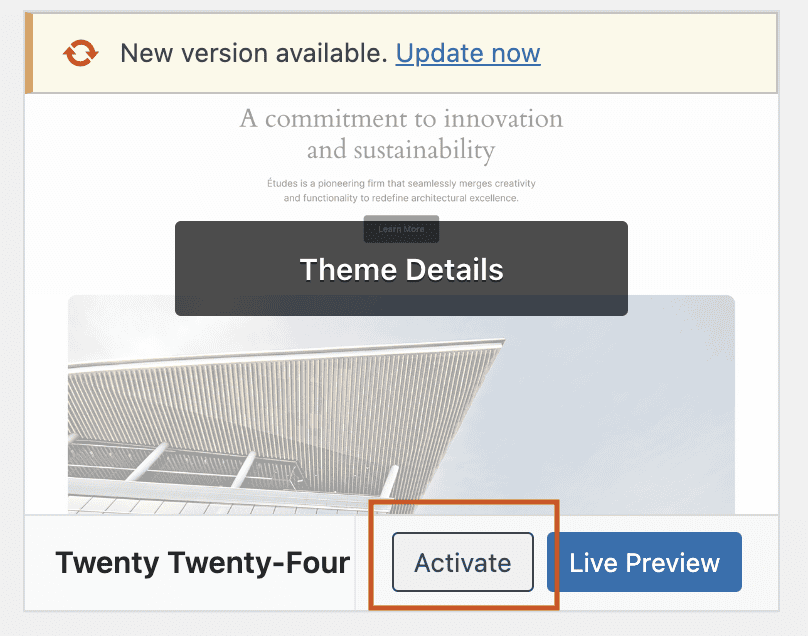
- Next, hover over the theme you want to update and click on Theme Details.
- At the bottom, click Delete. This way the existing file for that theme will be removed.
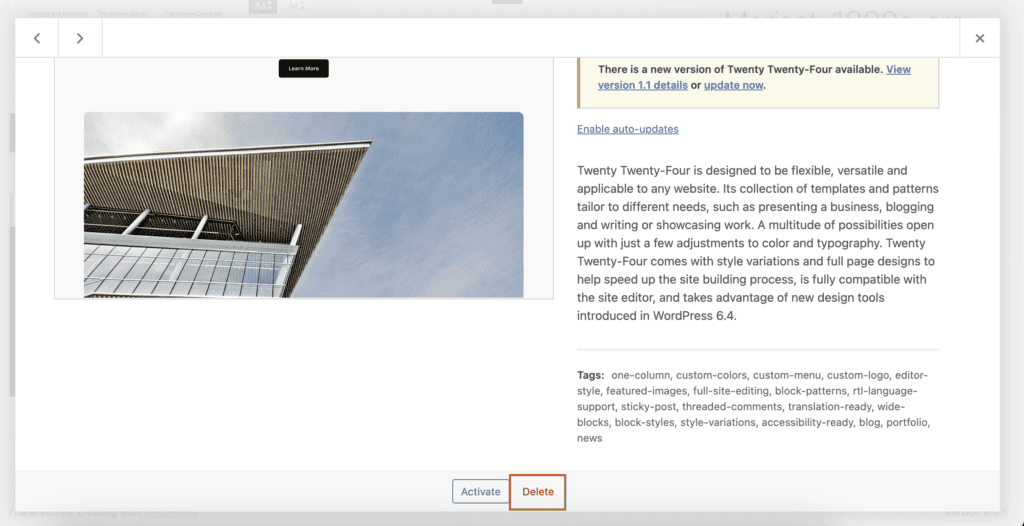
- In the Theme Details window, locate and click on the Add New button. Click on Upload Theme and then choose the new theme ZIP file from your computer and upload it.

- Once the upload is complete, click Activate to set your newly updated theme as the active theme for your website.

Option 2: Using alternative (manual) ways
Using the WordPress admin panel is the most straightforward method for updating your theme. However, there are manual alternatives that can be equally effective. Below are detailed steps for updating your theme using cPanel and an FTP client.
Using cPanel
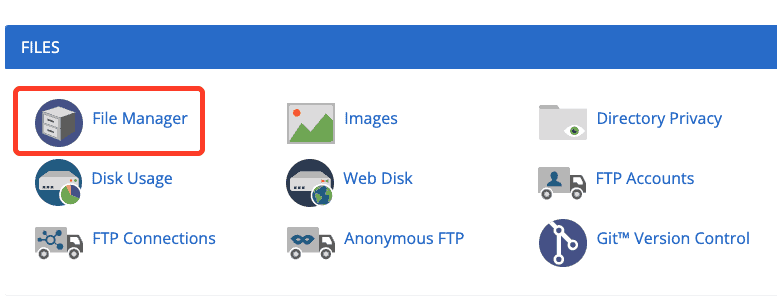
- Log in to your cPanel dashboard and open the File Manager.
- In the File Manager, navigate to the `wp-content/themes` directory where all your themes are stored.

- Click on the Upload button in the File Manager.
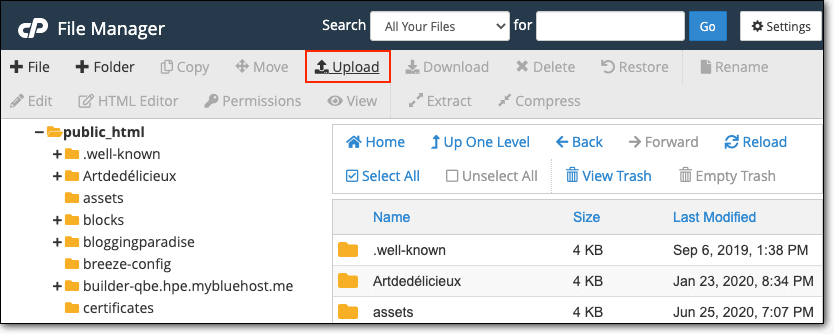
- Choose the zip file of the new theme from your computer and upload it.
- After the upload is complete, find the zip file in the Themes folder.
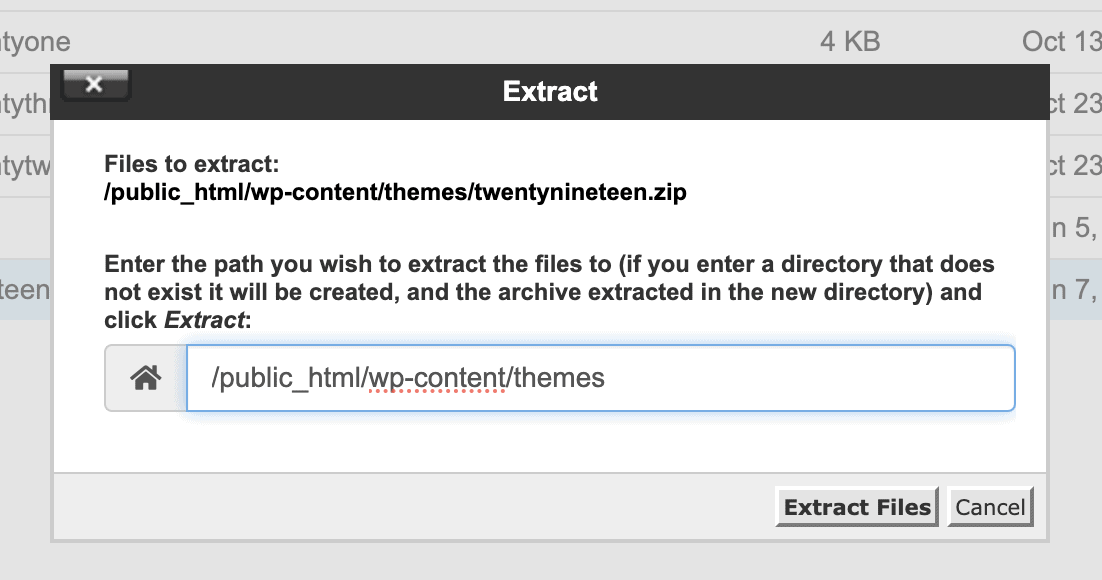
- Right-click on the zip file and select Extract

- Choose to extract it directly into the themes folder.
- If you are updating an existing theme, make sure to back up the old theme folder before replacing it. If the extracted folder has the same name as the existing theme, it will overwrite the old files.
- Finally, go to your WordPress admin panel, and navigate to Appearance in the sidebar. Then, click Themes, and activate the newly updated theme.
Using an FTP Client
- Before making any changes, back up the folder of the existing theme by downloading it to your local computer.
- Connect to your server using an FTP client like FileZilla. Navigate to the `wp-content/themes` directory and delete the old theme folder.
- Upload the new theme folder (unzipped) from your computer to the `wp-content/themes` directory.
- Once the upload is complete, go to your WordPress admin panel, and navigate to Appearance in the menu. Then, click Themes and activate the newly updated theme.
If you’re struggling with this, make sure you’re uploading it correctly, and uploading the right folder. If all else fails, reach out to the developer.
Step 3: Replicate steps on live site
After thoroughly testing and updating your theme on a staging site, it’s time to replicate the changes on your live site.
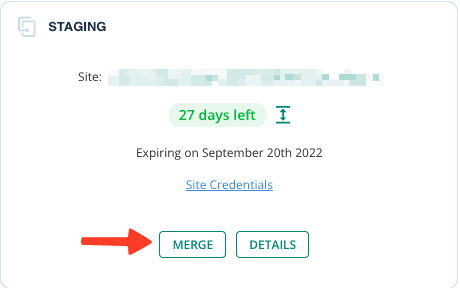
If you used BlogVault to create the staging site, this process is incredibly straightforward. Simply log into your BlogVault dashboard. Navigate to the staging section you’ve worked on, and click on Merge. This will automatically synchronize all the updates, ensuring that your live site reflects the tested changes. Best of all, BlogVault will do it without any downtime or disruption.
Step 4: Test everything
We’ve talked about how a theme update can be finicky. Once you’ve successfully updated the theme on your live site, thorough testing is crucial to ensure everything operates flawlessly. Here are some things to look out for.
- Navigate through various pages to check for broken layouts, missing images, or alignment issues.
- Test all menu links, dropdowns, and navigation features.
- Submit contact forms, comment forms, and other interactive elements.
- Ensure you can log into your WordPress admin panel without issues.
- Reactivate your plugins incrementally and test their functionality.
- Check mobile and tablet views.
- Use tools like Google PageSpeed Insights or GTmetrix to check site speed and performance.
- Ensure your plugins and settings are intact and functioning.
- Verify meta tags and schema markup are correctly displayed.
- Create a new backup of your updated site using BlogVault or another backup solution.
- Encourage users to report issues and set up monitoring tools for alerts.
- Monitor error logs for any new issues.
Should you update a WordPress theme via a ZIP folder?
Updating a WordPress theme via a ZIP folder is a common practice, but it raises some important considerations. This method can be convenient and straightforward, especially for those who prefer manual control over their website updates. However, it’s not without its risks and potential pitfalls.
- Keeping track of theme versions manually can be cumbersome. Automatic updates handle version control more efficiently. But, they’re not always available. So, keep this in mind.
- Errors such as incorrect file uploads, extraction issues, or failure to overwrite the right files can occur, potentially causing website functionality or design problems.
- Manually updating themes might not handle dependency checks as well as automatic updates do, leading to potential compatibility issues with other plugins or WordPress itself
What are the best practices around theme updates?
Updating a WordPress theme via a ZIP folder is a common practice, but it raises some important considerations. In this section, we’ll explore some measures you can put in place to update a theme as safely as possible.
- Always perform a full backup of your site, including both files and the database, before updating any theme. This ensures you can restore your site if something goes wrong.
- Make customizations in a child theme rather than altering the parent theme directly. This way, your changes won’t be lost during updates.
- Test theme updates in a staging environment first to catch any issues before applying them to your live site.
- Verify compatibility with your WordPress version, plugins, and custom code before updating.
- Review the release notes or changelog provided by the theme developer to understand what’s new and if any major changes could impact your site.
- After updating, clear your website’s cache to ensure that changes are reflected properly.
- Check theme settings and functionality after updating to ensure everything is working as intended and no configurations were reset.
- Keep an eye on website performance and functionality post-update to quickly identify and address any new issues
Final thoughts
Theme updates are necessary parts of site maintenance. But, they are not always simple. Themes are so critical to functionality that if anything goes wrong, your site can crash. This is why we recommend you take a backup and test the update on a staging site first. BlogVault can do both.
Install the BlogVault plugin and set it up. The plugin will automatically take a full backup. Then, create a staging site in minutes. Then, test the update on the staging site. If all goes well, merge the changes and push them to your live site. That’s as safe as you can be.
FAQs
How do I manually update a theme in WordPress?
To manually update a theme in WordPress, you can use either the cPanel or an FTP client.
For the cPanel method, log in to your cPanel dashboard and open the File Manager. Navigate to the `wp-content/themes` directory, where your themes are stored. Click the Upload button and select the new theme ZIP file from your computer. Once the upload is complete, locate the ZIP file in the themes folder, right-click on it, and select Extract. Make sure to back up your old theme folder before extracting if you’re updating an existing theme, as this will overwrite the old files. After extraction, go to your WordPress admin panel, navigate to Appearance > Themes, and activate the updated theme.
For the FTP method, connect to your server using an FTP client like FileZilla. Back up the existing theme folder by downloading it to your local computer, then delete it from the server. Upload the new theme folder (unzipped) to the `wp-content/themes` directory. Finally, go to your WordPress admin panel and activate the updated theme.
How do I automatically update my WordPress theme?
Automatically updating your WordPress theme can be a hassle-free process, especially if you’re using a theme from the WordPress repository. To enable automatic updates, log in to your WordPress admin dashboard and navigate to Appearance > Themes. Find the theme you wish to update and click on the Theme Details button. If an update is available, you will see an Update Now button. Clicking this will start the automatic update process. Additionally, you can enable automatic updates for your themes globally by navigating to Dashboard > Updates and clicking on the Enable automatic updates for all themes link. This ensures that your themes are always up-to-date with the latest features and security patches without any manual intervention.
How to apply a theme from a ZIP file?
Applying a theme from a ZIP file is a simple and effective way to upload a new theme or update an existing one. First, log in to your WordPress admin dashboard. Navigate to Appearance > Themes, then click on the Add New button at the top of the page. On the next screen, click the Upload Theme button, then choose the ZIP file of the theme from your computer and click Install Now. WordPress will automatically upload and unpack the ZIP file. Once the upload and installation are complete, you’ll see an option to activate the theme. Click Activate to set the newly uploaded theme as your site’s active theme. If you are updating an existing theme, it’s a good practice to activate a different theme temporarily before uploading the new ZIP file to avoid potential issues during the transition.
Tags:
Share it:
You may also like
How To Backup WordPress Site To Computer?
What do crashed sites, failed updates, and human error have in common? They are all fixable… if and only if you have a backup stored securely. Without a backup, you’ll…
How To Recover WordPress Website: A Step-by-Step Guide
Imagine waking up one morning and discovering that your WordPress site is completely down. Instead of your familiar homepage, you’re greeted with an error message or, worse, a blank screen…
WordPress Theme Update Failed: Easy Fix
You’ve just initiated a theme update on your WordPress site. But instead of a seamless process, you’re staring at an error message. It’s also possible that you’re staring at a…
How do you update and backup your website?
Creating Backup and Updating website can be time consuming and error-prone. BlogVault will save you hours everyday while providing you complete peace of mind.

Updating Everything Manually?
But it’s too time consuming, complicated and stops you from achieving your full potential. You don’t want to put your business at risk with inefficient management.

Backup Your WordPress Site
Install the plugin on your website, let it sync and you’re done. Get automated, scheduled backups for your critical site data, and make sure your website never experiences downtime again.


