How To Change Theme in WordPress Without Breaking Your Site
Bulletproof Backups for Your WordPress Website
Fortify your business continuity with foolproof WordPress backups. No data loss, no downtime — just secure, seamless operation.
Do you want to change a WordPress theme, but are unsure how to do it without losing content or breaking your site?
It is exciting to work with WordPress themes. They are changeable and you can quickly modify the look and feel of your website. Your site might have outgrown the existing theme and would benefit from a new look with some additional features. A WordPress theme can accomplish all of those things easily.
However, as themes have become increasingly more complex and customized to different types of websites, like e-commerce stores, for example, it does mean that they cannot be swapped for each other seamlessly. Page builders that are built on top of themes have the ability to add custom JavaScript and jQuery code, which can complicate WordPress theme changes.
Ideally, when changing WordPress themes, you want to keep the existing content and avoid downtime as far as possible. You may also like to keep the existing functionality, so it is more than just going into wp-admin and activating a new theme.
TL;DR: Change WordPress theme safely and easily with BlogVault. First, install the new theme on a staging site, and then, once you are 100% certain everything works correctly, move it to your live site. No downtime, no broken website, no risk. Use BlogVault to create a staging site in minutes, and take a backup of your site. This is the industry-standard method for making changes to your site, and you can rest assured that your site is always safe.
Video Tutorial:
What is a WordPress theme?
A WordPress theme is often described as the visual design of a site, and to a certain extent, that description is accurate. However, it is both more and less than the design.
A theme is a fundamental part of your WordPress website. It is so critical that a site will not work unless there is an active theme. It contains site information about headers, footers, page sizes, widgets, and more. Without this info, there is no way to render the website. Additionally, it contains templates for common elements like posts, pages, listing pages, forms, and so on.
However, the theme is only responsible for how the content appears on the website, but not the content itself. For instance, a theme doesn’t store image information, which can arguably be a part of the visual design. Images are stored in the database and are considered to be content.
Note: Themes are different from page builders. WordPress requires every website to have a theme, otherwise, it will not function. Page builders are usually drag-and-drop editors that build upon existing themes, but they are not necessary for a site.
Things to consider when changing WordPress theme
If your site is brand new, or has limited content and visitors, changing a WordPress theme is not difficult. You can go into Appearances, and then into Themes in wp-admin and switch to whichever theme you like most.
This process becomes more complicated if your site has customisations: a fair few plugins, premium themes, a lot of content, significant traffic, or a mix of several of these factors. When changing WordPress themes, you want to retain all the information and potentially the functionality as-is, so that your site works as expected. The complications arise because it is unlikely that one theme can perfectly replace another one.
Additionally, newer themes are evolving to be more complex, and use code like JavaScript. Code can conflict with other code, like that of plugins for instance. (Generally, you won’t see too many conflicts with WordPress core, because themes are usually tested on major installations of WordPress.) Conflicts can cause your site to break entirely and become inaccessible, in which case a backup is invaluable to restore your WordPress website and reverse the damage.
There are some things that will change with the theme, and things that won’t. WordPress core and most plugins are rarely tied to themes, and operate independently. Content is a little trickier. Although content is not tied to a theme, there are additional settings like widgets or pages that are theme-specific, which may be affected by a change in theme. For example, how much of the page width is used for an image is dictated by the theme, but not the image that is displayed.
Choosing the right theme for your WordPress website
There are a plethora of great WordPress themes available, so much so that it can be hard to choose. Of course, there is the overall design you want for your website, but apart from the look and feel of your website, there are other important considerations for choosing a WordPress theme.
- Compatibility with browsers: This is increasingly important as more devices proliferate, and screen sizes vary significantly. Google also checks for responsiveness on mobile and tablet devices, and uses it as a factor for ranking. Although responsiveness is almost a de facto standard by now, some themes may still not render well on all viewports.
- Plugin support: More complex themes or page builders, require add-on plugins for extended functionality. Where there is code, there is complexity, so check for compatibility with existing plugins.
- Compatibility with existing site: If your existing site uses page builders or complex themes like Elementor or Divi for instance, the layout and blocks will certainly be affected by a theme change. Page builders have their own theme as a building block, because WordPress requires a theme to function.
- Theme support: In our considered opinion, it is always better to opt for premium themes (and plugins), because of developer support. When things go wonky, support is invaluable to solve issues quickly and without headaches.
Things to do before changing a WordPress theme
Making any large-scale change on your WordPress website can be scary because so many things can go wrong. If your site has content and visitors, the stakes can be quite high. In the worst-case scenario, even something that seems as straightforward as a theme change can break your WordPress website.
We’ve put together this essential checklist of things to do before changing a WordPress theme. This checklist is your best guarantee for success, and even if something does go sideways, your website is 100% secure and recoverable.
- Backup your website: If the worst should happen, a full backup can save your website. This is your one, ironclad guarantee. If you do only one thing on this list (although we recommend doing everything), please backup your website.
- Copy all custom CSS on your website: In order to customise some aspects of your website, later versions of WordPress allow you to add custom CSS. If the CSS is added via a plugin or to a particular page or post, then it is unlikely to be affected. However, you can also add custom CSS directly to a theme. Before changing the theme, you need to save those CSS snippets, otherwise, they will not automatically be carried over to the new theme.
- List things you need to verify once the new theme has been installed:
- Important pages (homepage, landing pages, about, and contact pages, for example), menus, images, links, products, and so on.
- Tracking pixels and analytics code snippets which are usually inserted into the header file of the active theme, so they may not carry over into the new theme. Make a list of all active analytics integrations, and remember to retrieve them from the various analytics tools again after changing the theme, or alternatively save them to a file and copy them back later.
- Over and above design elements, there can also be things that are specifically important to your website. Say you have a blog on your website, how does the theme impact the listing, categories, and the individual post? These are important to consider. If you have an e-commerce site, you need to check the product pages, listings, etc.
- Check the current load times of your site: This is an important metric for your website, so that you can benchmark the new theme against this baseline. Ideally, your new theme should improve load times only. If the load times go in the other direction, it is problematic for user experience.
Some points to note before switching WordPress themes
Does your existing theme come with its own homepage? Certain themes have a special homepage that doesn’t follow the typical WordPress hierarchy, so if you have one of those, it will disappear with the new theme. To find out if your existing theme has a special homepage, check with the developer that set up the theme, or reach out to the theme developer for more info.
You may see an option to switch to this theme preserving my homepage content. You need to make sure this option is selected, otherwise it will load the demo content of the theme, and your existing homepage will be saved as a draft in pages.
Some themes will need additional installations, in the form of companion plugins. These add-ons can contain things like icon sets, templates, landing pages, etc. Most heavily-customisable themes will have add-on plugins, and it is worth exploring those for additional functionality.
How to change a WordPress theme (4 Best methods)
There are 4 ways to change a WordPress theme, although all aren’t equally effective or safe. We will cover each method in turn, in the order of most to least recommended.
- Use a staging site
- With live preview
- Use a dedicated theme changer plugin
- Manually change theme
How to change WordPresss theme without losing content (using a staging site)
The best way to change anything on your site is to use a staging site. Staging sites are exact replicas of your live site, which allow you to test changes in near-identical circumstances to forestall any issues.
BlogVault comes with an integrated staging feature, in addition to the automatic backups, so you can skip the backup step in the pre-installation checklist above.
Here is how to create a staging site on BlogVault to change a WordPress theme:
1. Create a BlogVault account, and wait for your site to sync
2. Once the site syncs, go into the site details page on the BlogVault dashboard
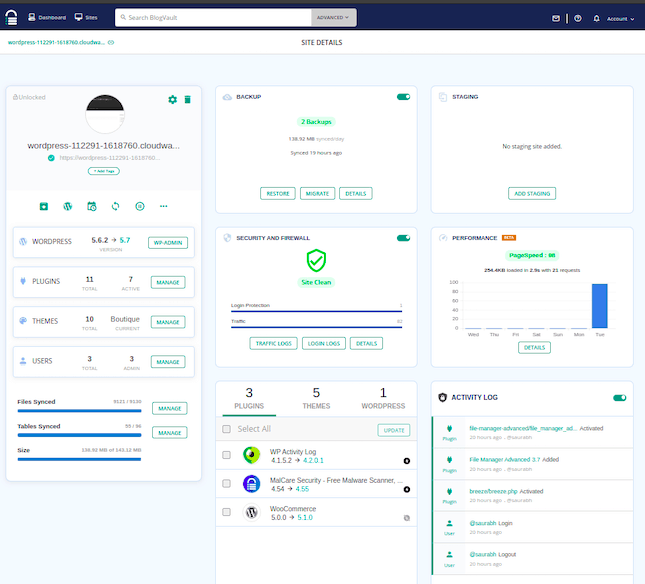
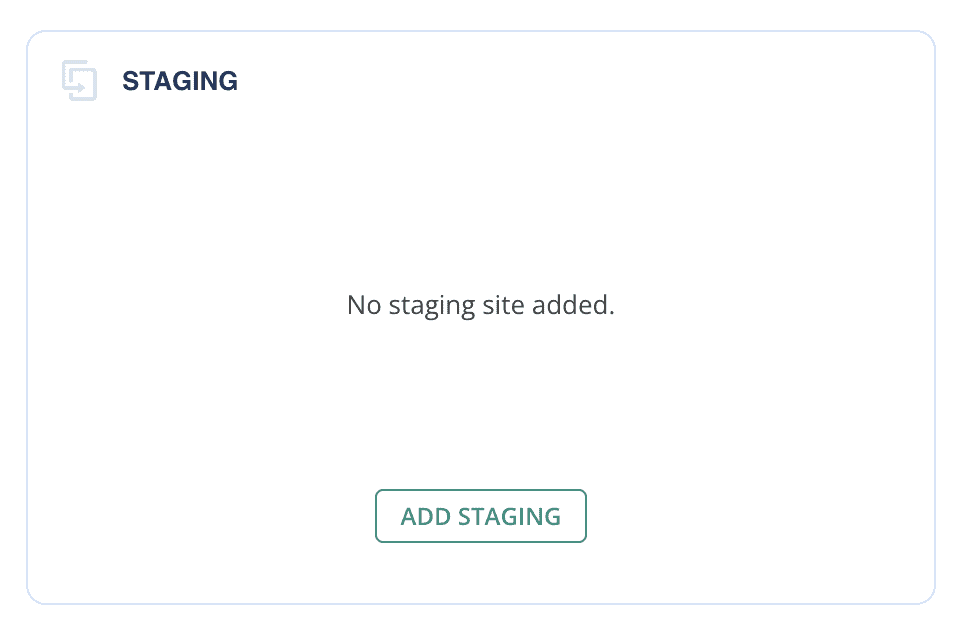
3. Click on Add staging
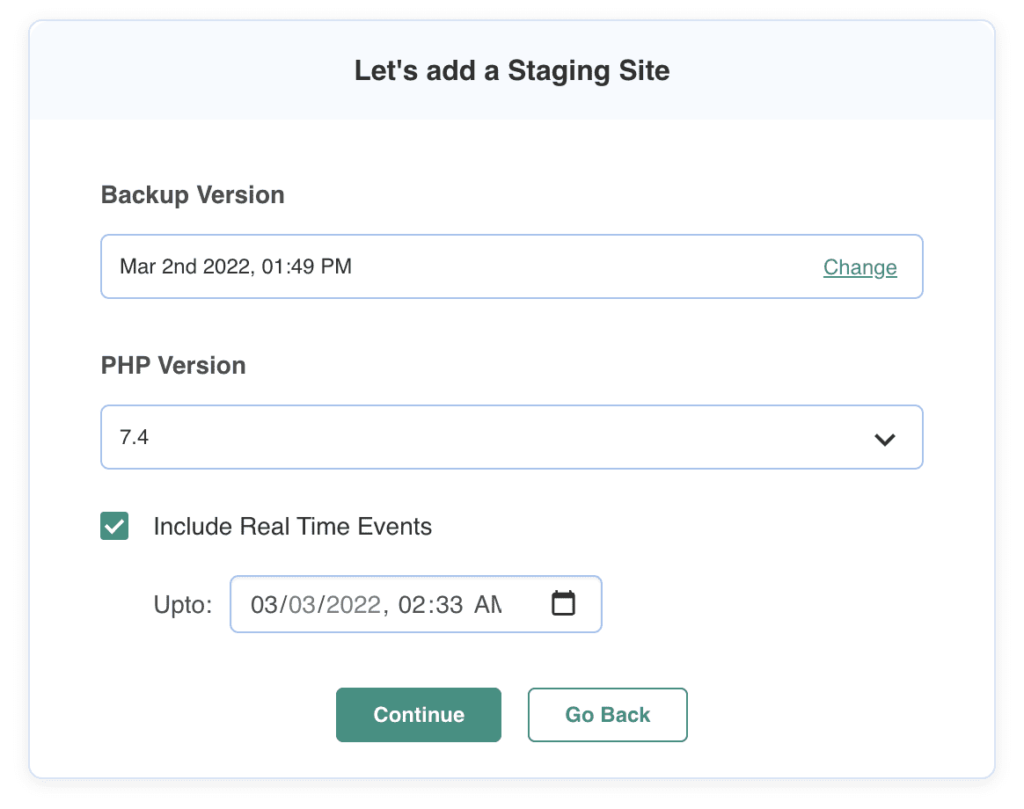
4. Select which backup to use to create the site. By default, the latest backup is selected. If you have a new BlogVault account, then the first sync is used to create the staging site.
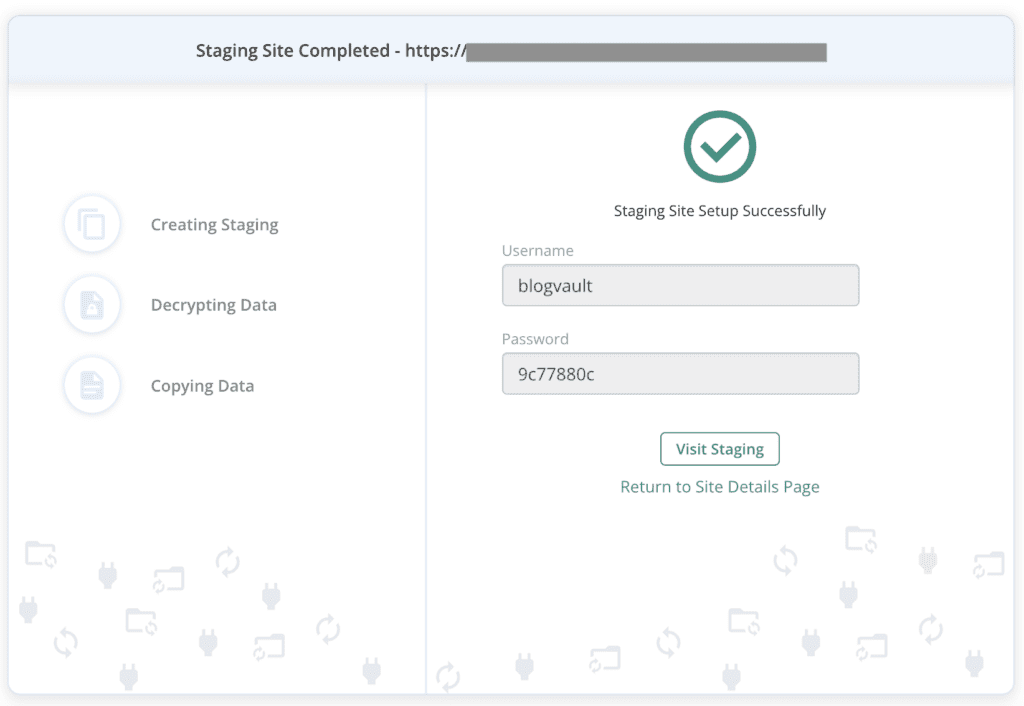
5. Once the site is created, copy the credentials to visit your site. To log into the staging site, use the same wp-admin login details as on your live website.
6. Update the theme as you would on your live site, and check it thoroughly.
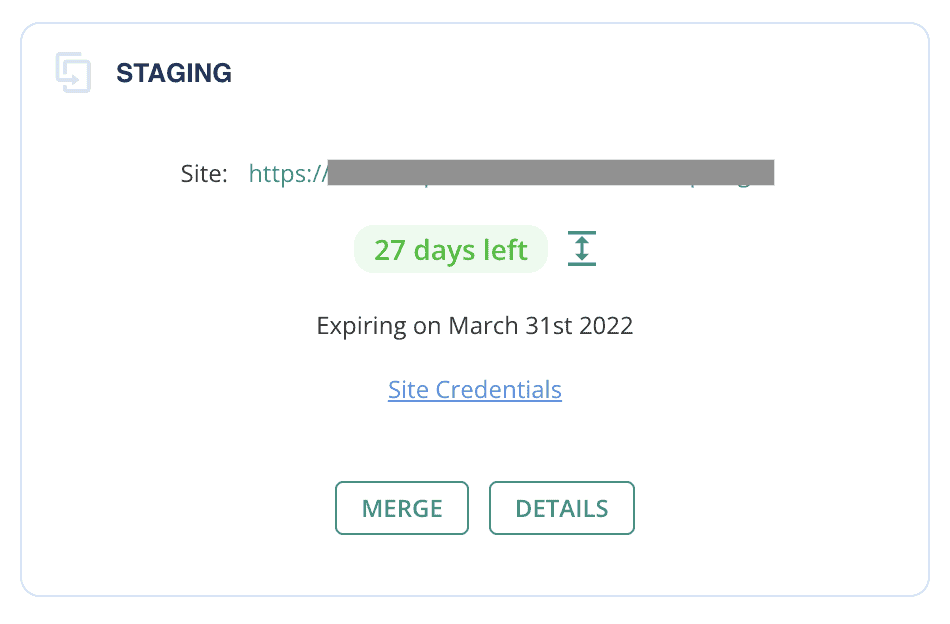
7. Once you are satisfied with the update, and finished troubleshooting, you’re ready to make the change live on your site. Go back to the BlogVault dashboard and Merge the changes.
8. BlogVault creates a comparison of both the files and the database between the two sites for review. You can select which changes you want to keep and which to discard from here. Click on Next.

9. Enter your FTP credentials, and complete the merge.
Your live site will have been updated with changes that are thoroughly tested on a replica site, and therefore there is no danger of losing content or breaking the site.
Why we recommend using a staging site for theme changes
- There is no one-size-fits-all-websites process to change a WordPress theme and have everything working as expected. It is important to make the change mindfully, and test everything before and after to make sure it tallies.
- You don’t want to have to do this testing on your production site, that’s why staging sites are so important. Try out everything on staging first, and only when you are satisfied, you can make the change on the live site. The alternative to a staging site is to migrate the website to a local machine, test the changes there, and then move it to production. This adds considerable mileage to the work needed to change a theme, and can be safely avoided with a staging site.
- You will be reducing downtime significantly, and making sure the experience isn’t broken for visitors.
Staging sites are the development standard used by engineers to make changes to live websites. They are usually tedious to create and maintain because, ideally, they should exactly replicate the live site. With BlogVault though, you can create and use a staging site in seconds.
Change theme in WordPress using Live Preview
You can change the WordPress theme on the live site from the wp-admin of your site easily, although we don’t recommend this method for complex themes and page builders. You can check out how the new theme will look on your website before activating it with the live preview, but it is necessarily limited. Also, the live preview will not forestall any code conflicts.
To change a WordPress theme from wp-admin, you need to follow these steps:
1. Enable maintenance mode before making any changes to minimize disruption to visitors. You can do this by installing a dedicated plugin, WP Maintenance Mode. It puts up a notice to indicate that your site is undergoing changes, so that visitors can expect odd behavior. This is especially useful for e-commerce stores, so that no transactions fall through the cracks, causing issues later.
2. Go into Appearance, and then Themes on wp-admin
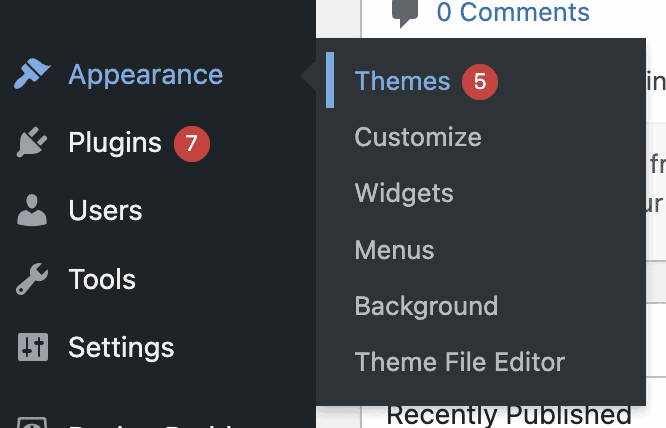
3. Click on Add New

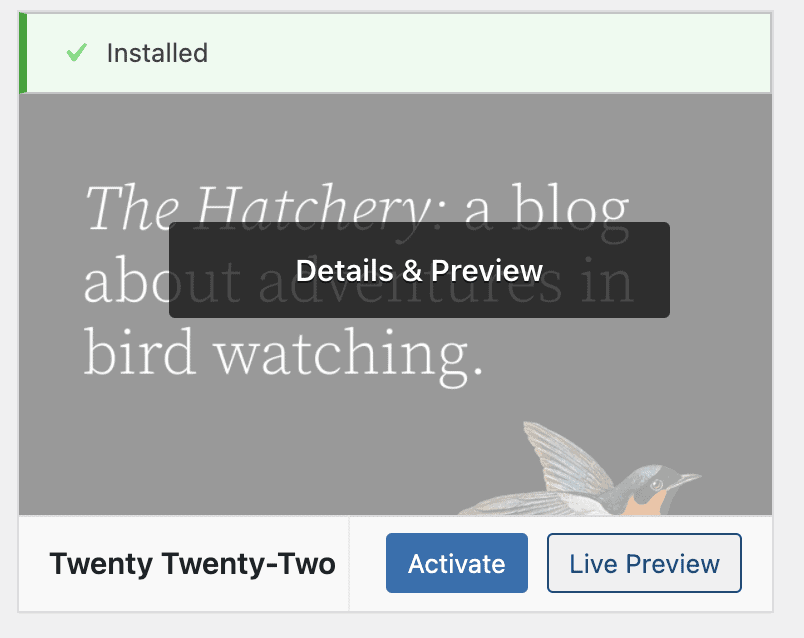
4. Identify the theme you like, and click on Install
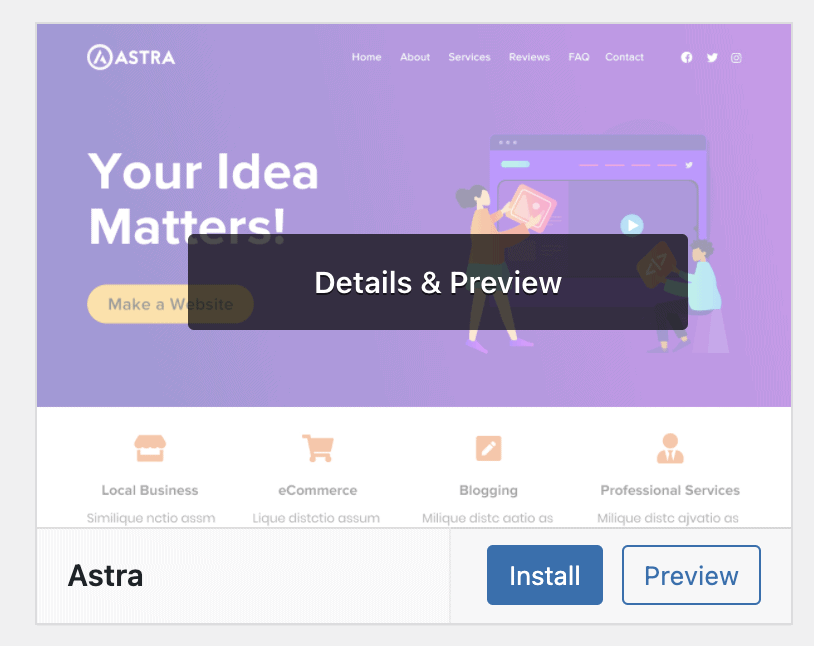
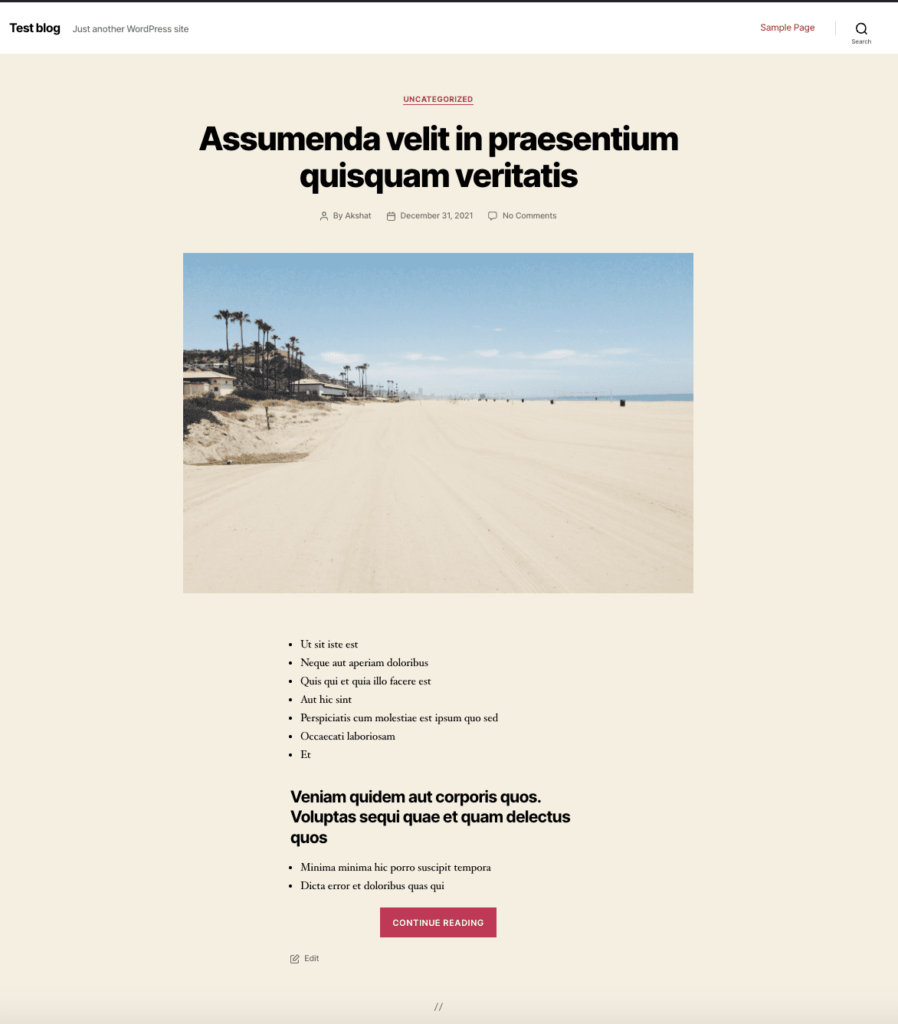
5. Hover over the installed theme to see options, and click on Live Preview. The theme loads with your live website content, which you can play around with a little to see how everything works.
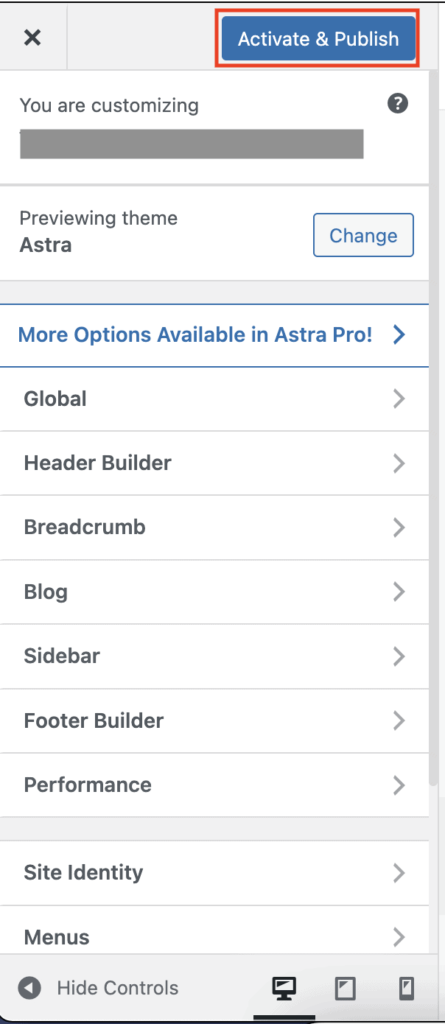
6. Once you are satisfied with how the theme looks, click on Activate & Publish to complete the change.
Change your WordPress theme using Theme Switcha plugin
There is a plugin for everything, including changing WordPress themes. You can use Theme Switcha to test drive your themes on your site’s frontend while the active theme is shown to visitors. There are a few more bells and whistles in this plugin, but for the purposes of this article, we are focusing on the theme changing abilities.
To use Theme Switcha, you need to follow these steps:
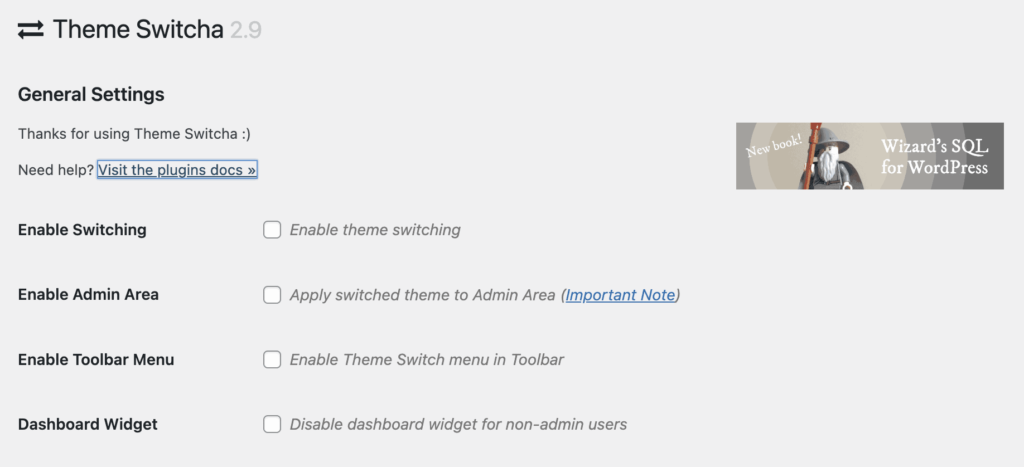
1. Install and activate the plugin from the plugin dashboard
2. From the plugin dashboard, go into Theme Switcha’s Settings and check Enable theme switching.
3. Once you’ve saved changes, you will see the installed themes on the same page, under the heading ‘Available Themes’.
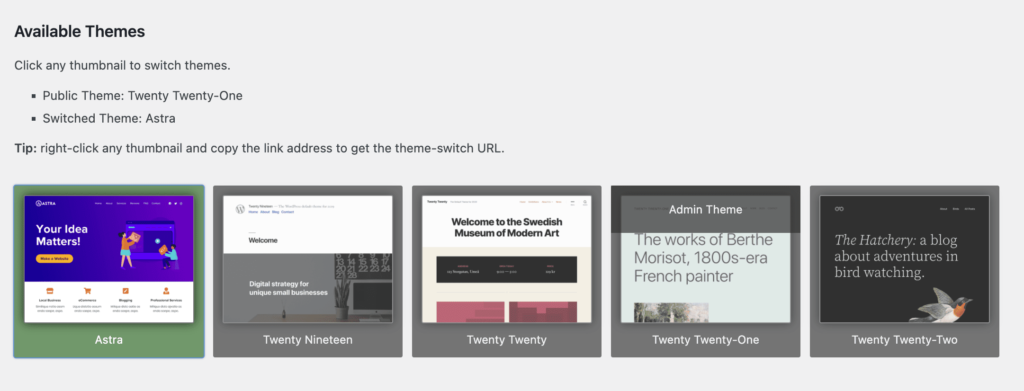
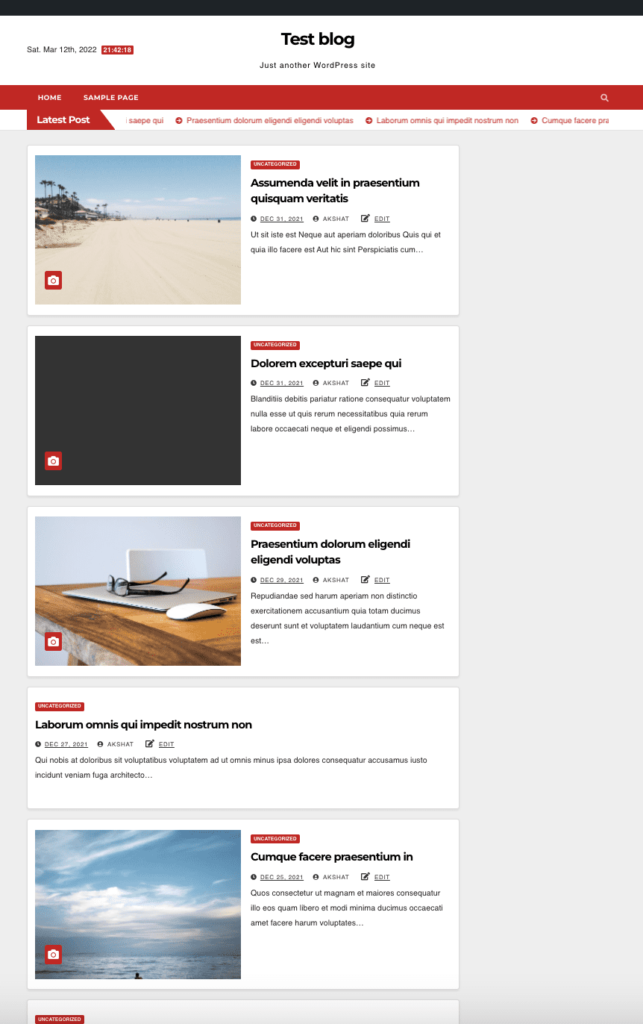
4. Click on any of the themes to see a full-functioning preview of your website in the new theme.
5. Once you have figured out how the new theme will look on the website, you can change your WordPress theme from the Themes dashboard as in the previous section.
The Theme Switcha plugin also allows you to customise which theme is visible to users, and set permissions for who can change themes. However, if you enable this, we recommend installing an activity log as well, so that you have a bird’s eye view of what is happening on your site.
How to change a WordPress theme manually
We don’t typically recommend changing a WordPress theme manually, because changing it from the wp-admin Themes dashboard is much easier and safer overall. However, if your website is not accessible due to a theme-related conflict, this is a good way to reset the website to a default theme, if you don’t have a backup in place.
In order to change a WordPress theme manually, you have to modify WordPress files and the database. We’ll explain the steps in detail, but this is a good time to take a backup because things can still go unexpectedly awry when modifying critical site components.
How to change WordPress theme manually:
1. Put your website in maintenance mode to minimize disruption to visitors. You can use the WP Maintenance Mode plugin to put up a notice indicating that your site is being updated.
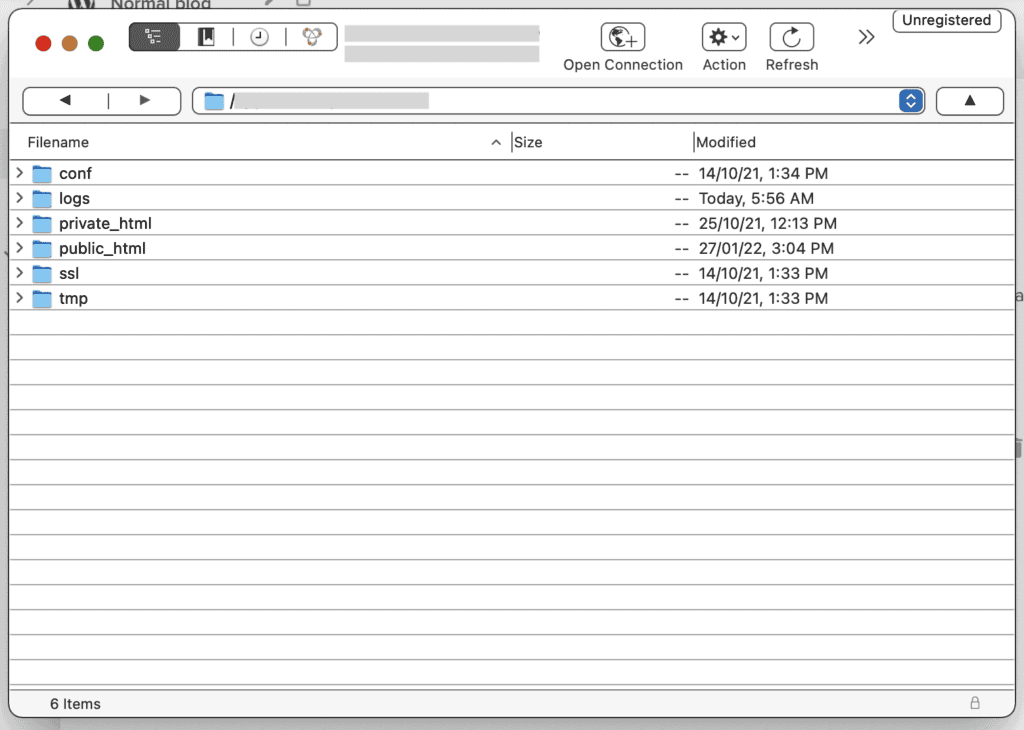
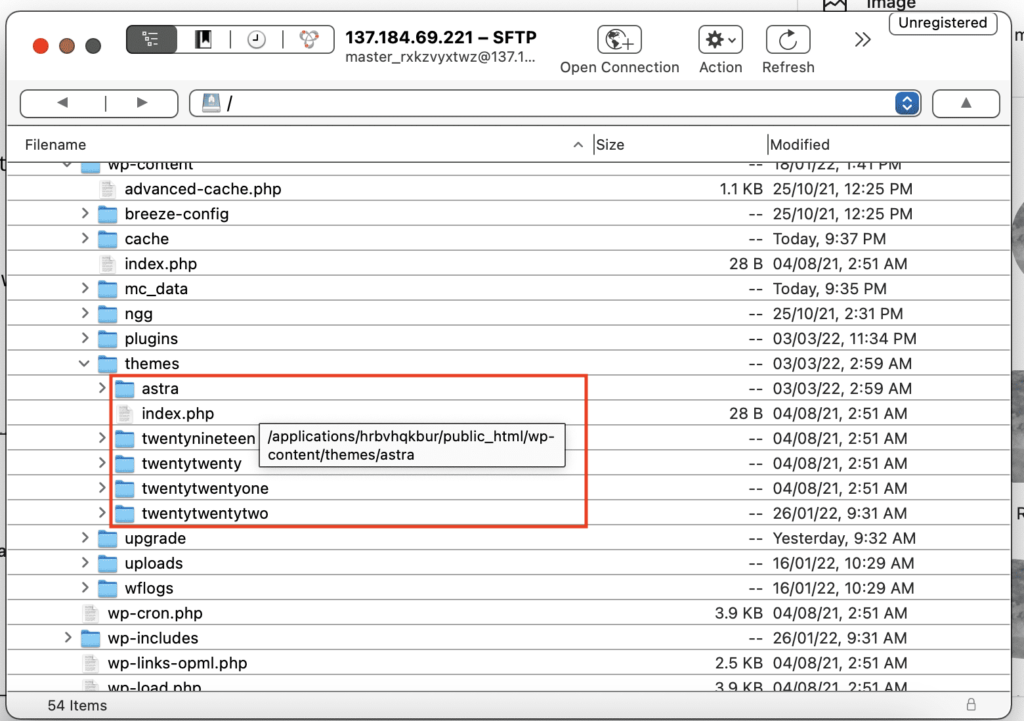
2. Using FTP, log into your website and navigate to the /wp-content folder. It is usually found in the /public_html folder
3. Next, assuming you have a zipped file for your theme, upload it to the /themes folder, and unzip the file.
4. Make a note of the folder name, exactly as it is without spaces or any change in characters.
5. Now you need to activate the theme. There are two ways to do this: a) From the wp-admin Themes dashboard; or b) by modifying the WordPress database
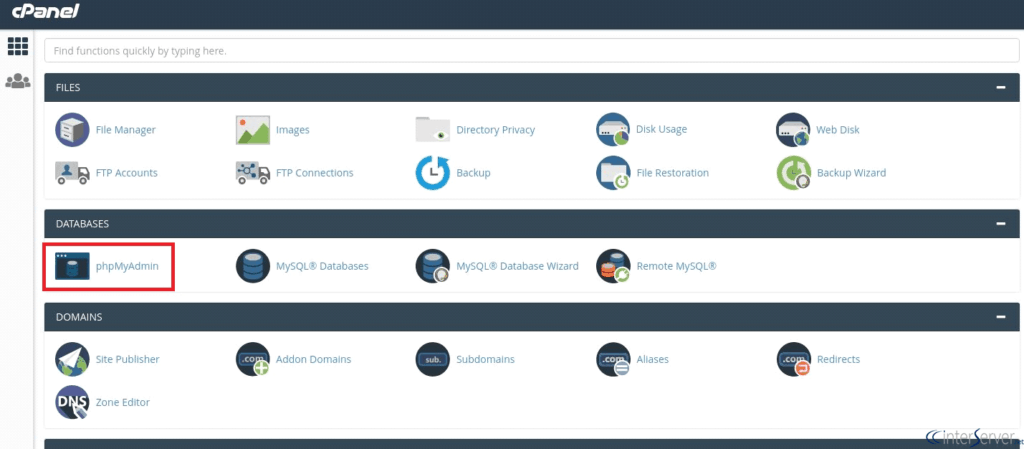
For option A, you need to follow the same steps as changing your theme with live preview; or even with the staging site (see previous section). For option B, you need to log into phpMyAdmin. We’ve elaborated on option B below.
6. Once you’ve logged into your database, find the correct database for your site. If you have more than one and are unsure which is the correct one, you can find the active database name in the wp-config.php file.
7. Next, locate the wp_options table. Here, you need to scroll down the column for option_name and find two: template and stylesheet
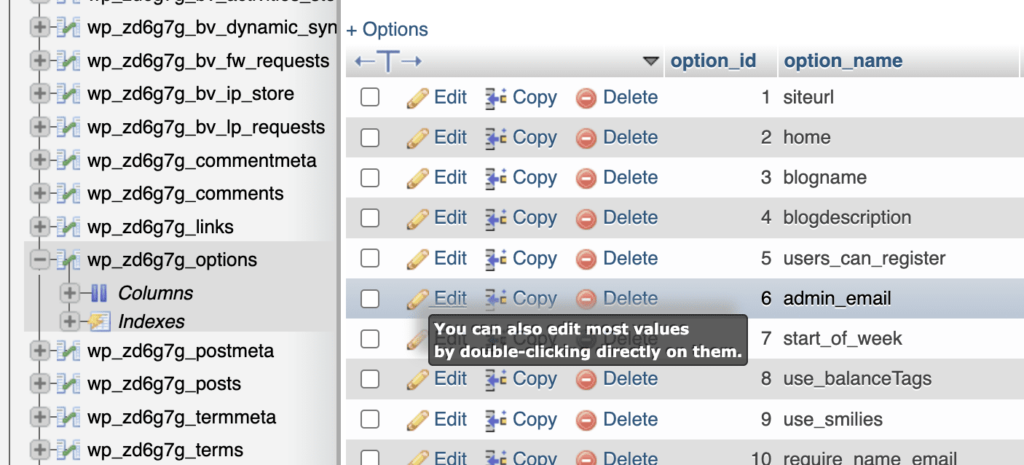
8. Once you’ve located these two values, you will see that they are set to your current theme. Follow onscreen instructions to change both values to the new theme. Note: The value needs to be the exact folder name, otherwise your site will break.

9. Save changes and exit phpMyAdmin. Reload your site to see the new theme.
If there is a single typo when updating the theme name in the database, it will crash your site. WordPress requires a theme to function, and the values in the database indicate to the core which theme is currently active, and where to find the necessary files.
Of all the ways you have available to change a WordPress theme, the manual way should really be a last resort. It is unnecessarily time-consuming when there are clearly better options, and involves poking around in WordPress files and the database, which is never recommended unless you are an expert or in dire straits.
Things to do after changing a WordPress theme
Once your theme has been changed and the site is working properly, the major part of this process is accomplished. In this section, we’ve put together a checklist of elements you need to verify and update after switching WordPress theme.
While you are going through this checklist, break out the pre-change checklist we had you make in the beginning. It is about to become super useful.
- Design elements: Certain design elements are critical for your website, and have a direct impact on visitor engagement and user experience. Here are the top few that you should check as soon as the theme change is complete.
- Homepage: Is the correct page showing up as the homepage? Some themes have dedicated homepages that exist outside of the WordPress page hierarchy, so you need to indicate which one is the correct homepage. If the old theme had a custom homepage, it will be saved in Page drafts, and the new theme’s default homepage will appear instead.
- Menus: You may need to recreate menus if they have disappeared. Check each of the links to see if they work as expected. Also, double-check if all the links are visible from the previous theme. Some may have disappeared because of design constraints, for example.
- Custom CSS: Custom CSS are snippets of code that are inserted into the site theme to change the appearance of the website, above and beyond the underlying theme. It is an easy way to make bulk changes to templates. This is one of the things that will not transfer over to the new theme automatically, because custom CSS is theme-specific. In any case, you need to evaluate whether or not you need the custom CSS in the new theme at all, considering you’ve just nuked the old theme for a brand new one.
- Widgets: Each theme supports different widget locations, so are widgets appearing where they should?
- Other elements: Posts, comment sections, images, pages, forms, and so on also need to be checked for inconsistencies.
- Analytics and other tracking pixels: Tracking info is usually inserted into the header of the theme as a best practice. But because of this reason, it sometimes doesn’t carry over to a newly installed theme. So you definitely need to check to see if the code needs to be inserted again.
- Check user experience: User experience is one of the biggest things to change with a different theme. Although most themes now display correctly across different browsers, this is not 100% the case. Responsiveness, or the ability for the site to render correctly on different screen sizes, is a cornerstone of current web design. Additionally, check site loading time. Has installing the new theme affected load times? Speed is a critical factor for SEO and as a rule of thumb, you always want the new theme to load faster than the previous one. It improves experience.
- Check plugin compatibility: Any change to your website has the potential to break it, unfortunately. That is just how code works. Check wp-admin notifications for errors, and resolve any compatibility issues. You may have to look for alternatives if they are not easily resolved.
- Disable maintenance mode: Finally, once you have verified everything on your website, remove this traffic cone. You’re all set.
Errors you may encounter when Changing WordPress themes
In our experience with newly installed WordPress themes, there can be a number of things that can go wrong. Here’s a list of errors you may experience:
- WordPress’s white screen of death
- New theme enforces its own layout causing your existing layout to break
- Theme is incompatible with an installed plugin
- Theme is incompatible with the current PHP version
- Custom widgets disappear
- Navigation menu can lose links without warning
- Contact forms stop working
- Sections within pages may break
- Any shortcodes that were added in by your previous theme are deleted
- Errors in schema data
This list isn’t exhaustive by any means, but it gives you an idea of the errors you want to look out for. That’s why it is important to install a theme on a staging site first and find solutions to these issues before making the change to your live site.
Conclusion
WordPress themes are great ways to give your website a lift without developing the design from scratch. Often people outgrow their site themes and then want to install new ones. Whenever you want to switch WordPress theme—or make any sort of change to your site—always use a staging site. It prevents a whole lot of problems.
FAQs
Can I change WordPress themes without losing content?
Yes, it is possible to change WordPress themes without losing content, and in fact, is the expected behavior of any theme change. Themes are independent of content, and while there can be conflicts with display or design, themes never delete content from the database.
When we speak about content, we are referring to user-generated content like blog posts, page content, images, uploads, users, etc. Themes do not modify any of these things but will delete things that are stored directly in the theme itself, like tracking pixels, custom CSS snippets, and so on.
How do I change a WordPress theme without losing content or breaking my website?
The best and safest way to change a WordPress theme without losing content is to use a staging site. A staging site is an exact replica of your live site and is like a testing ground for changes. Install the theme first on the staging site to see if there are any issues. If you discover issues, you can resolve them there, and only then move the changes to the live site.
In the best-case scenario, Switching your WordPress theme should not impact your website, but with themes evolving to be more complex and dynamic, this is no longer a given.
Tags:
Share it:
You may also like

How to Limit Form Submissions with Droip in WordPress
Forms are an indispensable part of any website because of their versatility, letting you collect information for various purposes! However, people with ill intentions often attempt to exploit these forms…

How To Manage Multiple WordPress sites
Management tools help agencies become well-oiled machines. Each task is completed with the least amount of effort and highest rate of accuracy. For people managing multiple WordPress sites, the daily…

PHP 8.3 Support Added to Staging Feature
We’ve introduced PHP version 8.3 to our staging sites. Test out new features, code changes, and updates on the latest PHP version without affecting your live website. Update PHP confidently…
How do you update and backup your website?
Creating Backup and Updating website can be time consuming and error-prone. BlogVault will save you hours everyday while providing you complete peace of mind.

Updating Everything Manually?
But it’s too time consuming, complicated and stops you from achieving your full potential. You don’t want to put your business at risk with inefficient management.

Backup Your WordPress Site
Install the plugin on your website, let it sync and you’re done. Get automated, scheduled backups for your critical site data, and make sure your website never experiences downtime again.


