Learn How to Launch a Secure Online Course Platform Today (Easiest Guide)
Bulletproof Backups for Your WordPress Website
Fortify your business continuity with foolproof WordPress backups. No data loss, no downtime — just secure, seamless operation.
E-Learning has already grown into a multi-billion dollar industry. For a number of students, it’s more convenient to take a class online at their preferred place and location. Similarly, eLearning sites provide instructors with the opportunity to share their knowledge globally and earn through it.
If you think creating an educational site is challenging, think again. With a great WordPress LMS plugin, you can publish your site in no time at all. Let’s look at how to launch a secure eLearning platform with Tutor LMS and back it up with BlogVault.
[lwptoc skipHeadingLevel=”h3″ skipHeadingText=””]
1. Set Up Your WordPress Site
If you’re a complete newbie to creating sites on WordPress, the easiest way to do so is to choose a reliable hosting company. Choose a unique domain and then set up your WordPress site really fast. Go to your hosting panel and choose the ‘Create site’ option from your dashboard.
Your hosting provider will offer you a set of plugins that you can install while setting up your site. You can skip the process for now and add them later if you need any. Some hosting providers offer an SSL certificate to ensure you can make transactions on your site.
Once your WordPress site is all set up, you can start using Tutor LMS plugin to launch a full-fledged eLearning site right away!
2. Install Theme (preferably an LMS Based Theme)
One of the greatest perks of using Tutor LMS is that you’ll find themes on the Themeum site that are based upon Tutor LMS. Depending on whether you’re a single instructor, coaching center or eLearning platform, you’ll find a theme perfect for you.
There are multiple themes integrated with Tutor LMS that you can purchase from their site. However, if you prefer any other theme, you can definitely utilize Tutor LMS with that plugin.
For this tutorial, let’s use the highly functional Edumax theme. To upload the theme, go to the WordPress dashboard and select Appearance> Themes and click on the “Add New” option.
Then select the “Upload” option to upload Edumax and then activate it. You can then move on to the next step.
3. Install & Activate All Necessary Plugins
Once you are done with uploading the theme, now it’s time to install & activate Tutor LMS along with other plugins. Navigate to your WordPress dashboard and select ‘Plugins’. You’ll see a list of all the installed plugins from where you can activate them.
If you want to earn from your courses, you will need to have plugins like WooCommerce installed and activated. After you make sure you have all the components you need in place, you can start creating your course.
4. Create a Course
The fun part begins! Let’s start creating our first course.
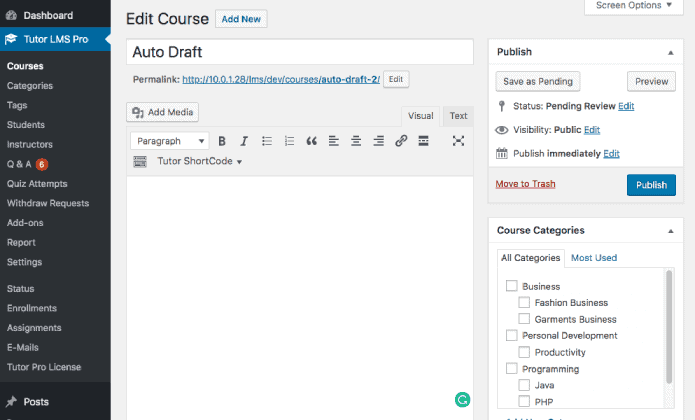
In your WordPress dashboard, you’ll see the Tutor LMS Pro option. Select “Courses” to be directed to the course creation page. One of the most awesome things about Tutor LMS is that you get to use an industry-first frontend course builder. That way you get to see how your course will look while building it.
There are a ton of handy options that you get inside the course builder. Some of those are:
- Add a course title, description & excerpt
- Include course topics
- Define the course duration
- Determine the difficulty level
- Tell about the course benefits
- Provide instructions
- Specify the target audiences
- Course intro video
- Materials Included
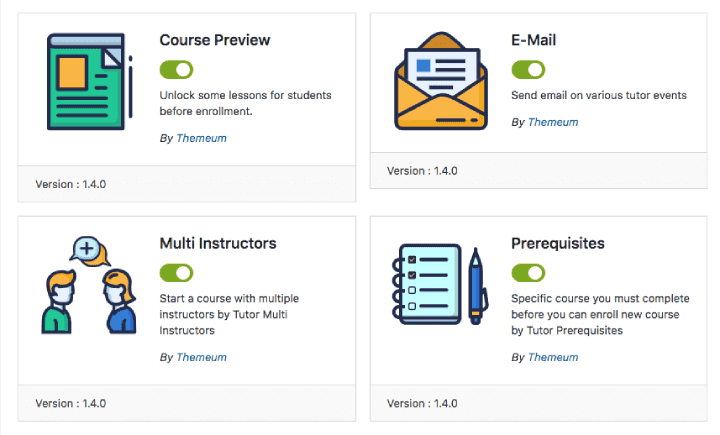
When you’re using the premium version, you can set prerequisites for your course. That way students will have to fulfill certain eligibility requirements before they enroll for your course.
Another awesome part is that you can make your course very resourceful by adding multiple instructors. You can add instructors to your platform and even let them have access to publishing courses.
When you complete all the fields, your course page should look something similar to this on the frontend. You can already see how the course looks professional and no one would be able to tell that you didn’t hire a huge development team to pull this off.
So let’s get into the details of how to add lessons, assignments, and quizzes to your course.
Adding a Lesson
Since Tutor LMS is completely UI-based, most of the steps are pretty easy to follow and self-explanatory. To add a lesson, simply scroll down to the course builder on the course edit page. There you’ll find an “Add New Lesson” button from where you can start adding your lessons. You can change the order of the lessons using the drag & drop course builder.
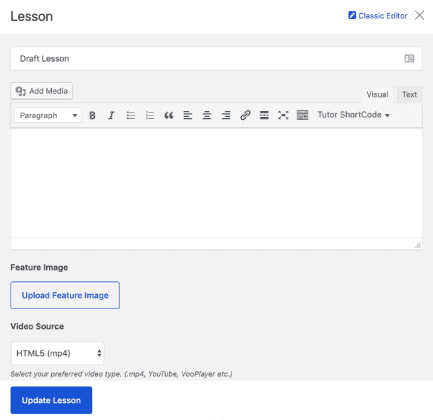
Moreover, Tutor LMS supports all page builders on the lesson creation page. You can choose the “Classic Editor” option to start building lessons on your page builder. You can also add a featured image, video in your preferred format, define playback time, and so much more.
Challenging & Fun Quizzes
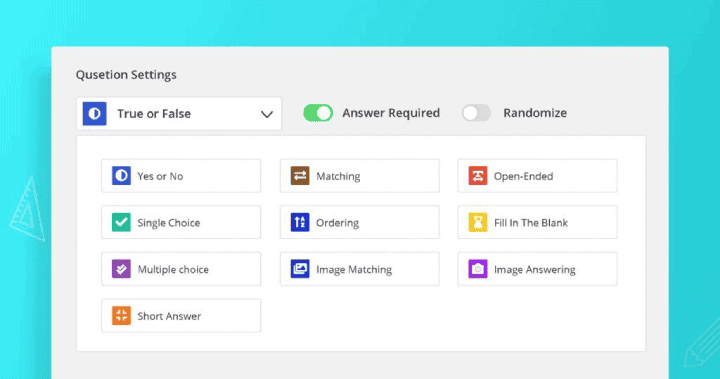
One of the best features of Tutor LMS is the quiz creator. There are over 10 types of unique question types. So no matter what kind of quiz you want according to your teaching methods, Tutor LMS opens up the possibility for you. The 10 question types include:
- Image Matching
- Image Answering
- Ordering
- True/False
- Single Choice
- Multiple Choice
- Open-Ended/Essay
- Fill in the Blanks
- Short Answer
- Matching
But that’s not where the innovative quiz creation process ends. When you start a quiz, there are some useful options:
- Display points
- Randomize quiz order
- Question description
- Insert correct answer for auto-grading process
- Set time limit for the quiz
- Hide time display
- Define attempts limit for quiz
- Set passing grade
- Define question layout & question order
Create Assignments
Assignments make the learning experience even more enriching for students. Tutor LMS incorporates all the features of assignments that you’d include in a real classroom task. Select the “Create Assignment” button inside the course builder.
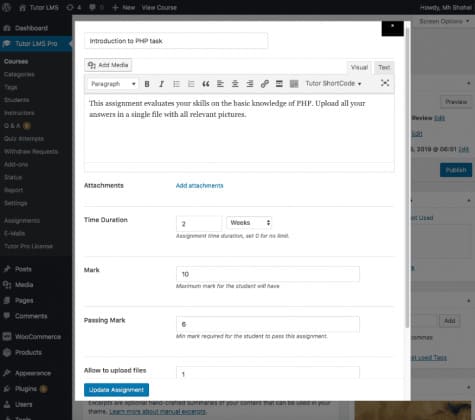
After you add an assignment title and optional description for the assignment, you can start filling all the handy fields inside:
- Add assignments
- Set assignment submission deadline
- Define total points and minimum pass points
- Enable the option to upload files and set the number of files to upload
- Fixate the maximum file size to upload for assignments in MB.
You have just finished creating your course complete with quizzes and assignments. Now it’s time to earn some money!
5. Monetize Courses
Tutor LMS comes with every option that facilitates your earning potential from the courses you create. You can offer a lifetime license, course category-wise subscription or entire site subscription.
Tutor LMS offers multiple integrations with some of the best e-commerce plugins. For subscription options, you get a couple of pro add-ons: Paid Memberships Pro & WooCommerce Subscriptions. Enabling either one will give you options to create subscriptions.
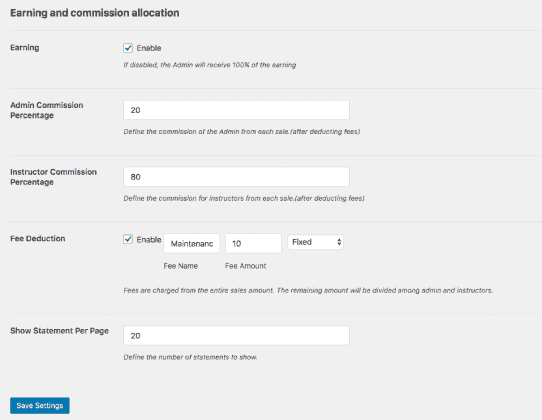
Not only that, if you have multiple instructors in your eLearning portal, there’s an option to control and customise the earning & withdrawal options. Admins can set the option to divide the earning percentage among instructor and admin along with the option to deduct fees. You can even choose the number of statements to be displayed per page in your dashboard.
For withdrawal options, you get the option to define the minimum withdraw settings. There are three withdrawal methods: Bank Transfer, ECheck and PayPal payment. You also get all the details of the withdrawal options right on your dashboard.
6. Offer Certificates
Majority of students look for certified courses to add to their resume/portfolio. Issuing certificates is a huge plus for any course – online or offline. If your instructors are authorised to issue certificates, you can give them the option to offer professional certificates from an array of templates crafted inside the Tutor LMS.
All you have to do is enable the Tutor Certificates add-on and then go to certificate settings. From there, you can choose the certificate template and complete all the fields along with your signature. You can even upload your own custom certificates inside Tutor LMS.
7. Monitor Course Performance
Once you have created a completely professional course, statistics and data can help monitor and analyze the course performance. Tutor LMS comes with an amazing Tutor Reports add-on to make sure you know all the data of every course.
When you navigate to Tutor LMS Pro> Report, you get to see a complete report of your courses – student enrollment graph, popular courses, most enrolled courses, reviews, etc. It offers a complete track performance of all your courses. Moreover, you get a set of parameters as well to evaluate courses over a specific period of time.
Important: Always Backup Your Site
When you have put in so much effort into creating a site with Tutor LMS, you need to ensure it runs 24×7 without any downtime. You also cannot afford to lose any data on your website.
It goes without saying that you need a full-fledged backup and security system. Blogvault is the most reliable solution to keep your website and its data secure. We offer real-time backups which are highly recommended for Tutor LMS sites. This copies every single change made to your website. You won’t lose the data of any instructor, student, course transaction, etc.
Backup processes usually add to the load on your server which can slow down your site. The BlogVault plugin takes care of this by taking incremental backups on separate dedicated servers. We also store the data in safe offsite locations. Your users will continue to get the best experience without being affected by the backend processes.
The best part about using BlogVault is that you automatically get access to security features powered by MalCare. So not only is your site backed up, but you can be rest assured that your website is constantly monitored and protected against hackers and malware.
What’s great about both Tutor LMS and BlogVault is that both do not require you to have technical knowledge. The plugins are simplified for anyone to install and use without any hassle.
So what are you waiting for? Create your own eLearning platform today!
Tags:
Share it:
You may also like

How to Limit Form Submissions with Droip in WordPress
Forms are an indispensable part of any website because of their versatility, letting you collect information for various purposes! However, people with ill intentions often attempt to exploit these forms…

How To Manage Multiple WordPress sites
Management tools help agencies become well-oiled machines. Each task is completed with the least amount of effort and highest rate of accuracy. For people managing multiple WordPress sites, the daily…

PHP 8.3 Support Added to Staging Feature
We’ve introduced PHP version 8.3 to our staging sites. Test out new features, code changes, and updates on the latest PHP version without affecting your live website. Update PHP confidently…
How do you update and backup your website?
Creating Backup and Updating website can be time consuming and error-prone. BlogVault will save you hours everyday while providing you complete peace of mind.

Updating Everything Manually?
But it’s too time consuming, complicated and stops you from achieving your full potential. You don’t want to put your business at risk with inefficient management.

Backup Your WordPress Site
Install the plugin on your website, let it sync and you’re done. Get automated, scheduled backups for your critical site data, and make sure your website never experiences downtime again.


