You’ve just set up a WordPress site. The layout is perfect, the colors pop, but something feels… generic. You look at your cool, custom logo, then back at the plain text on the page. They just don’t match. It’s time to learn how to change font in WordPress
Unfortunately, it’s not as easy as editing the page in a block editor. You have to make some global font changes. The process also varies depending on the font. But, we’ve got you covered.
We’ll show you 4 different ways to change your fonts. We’ll break down the steps and walk you through it. So, irrespective of your theme, you’ll know how to make these changes.
The easiest way to change the font is to go to Appearance > Customize on your dashboard. Find the Typography or Fonts menu to change your site’s font.
We recommend you use a staging site to experiment with the fonts. Otherwise, you run the risk of breaking the design for your live visitors.
Choosing the right method for changing your font depends on a few key factors: the type of theme you’re using, your technical comfort level, and how much control you need over your typography. There isn’t a single “best” way, but there is a best way for you.
The best way to change your font depends on your specific WordPress setup. To find the right method for your site, simply answer these questions:
- Are you using a new WordPress theme that is Twenty Twenty Two or higher?
- Are you using a popular “classic” theme like Astra, Divi, or GeneratePress?
- Does your current theme have very few font options, or none at all?
- Are you comfortable with CSS and custom code?
Method 1: Using the Site Editor (Block Themes)
If you’ve ever fixed a WordPress error, you’re familiar with the default themes. One of the easiest ways to check for theme conflicts is to revert to one of them.
If you are using a WordPress theme released in 2022 or later (Like Twenty Twenty-Two or higher), you have access to the powerful Site Editor. This tool allows you to visually change your site’s global styles, including the fonts for all your text, headings, and links, all in one place. It’s the most direct way to control typography on newer themes.
Here’s how to do it:
- Navigate to Appearance > Editor from your WordPress dashboard.

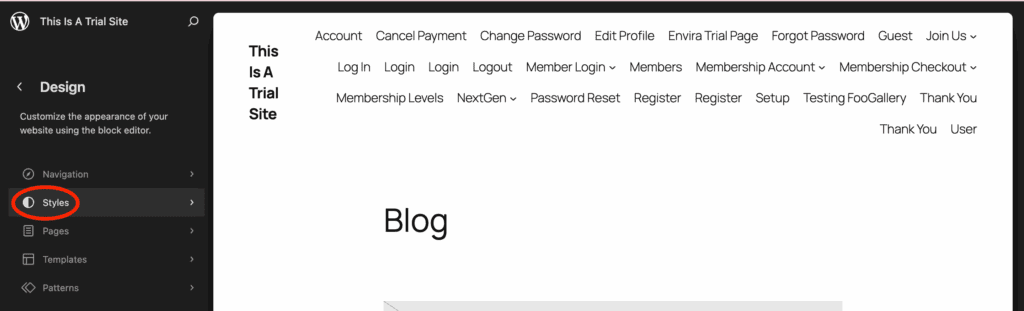
- Click the Styles icon in the sidebar.
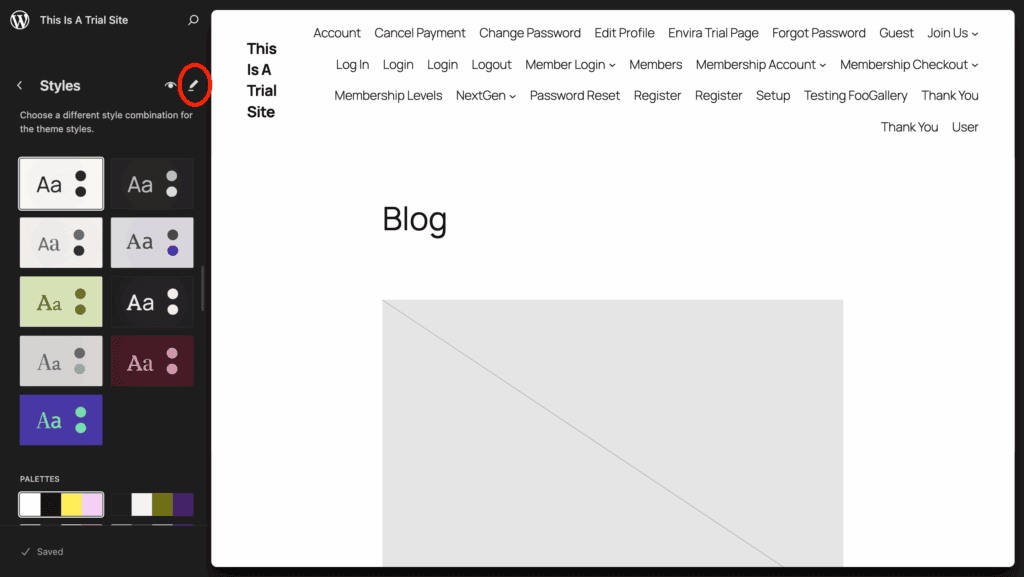
- Click the little Edit icon in the sidebar.
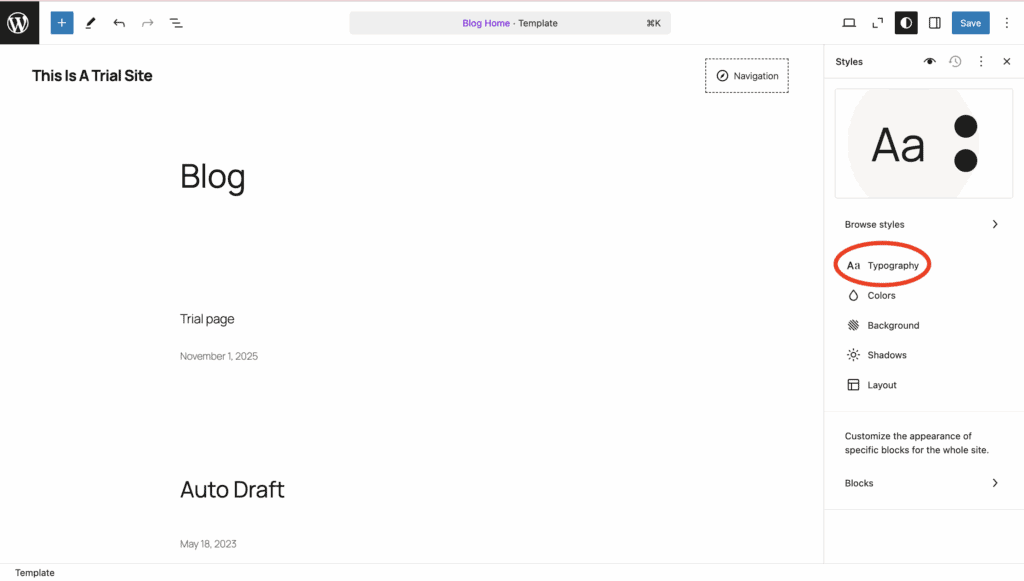
- Choose the element you want to change, such as Text or Headings.
- In the menu that appears, select Typography to see all your site’s font settings.
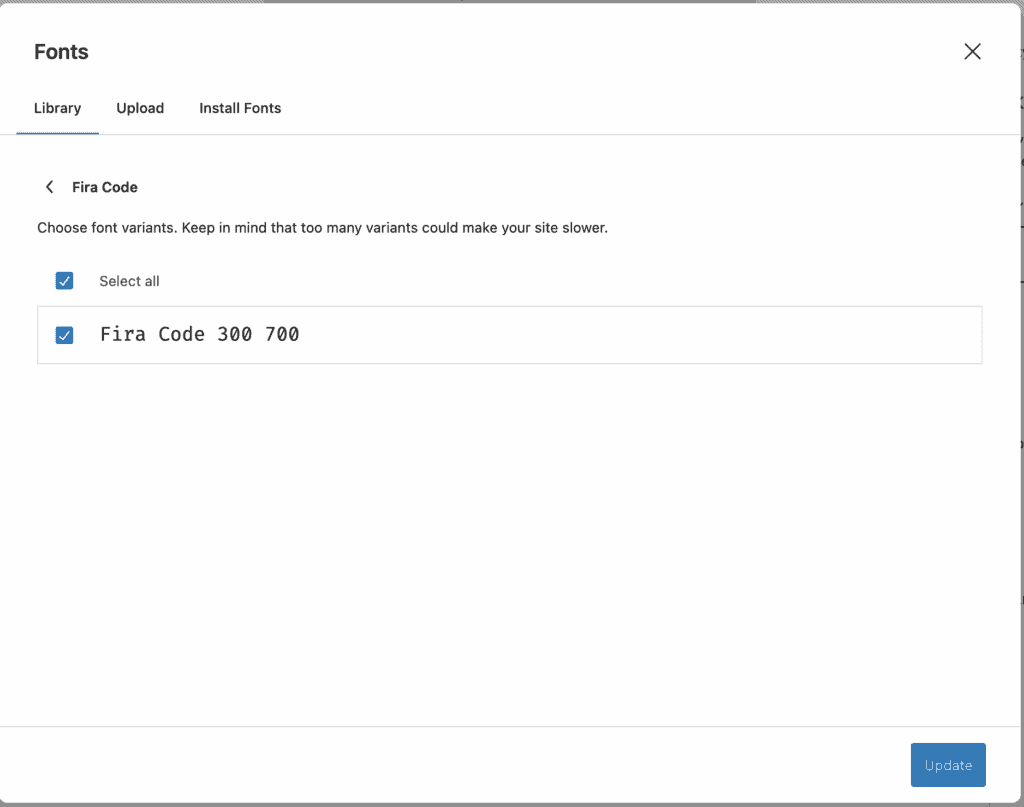
- Click the dropdown menu under Font to select a new font family.

- Use the available options to adjust the font variations. Then, you can change the size, weight (appearance), and spacing.
- Click the Save button in the top right corner to make your changes live.
Method 2: Using the Theme Customizer (Classic Themes)
For many popular “classic” themes like Astra, Divi, or GeneratePress, font options are built directly into the WordPress Theme Customizer. This interface provides a live preview of your site on the right while you adjust settings on the left, making it easy to see how your font changes will look before you save them.
Here’s the typical process:
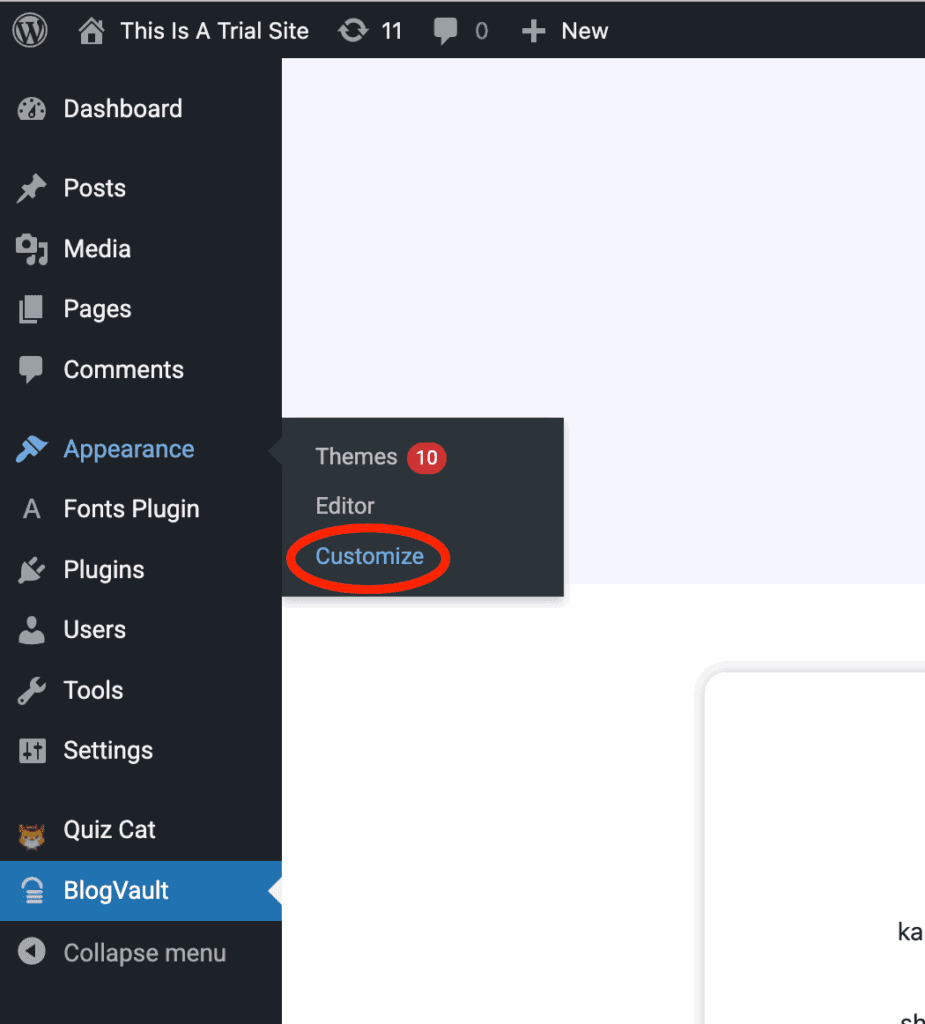
- Navigate to Appearance > Customize from your WordPress dashboard.
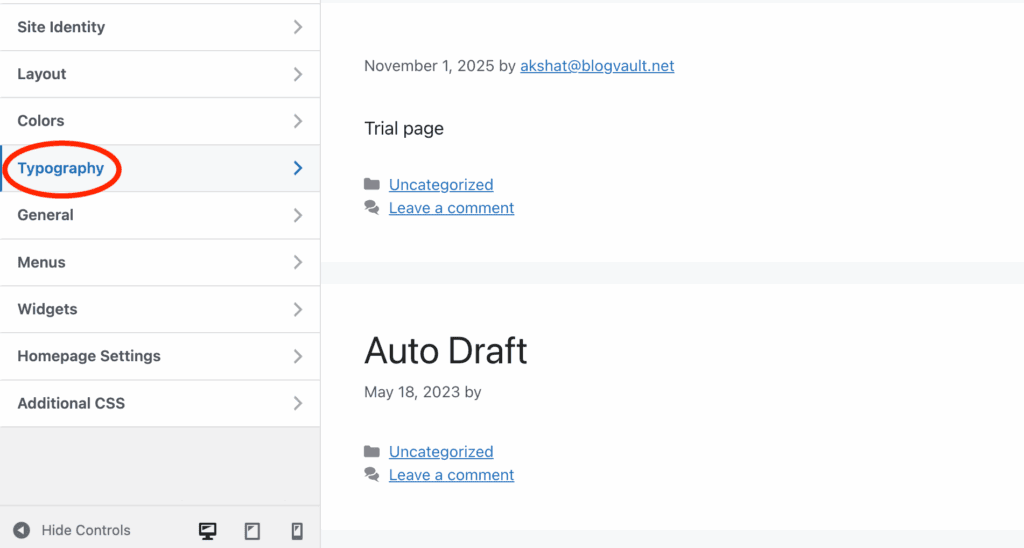
- Look for a menu item named Typography, Fonts, or something similar, and click it.
- Select the element you wish to change, such as Body or Headings.
- Choose your desired font from the dropdown list provided by your theme.
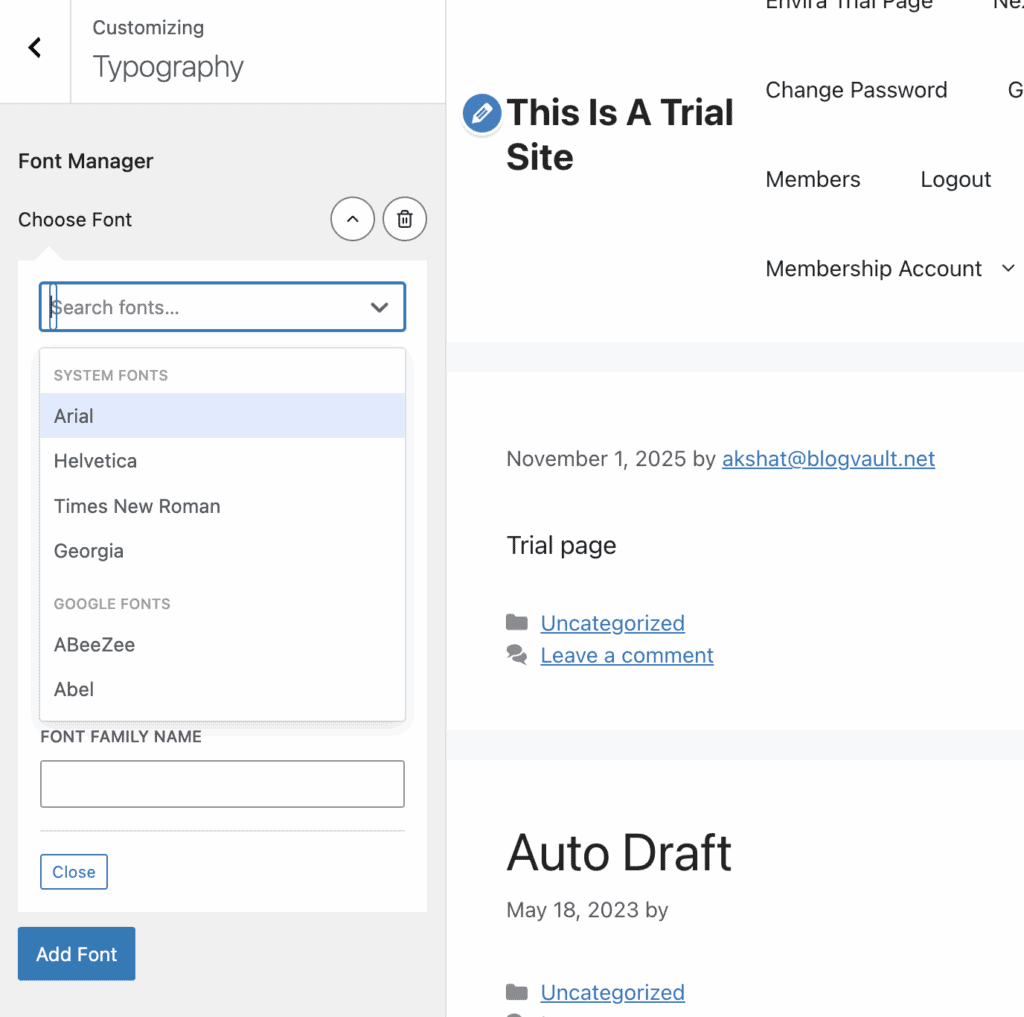
- Watch the live preview on the right update to reflect your choice.
- Click the Publish button at the top to save your changes and make them live.
Method 3: Using a Font Plugin
If your theme has limited font options or you want access to a larger library like Google Fonts, a plugin is the perfect solution. Plugins add a new set of user-friendly controls to your site, often within the Theme Customizer, giving you extensive typographic control without touching a single line of code. This is the most flexible and beginner-friendly method if your theme falls short.
Here’s how to use a font plugin:
- Go to Plugins > Add New from your WordPress dashboard.
- Search for a popular font plugin like Fonts Plugin. That’s what we used for this article.

- Click Install Now and then Activate the plugin.
- Navigate back to Appearance > Customize.
- Find the new menu section added by the plugin.

- Use these new controls to select and apply fonts to your headings, body, and other text elements.
- Click Publish to save your new font settings.
Method 4: Using Custom CSS
For those who want granular control over specific elements or need a solution when other methods don’t work, adding Custom CSS is the most powerful option. This method allows you to target any part of your site—from a single heading to the navigation menu—and apply a specific font. It requires a small snippet of code but offers unparalleled precision.
Here’s how to add custom font CSS:
- Navigate to Appearance > Customize from your dashboard.
- Click on the Additional CSS tab at the bottom of the menu.
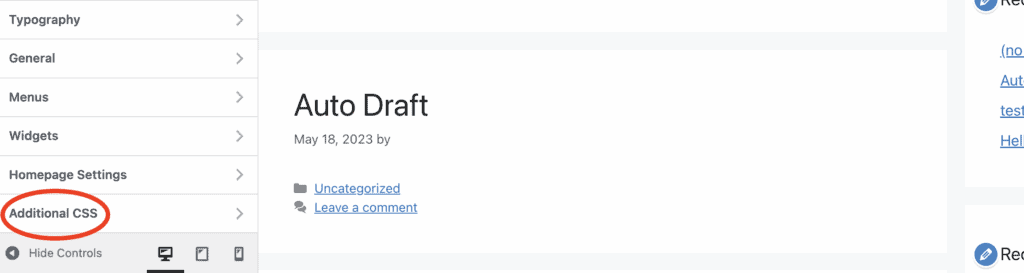
- Enter your CSS code in the text box. For example, to change all H2 headings to the font Georgia, you would add: h2 { font-family: “Georgia”, serif; }
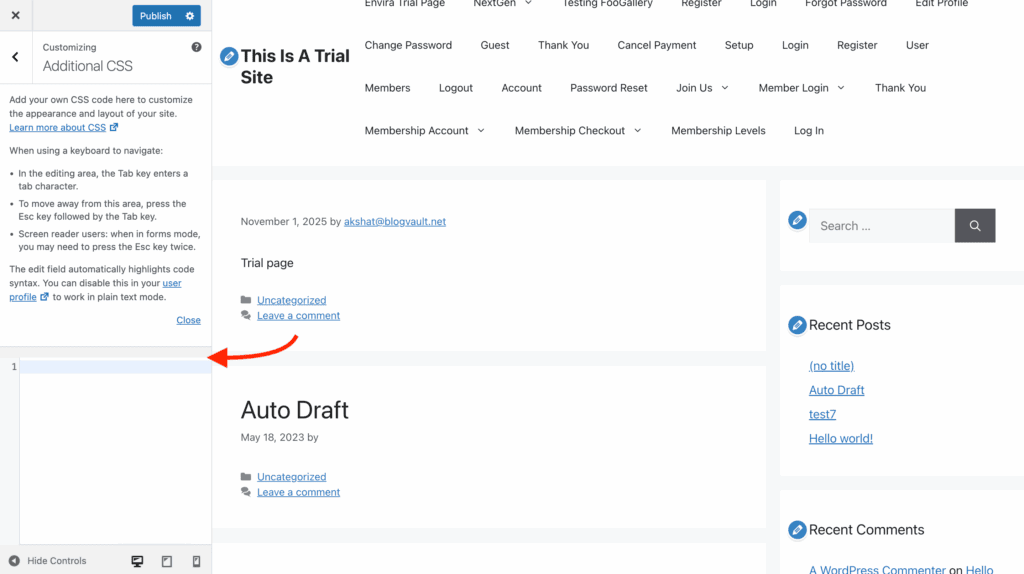
- The live preview will instantly show your CSS changes in action.
- Once you are satisfied, click the Publish button to save your code.
Best Practices for Blog Management
Now that you’ve mastered changing your fonts, you’re well on your way to creating a site that truly reflects your brand. However, a beautiful design is just the beginning. To protect all your creative work and ensure your blog thrives, it’s crucial to manage what happens behind the scenes. These essential best practices will keep your site secure, fast, and growing for years to come.
- Install a reputable security plugin: Actively protect your site from malware, spam, and hackers.
- Schedule automatic, off-site backups: Ensure you can always restore your site if something goes wrong. The best way to do this is to install a security plugin.
- Use strong passwords and 2FA: Secure your login page, the front door to your website.
- Keep your WordPress site updated: Regularly update your WordPress site. We’re talking about core files, plugins, and themes to patch vulnerabilities.
- Install a speed plugin: Use caching plugins or speed plugins to ensure your pages load quickly for visitors.
- Install an SEO plugin: Optimize your content to rank higher in search engine results. Use an SEO plugin like RankMath to do this without needing any technical knowledge.
- Track traffic with Google Analytics: Understand your audience and monitor your site’s performance.
- Regularly audit plugins and themes: Deactivate and delete any tools you no longer use to reduce security risks and improve speed.
Final Thoughts
Changing your website’s font is more than just a simple cosmetic tweak; it’s a powerful way to define your brand’s personality and improve the user experience. The right typography can make your content more readable, convey a specific tone, and give your site a professional polish that sets it apart from generic templates. It’s one of the simplest yet most effective ways to transform your website’s look and feel, ensuring it is unmistakably yours.
As you experiment with new fonts and other significant design changes, it’s highly recommended to use a staging site. A staging site is a private copy of your website where you can test changes safely without disrupting the experience for your live visitors. This allows you to perfect your new look without any risk of a broken layout or downtime. This professional approach ensures your live site remains flawless while you innovate behind the scenes.
FAQs
How do I change my font style?
You can change your font style—including the font family, size, and weight (boldness)—using your theme’s built-in settings. For modern themes, go to Appearance > Editor > Styles > Typography. For classic themes, go to Appearance > Customize > Typography. These menus provide all the options to adjust your site’s text style.
How do I change the text in a WordPress theme?
To change the content of the text (the words themselves), you edit the specific page or post directly from your WordPress dashboard. To change the appearance of the text (the font, color, or size), you use your theme’s settings, typically found in the Site Editor or the Theme Customizer as described in this guide.
Can I use any font in WordPress?
Yes, but you may need a plugin or custom code. While most themes come with a curated list of popular Google Fonts, you can use any font you have a license for. The easiest way to upload and use a custom font file (like a .ttf or .woff) is to install a plugin like “Custom Fonts” that allows you to upload font files directly to your media library and then select them in the Customizer.
How do I change the font in the WordPress menu?
First, check your theme’s settings in Appearance > Customize > Typography, as many themes have a dedicated section for “Navigation” or “Menu” fonts. If no option exists, the most reliable way is to add Custom CSS. Navigate to Appearance > Customize > Additional CSS and add a snippet like .main-navigation a { font-family: “Your-Font-Name”, sans-serif; } to target the menu.

Shreya has been a writer for as long as she can remember. Now, she writes articles that help WordPress users manage the sites that they're proud of, with little to no coding