How to Update WordPress Manually to a Newer Version (5 Easy Ways)
Bulletproof Backups for Your WordPress Website
Fortify your business continuity with foolproof WordPress backups. No data loss, no downtime — just secure, seamless operation.
WordPress is like a car engine. Whenever we want it fixed, we’d rather leave the fixing to the experts. But if there’s a breakdown in the middle of nowhere, we should know how to fix it.
Similarly, it is always better to update your website with a staging site or use BlogVault’s auto-update feature that takes a backup before making any changes to your site. WordPress updates contain important security and bug fixes in addition to overall improvements.
However, if you don’t have access to wp-admin and you still need to update your site, it is worth knowing how to upgrade WordPress manually. It is definitely more time-consuming and nerve-wracking, considering many things could go wrong. Also, if you don’t have access to wp-admin, updating WordPress shouldn’t be on your list of priorities unless you think that’s causing the issue.
In this article, we will show you how to update WordPress manually without losing any of your content. Additionally, we will help you troubleshoot some common errors.
TL;DR Updating WordPress manually should be a last resort because it is prone to failure for the most trivial reasons. Even if you follow all the instructions perfectly, your network could time out, or a file could get corrupted during the transfer process. The safest way to update your site, without downtime and hours of troubleshooting, is to use a staging site. Create a staging site on BlogVault in minutes. Test the update, and only then make the change to your site.
There are two types of WordPress updates: major releases and minor releases. For the most part, minor updates will be applied automatically, unless explicitly turned off. Minor updates rarely even register as a blip in the course of your site operations, so you may not even notice it apart from the odd notification on your dashboard or from your web host.

Major WordPress updates are a whole different ballgame. They rewrite 2 of the 3 WordPress core directories, and most of the core files of your site. While it is possible to automate WordPress updates for major releases, you must do so carefully.
WordPress manual update is the worst possible way to update your site because there are many things that can go awry. Nevertheless, we have listed step-by-step instructions and provided checklists to make the process as safe as possible. Even so, please note that you cannot predict things like network outages or corrupted files, and take a WordPress backup before starting.
What to do before you update WordPress manually
Since you are planning to update WordPress manually, there are few things to keep in mind before you begin. This checklist will give you the best chance of successfully upgrading WordPress manually, with the fewest glitches and minimum downtime.
1. Take a full backup of your site
Any major change to your site can cause it to react unpredictably. A site update definitely qualifies as a major change, and should be treated as such. Backup your site with BlogVault, because if things go sideways you can restore a functioning version of your site in minutes, and minimise the disruption to your visitors.
2. Save custom code separately
You can skip this section if you backed up your site with BlogVault. As we explained in a previous section, the WordPress website updates overwrite core files and directories, so if there is any custom code in those places, it will get deleted.
An exception here is the wp-config.php file. It doesn’t get overwritten, simply because there isn’t a wp-config.php file in a new WordPress download. It is dynamically generated to connect to the WordPress database during the first installation.
If you have made changes to stock WordPress themes, without renaming or using a child theme to do so, then definitely back those up. Although it is not always the case, WP updates can affect the stock WordPress themes as well.
3. Deactivate all plugins and themes, except one theme
Plugins and themes complicate matters on a WordPress site and may react unpredictably to a site update. It is safest to deactivate them all and reactivate them one by one once the update has been successfully completed. In this way, even if there are issues, you will immediately know which one is the culprit.
Do remember to keep one theme active though. At least one theme is required for a WordPress site to load successfully. We recommend keeping a stock WordPress theme active because those themes are relatively simple and always compatible with WordPress.
4. Deactivate any caching or firewall plugins
Although this is a repeat of the previous point, it is worth mentioning separately. Caching and firewall plugins impact load order, save copies of the site, and block out processes. There is the outside chance that a caching or firewall plugin can cause a conflict during the update. Best to disable them all, and reenable later.
5. Install a maintenance mode plugin
You only need to install this plugin if you are updating WordPress manually via FTP. All other methods put the site in maintenance mode automatically. Of course, the maintenance mode plugin is the one exception to the plugins you need to deactivate.

Users can make unexpected changes on the site, which is not great during an update of any kind. Install a maintenance mode plugin so that users are aware that something is going on, and cannot log into the site at all.
This is another reason we recommend against manual WordPress updates. The prep, actual update, and post-update tasks are significantly time-consuming. You could skip a lot of the tasks on this list by using BlogVault to update your website version.
How to manually update WordPress to a newer version (5 easy ways)
There are a few ways to update WordPress manually, depending on what your definition of ‘manual’ is. Whichever method you choose, there is a certain amount of associated risk.
Even at this juncture, we would highly recommend creating a staging site on BlogVault, and testing the WP update before applying it to your site.
Update WordPress manually from the wp-admin dashboard
At first glance, this is possibly the easiest way to update WordPress manually on your site. We’re including it in this list simply because, even though it is an option provided by WordPress to update a site on a WordPress site, it isn’t free of risk at all.
On the contrary, updating your site this way only removes the element of human error. Crashed sites and downtime are still distinct possibilities, as are a failed update and the dreaded update database error loop.
1. Log into the wp-admin dashboard, and navigate to the Updates link in the left navigation menu.
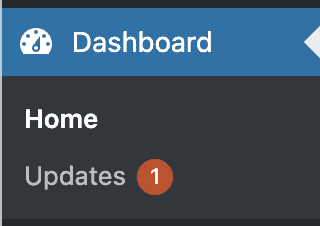
2. There, you should see if there is an update available for WordPress or not. If there is, click on the link.

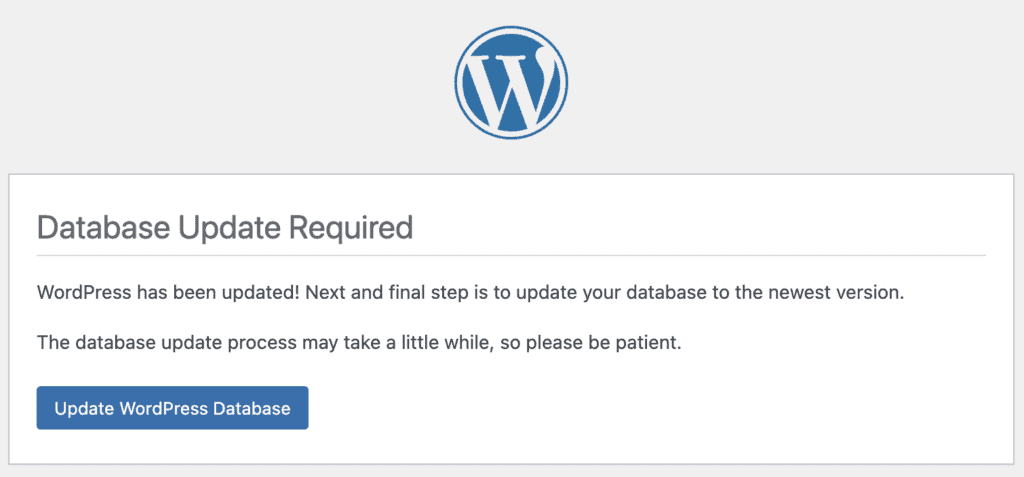
3. Check your wp-admin dashboard. If you need to update the database as well, you will see a prompt to do so. Click on it to complete the update.
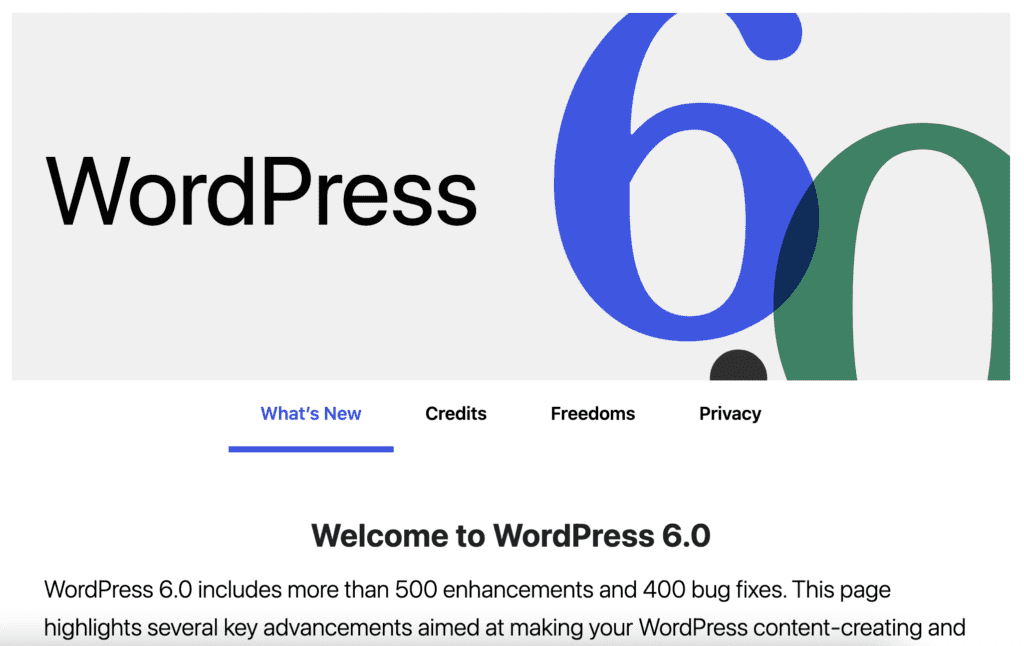
4. That’s it. During the update, your site will automatically be put into maintenance mode. Once the update is complete, you will be taken to the dashboard. To learn more about the new WordPress update, add /wp-admin/about.php to the end of your URL.
Upgrade WordPress manually via FTP
FTP is a way to view and interact with the files on your site server easily, much like you would in the file explorer on your computer.
That being said, updating WordPress manually via FTP is prone to considerable human error. Additionally, although FTP is a stable technology, FTP connections are prone to frequent disconnections. When transferring large files over a long period of time, the connection could break and cause unexpected results.
To update WordPress manually via FTP, you will need to use an FTP client. For the purposes of this article, we used FileZilla.
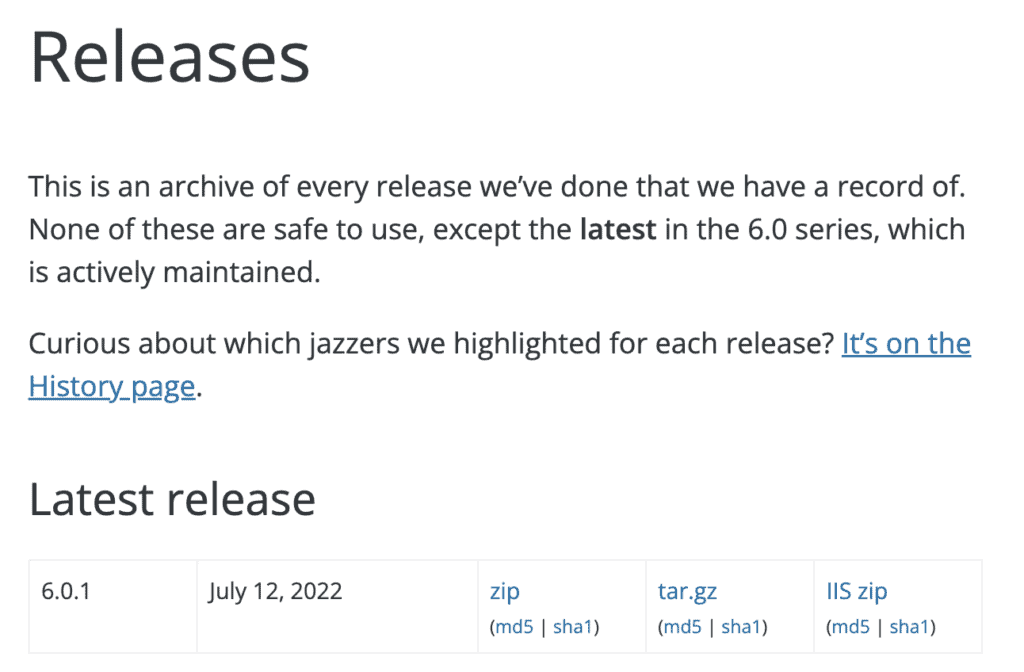
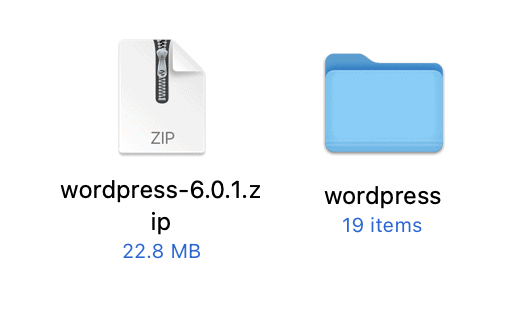
1. Download the latest WordPress version from the WordPress repository.
If you are updating WordPress over multiple major versions, do so in an incremental way. It is incredibly tedious and time-consuming, but this is your best chance to avoid conflicts or detect them without hours of troubleshooting. Check which version of WordPress is running on your site by visiting the www.yoursite.com/wp-admin/about.php page.
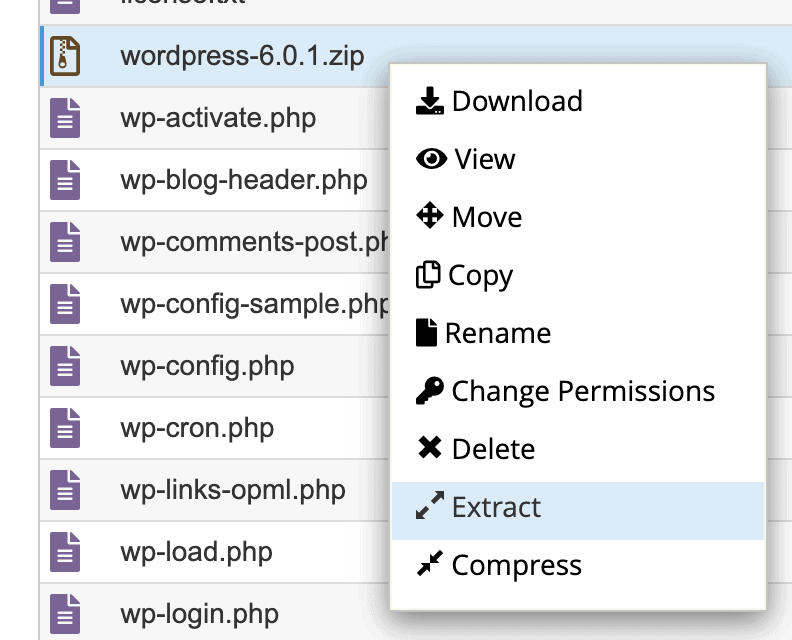
2. Extract the files from the zip folder.
3. Connect to your site via FTP. You will find the credentials on your hosting dashboard. You’ll need the hostname or IP, the username, and password. In some cases, you may need the port number as well depending on your host’s configuration. Check their documentation for that info.
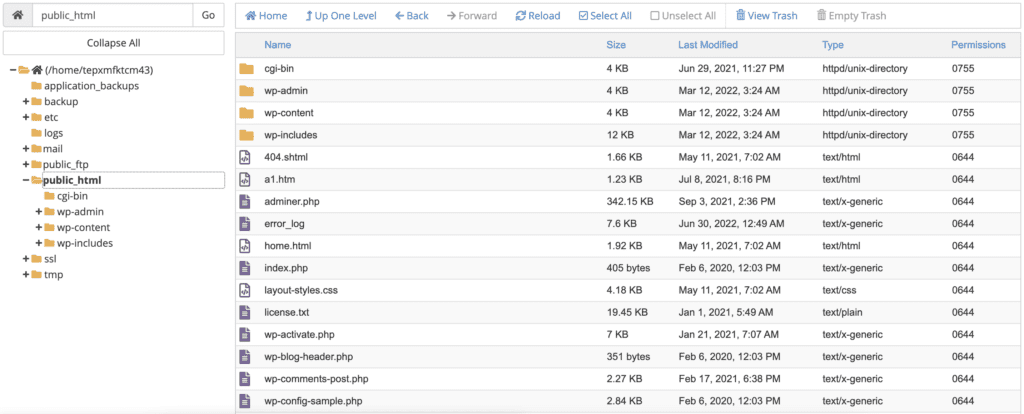
4. Navigate to the root directory of your site. In most cases, this will be the public_html folder. Our test site is on Dreamhost, so the root directory is the name of the site.
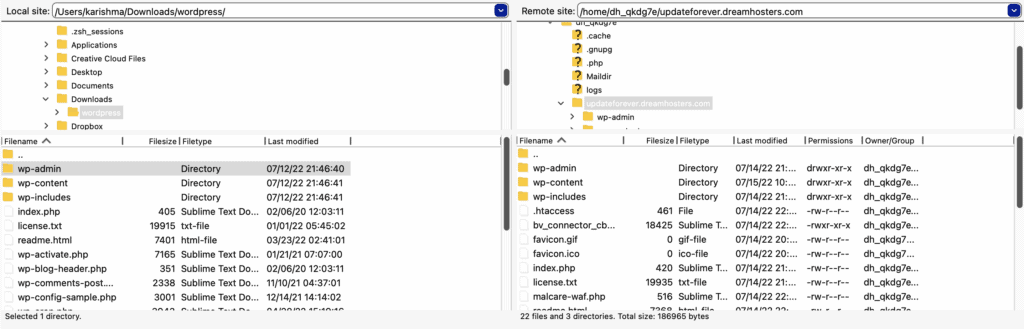
5. Copy over the wp-includes and wp-admin directories from the unzipped folder. If the FTP client prompts you to overwrite files, then do so. You cannot cherry pick which files to update in these core folders. Warning: Do not delete or overwrite the wp-content folder. This folder contains all your plugins, themes, and uploaded media. Overwriting it will delete all of that.
6. Next, open the wp-content folder and check which files and directories they correspond to on your site. Only delete those files, and copy the ones from the new installation onto your site.
7. Replace any files in the root directory as well, after you’ve finished with the 3 main directories, except the wp-config.php file and the robots.txt file, if it exists in the root directory.
8. After all the files have been replaced, check the wp-config-sample.php file in the new installation. There may be new code added to it, and if so, you can add it to your existing wp-config.php file.
9. The last thing you need to do is check if the WordPress version in the version.php file matches the one in the database. Open up the file, which is in the wp-includes directory. Make a note of the value for the variable $wp_db. Next, open up your database with phpMyAdmin.
10. Check the db_version value in the wp_options table. If it is different from the one in the version.php file, you will need to update it to match in the database.
11. Once you are done with this, log into your dashboard. If the database needs updating as well, you will need to follow onscreen instructions to do so.
12. Finally, clear all the caches. Check that your WordPress version has updated successfully by adding /wp-admin/about.php to the end of your site URL. You will see a page with all the information about the installed version.
With this, the WordPress version will have updated. Congratulations on getting this far. It is a risky process.
Manually upgrade WordPress using SSH
Another, somewhat more technical, method to update WordPress manually is by using WP-CLI. It is a command-line tool that can control WordPress sites over SSH.
It is actually a simple process, and replicates the one-click install from wp-admin on the command line. However, you will need to have WP-CLI installed on your computer to be able to execute the following commands.
To get started, log into your site server with the SSH credentials. These may well be the same as your SFTP or FTP credentials, however you would need to confirm that with your host.
1. Navigate to the root directory of your WordPress site. In our case, this was public_html, however, it may vary for you, depending on the setup used by your web host.
2. Next, check for WordPress core updates. Type in wp core check-update. If the resulting message looks like the one below, there is an update available.

3. Update WP version by typing in wp core update. It really is as simple as that. Once the update is complete, you will see the following success message:

4. In case you need to update the database as well, you can run the following command: wp core update-db.
5. And that’s it! You’ve now successfully updated WordPress manually via WP-CLI.
Manually update WordPress using cPanel
In lieu of FTP, you can use cPanel to update WordPress manually. The steps are fairly similar, in that you have to delete the existing directories and files, and upload new ones in their place.
1. Download the latest version of WordPress to your computer.
2. Log into cPanel, and open File Manager.
3. Navigate to the root directory of your site. In our case, this was public_html, however it might be different for your site.
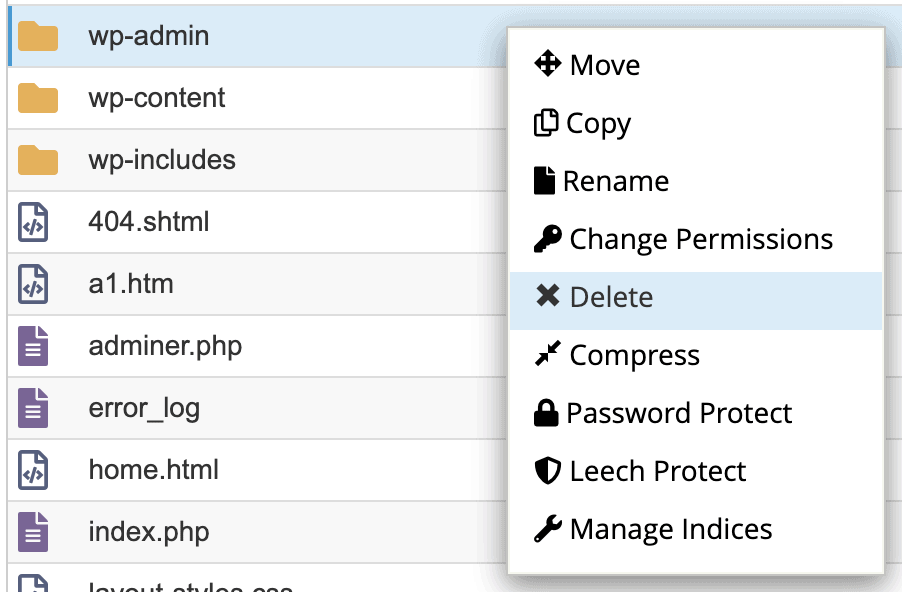
4. Delete the wp-includes and wp-admin directories.
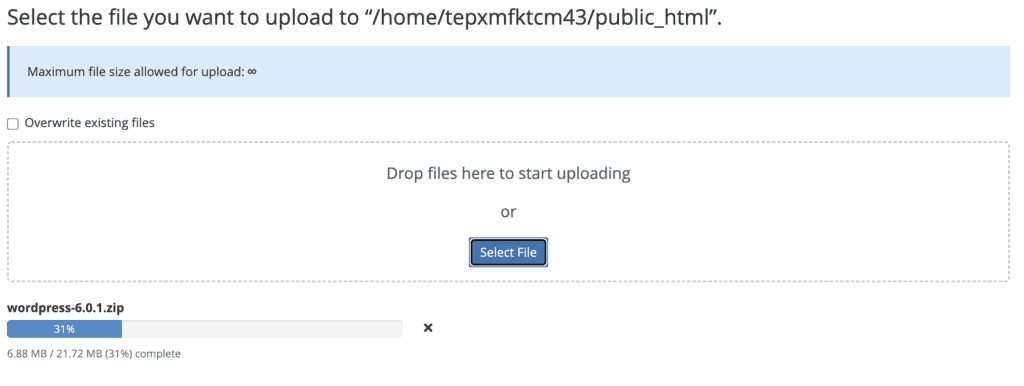
5. Click on Upload, and upload the zipped WordPress file to your site server.
6. Extract the zipped file.
7. Move the wp-admin and the wp-includes files to the root directory. Do the same with any loose files in the folder. Now, just the wp-content folder should remain.
8. Compare the two wp-content folders, and only move the files and folders that don’t already exist on your site. This protects your plugins, themes, and uploaded media from being deleted inadvertently.
9. While you’re still in File Manager, navigate to the version.php file in the wp-includes folder, and note down the value for $wp_db.
10. Close File Manager, and open up phpMyAdmin from cPanel. Find your site’s database, and open the wp_options table. There, you will find a value for db_version. Make sure the version number is the same as it is in the version.php file. If not, change it and save.

11. Log into wp-admin, and check the dashboard for messages. The database may need to be updated, so go ahead and follow the instructions to do that.
Once complete, you can add /wp-admin/about.php to the end of your site URL to check if the WordPress version updated correctly.
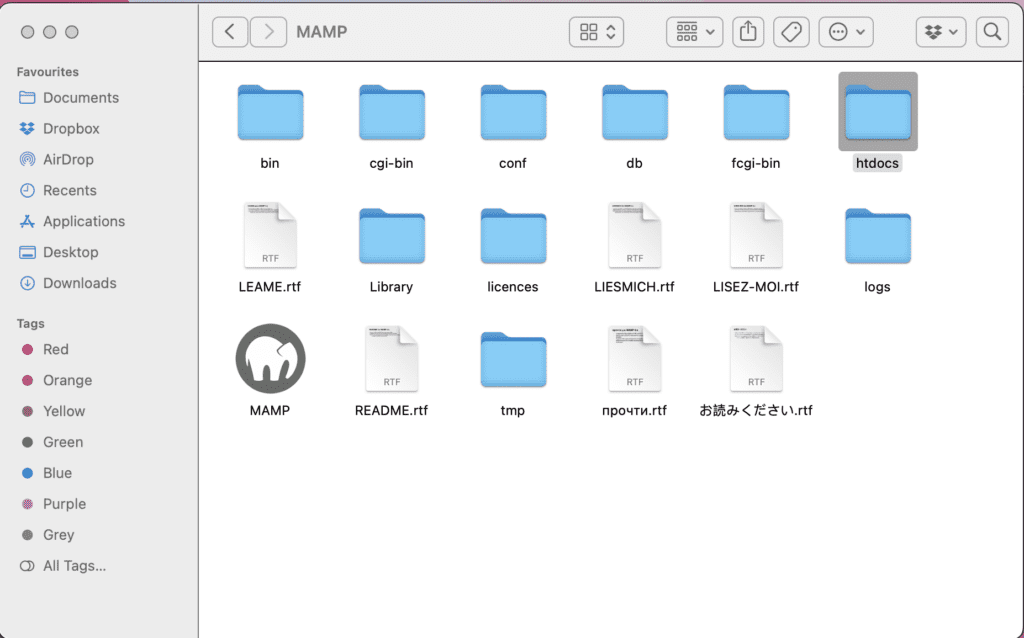
Update WordPress version manually on localhost
You can also update the WordPress version of a site installed on your computer. The methods to do so are the same as the one-click install from the dashboard or using WP-CLI. For the manual method using FTP, it is almost the same. You need to simply copy the files and directories from one folder on your computer to the root directory of your site.
Our test site’s root directory, as shown in the image below, is updatelocalsite, and it is in the htdocs folder of our site.
Once done, make sure to log into the dashboard, and check if the database needs an update as well.
Problems with manually updating WordPress
As with anything manual, there is always potential for human error. One of the big dangers we have encountered with manually updating WordPress is that admins have a tendency to overwrite the wp-content folder. This costs them their installed plugins and themes, often with heavy customisation. Alternatively, you can forget to update the version in the database, and will see a critical error when trying to access your site.
Additionally, you have to update core WordPress and the database separately. Especially if you are using FTP, the whole process can take a considerable amount of time. It is a fraught exercise, and with so many moving parts, anything can cause issues. For instance, during our testing, the network cut out for a few minutes. Some of the file transfers timed out and failed. It was a good thing that FileZilla has a log, otherwise we wouldn’t have known at all.
Overall, the best way to update your site is to do it with BlogVault. Even if something goes wrong, you can immediately roll back site to the previous version and start again.
What to do after you update WordPress manually
Once the update process is complete, and hopefully there are no errors and that the site actually loads after digging through the core files, there are a bunch of things you need to do to make sure everything works.
- Log into wp-admin, and check the dashboard for error messages.
- If you are updating WordPress manually after the one-click process didn’t work, remove the .maintenance file. This will remove the failed update error message.
- Manual updates do not include the database, so you may see a message to update the database as well. We have a full tutorial on how to update the database, and how to resolve any issues you may run into.
- Check your site, and all its important pages: homepage, about, contact, etc.
- Activate plugins one by one. Check the site after each activation. This is to ensure that if there is a conflict with the new version of WordPress, you will know which plugin is the culprit.
- Clear all the caches.
- Deactivate the maintenance plugin if you used one.
- Enable the caching and firewall plugins you deactivated previously.
Troubleshooting WordPress manual update issues
There are a few things that can go wrong during the manual WordPress update process. For instance, FileZilla kept dropping the connection during the transfer. This meant a bunch of files failed to transfer, and when we redid those manually, we experienced the following errors:
- Critical error

- Update database error loop
None of these errors give any indication on how to solve the problem causing them. Any number of things could have gone wrong, and most probably did. There may be a misbehaving plugin or a file that was corrupted during the transfer. Whatever it was, troubleshooting it took far too much time. We opted to restore a backup and start again from scratch.
Conclusion
Updating WordPress manually is a useful skill to have, but hopefully one that you should never have to use. During our testing, everything that could go wrong did go wrong. Even when files failed to transfer, and we rectified that mistake, we still saw a critical error on our test site. Finally, we restored our BlogVault backup and tried again.
The moral of this saga is to always have full site backups. If we can squeeze in a secondary one, it is to use a staging site to update your live site every single time. It will save you countless hours of troubleshooting and stress.
FAQs
How do I update WordPress locally?
To update WordPress locally, download the latest version from the WordPress repository. Unzip the folder, and follow the instructions above to copy the new core installation to your site.
How do I update WordPress manually from the command line?
You can upgrade WordPress manually from the command line using WP-CLI. Use SSH to connect to your site server, check to see if there is an update available, and then use the command wp core update to apply the update.
How do I manually update my WordPress database?
Add /wp-admin/upgrade.php to the end of your site URL. If there is an update available for your site database, you will see a prompt to update. Follow the instructions to do so.
You can also update the database using WP-CLI. Log into your site server using SSH, and run the command wp core update-db.
What does updating WordPress mean?
When WordPress is updated, the wp-includes and wp-admin directories are completely overwritten. This means that all the files are replaced with newer versions. Any custom code, say, in the .htaccess file for whitelisting IPs or geoblocking, will get wiped out.
The third core WordPress directory, wp-content, contains a lot of custom additions to a site, like plugins, themes, and even uploads. An update will only replace files that are in both the old and new versions.
How to manually update WordPress across multiple versions?
If you’ve got a really old version of WordPress, prior 3.7 for instance, it is better to incrementally update. This means, update to the next version, till you reach a more recent one. While WordPress is built to be backwards compatible and it should be possible to update directly from the first to the last release, this is only in theory. We experienced issues upgrading from 5.3 to 6.0, and they were unpleasant to deal with, to say the least.
How often do you need to update your website version?
WordPress releases 2 major versions a year, and several minor updates in between. Generally, the minor updates work automatically, unless explicitly turned off. We recommend leaving this to continue as is. Major updates change the entire WordPress version, and are a large undertaking in and of itself. Updates are important from a WordPress security perspective though, and should be done as soon as possible.
Tags:
Share it:
You may also like

How to Limit Form Submissions with Droip in WordPress
Forms are an indispensable part of any website because of their versatility, letting you collect information for various purposes! However, people with ill intentions often attempt to exploit these forms…

How To Manage Multiple WordPress sites
Management tools help agencies become well-oiled machines. Each task is completed with the least amount of effort and highest rate of accuracy. For people managing multiple WordPress sites, the daily…

PHP 8.3 Support Added to Staging Feature
We’ve introduced PHP version 8.3 to our staging sites. Test out new features, code changes, and updates on the latest PHP version without affecting your live website. Update PHP confidently…
How do you update and backup your website?
Creating Backup and Updating website can be time consuming and error-prone. BlogVault will save you hours everyday while providing you complete peace of mind.

Updating Everything Manually?
But it’s too time consuming, complicated and stops you from achieving your full potential. You don’t want to put your business at risk with inefficient management.

Backup Your WordPress Site
Install the plugin on your website, let it sync and you’re done. Get automated, scheduled backups for your critical site data, and make sure your website never experiences downtime again.


