How to Update WordPress Safely – Complete Guide
Bulletproof Backups for Your WordPress Website
Fortify your business continuity with foolproof WordPress backups. No data loss, no downtime — just secure, seamless operation.
Do you want to update WordPress to the new version, but are worried that it might cause complications?
WordPress updates are often handled with kid gloves because if the update causes anything to break on your site, your next few days will be spent troubleshooting and fixing the issues.
But not updating your WordPress site is even worse. Updates often patch security gaps and vulnerabilities that can be exploited by hackers to attack your site. Moreover, updates help enhance the user experience and are a necessary part of website maintenance.
In this guide, we’ll show you how to upgrade WordPress site safely, without breaking your site.
TL;DR Update WordPress version, while being confident that your site won’t break. Test your WordPress update first with BlogVault’s staging and then merge with the live site when done. Take a full backup of your website seconds before, so that you know that your site is safe from downtime.
Is updating WordPress completely necessary?
The reason WordPress updates are important can be boiled down to one word: security. Of course, there are other factors, but security is the most important one. Over 45% of websites worldwide use WordPress, a truly staggering number. The sheer level of popularity WordPress enjoys makes it a prime target for hackers and other malicious agents. WordPress is also open-source, making it easier for hackers to reverse-engineer vulnerabilities and figure out ways into secure sites.
However, given that most people are invested in making sure their site is safe, legions of coders around the world spend their time and effort in finding vulnerabilities, patching them, and reporting them.
Every single WordPress update contains a large number of patches, making sure that any site powered by WordPress is protected.
Other than security, WordPress upgrades come with new features and a variety of improvements, making your user experience better and smoother. Updates increase your site’s efficiency as well, making it faster to load, and can sort out issues with plugin compatibility as well.
What does upgrading WordPress change on your site?
Before we get into the actual WordPress update, it helps to know what exactly is about to change on your site. A lot of admin are concerned about losing content or customisations during a WP update, and this fear is not entirely unfounded.
A WordPress update replaces the core WordPress files on your site. This includes the wp-admin, wp-includes, and wp-content directories, and the files contained within; but with one important exclusion. A WordPress update will not impact installed plugins or third-party themes. It may update stock theme files, like twentytwentytwo or twentytwentyone.
Ordinarily, these changes will not affect the operation of your site. However, if you have used the .htaccess file for redirects or geoblocking, or perhaps added custom code to your wp-config.php file, you should be aware that these changes will be wiped out. The best course of action is to backup your full site before an update is made, and then go back in and add the custom code once again.
Things to do before updating WordPress website
Given how useful and important updating WordPress is, you might think you should immediately start updates. But there are a few things you need to do before you start with the updates.
- Backup your site.
WordPress updates can be volatile. In case something goes wrong, like a site modification clashes with the update, you need to be able to roll back to a functional site. By backing up your database, plugins, and themes, you’ll be able to keep your site functional.
- Turn off caching.
There is a chance that caching saves pages undergoing maintenance, in which case it will present a broken or incomplete version of your site to your visitors. So it’s best to turn it off before you start updates.
- Update themes and plugins.
Theme and plugin developers usually know when an update is about to be released, and update their products to match. By updating what you’re using before installing the WordPress update, you can be certain that any incompatibility issues are mitigated. - Deactivate themes and plugins.
Once WordPress is updated, there could be conflicts with plugins and themes. Therefore, it is safest to deactivate all of them (except one active theme), so when the update is complete, you can reactivate them one by one to make sure you will catch out any conflicts. This step will save you a lot of time troubleshooting in case of downtime. - Copy custom code from core files.
A lot of sites use the .htaccess file to implement geoblocking or to whitelist IPs. Or perhaps, have changed the database prefix in the wp-config.php file. If you have done so, make a copy of your existing core files before applying the update. - Backup modified stock WordPress themes.
When customising a theme, we usually recommend creating a child theme and making changes to that. However, sometimes changes are made directly to the original theme. In the case of third-party themes, this doesn’t present a problem during a WordPress update, although the case may well be different when updating those themes. With stock WordPress themes though, there may be changes to those files, and the corresponding ones on your site will be overwritten as a consequence of a WordPress update. Therefore, if you have made changes to a stock WordPress theme, back it up. - Install a WordPress maintenance plugin.
Use a maintenance plugin during the update to keep out any visitors to your site. Ideally the WordPress update will not affect operations too much, but it is better to be cautious.
These steps will ensure that the chances of a failed update and reduced drastically, and you can proceed with the WordPress update.
How to update WordPress (5 Easy Methods)
Now, coming to the actual updating. There are various ways to update your WordPress site to a current version. We have listed all of them here so that you can make an informed decision based on feasibility and safety. We recommend using a staging site because it is the safest and most efficient way to upgrade WordPress website.
Update WordPress version without losing content or data
The safest way to update WordPress version without losing content is using a staging site. Usually, creating a staging site is a lot of technical work, but with BlogVault, it becomes a cakewalk.
In order to be completely sure that your updates are safe, you can test your updates by creating a staging site. BlogVault can help you easily create a staging site and merge the changes with your live site without having to go through the whole process again.
To create a staging a site, just follow these steps:
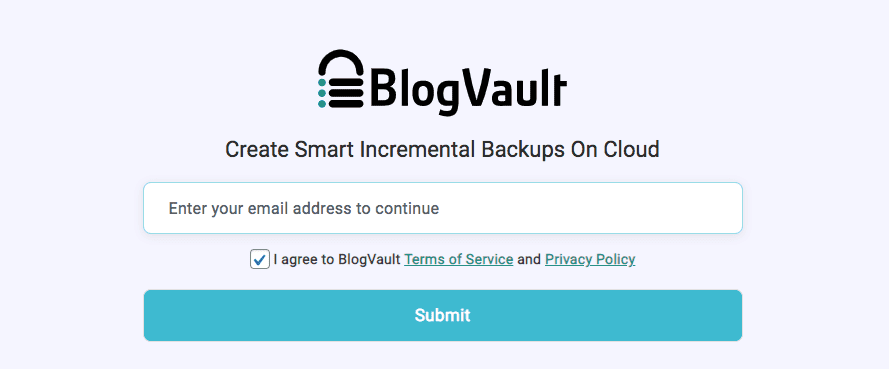
- Install BlogVault on your WordPress site.
- Once you activate the plugin, you will be redirected to the BlogVault dashboard, where you can create a new account.
- Next, you will be asked to connect your site to BlogVault. Click on Continue, and it will automatically start syncing your site.
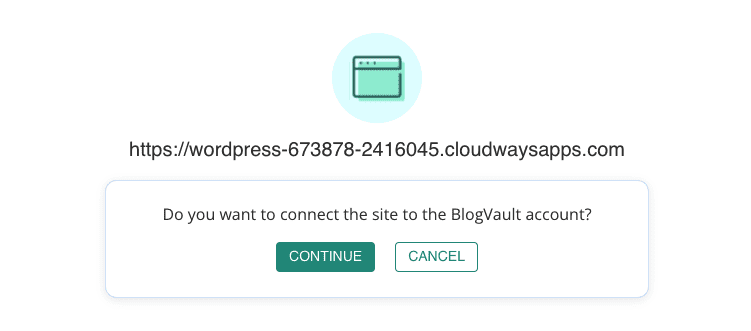
- Once the sync is complete, BlogVault will automatically backup your site.
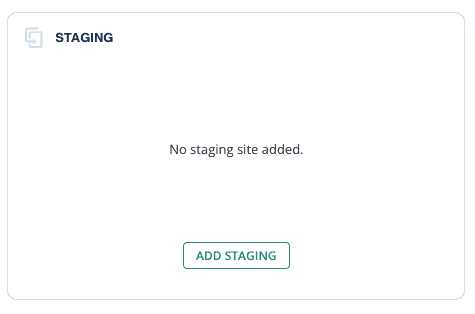
- Once the backup is complete, select Add Staging on the Staging panel of your dashboard
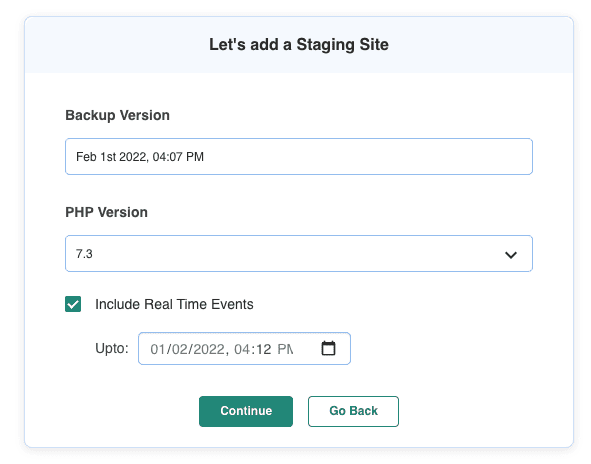
- On the next page, BlogVault gives you the option to select the backup version and PHP version you want to use. The latest versions are selected by default, so you can skip this and click on Continue. If you have just created an account, you don’t need to bother with this step at all.
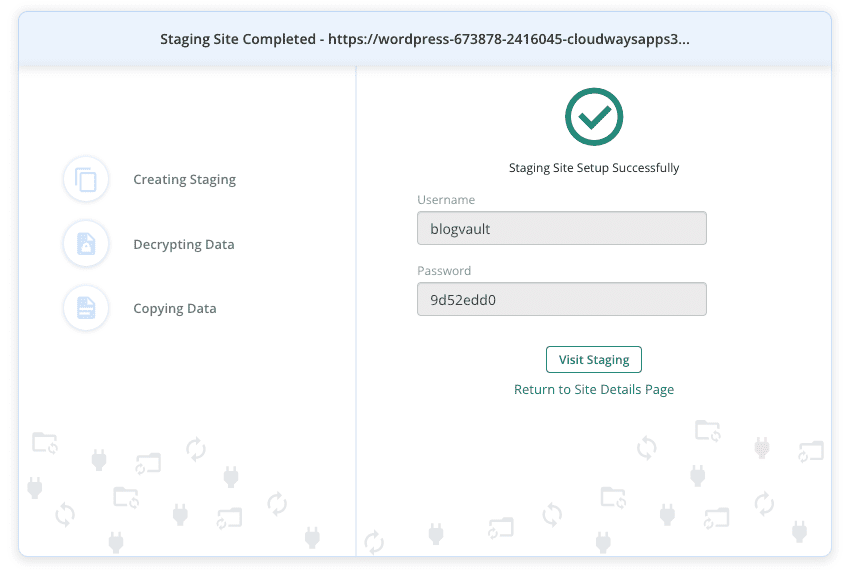
- When the staging site is ready, BlogVault will give you a username and password. This is to ensure that your staging site is not accessible to anyone else. Note this down, you’ll need it in the next step. Next, click on Visit Staging Site.
- A pop-up window will appear with the staging site URL. It will ask you for a username and password to sign in. Enter the credentials you noted down in the previous step.
- You can access the staging site’s admin panel, add ‘wp-admin’ at the end of the staging site URL. To log in, you can use the same wp-admin credentials as your live site.
- Your staging site is ready for you to update WordPress.
- Next, you will see this kind of notification on your staging wp-admin dashboard.

- Click on Please update now. Once the update is complete, check for the following things on your staging site:
- Visit all the important pages on your site such as the home page, blogs, checkout, cart pages, and contact us.
- Test any forms or input fields on your site.
- Make sure all your button links or custom theme layouts work as expected.
- Check custom menu items that you can find under Appearance > Menu.
- Check for broken links and images with a tool like https://nibbler.silktide.com/.
- Run a cross-device test across all major screen sizes such as mobiles, tablets, desktops, and laptops.
- Run a cross-browser test on all major browsers such as Chrome, Safari, and Firefox.
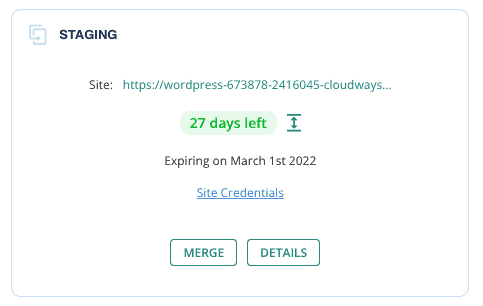
- If you are happy with the updates, you can now simply click on ‘Merge’ on the staging panel of your dashboard.
Note: For WooCommerce sites, you also need to export the database from the live site, import it into the staging site, and then merge. Otherwise, you will lose any changes to the database like new orders or customer details which can be disastrous.
- Once the sync is complete, BlogVault will ask you for your FTP credentials, which you can get from your web host. Once you enter them, it will merge all the changes with your live site.
- And that’s it, your site is updated!
Update WordPress from WP admin dashboard
Updating WordPress through your wp-admin dashboard is the easiest way to do so, but we recommend against it because it is not a safe method and can cause your site to break if the update has a bug or is incompatible with any of your themes and plugins.
This method is basically the same one that we followed with staging, minus the safety of a staging site.
- Go to your wp-admin dashboard and select ‘Updates’.
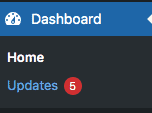
- You will see a notification on your updates page that says a new version is available, Please update now.

- Click on Please update now. If it is a major update, you will see a welcome page that details all the new changes in the update, or you will see a success message for minor updates.
Update WordPress automatically (Without using FTP)
WordPress rolls out a major update every 152 days, and several minor updates in between. In the rest of the methods in this article, we have considered the major updates only. However, with automatic updates, it bears thinking about minor and major updates separately.
Minor updates
By default, WordPress auto-updates your site for minor updates. You can disable this feature if you wish, but given that minor updates only improve a few bugs here and there, it is best to keep it as is. Enable daily backups with BlogVault so that on the off chance that minor updates cause any issues, you have a reliable backup to restore.
Major updates
There are a few ways to apply major WordPress updates automatically. We recommend setting up an auto-update schedule with BlogVault, which will take a backup just before each update. This way, your site is updated with the latest security fixes and improvements, but without the danger of any downtime.
It is a simple process to create a schedule to auto-update WordPress with BlogVault.
1. Create a BlogVault account, and follow onscreen instructions to sync your site. This process may take a little time if you have a large site, however you do not need to babysit it. You will receive an email once it is complete.
2. Once the site has synced, navigate to the Site Details page. There, you will find an option on the dashboard for Auto Update.
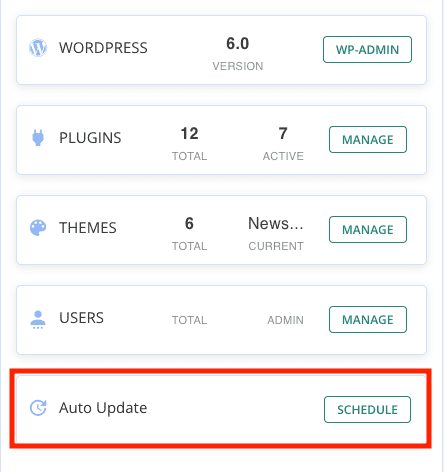
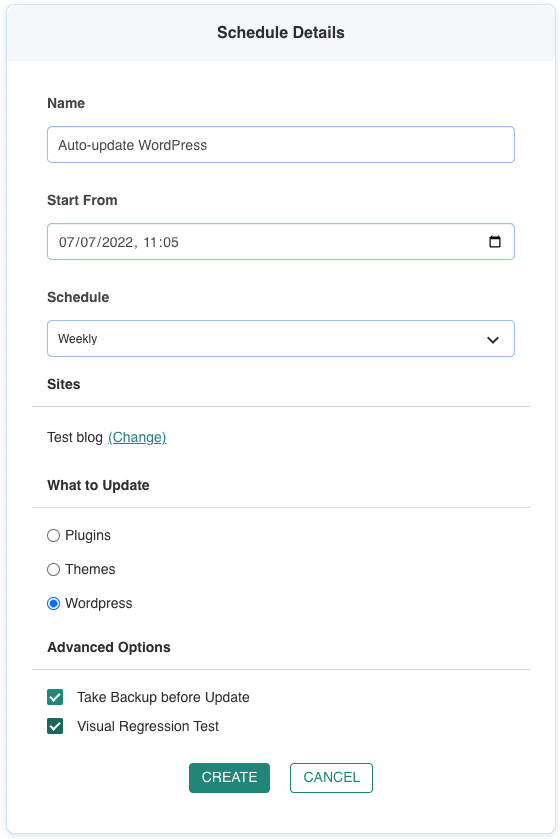
3. Click on Schedule to set up a daily, weekly, or monthly update schedule on the next screen. As you can see, you can set up updates for plugins, themes, and WordPress itself.
4. Enable the checkboxes for backups and visual regression, and continue.
5. On the next screen, you will see all the schedules you have set up for your account, and modify, pause, or delete them if you so choose.
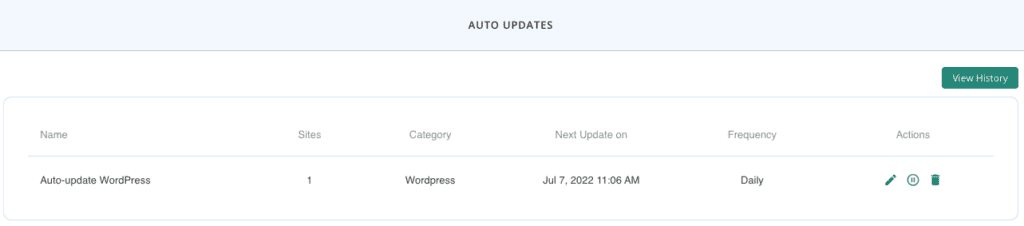
Every time the schedule executes, you will receive an email with the results. This is the safest way to update WordPress on your site to the latest version, as the backup ensures that your site can be restored in minutes if there is downtime due to a failed update.
WordPress allows you to set your settings on auto-update if you wish, but we do not recommend this course of action. Major updates roll out major changes which may turn out to be incompatible with certain elements on your site, and if you enable auto-updates, it could break your site overnight and you wouldn’t be any the wiser.
Still, if you wish to update your site automatically for all the WordPress updates, there are various ways you can do it such as using a dedicated plugin, via wp-config, or through your web host. You can read our detailed guide on automatic WordPress updates to understand how each of these methods work.
Update WordPress manually via FTP
Another way to update your WordPress site is via FTP. This is a more technical approach and we do not recommend doing this unless you are well versed with the process.
FTP is a communication protocol that allows you to transfer files from a server to your computer. In order to update your WordPress with FTP, you need to use an FTP client such as FileZilla or Cyberduck.
1. Install FileZilla on your computer, and connect to your site server using FTP credentials. If you don’t know what these are, either you will find them on your web host’s dashboard or you will need to reach out to their support.

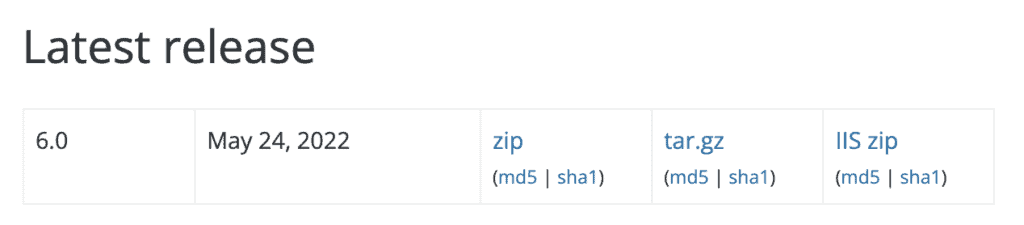
2. Download the latest version of WordPress from the WordPress repository, and unzip it on your computer.
3. Go back to FileZilla and open the public_html folder. You will see three folders in here: wp-content, wp-admin and wp-includes.

4. Delete the wp-admin and wp-includes folder on File Manager, and upload wp-includes and wp-admin from the latest version of WordPress that you have downloaded.
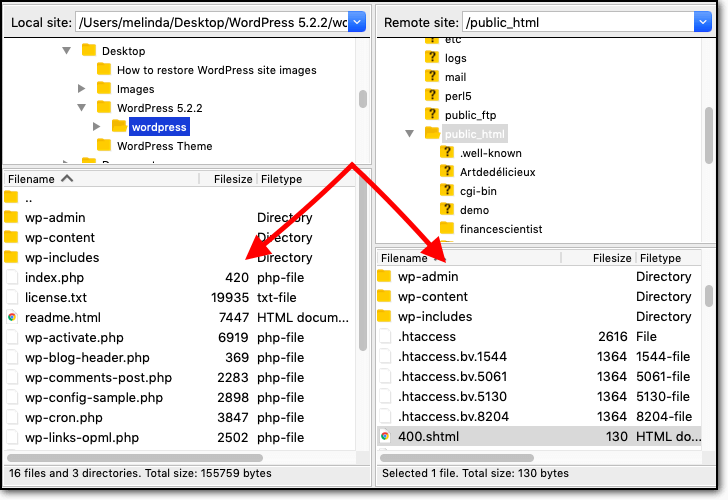
5. Next, check which files and directories the updated version of the wp-content directory corresponds with on your site. Only delete those files and directories, and copy the ones from the new installation in their place. If you have modified any of these files, then you need to open up the old and new versions and compare the code to retain those modifications. Do not delete the wp-content folder under any circumstances, or you will lose your installed plugins, installed themes, and media uploads.
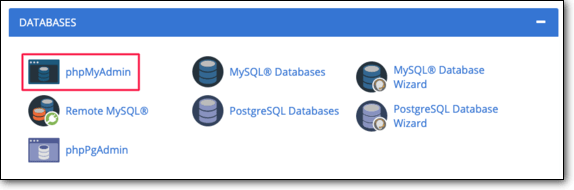
6. Now you will need to update your WordPress database version in the version.php file located in your wp-includes folder. For this, you will need to access phpMyAdmin through your cPanel.
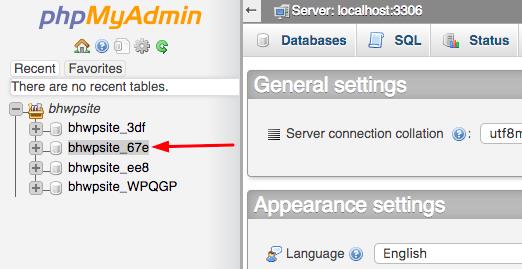
7. Go to phpMyAdmin, and select your database.
8. Open the version.php file in the wp_includes folder. Look for the variable $wp_db_version and check the value. Then, log into the database, and open the wp_options table. Locate the db_version value.
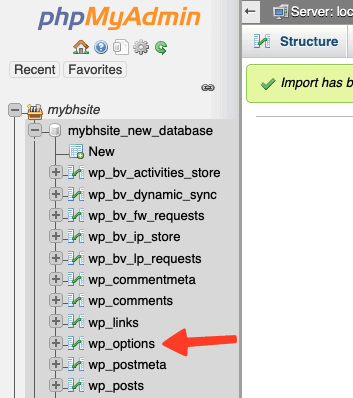
9. If this value does not match the value from the version.php file, update it in the wp_options table.
Upgrade WordPress via WP-CLI
A second way to upgrade WordPress on your site is to use WP-CLI. WP-CLI is a command-line tool that was developed to interact with your site server via SSH.
Rarely do admin want to work with the command line interface, unless they are comfortable with development. However, in our experience, it is actually safer to use the command line to make manual changes to your site as opposed to FTP, because the margin of human error is smaller. Having said that though, it is still risky compared to using a plugin. Use BlogVault take a backup of your site before making any changes.
To update WordPress on your site using WP-CLI:
1. Log into your server with the SSH credentials. Often these are the same as your FTP credentials, and can be found on your web hosting dashboard or with their support.
2. Navigate to the root directory of your site. Generally this is public_html. Use the command wp core check-update to check for updates available for your site. If there are updates available, you will see this sort of message:

3. Next, update the WordPress version using the command wp core update. Once the update is complete, you will see a success message.

4. You will also need to update the database, for which the command is wp core update-db. For our test site, the database was already up to date.

5. Finally, confirm that the WordPress update was successful by using wp core check-update again.

Recommended Read: How to update WordPress manually without breaking the site.
Problems with manual WordPress updates
In general, it is safer to use a plugin to do anything that requires tinkering with code. Updates are critically important for security reasons, but they are unpredictable. Many sites have broken designs or experienced downtime because of updates. That is why it is so important to backup your site before changing anything.
Manual updates are prone to human error, especially when using FTP to make changes. Consider the wp-content folder on your site. This folder has all your themes and plugins, plus uploads on your site. Therefore, it is unwise to replace the wp-content folder with the latest update. We’ve mentioned that in the steps above, however if someone were to inadvertently do so regardless, they’ve effectively wiped out their plugins and themes, including any customizations that were there too.
Additionally, manually updating WordPress is a three-step process. First, you need to update the files, then update the database as well, and finally make sure that the versions across both match. As you can imagine, this is not a simple process. Version mismatches can cause conflicts, and you can get stuck in the update database error loop.
Overall, it is vastly simpler and safer to use a plugin to update WordPress, or even themes and plugins.
Things to do after upgrading WordPress
Once you’ve updated WordPress, the first thing to do is to check your site. Ideally speaking, updates should leave your site functioning better than it was, but some updates tend to break things. Of course, this will not occur if you have tested the updates previously. It can be as minor as headers and footers changing size, or as major as the site refusing to load.
- Check your site for errors, broken design, or even downtime.
Hit all the important pages, like the homepage, products pages, features pages, blog pages, and so on. Also test out menu links, contact forms, search boxes, and other important UI elements. - Check wp-admin for error messages.
You may see a persistent failed update error message on your dashboard, if you tried updating using the dashboard and it didn’t work. Even if you later successfully updated WordPress manually, the error message might still be there. In this case, use FTP to go into your files and delete the .maintenance file.
Another issue with a manual WordPress update is that the database may need an update as well. You may see that message on the dashboard. We have a detailed article on updating the WordPress database, which includes troubleshooting tips for removing annoying error messages from your wp-admin. - Activate plugins and themes.
Do this step one at a time, and check your site after each activation. If there are any issues, you will know which plugin or theme is the culprit. - Remove the maintenance plugin.
It has done its duty. Time for it to retire. - Clear all caches.
Caches contain stored copies of your site in order to speed up loading. After any updates to your site, clear all the caches—WordPress, browser, plugins—so that the latest version of your site will load.
Depending on the issues you’re facing, you can either try to fix them on the updated version, or downgrade WordPress changes until you can diagnose what’s wrong before updating again. If your site is functional, then you should proceed with turning on your site caching, at which point you’re done.
Updating WordPress across multiple versions
In an ideal world, this situation should never arise. However, if you have inherited a site from another designer, or are trying to revive an old site, you may find yourself trying to update from WordPress version 4.0 to 6.0 for example. If your site hasn’t been hacked, this is a moment to thank your lucky stars. Out-of-date software is the cause of 95% of all successful malware infections.
Upgrading across multiple versions exponentially increases the chances of something breaking on your site. Therefore, you need to be extra careful.
It is theoretically possible to upgrade successfully from the oldest to the newest version of WordPress, but that is the best case scenario. Sites can be quite large and complicated, and with the intermingling of themes and plugins, it is impossible to predict exactly how an upgrade will land.
The best possible—although undeniably tedious—way to update your site safely is to move incrementally from one major version to the next. In between each update, check your site thoroughly. You can find older versions of WordPress on the repository.
Troubleshooting WordPress update errors
There are several ways that a WordPress update can go wrong, and that’s why we recommend trying the update on a staging site first. Failing that, always have a backup of your full site. That way, if any of the following errors occur, your site is safe.
HTTP 500 error
The most common error, and possibly the most annoying is the HTTP 500 error or the 500 Internal Server Error. It can occur for a multitude of reasons, and sometimes have more than one reason. None of these reasons, mind you, are visible in the error message. So there is some guesswork involved in trying to fix it. Hence, annoying.
Most commonly, the error is caused by a misbehaving plugin, so the first call to action is to deactivate all the plugins and enable them one at a time. Alternatively, the .htaccess file is causing an issue, so check that as well.
If these solutions don’t fix the error, check out our dedicated guide for troubleshooting solutions specific to just this error.
Failed update message
The failed update message is an annoying message that appears on the wp-admin dashboard when you log in. It often occurs when you’ve tried to update via the dashboard, and the update fails. Even if you’ve then successfully updated WordPress via another method, the error can still show up.
To remove the message, use FTP to log into your site server, and delete the .maintenance file. Thereafter, make sure to clean the caches.
The failed update message here is distinct from the update database error loop. To learn more about how to resolve that error, check out our dedicated guide.
File permissions error
You may see the following error when trying to upgrade WordPress:
Update Failed: The update cannot be installed because we will be unable to copy some files. This is usually due to inconsistent file permissions.
As the error indicates, this is because of a file permission issue. File permissions are used to control access to files and directories for security reasons. WordPress update is carried out by a user account, and that user account needs access to the core files to be able to change them. If the access is not available, the update will fail.
We have a detailed guide about how file permissions work and how to change them without impacting site security.
These are the most common reasons a WordPress update fails. If none of the troubleshooting steps work, then restore your site backup and try again.
How often do you need to update WordPress?
WordPress releases updates periodically: 2 major updates a year, and several minor ones in between. Updates contain bug fixes, security patches, improved features, and much more. On the WordPress history page, there is a list of releases and the corresponding improvements of each version.
You should update WordPress as soon as a new version is made available. Of course, if you do not avidly follow the developments in the WordPress world, you may miss notifications. Install BlogVault, set up an auto update schedule and forget all about it.
Final thoughts
WordPress updates are tedious and nerve-racking, but absolutely necessary for your site performance as well as security.
Ideally, this article should help you understand the various ways in which you can update your WordPress site to the latest version, and do it safely. The best way to do this is to rely on BlogVault so that your updates are fast and safe.
FAQs
Does WordPress automatically update?
Minor updates to WordPress are generally automatic, unless explicitly turned off. Major updates, which are released twice a year, can be configured to update automatically using a plugin, editing the wp-config file, or through your web host.
How to update WordPress version without losing content?
The best way to update the WordPress version without losing content is to take a backup before the update. In case any content is lost, you can always restore it from the backup.
What to update first- WordPress or plugins?
You should update your plugins first, since they’re almost always compatible with the older versions of WordPress. In case you update your WordPress but fail to update your plugins, you may run into compatibility issues or open up vulnerabilities.
When should I upgrade WordPress?
Ideally speaking, you should update your WP site as soon as an update is released. But if that’s not possible, you should update your WordPress site once every month.
Why do I need to update WordPress?
You need to update WP site to keep your site secure. WordPress updates come with patches for newly-discovered vulnerabilities, and should a hacker learn that your site is not updated, they can use those vulnerabilities to get access to your site.
Will I lose my website if I upgrade WordPress?
It is very unlikely that you will lose your website if you upgrade WordPress, however it is not impossible. However it is always better to take a full site backup before making any major changes to your site, not only to avoid downtime, but to be able to restore immediately in the event of an irretrievable site crash.
Which folder in a WordPress install is not affected by an automatic WordPress update?
Automatic WordPress updates affect only the core WordPress files and folders. Therefore, the root directory of your site, usually public_html, will have all the core files within it replaced, but any other files will be unaffected. The wp-admin and wp-includes folders will be replaced entirely, however only the stock themes in the wp-content folder will be affected by a WordPress update.
Why can’t I update my WordPress?
If your WordPress update keeps failing, there is most probably a file permission issue. WordPress update requires access to core files and directories in order to update them.
In this case, you have a few options: 1) you can edit your file permissions if you have access to your server; 2) get developer assistance to make the changes if you are not comfortable with making these changes; or 3) reach out to your web host support.
How long does it take to update WordPress?
Updating WordPress can take as little as 5 minutes or as long as 5 days, depending on the method you use. Manual updates take a considerable amount of time, and are necessarily painstaking because of the possibility of human error. We always recommend using BlogVault to upgrade WordPress to current version, so that you can test the update first on a staging site, then apply it to your live site.
How can I tell when my WordPress was updated?
After a successful WordPress update, you will see a notification on your wp-admin dashboard, especially for major releases. Alternatively, you can click on the Updates menu item on wp-admin to check if there are any updates for your site. If not, then your site has the latest version of WordPress.
If you want to learn more about the WordPress version on your site, you can add /wp-admin/about.php to the end of your URL to read more about it.
Is it safe to update the WordPress database?
Yes, it is safe to update the WordPress database. Updates do not affect the contents of tables, but the software used to manage the database. Therefore, your site data is unaffected.
Can you upgrade WordPress later?
You can upgrade WordPress at any time, however it is always better to apply updates between 1 and 2 weeks after they are released. Updates contain security improvements, bug fixes, and optimisations to the code that makes your site function better and protects it from malware and hackers.
How to update WordPress to a specific version?
To upgrade WordPress to a specific version, you need to download the version from the WordPress repository, assuming there are later versions available. Then, unzip the file and upgrade WordPress manually on a staging site. If the update doesn’t break the site, apply it to your live site.
Tags:
Share it:
You may also like

How to Limit Form Submissions with Droip in WordPress
Forms are an indispensable part of any website because of their versatility, letting you collect information for various purposes! However, people with ill intentions often attempt to exploit these forms…

How To Manage Multiple WordPress sites
Management tools help agencies become well-oiled machines. Each task is completed with the least amount of effort and highest rate of accuracy. For people managing multiple WordPress sites, the daily…

PHP 8.3 Support Added to Staging Feature
We’ve introduced PHP version 8.3 to our staging sites. Test out new features, code changes, and updates on the latest PHP version without affecting your live website. Update PHP confidently…
How do you update and backup your website?
Creating Backup and Updating website can be time consuming and error-prone. BlogVault will save you hours everyday while providing you complete peace of mind.

Updating Everything Manually?
But it’s too time consuming, complicated and stops you from achieving your full potential. You don’t want to put your business at risk with inefficient management.

Backup Your WordPress Site
Install the plugin on your website, let it sync and you’re done. Get automated, scheduled backups for your critical site data, and make sure your website never experiences downtime again.


