WordPress Export: 4 Ways To Do It Quickly and Efficiently
Bulletproof Backups for Your WordPress Website
Fortify your business continuity with foolproof WordPress backups. No data loss, no downtime — just secure, seamless operation.
Exporting a WordPress site essentially means that you’re creating a copy of your site that you can use for various reasons, like migrating to a new host. If you’re a WordPress site owner, you’re already familiar with hosts and their individual pros and cons. The kind of features that hosts offer vary and you may want to move from one to the other. Maybe you want to change your site from wordpress.com to wordpress.org or to a non-WordPress site.
If not migration, maybe, you’re looking to backup your site. WordPress 101 is that backups are crucial. They provide insurance for when something goes wrong and they prevent a whole lot of heartache and frustration.
Similarly, maybe you want to store a copy of all your blog posts on your local computer. This is especially helpful if you want to backup just your blogs or put them on a different site.
No matter what your reasons, if you want to export WordPress site, this article will be a God-send, so keep reading.
TL;DR: Whether you need a copy of your site for migration or as a backup, if you’re looking to download a WordPress site as a zip folder, the best way to do so is to export a BlogVault backup. It’s quick, easy and works every time.
Before we talk about how to export a WordPress website, let’s take a minute to understand what we are exporting and in what formats.
There are 2 parts of a WordPress site:
- Files contain all the code used to run your site successfully, right from the core WordPress software powering your site, to the plugins and themes you install to extend its functionality.
- Database contains, unsurprisingly, all the data on your site. The data could be anything, right from user account data like logins and passwords, to user-generated content like pages, posts, comments, and so on.
There are also three important things in your database that you may want to export:
- Pages are the building blocks of your site. It displays content and can be made up of text, images, videos, etc.
- Posts are time specific pieces of content like blogs and company news.
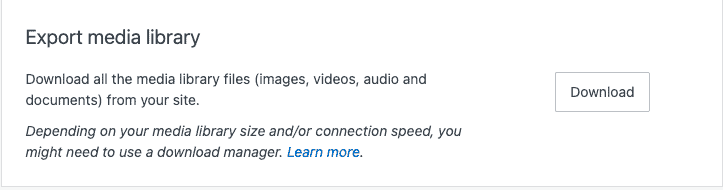
- Media library is where you can manage all the images, videos, documents and audio used on your site.
Depending on your requirements, different parts of a site export to different formats. Two such formats are:
- You can export your site to an XML file by using the inbuilt WordPress export tool. XML is well structured and can be formatted easily. It is specifically designed to transport data easily.
- Exporting to an HTML file is easiest with a plugin like Export WP Page to Static HTML/CSS. This is especially helpful for websites that are simple.
Now that we’ve got the basics out of the way, let’s talk about the different ways to export your site.
How to export a WordPress site using a plugin
We’re starting with BlogVault because it is the easiest method and the most complete one. Both your database and files can be exported at once and with just a few clicks. Here are the steps to do so:
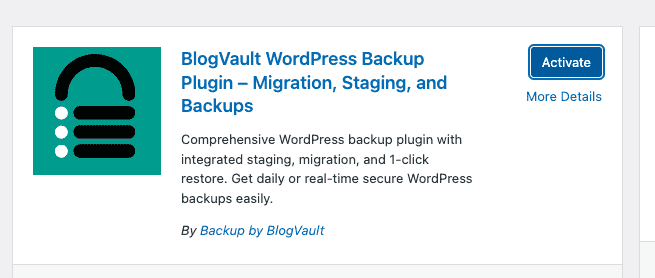
- Install and activate the plugin: First hover over Plugins on the sidebar, and click Add New. Look for BlogVault in your plugin directory, and click Install and Activate. Scroll down till you see BlogVault and click Settings.
- Create an account: Fill in your email address and click Submit. On the next page, click Continue and Back to Dashboard. This will take you to your BlogVault account dashboard. Creating an account also automatically backs up your whole site for the first time. Give it a few minutes.
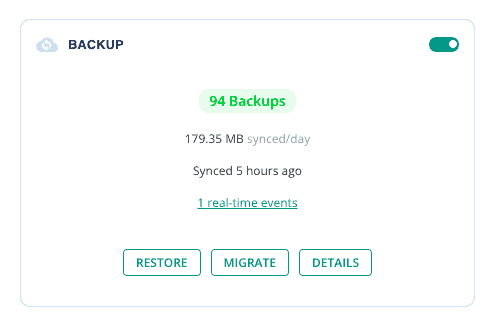
- Initiate download of the backup: Once a backup is done, click Details in the Backup section of your site dashboard. Then click the download button.
- Select files to download: BlogVault already selects the entire site to export. Next, click Continue. This may take a few minutes and you’ll be able to see the progress.
- Download Link: Once done, click Download Link on the right and all your files will be exported as a zip folder.

How to export a WordPress site using built in export tool
You can only use this method to export WordPress pages, posts, and media. If you’d prefer a complete export, you should try the plugin method. If not, here are the steps to do so:
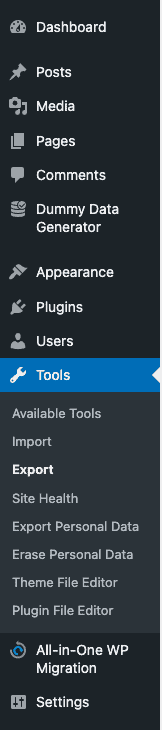
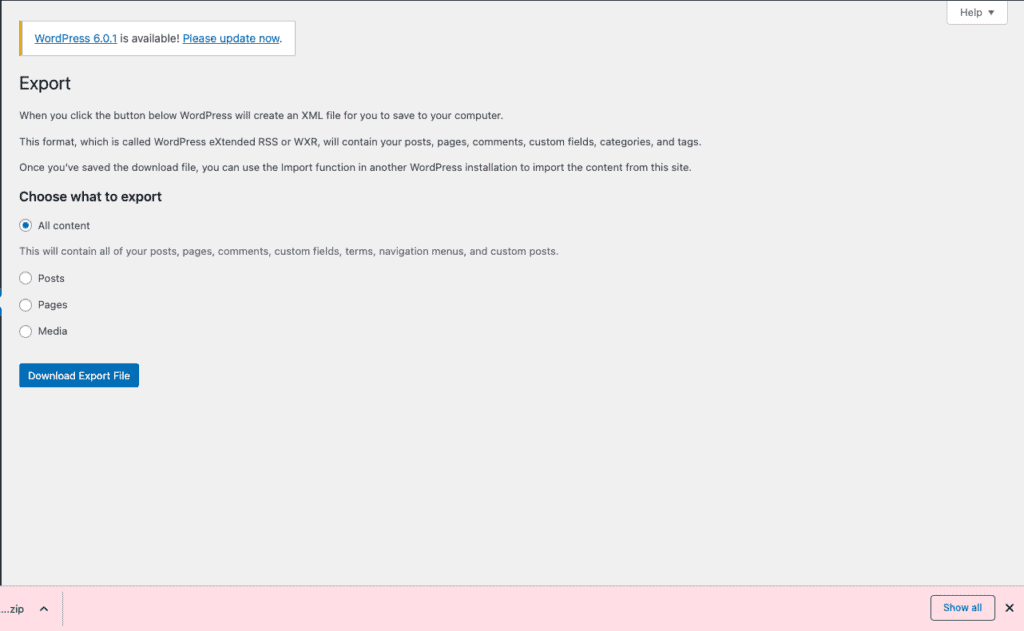
- Open the Export Page: Hover over Tools in the sidebar and click Export.
- Select what to export: You can either choose to export all WordPress files or choose between posts, pages, and media.
- Posts: You can specify which authors, which category, which status, and what time period of posts.
- Pages: You can customize which authors, which category, which status, and what time period of posts.
- Media: You can pick what time period to export.
- Export files: Once you’re done, click Download Export File to get a zipped folder of the export.
How to download a WordPress site manually
We don’t recommend this method because it is incredibly time-consuming, as both your database and files have to be exported separately. But, if you’d like to try out the manual method, here are the two ways to do it:
Download WordPress site files manually with cPanel:
Manually exporting your WordPress files with cPanel might be the easiest way because all you need to do is connect to your host dashboard and download the files. However, not all web hosts have cPanel, so you may have to use an FTP method in those cases. For our tutorial, we used a site hosted on Bluehost.
- Access your cPanel: Log into cPanel, or click on the link on your host’s dashboard. Once you’ve signed in, go to My Sites. Go to Advanced Settings.

- Compress files: Open File Manager and right click on public_html. Click Compress and select Zip Archive.
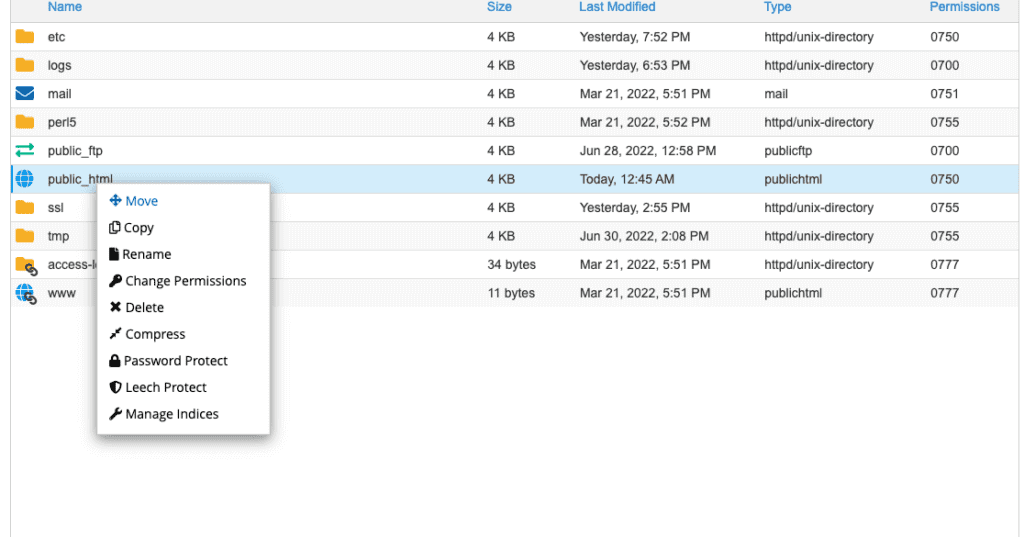
- Download Files: Once the files have been compressed, download the zip file. This might take a few minutes depending on the size of the website.
Export WordPress files with FTP
If you’ve got no option but to use FTP to export the WordPress site, this section will walk you through it. For this process, you’ll need to connect to your server using an FTP client and download the files.
- Find application credentials: You’re looking for a server IP or hostname, username, and password. Occasionally, you may also need the port number. Generally, you will find them on your host’s dashboard for your site. In our example, our site is on Cloudways. You can find the details in the Access Details section under Application Credentials. If you haven’t created those credentials, you can create a username and password. Copy the IP, username, and password after that.
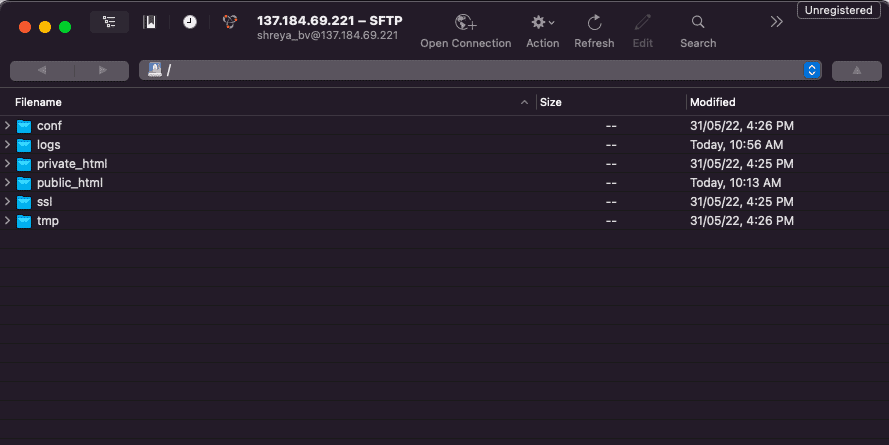
- Install a FTP client: There are many to choose from like FileZilla and Cyberduck. In this case we’ll be using Cyberduck.
- Connect to server: Click Open Connection. Select the correct protocol from the dropdown menu. In our case, this was SFTP. Then, paste the credentials you have copied. Click Connect.
- Export files: You can see your files in the root directory, which in our case is the public_html folder. Download the files you want to export. The larger the site, the longer the export will take.
Export WordPress database
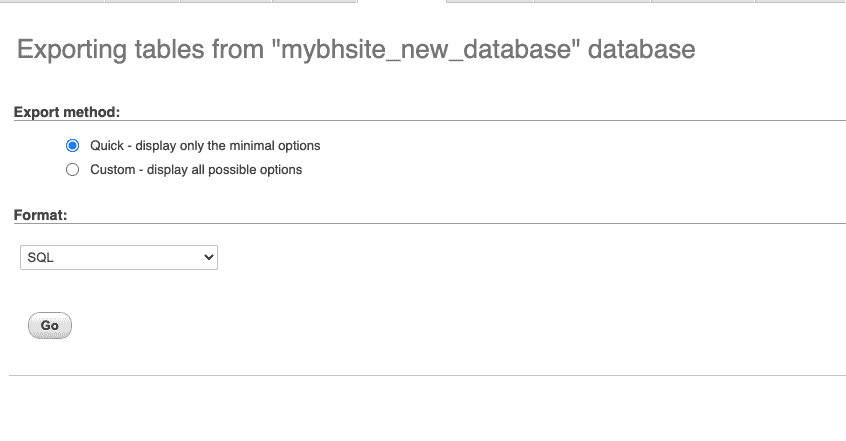
- Access your phpMyAdmin: This can also be accessed by your site’s web host, in the database section. Much like cPanel, not every web host has a phpMyAdmin. Cloudways, for example, has its own database manager that you can access on your Access Details section.
- Locate the right database: Click the Database tab. Select the database you need to export.
Note: To find out which database to export, look for the database name in the wp_config.php file.
- Export the database: Select all the files and click Export.
Most often, your webhost will also store a backup that you’ll be able to restore with methods depending on the web host itself. Most web hosts also allow a cPanel backup that you can create using the Backup Wizard.
If you want a complete guide on exporting databases, here is our article on how to export WordPress database
How to export a WordPress site from WordPress.com
If you’d like to export a WordPress site from WordPress.com site, you can use the inbuilt export tool. Follow the steps given below to do so:
- Hover over Tools and click Export.
- Click Export All at the top.
- Once you’re notified that it’s ready to download, click Download.
- This will download a zipped folder to your computer.
What to do after you export WordPress site?
Depending on what you intended to use your exported files for, the next thing you do will obviously differ.
- Restore: If you want to restore the backup that you’ve just created, BlogVault helps you do that with one click. If you have a manual export of your site, you can follow this article on a manual restore.
- Migrating to a new host or server: If you’re looking to migrate your site, checkout this article on migrating to a new host or server.
- Storing a backup: We recommend you create a copy of the files you just exported and store it externally using a cloud service like Dropbox or Google Drive. Additionally, we recommend checking out these other tips on what to do after a backup.
- Test the export: Create a staging site using BlogVault and try to import the export you’ve just created. This will help you make sure you have a usable export. You’ll see in the next section that when you try to manually export WordPress site, you can run into some trouble.
Why is exporting your site with BlogVault better than a manual export?
We can’t tell you enough that BlogVault is the way to go. You might think we’re biased but here are some reasons why it is a bad idea to export a WordPress site:
- Partial Exports: When you export WordPress site files with an FTP, for example, you need to connect to your server, Any disruptions in this connection can result in incomplete export. This can deem the export useless. With BlogVault, every export is a full site export.
- Higher Server Load: Manual backups can be very resource intensive and heavy for your server. This raises the chances of downtime or timeouts. Thankfully BlogVault takes a copy of your site in increments.
- Storage: Storing an export can take up a lot of space on your computer, especially with larger sites. If you’re taking an export for backup reasons, we recommend you use BlogVault. It’s stored on Amazon S3 servers that don’t affect your computer.
Final thoughts
When thinking about exporting a WordPress site to your local computer, the question isn’t “is it possible?” The bigger question is about what is the easiest way to do so. There are so many plugins that take care of the hassle for you. BlogVault, for example, can take a backup and store it on multiple servers, automatically. MigrateGuru, another BlogVault product, can migrate your site in just a few clicks. So…ditch the trouble, pick BlogVault.
FAQ
- How do I download an entire WordPress site?
The easiest way to download an entire WordPress site is to create a backup using BlogVault and export the entire backup. Here are the steps to do so.
- What is the best way to migrate your site?
The best way to migrate your site is to use MigrateGuru because it helps you to migrate to a new host or server and does it all with no downtime. Here’s an article that walks you through the process.
- Is WordPress export a backup?
Yes. They are the same thing. Exporting your WordPress site essentially means creating a copy of your site and downloading it to your local computer. You can store this copy in a safe location as a backup, or use it to migrate your site to a new host or server.
Tags:
Share it:
You may also like

How to Limit Form Submissions with Droip in WordPress
Forms are an indispensable part of any website because of their versatility, letting you collect information for various purposes! However, people with ill intentions often attempt to exploit these forms…

How To Manage Multiple WordPress sites
Management tools help agencies become well-oiled machines. Each task is completed with the least amount of effort and highest rate of accuracy. For people managing multiple WordPress sites, the daily…

PHP 8.3 Support Added to Staging Feature
We’ve introduced PHP version 8.3 to our staging sites. Test out new features, code changes, and updates on the latest PHP version without affecting your live website. Update PHP confidently…
How do you update and backup your website?
Creating Backup and Updating website can be time consuming and error-prone. BlogVault will save you hours everyday while providing you complete peace of mind.

Updating Everything Manually?
But it’s too time consuming, complicated and stops you from achieving your full potential. You don’t want to put your business at risk with inefficient management.

Backup Your WordPress Site
Install the plugin on your website, let it sync and you’re done. Get automated, scheduled backups for your critical site data, and make sure your website never experiences downtime again.


